Foreword
In this guide, we will install an Exchange Server 2019 with the latest CU15 and configure it as securely as possible. We will create our own WAF rules on the Sophos XG and configure functions such as SPF, DMARC, DKIM and more.
Prerequisites
- Active Directory
- Sophos XG Firewall
- Own your own domain
- Optional: Internal separate DMZ domain (significantly higher management effort - you probably don’t want that)
- Separate VLAN/network
- Optional, but recommended: Separate zone (e.g. “EXCH”) on the Sophos
- Wildcard certificate for your own domain (Can be mapped with Let’s Encrypt, but it’s better to buy a certificate for 1 year. I bought mine from https://www.ssl2buy.com/ for example - costs only 42$ for 1 year)
Preparation of the VM
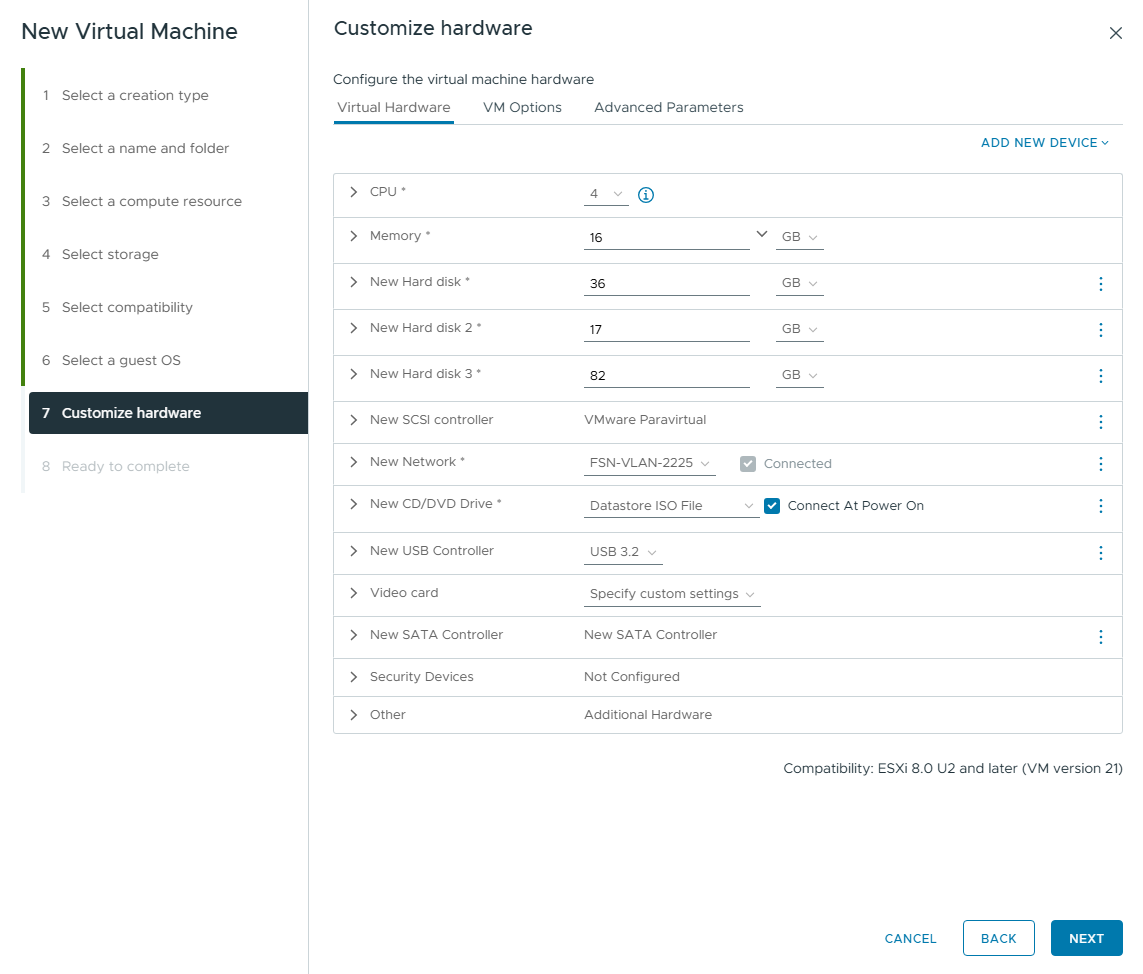
For our small environment, 16GB RAM is sufficient for the Exchange Server. Microsoft officially recommends 128GB RAM for Exchange Server 2019.
After a lot of research, I decided on the following constellation:
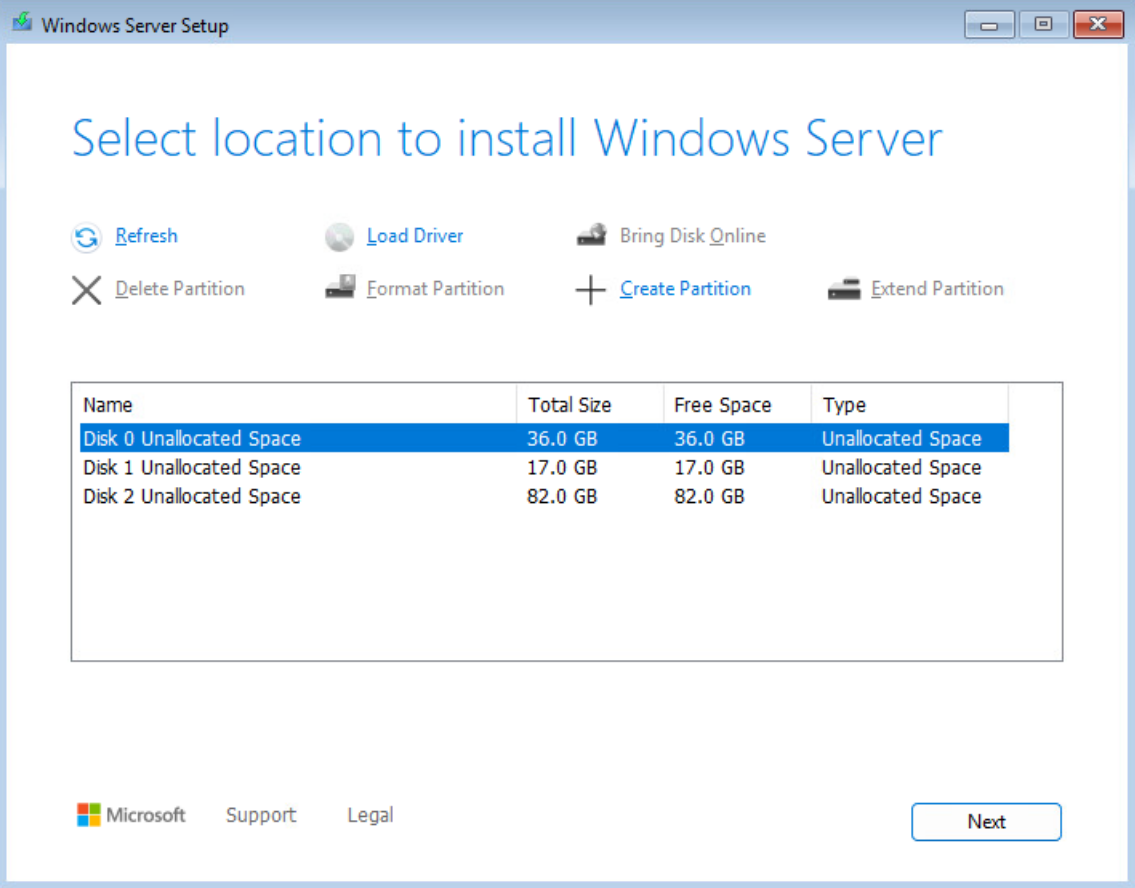
- One hard disk for the operating system (36GB)
- One hard disk for the Windows swap file (pagefile) (17GB)
- One hard disk for the Exchange (82GB)
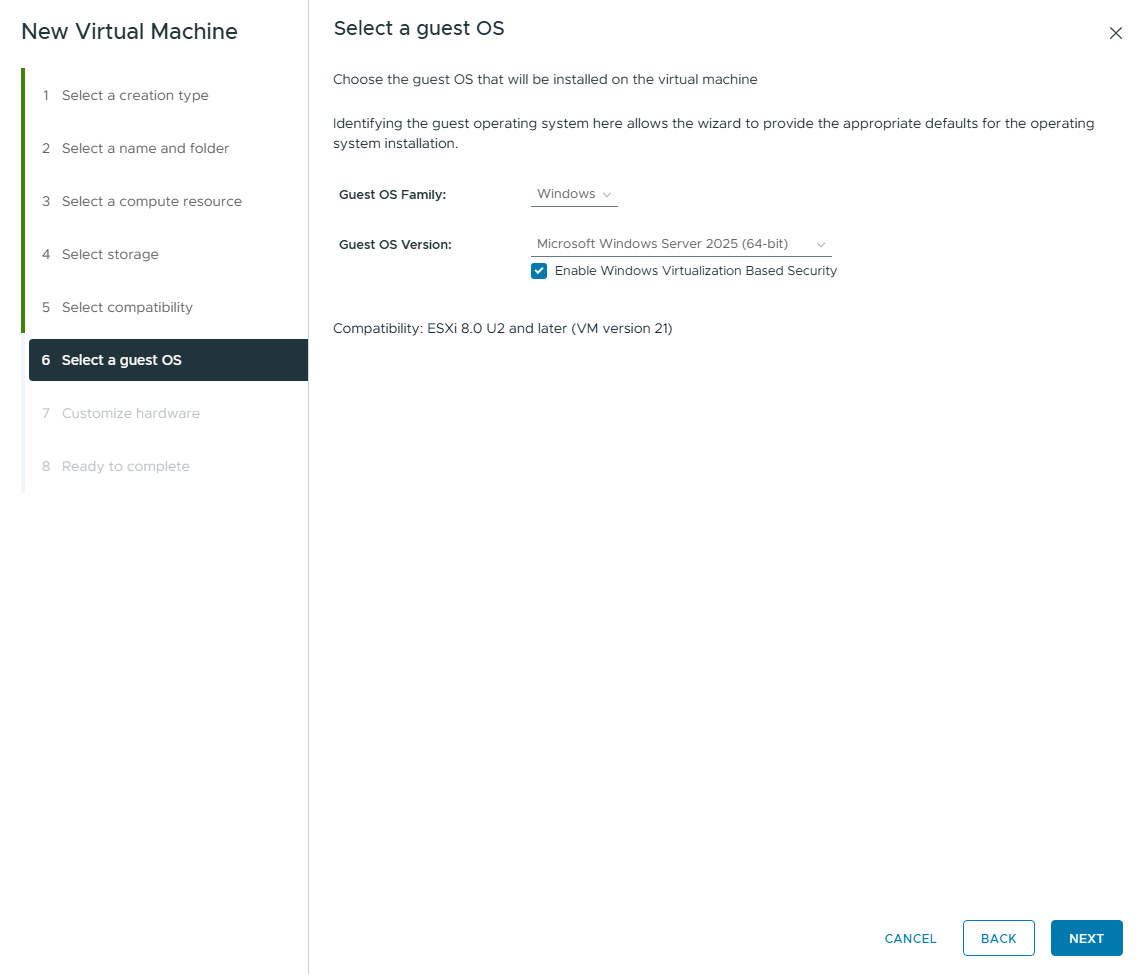
Please check the “Enable Windows Virtualization Based Security” box.
Please install the server in a separate VLAN and select the NIC accordingly during installation.
Installation of the OS
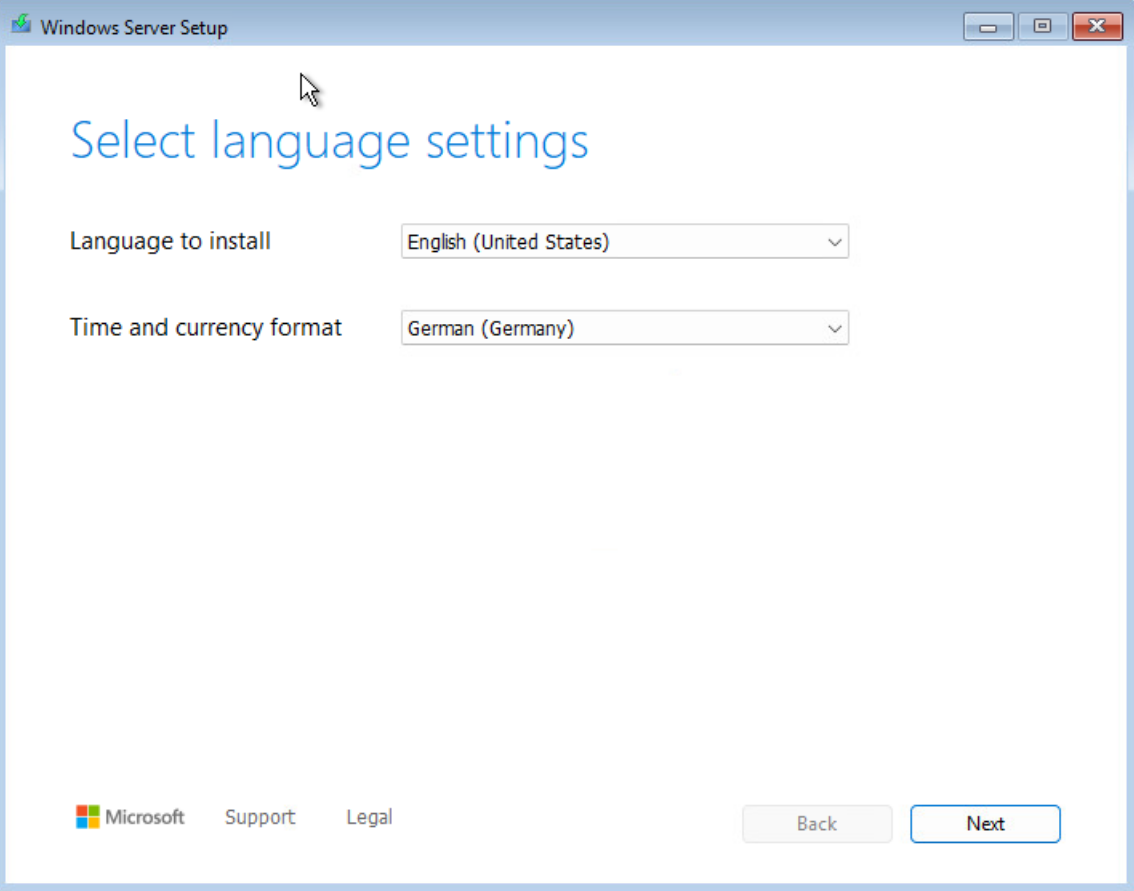
As there have been problems in the past regarding the installed language for updates, I generally recommend installing all servers in English. Otherwise, error messages are often poorly translated and not easy to find on the Internet.
You can then adjust the time and currency format to your country accordingly.
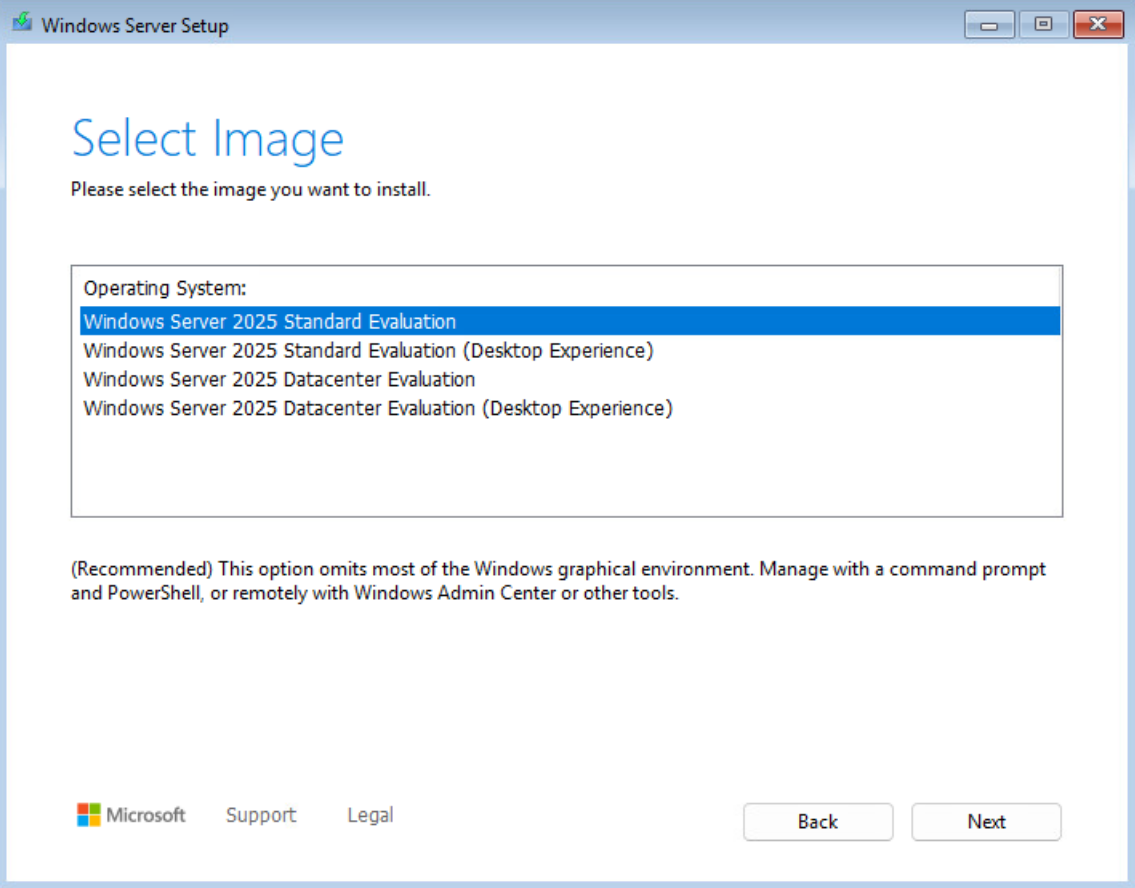
In this guide, I am following Microsoft’s best practice guidelines and best practices. According to Microsoft, a headless Windows server is recommended for Exchange Server 2019 - i.e. a server without a GUI. This is what we will do in this guide. When installing the Windows Server, select the top option “Windows Server 2025 Standard” for this reason.
For the operating system, we select the hard disk with 36GB.
Basic configuration of the Windows server
Configure IP, join domain, etc.
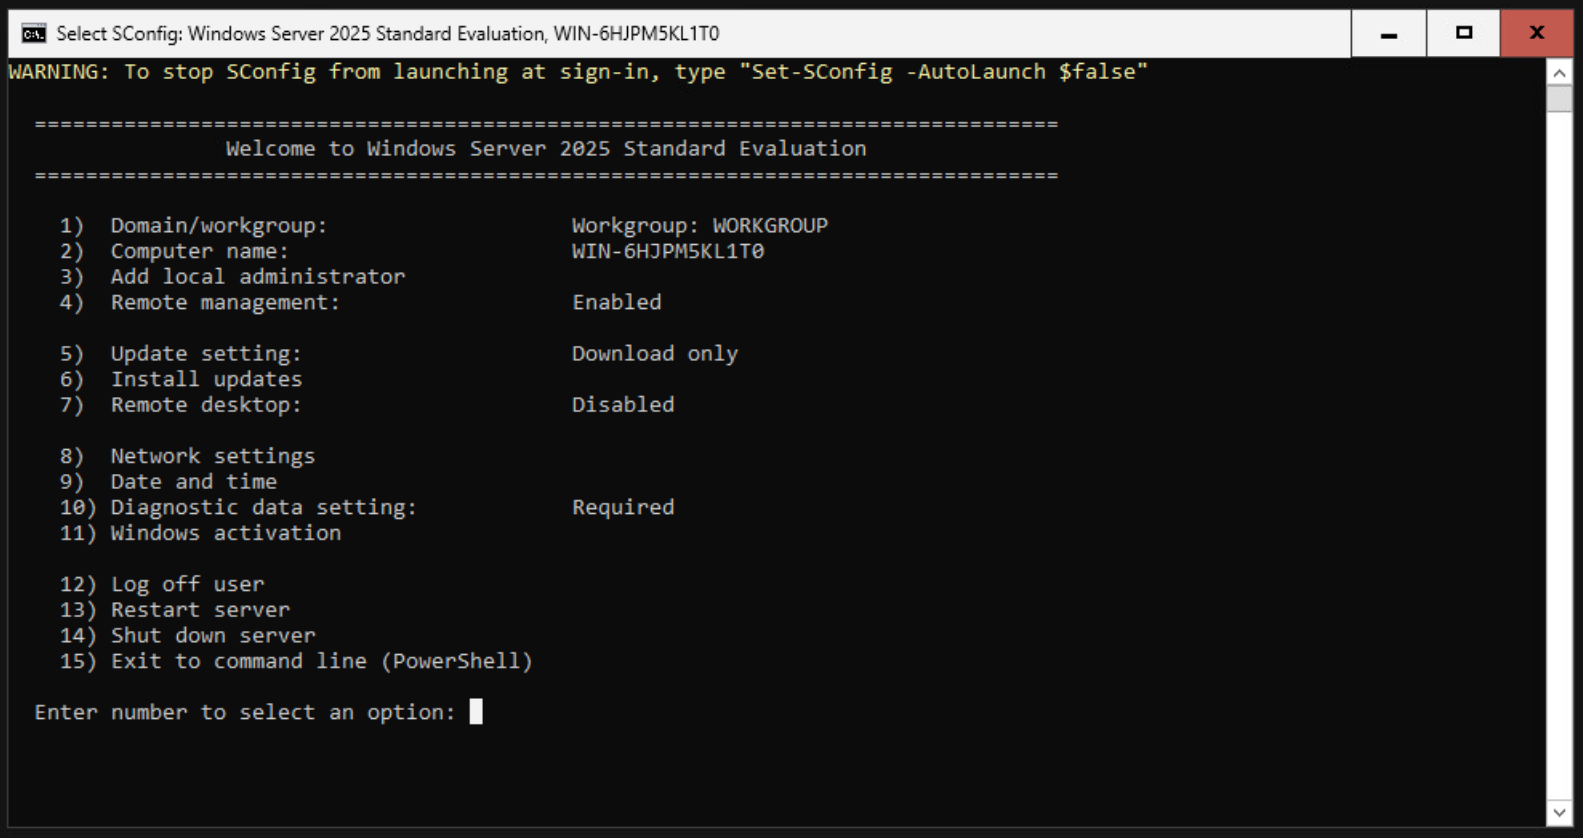
A password must be set after installation. We then log on to the server. After logging in, we are greeted with the following image. We can navigate through the various menus using the numbers.
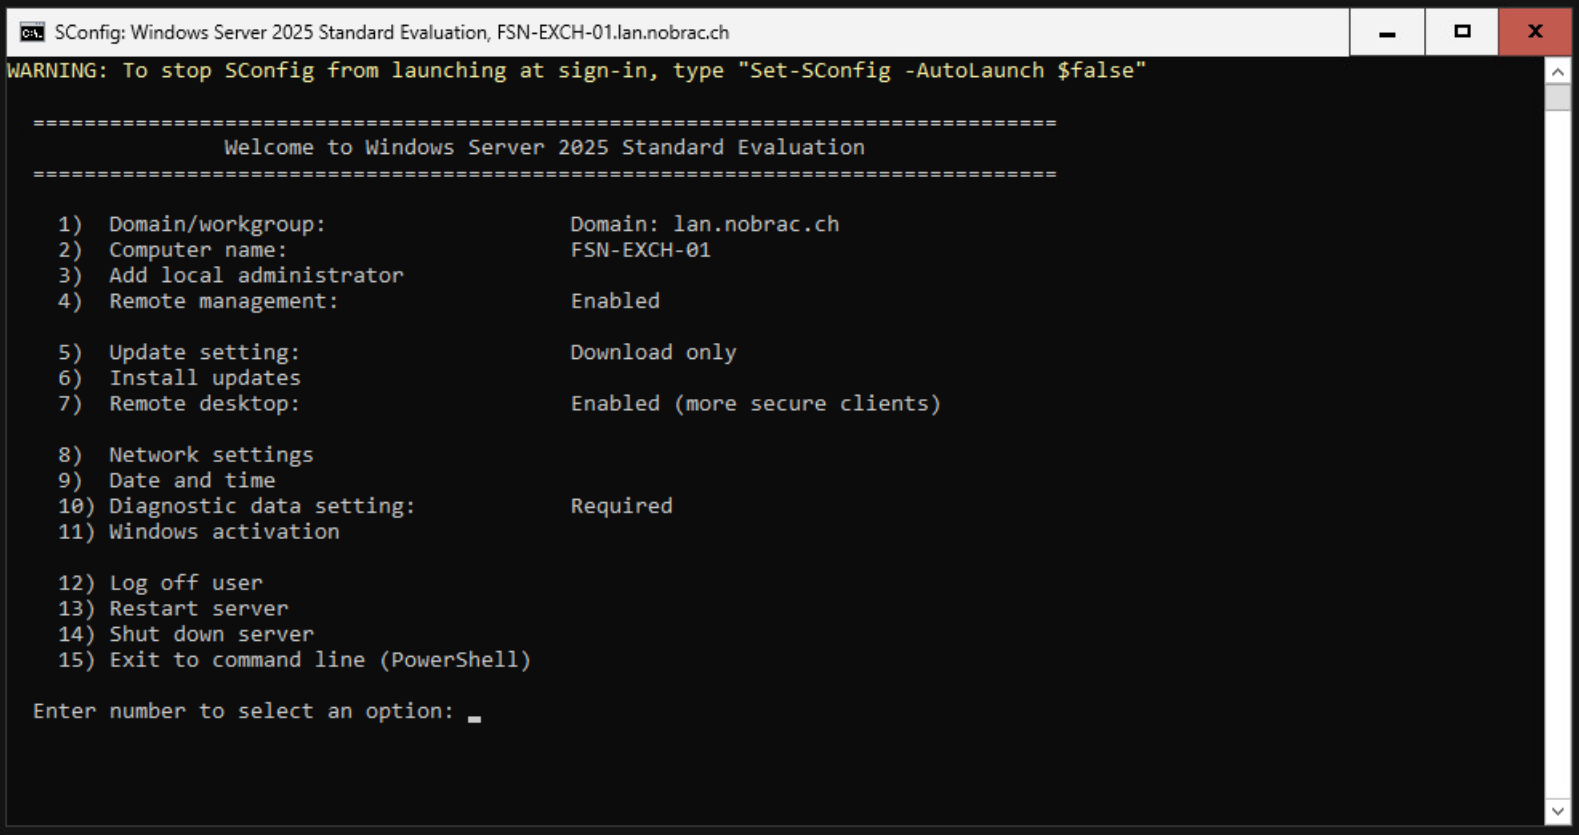
You now name your server properly, add it to the domain, assign it a static IP address with DNS server, adjust the time/time zone if necessary and restart it. I think the steps are self-explanatory. It should look like that in the end.
Install VMware Tools
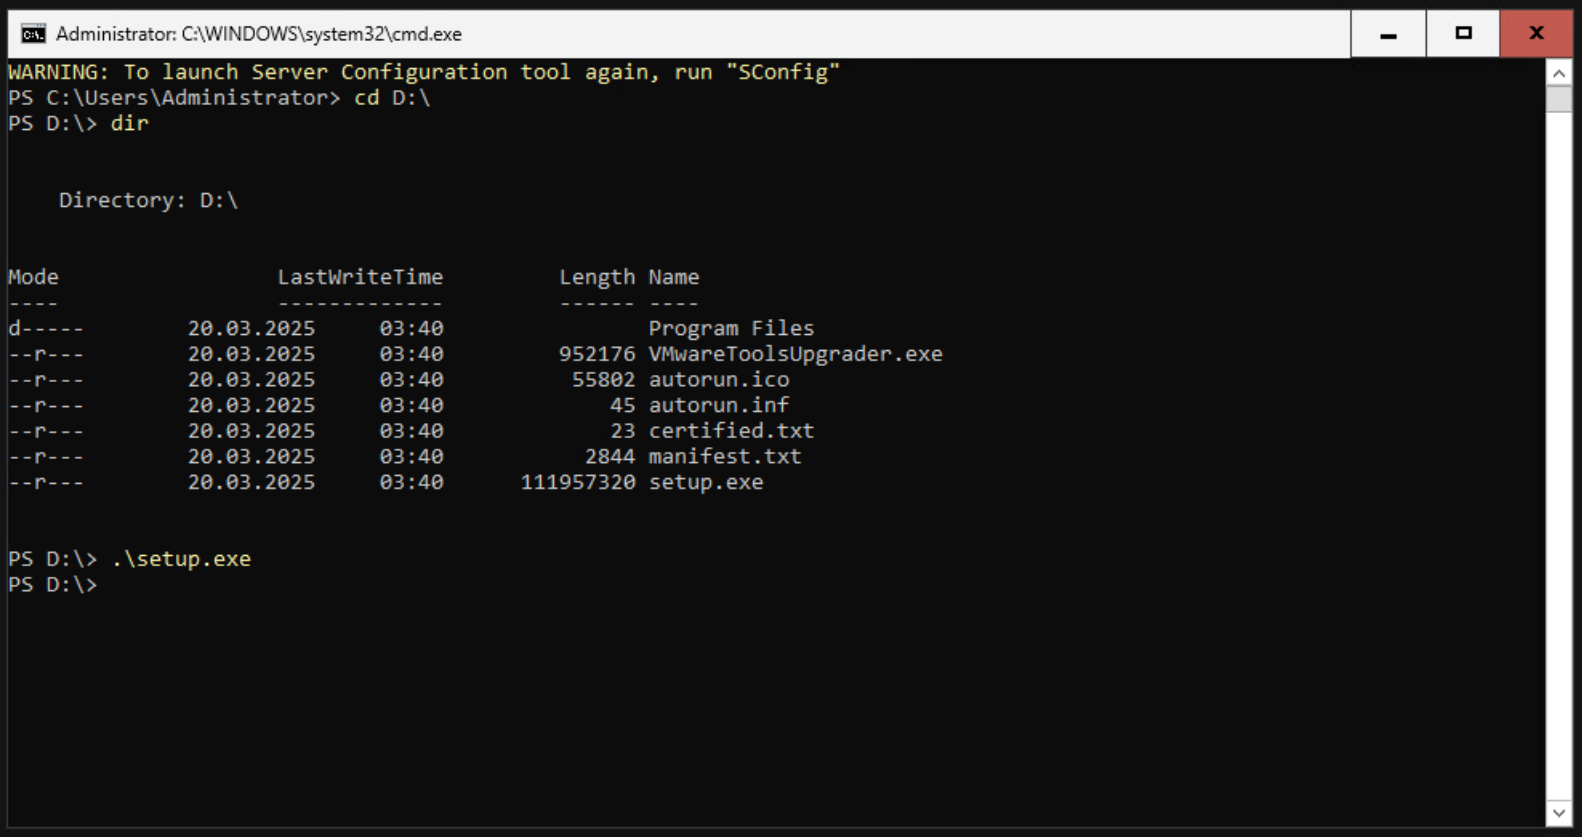
In addition, the VMware Tools should now be installed. As always, you mount these via the vCenter. We can then change to the directory in which the ISO was mounted. For me it was D:. Then simply run the setup.exe.
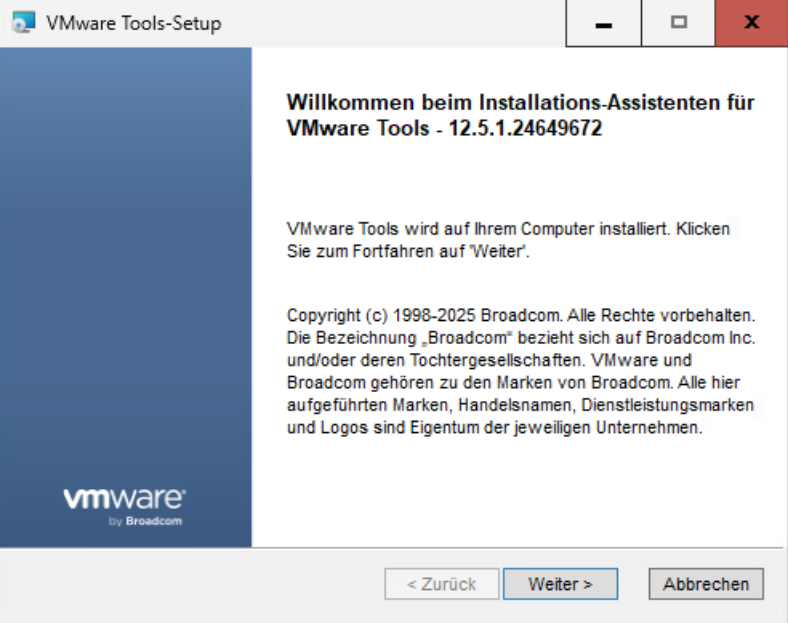
Then simply click through the setup (in my case it is now in German on the screenshots).
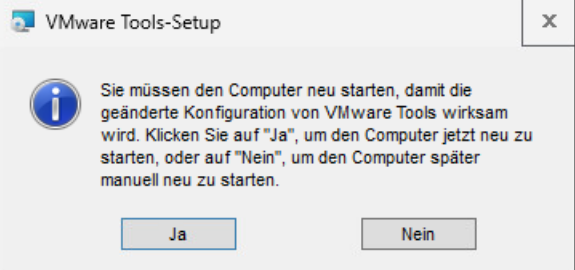
The server must be restarted after installation.
Configure Disks
Initialize Disks
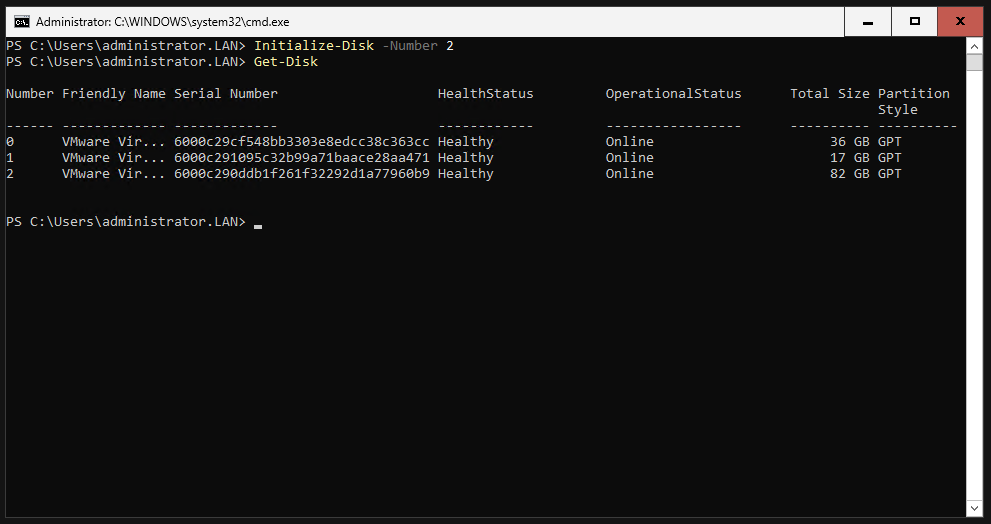
In the sconfig menu, we select the number 15 to switch to Powershell. With the command “Get-Disk” we can display all hard disks.
|
|
Disk 0 is our OS disk.

With the command “Initialize-Disk -Number 1” we can initialize the hard disk with the ID 1.
|
|

We have to do the same for the hard disk with ID 2.
|
|
Parition Disks
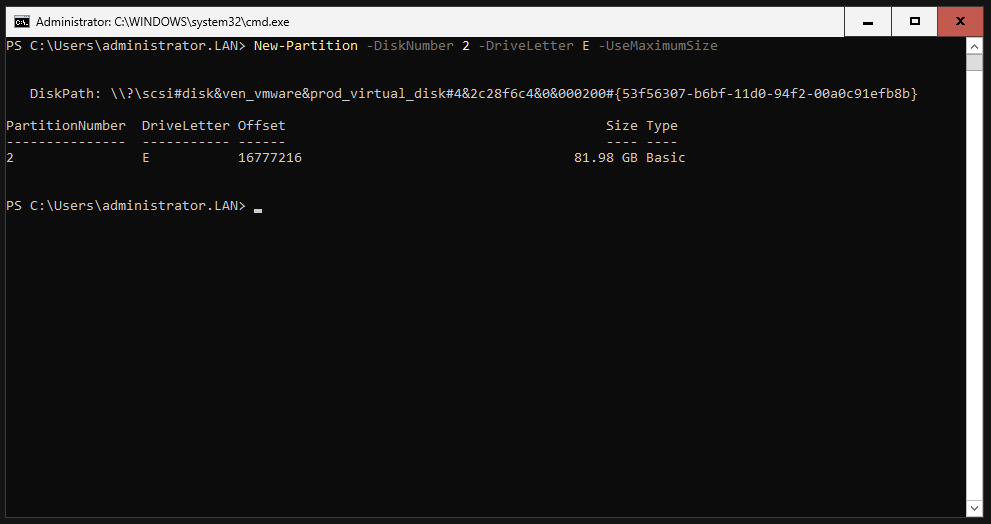
We now partition the hard disks. We can partition the hard disks with the “New-Partition” command. I give the disk with 17GB, i.e. the disk for our swap file, the drive letter F.
|
|

We now have to do the same for the other hard disk. I give it the drive letter E for Exchange.
|
|
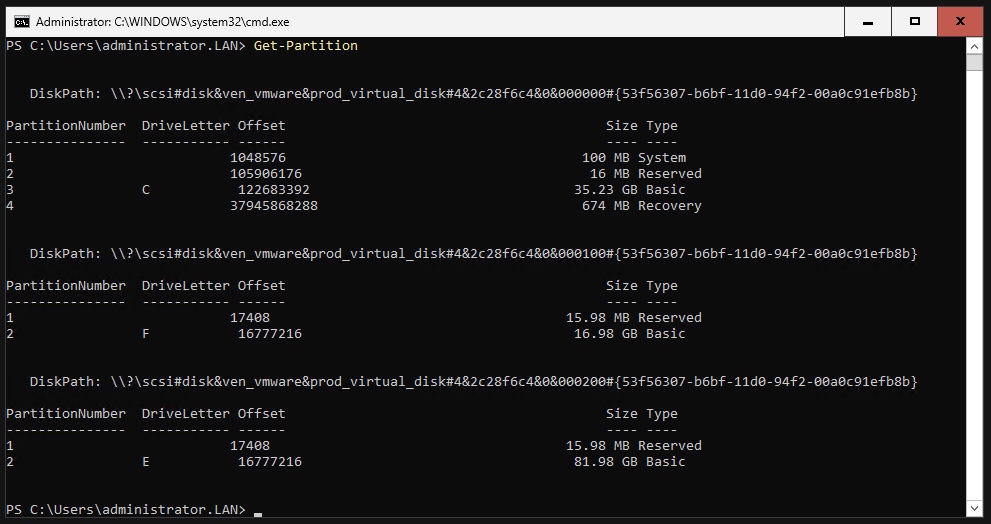
We can now check everything with the “Get-Partition” command.
|
|
Format Disks
Now we have to format the partitions with NTFS. This can be done with the “Format-Volume” command.
|
|
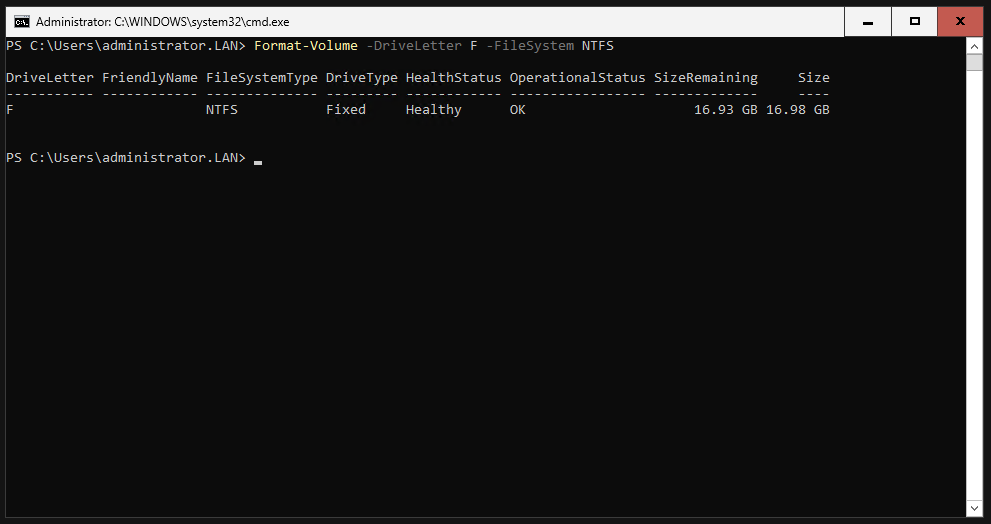
Do the same for the other partition.
|
|

Configure Swap File
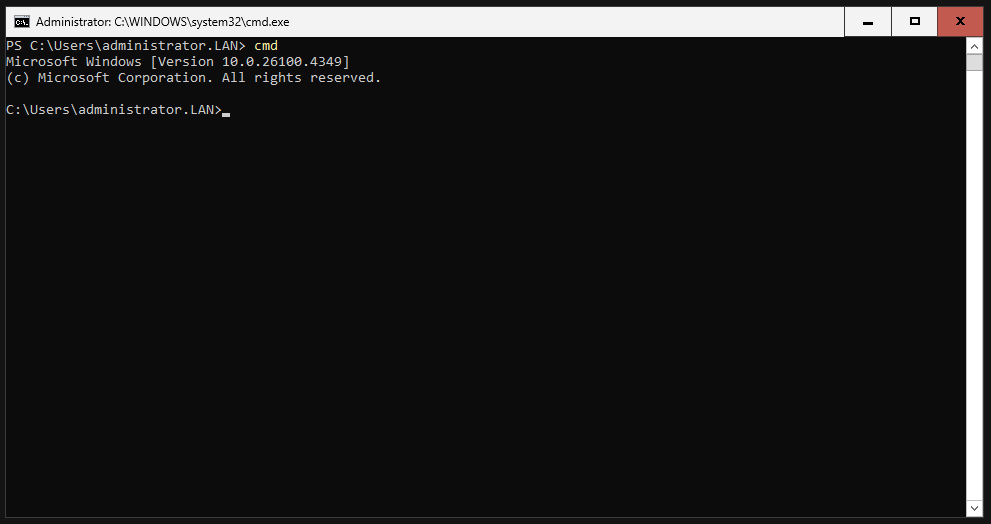
We enter “cmd” to open the command prompt.
We disable the automatic page file.
|
|

We delete the current page file.
|
|

We create a new page file on our dedicated page file drive.
|
|

We adjust the size of the page file.
|
|
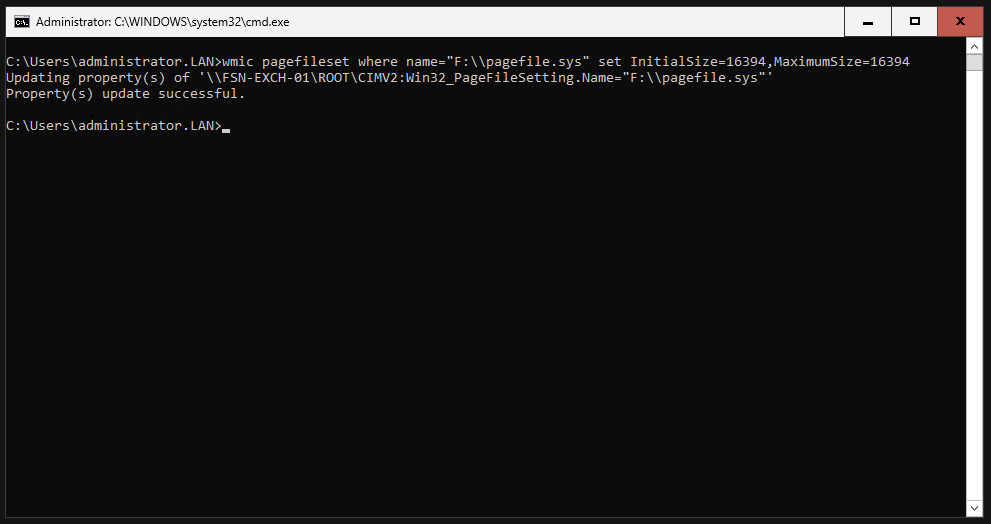
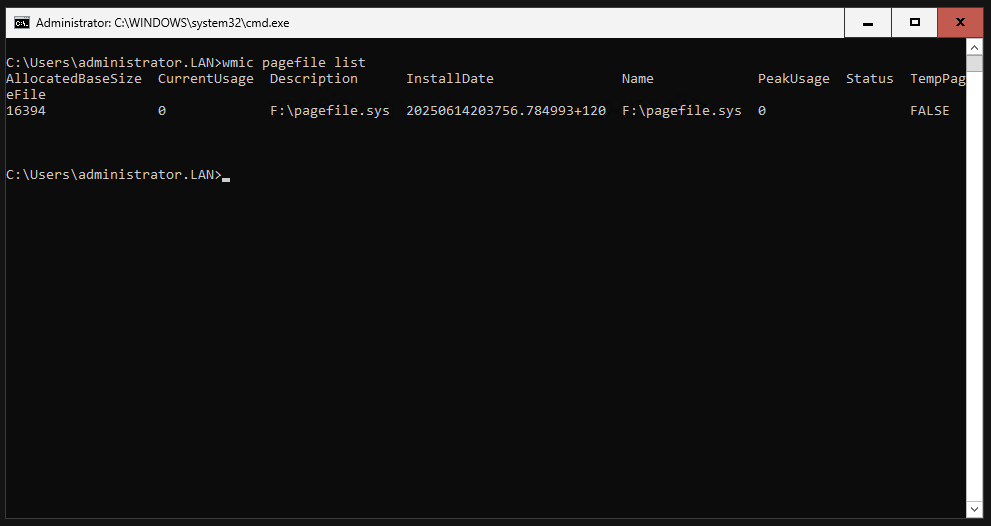
We check the settings we have made.
|
|
Preparation for Exchange installation
Install needed Features
Open Powershell on your server and install the following prerequisites.
|
|
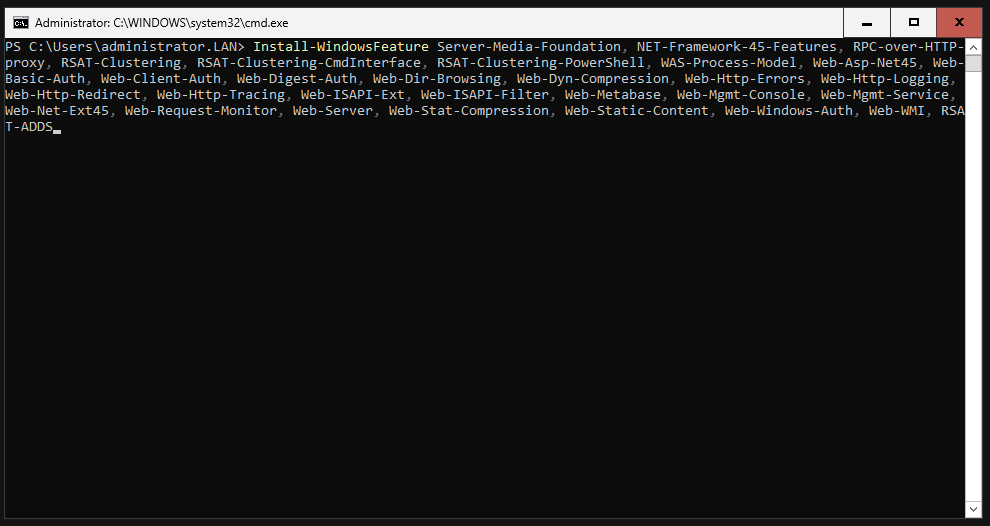
This can take some minutes to complete.
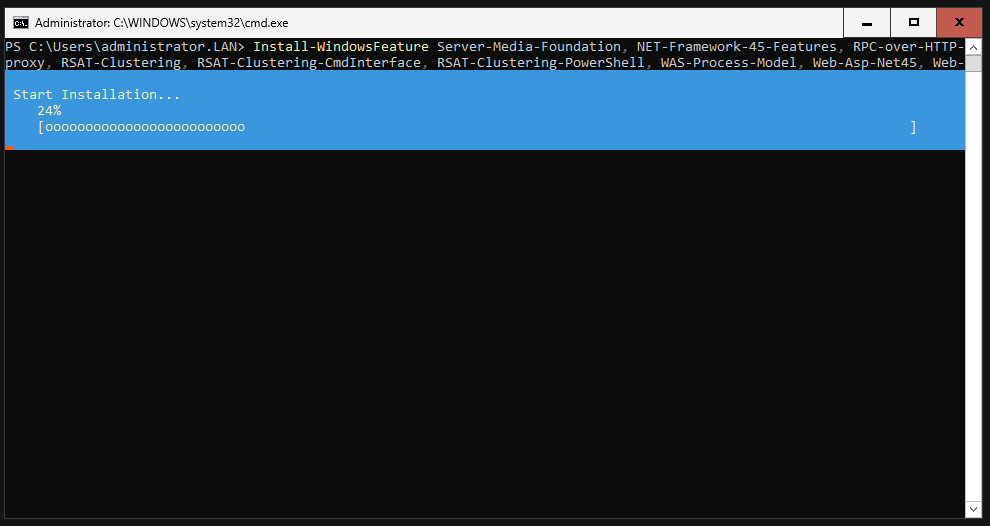
It should display “Success” when it’s done.

Install VCRedist 2012
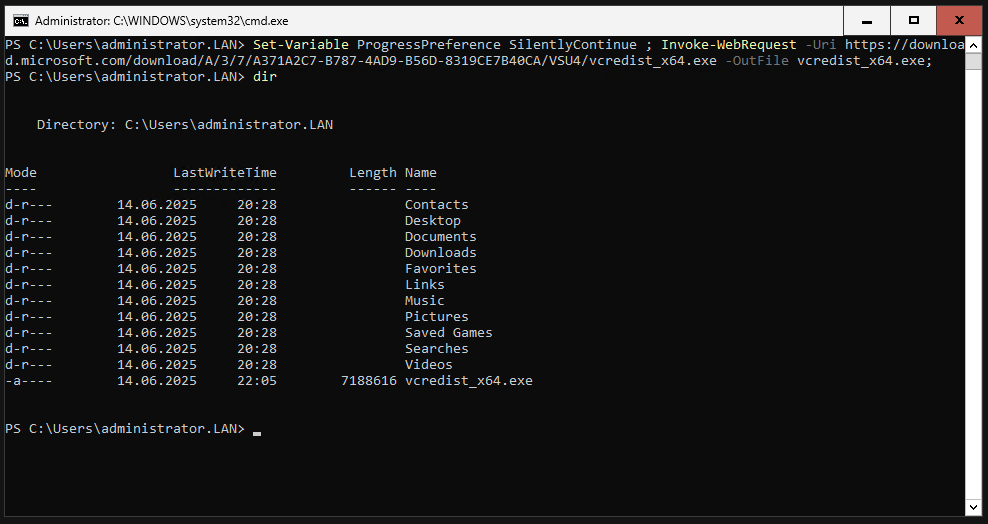
Enter the following command to download VCRedist C++ 2012 in x64.
|
|
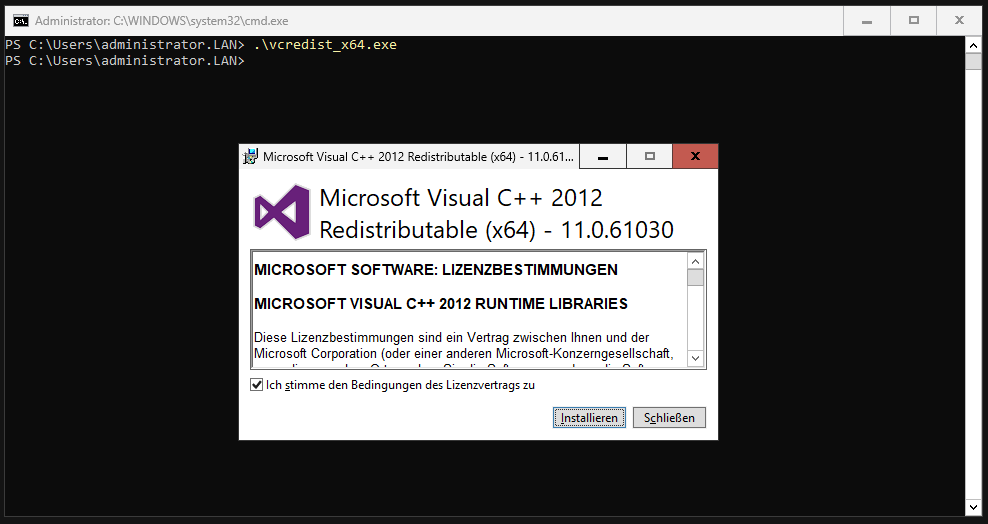
Run the setup and just install it.
|
|
Install VCRedist 2013
Enter the following command to download VCRedist C++ 2013 in x64.
|
|

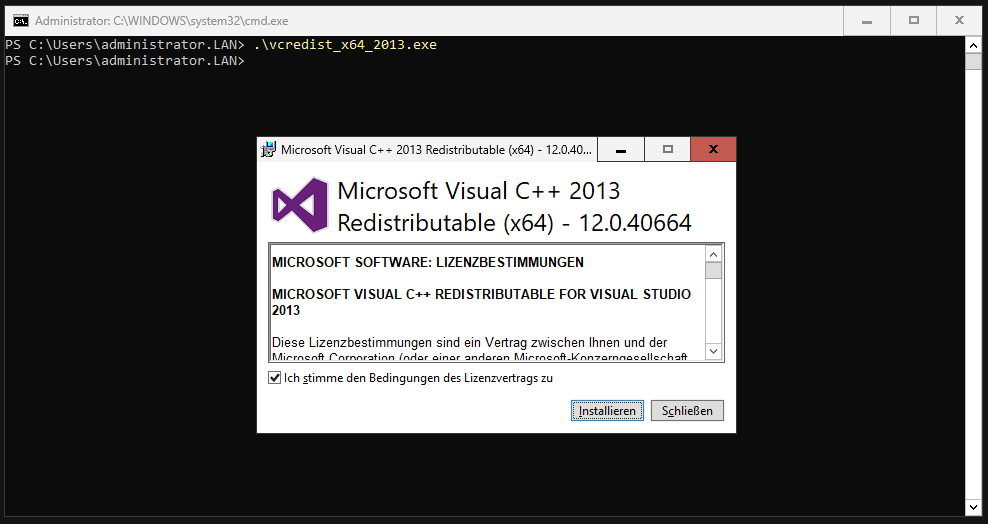
Run the setup and just install it.
|
|
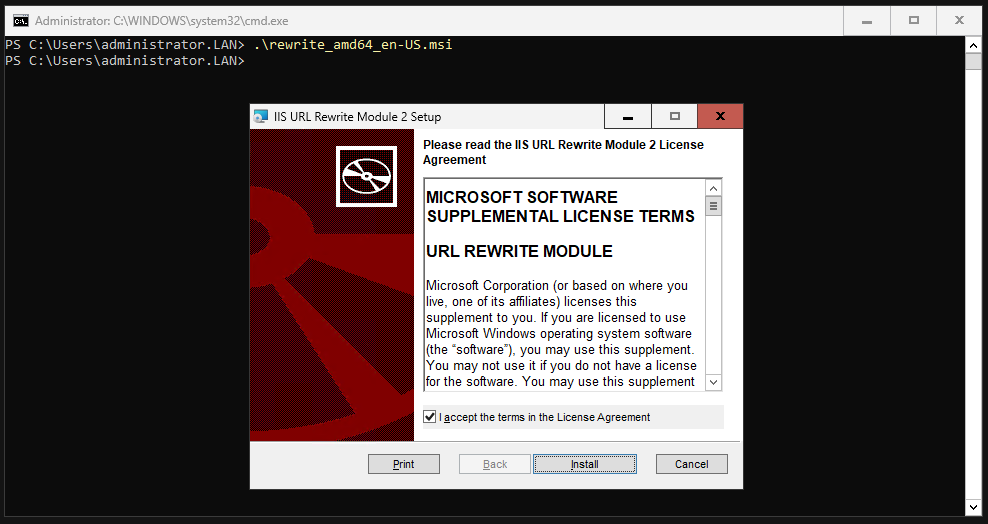
Install IIS-Rewrite
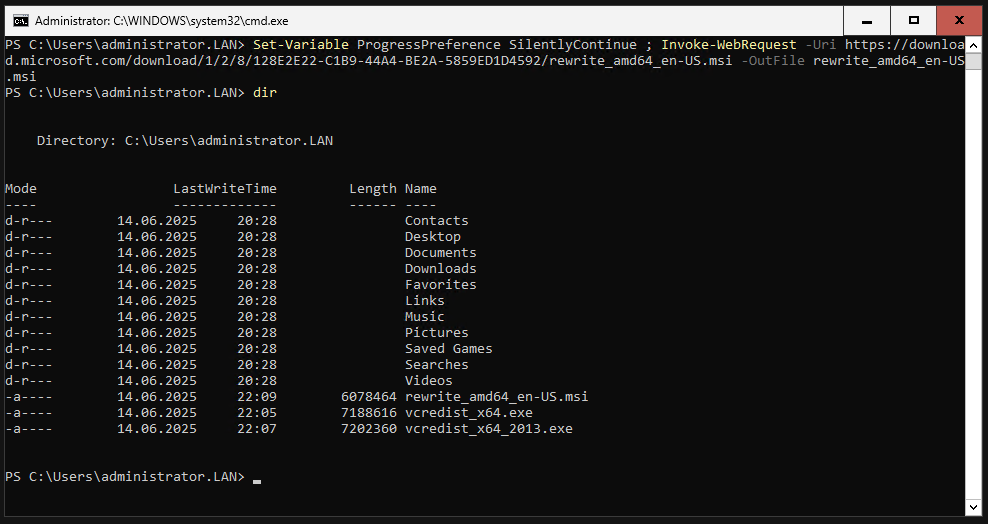
Enter the following command to download IIS-Rewrite.
|
|
Run the setup and just install it.
|
|
Download Exchange 2019 ISO
Enter the following command to download Exchange 2019 CU15.
|
|
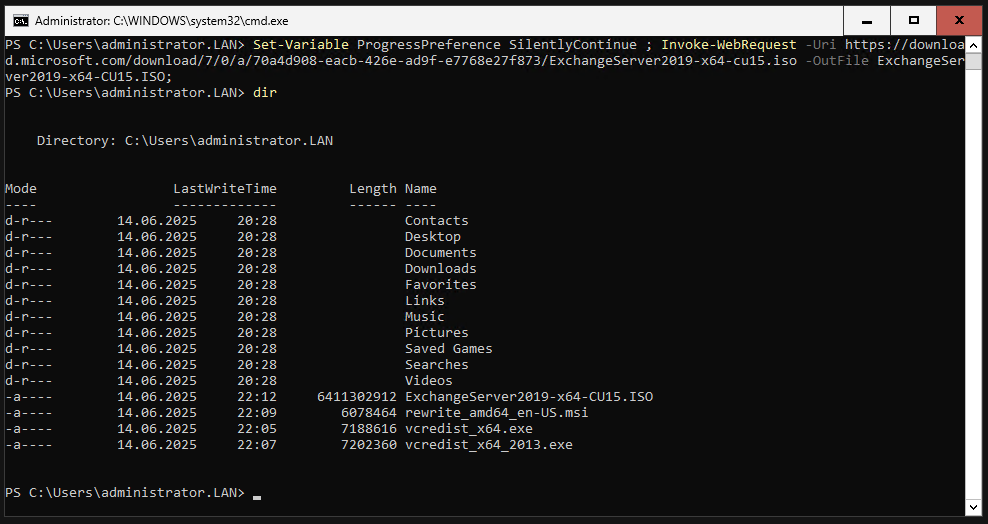
Mount the ISO
|
|

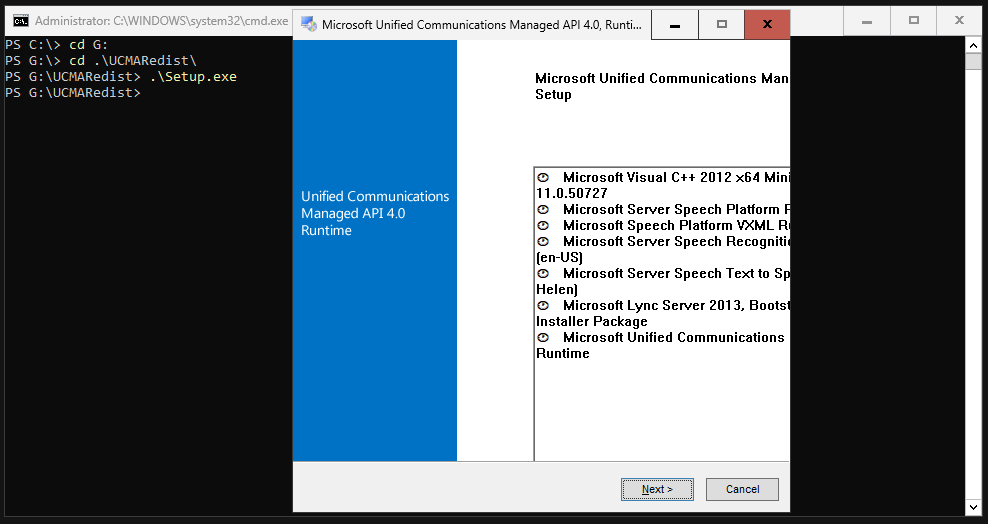
Install UCMARedist
The UCMARedist setup is located on the Exchange ISO. In my case, the ISO was mounted with the letter G. I change the directory to G: and then to the “UCMARedist” folder. In this folder we simply execute the Setup.exe.
|
|
Install Exchange
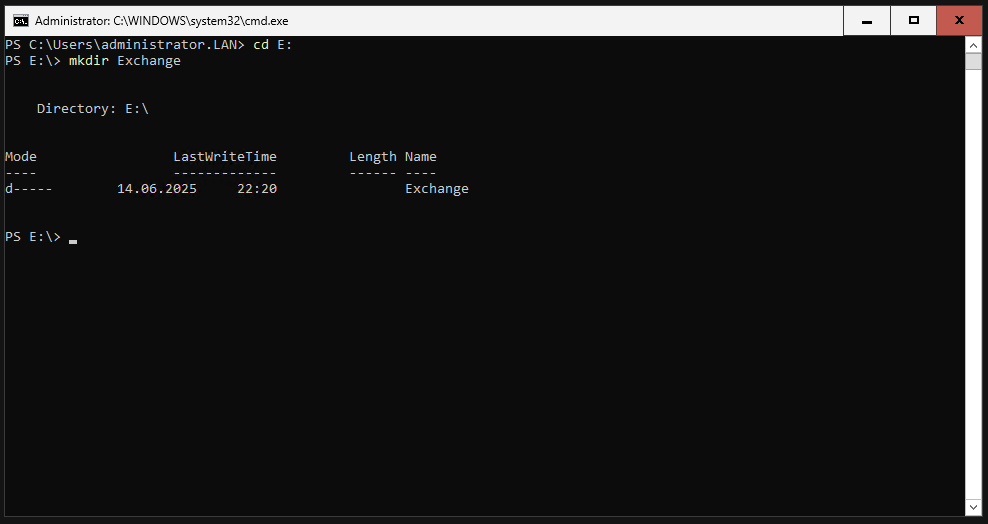
Create Folders
Before the actual Exchange installation, we now create three folders on the hard disk intended for the Exchange, in my case drive E. This can be done with the mkdir command.
We create a folder with the name “Exchange”.
|
|
We create a folder with the name “Database”.
|
|
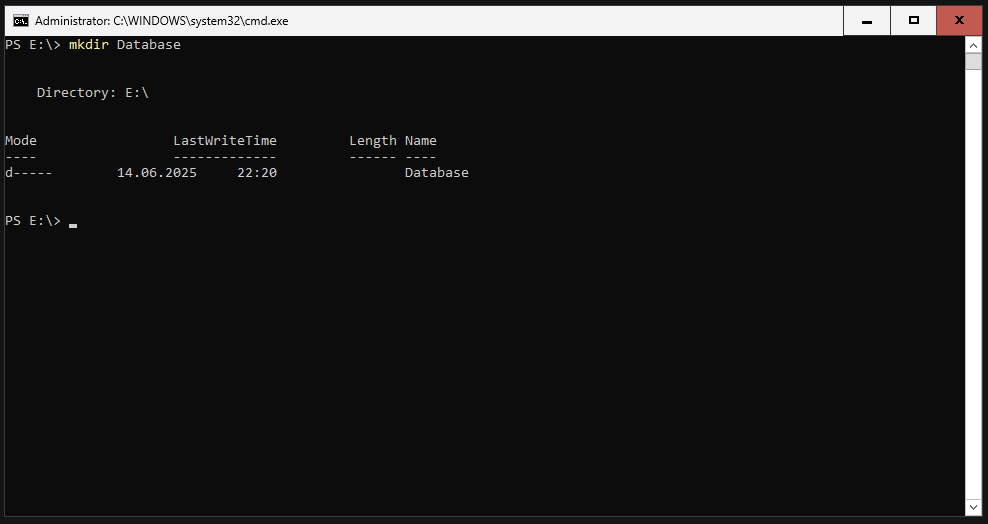
We create a folder with the name “Logs”.
|
|

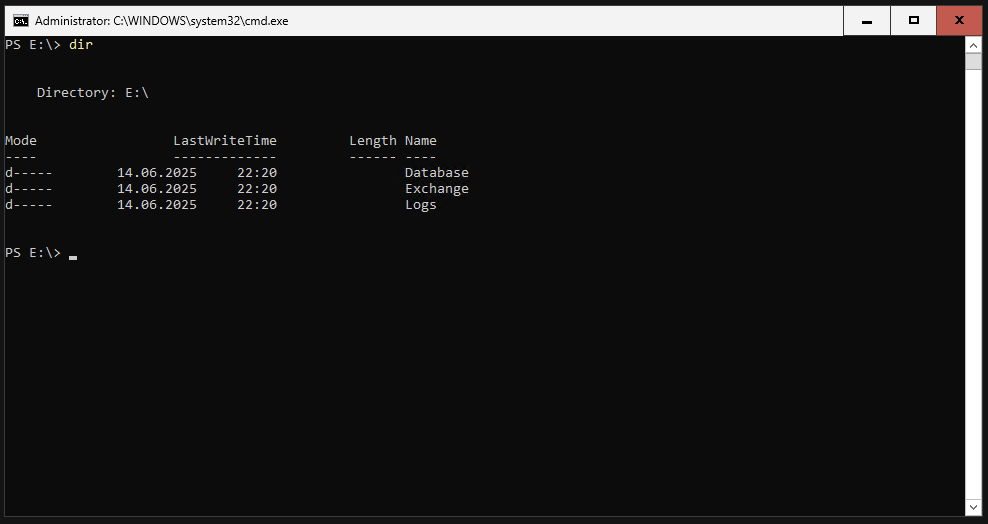
It should look like this.
Run the setup
Now we switch back to the drive with the mounted Exchange ISO. Here we now start the Exchange installation.
Change the “Organization Name” accordingly. Keep quotation marks.
|
|
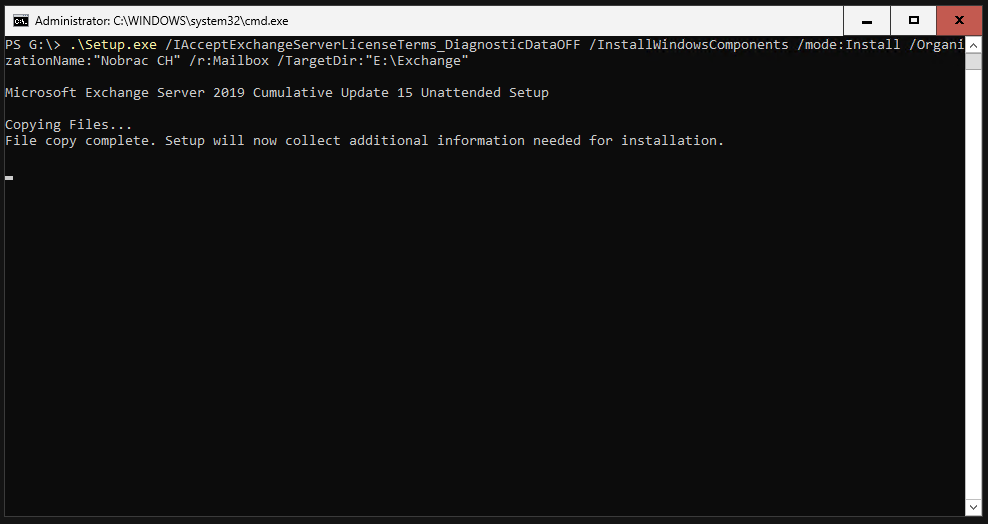
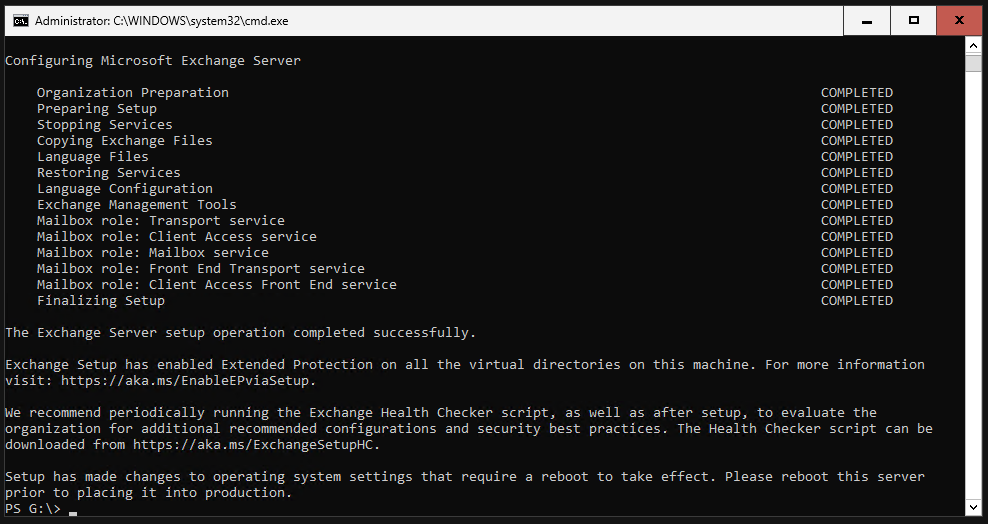
The setup will start.

This will take around 15-20 minutes on SSD/NVMe.
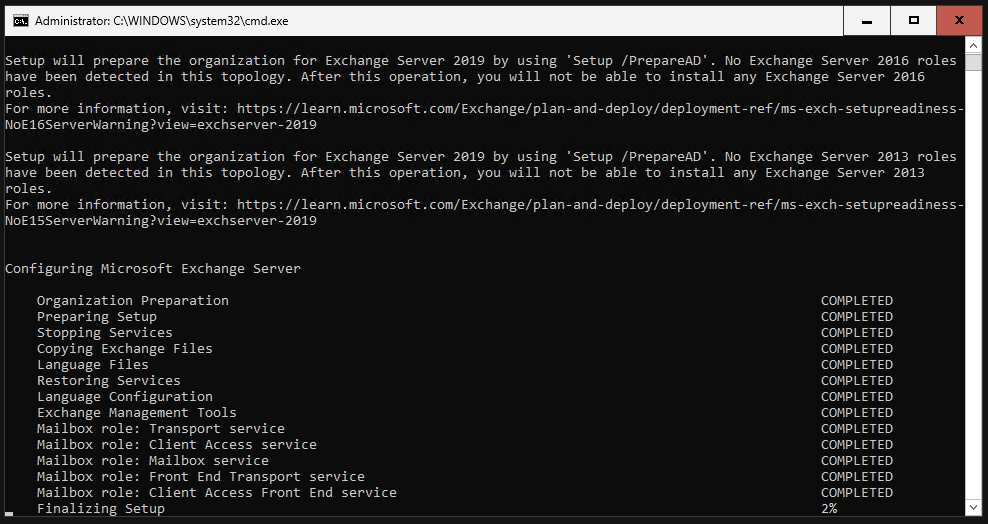
It should look like this when the setup is finished. We need to reboot the server now.
Test OWA and ECP
OWA and ECP should now be accessible after the reboot.
OWA
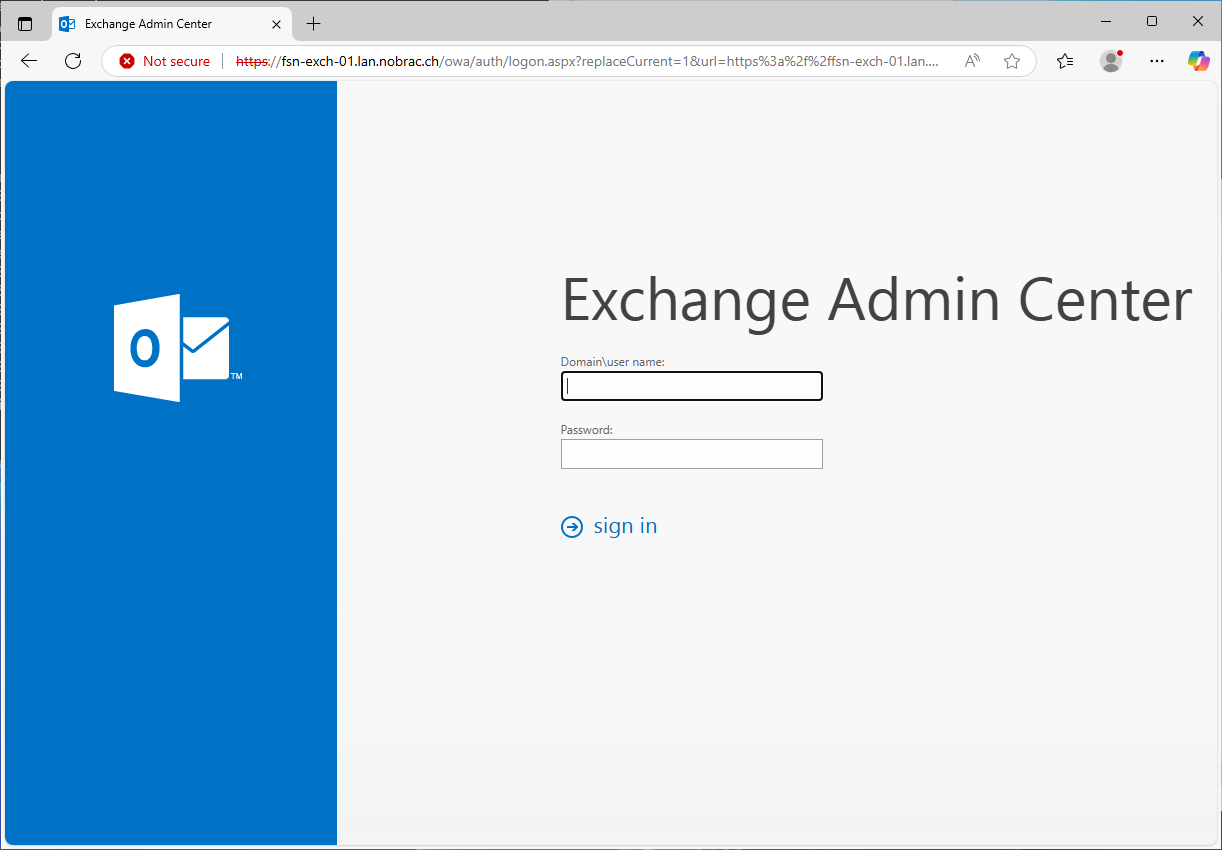
OWA can be accessed at https://fqdn.of.your.server/owa.

ECP
ECP can be accessed at https://fqdn.of.your.server/ecp.
DNS Records
A-Record, MX-Record, SRV-Record
We will now configure DNS records. In my case, my domain is with Cloudflare. But it should actually be similar for other providers.
Login to cloudflare and click on your domain.
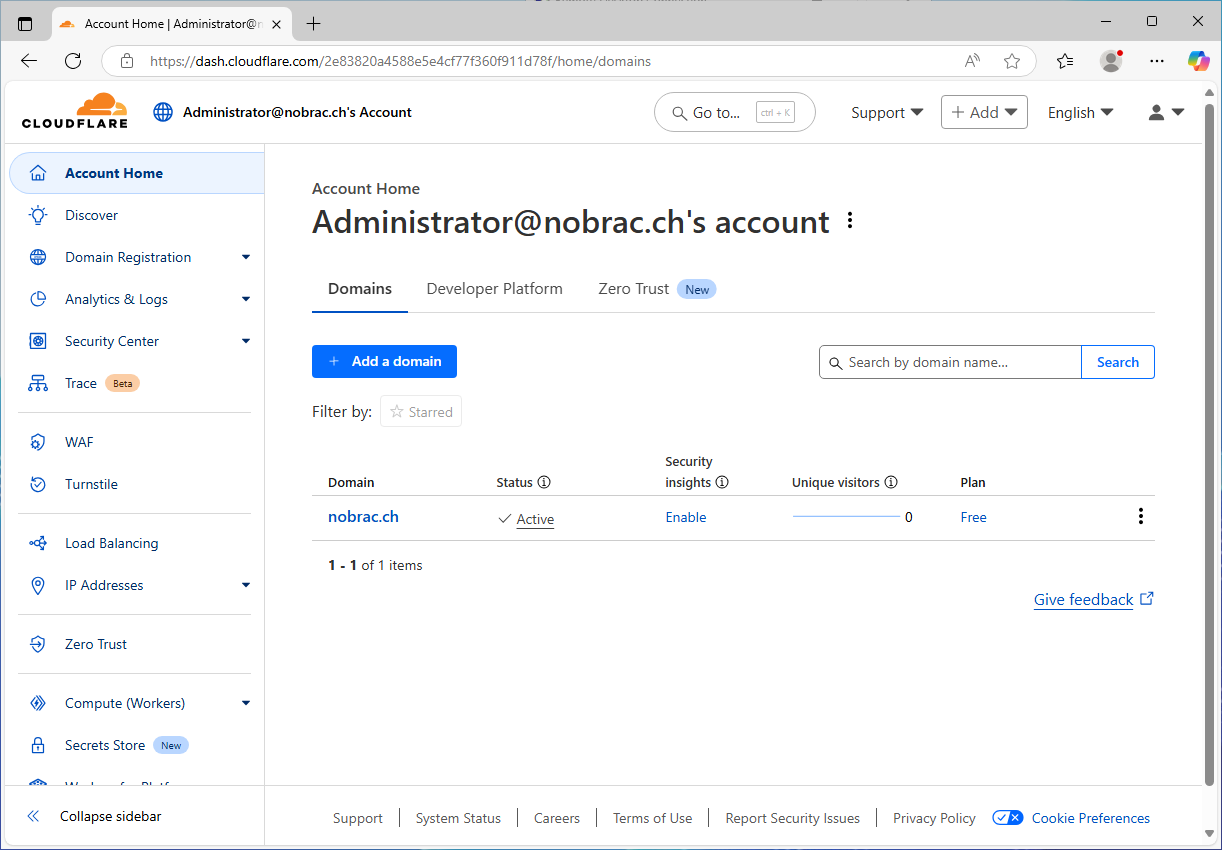
You should be here now. Click on “DNS” in the left-hand menu.
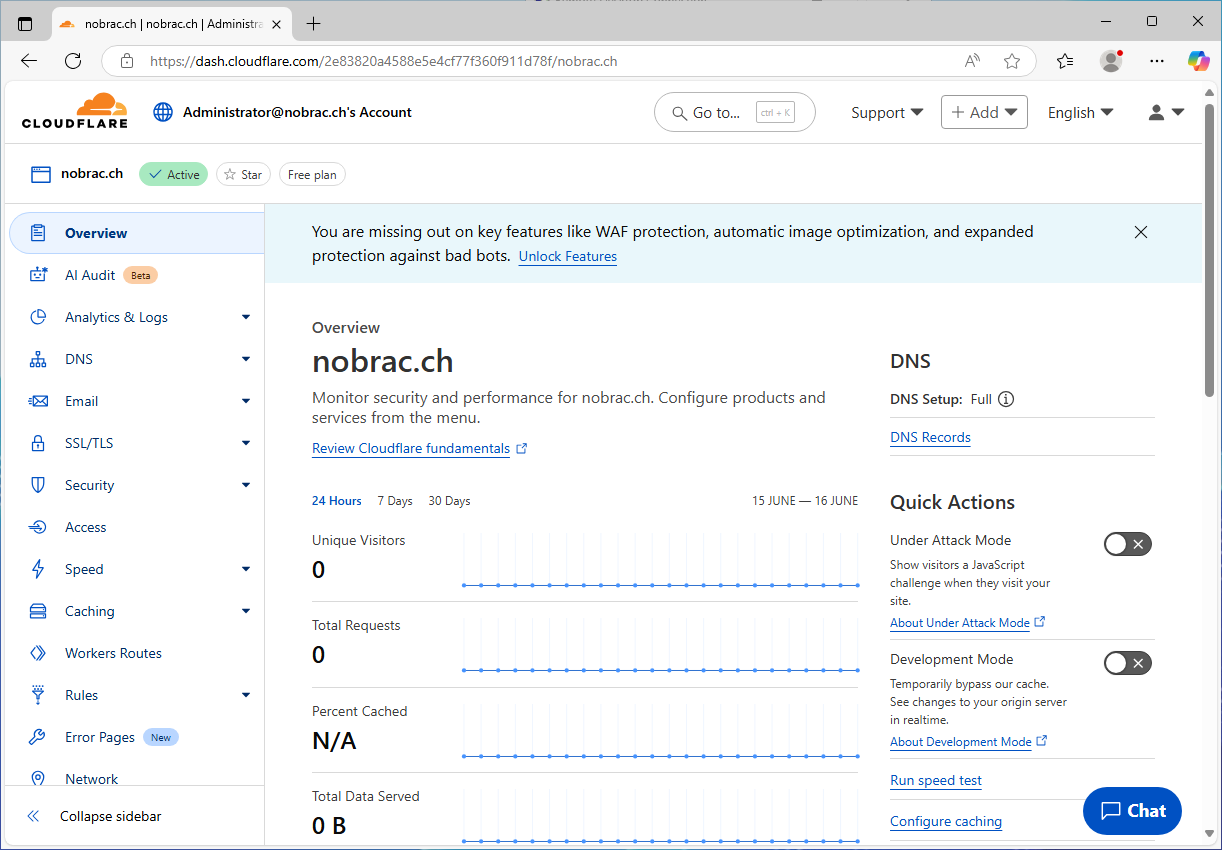
And then on “Records”.
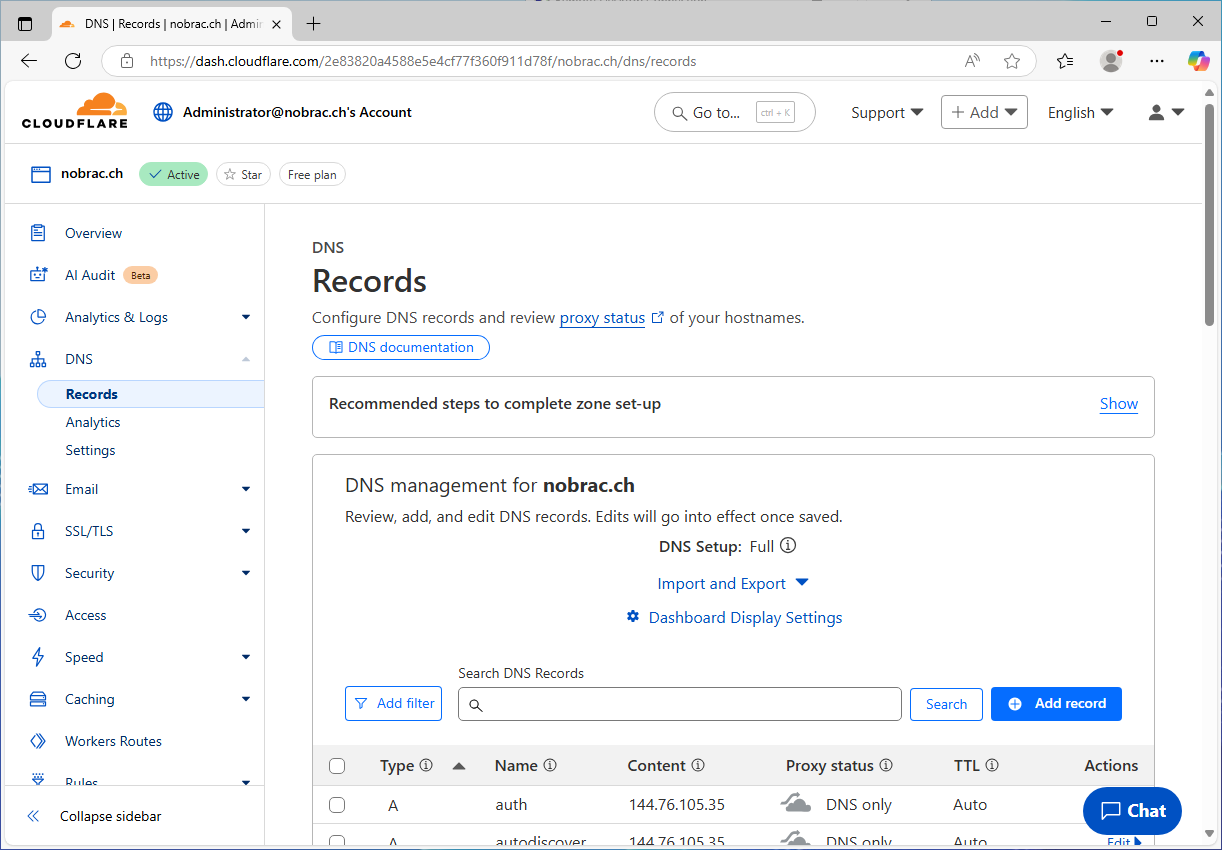
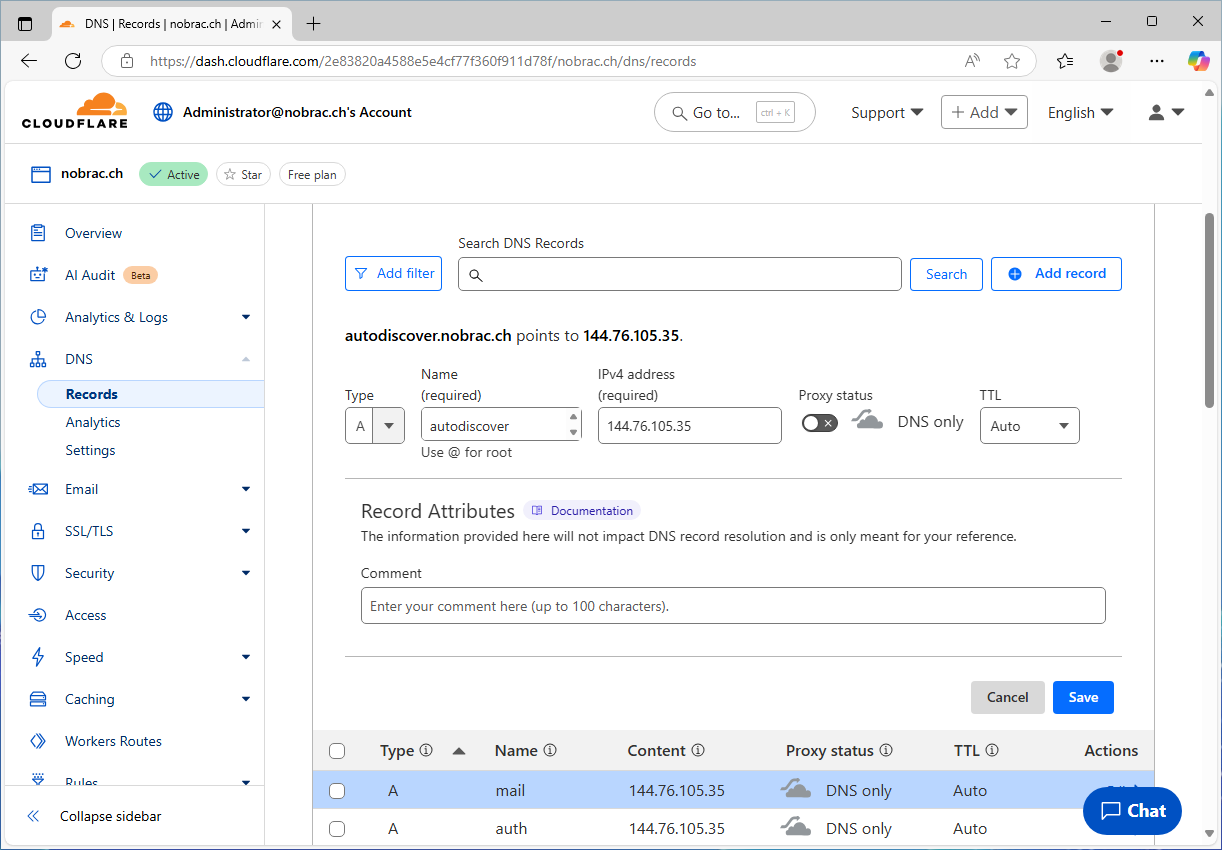
Click on “Add record” and select “A” as the record type. Now enter a name for the A-Record under which your mail server should be accessible. A common name is “mail”. This is also the name I choose in my case. The IPv4 address field is self-explanatory.

Create another A-Record with the name “autodiscover”.
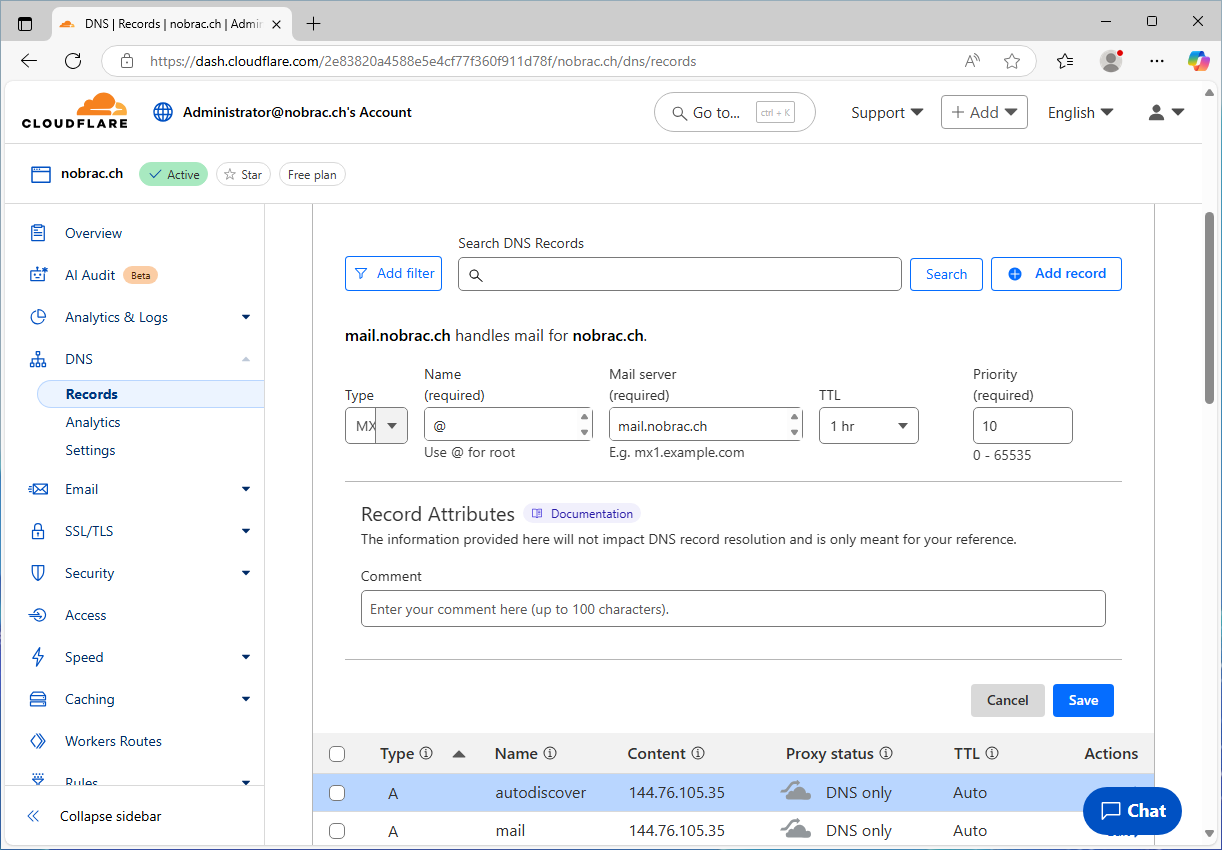
Create another record but select “MX” as the type. Enter “@” for the name and enter the previously created A-record for your mail server in the “Mail server” field. Select one hour for the TTL and 10 for the priority.
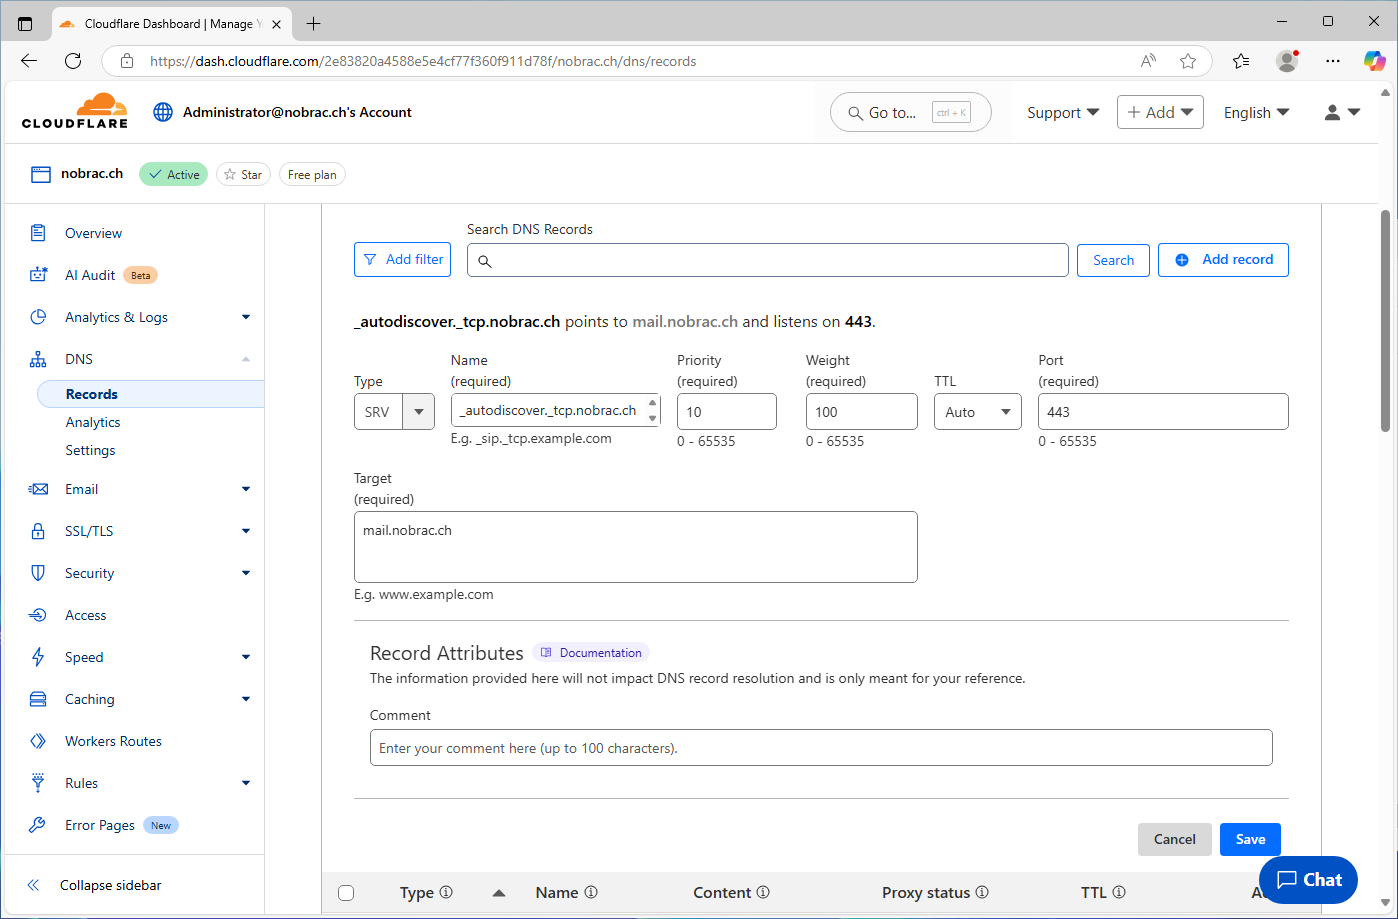
Create another record but select “SRV” as the type. You must enter the following in the “Name” field:
|
|
The target is again your previously created A-Record for your mail server. You can copy the other settings from the screenshot.
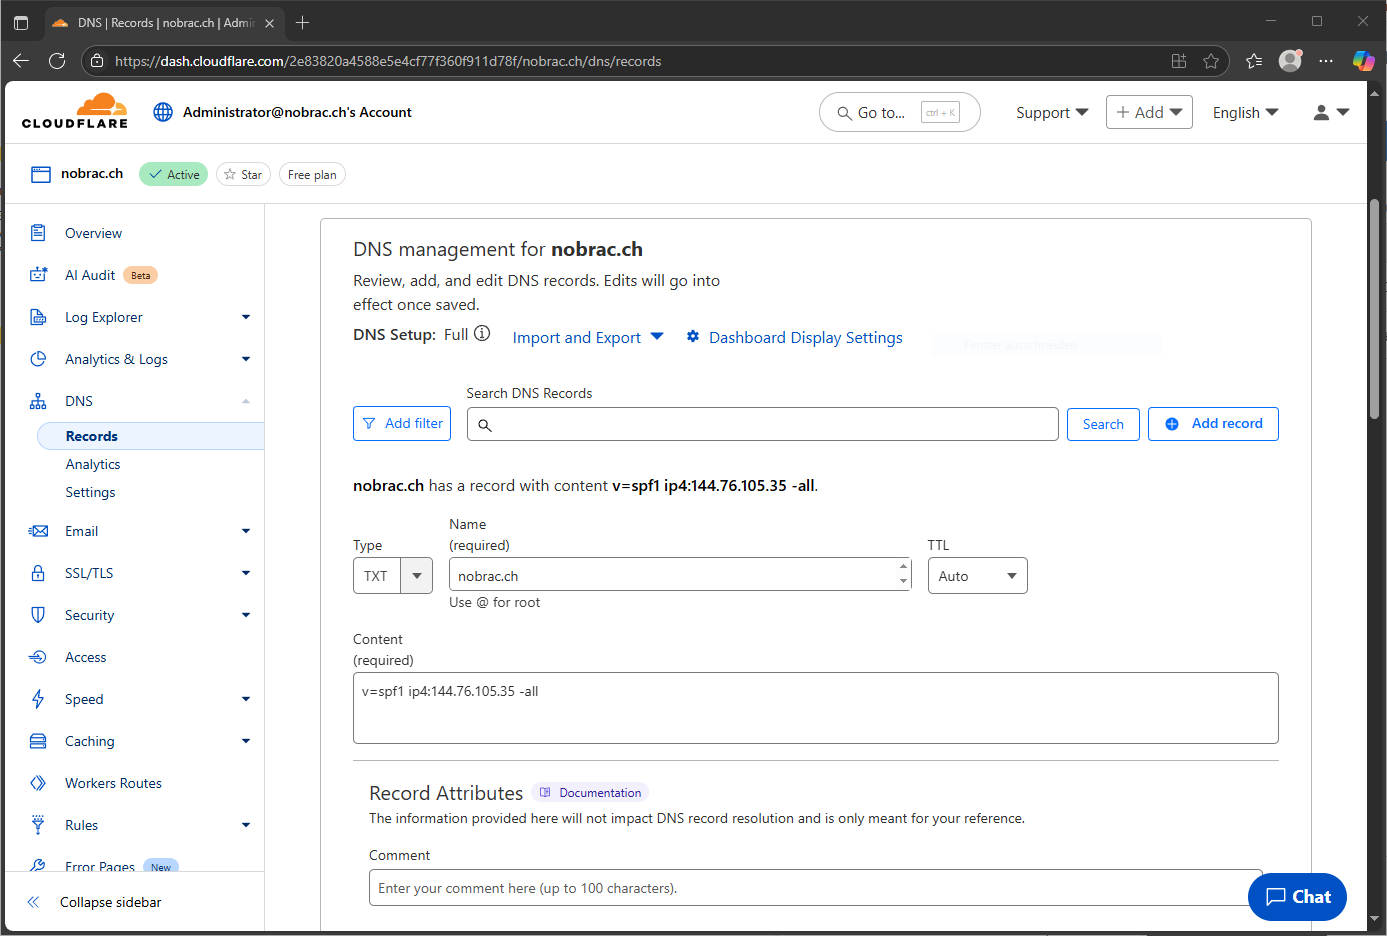
SPF-Record
Create another record but select “TXT” as the type. Enter your domain in the “Name” field and enter the following in the “Content” field:
|
|
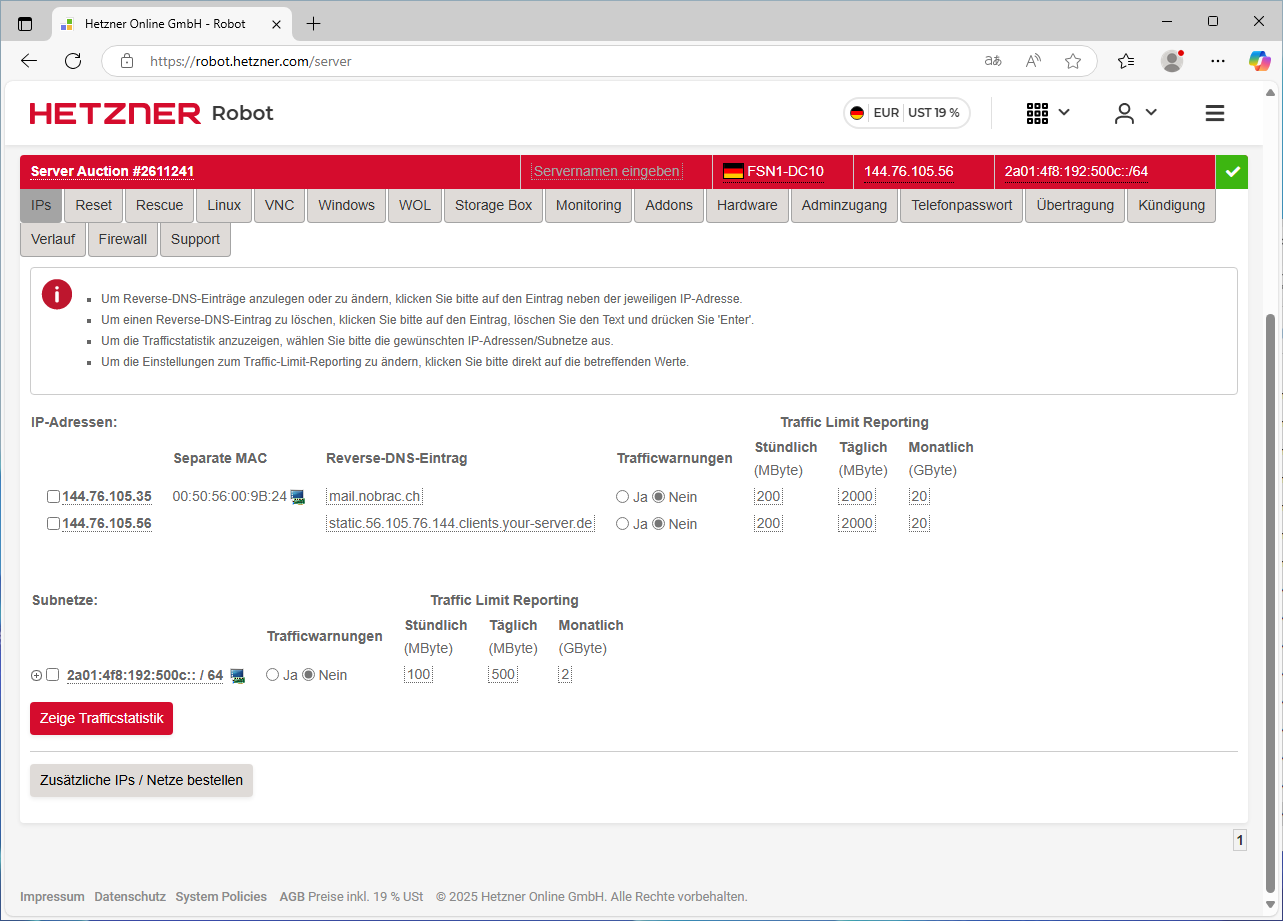
RDNS Configuration
You must now configure the reverse DNS entry with your server host. Please check whether your server provider has this option. My servers are at Hetzner, where this is configurable.
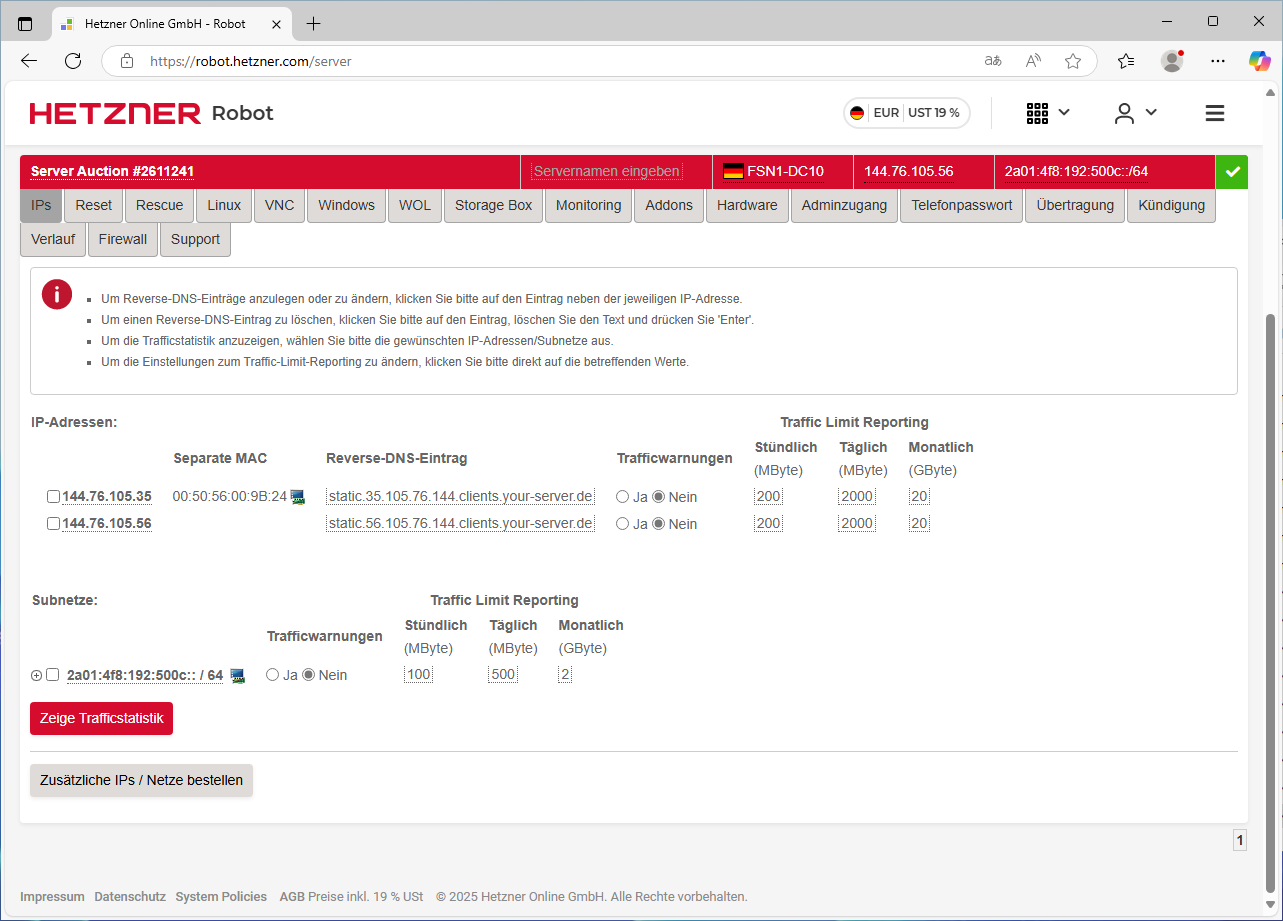
In my case, I change the reverse DNS entry for the IP address 144.76.105.35 to “mail.nobrac.ch”.
Renaming and moving the mailbox database and the log directory
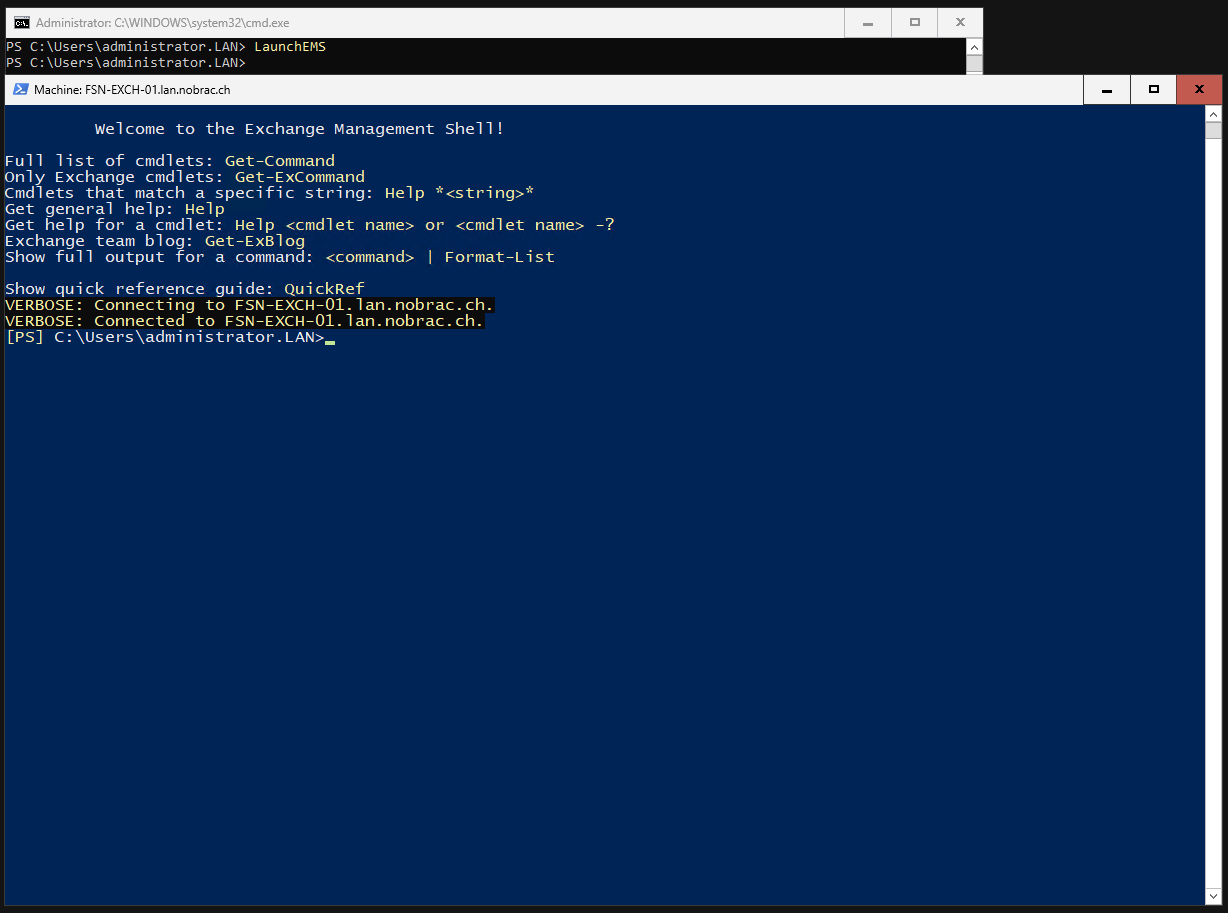
Open Powershell on your Exchange Server and enter “LaunchEMS” to start the Exchange Management Console.
|
|
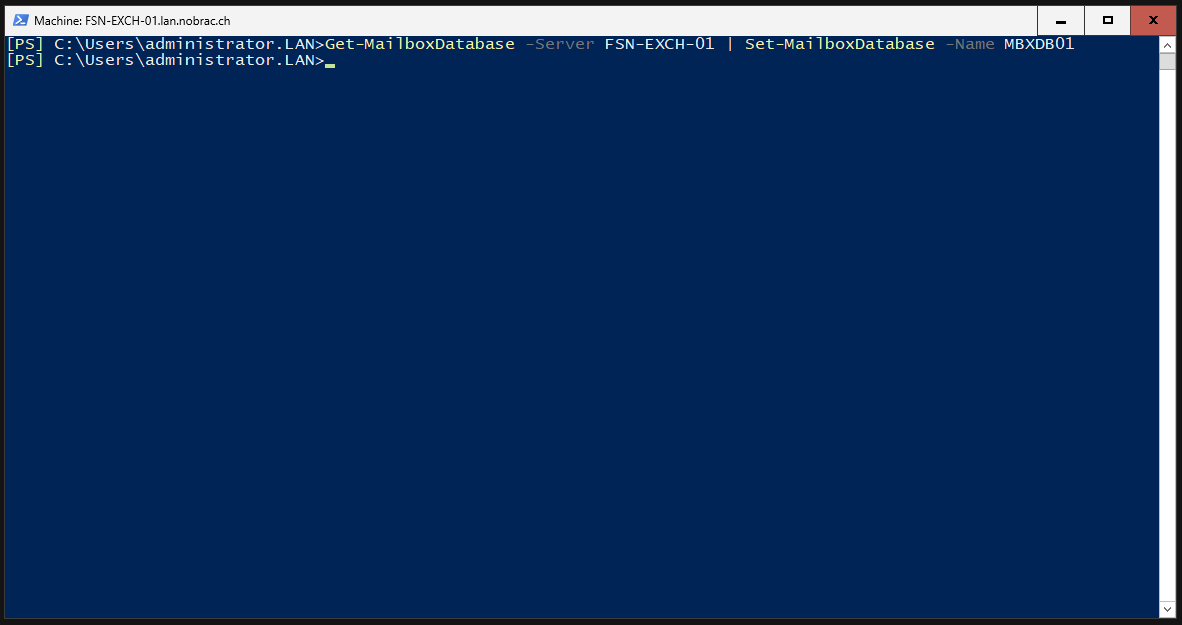
I call my mailbox database “MBXDB01”. You can call it whatever you like. Hostname of the server must of course be adapted to yours.
|
|
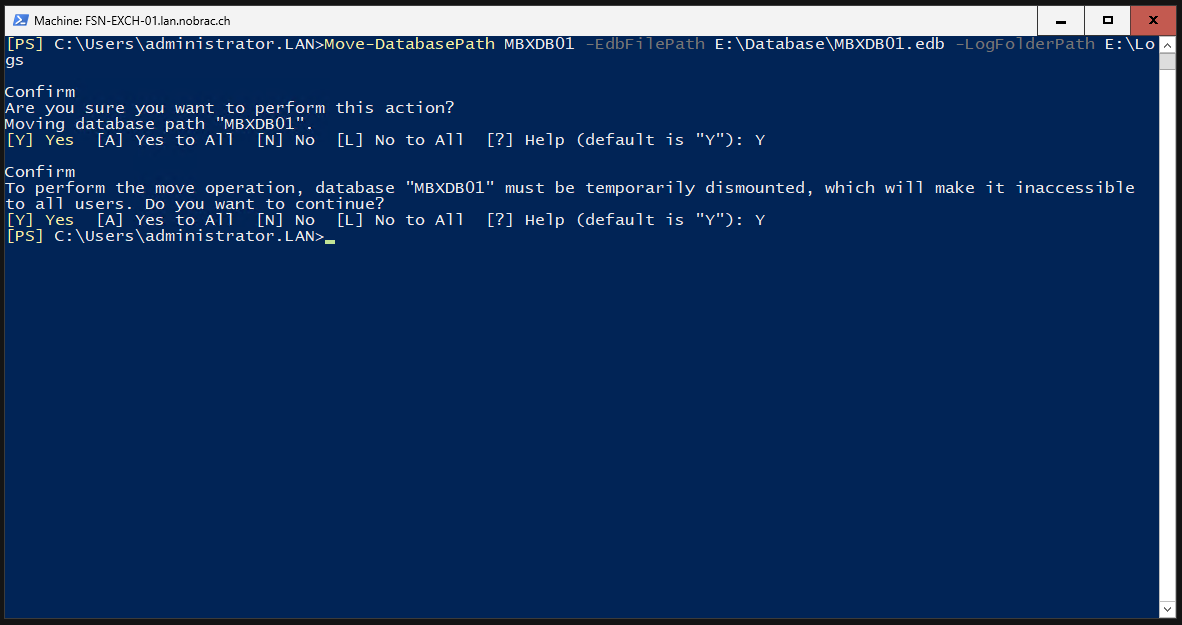
We then move the database and the log directory to the dedicated folders we created previously.
|
|
Confirm the prompts with “Y”.

Exchange Configuration
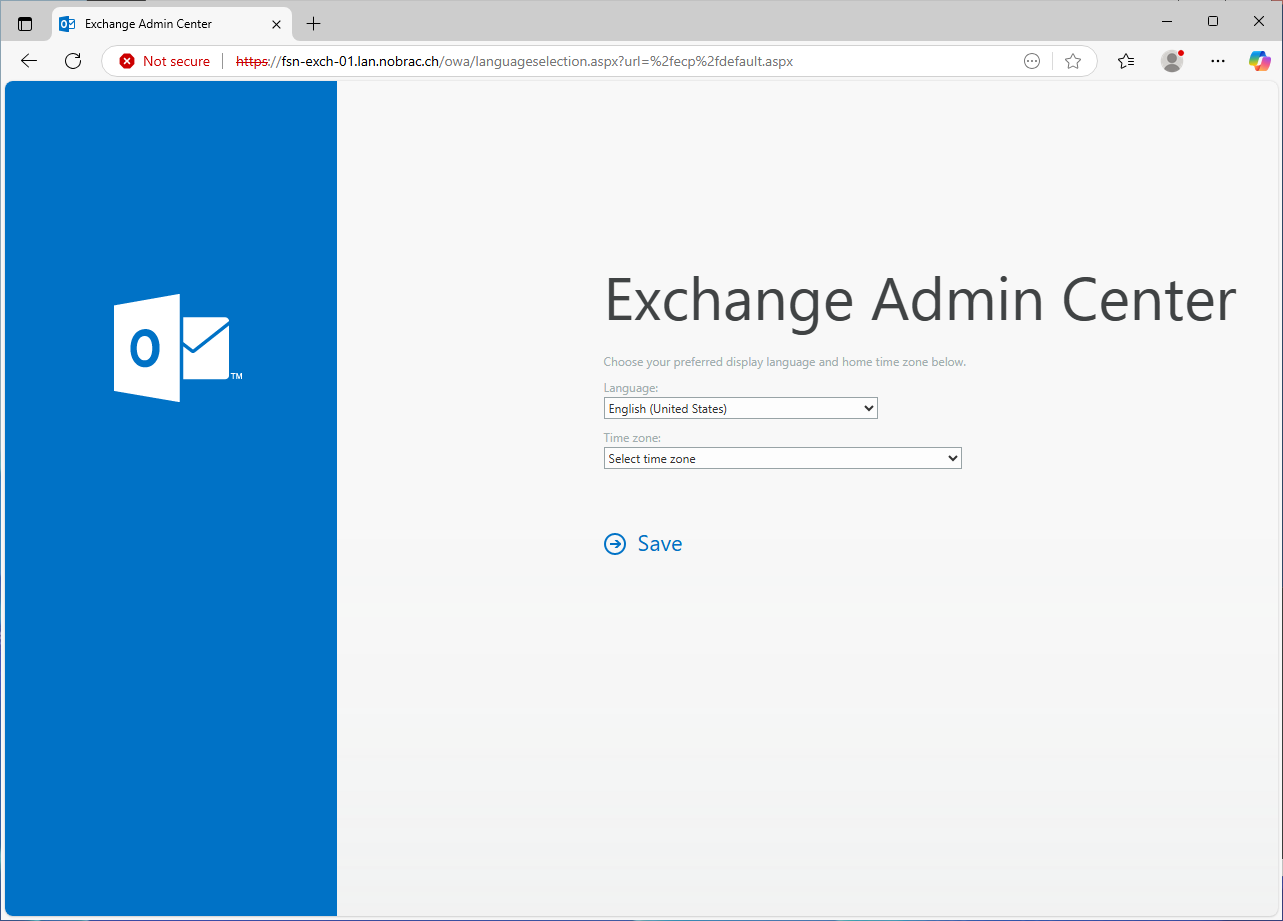
Open your ECP and login.

Log in with the domain administrator. When you log in for the first time, you must configure the language and time zone.
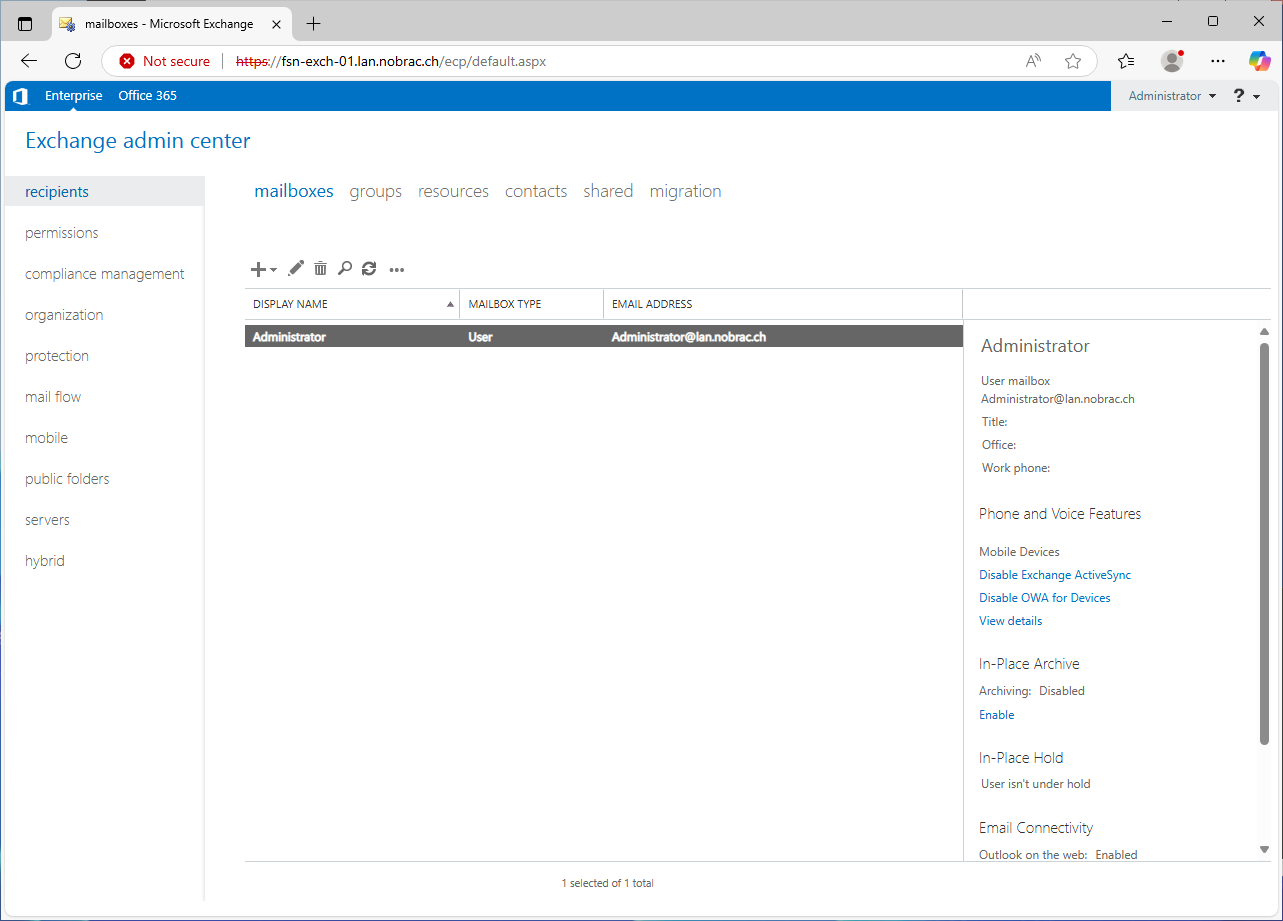
You should see the following page after the login.
Configure “Accepted Domains”
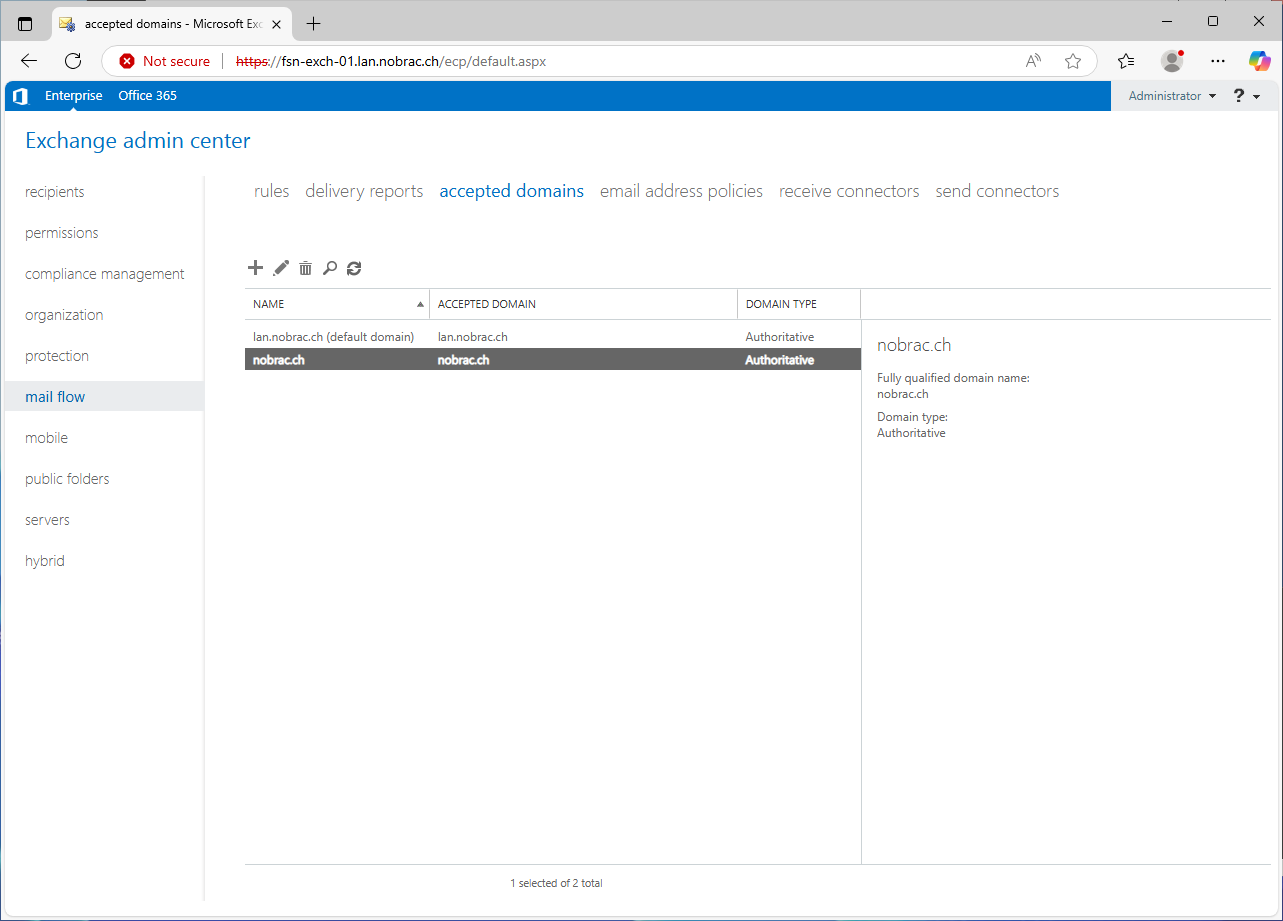
Select “mail flow” in the menu on the left and then click on “accepted domains” at the top of the bar.

Then click on the plus symbol. The following window opens. We then assign any name here. It is best to enter the name of your domain here. We then also enter our domain in the “Accepted domains” field. We select “Authoritative” in the lower selection and click on “Save”.
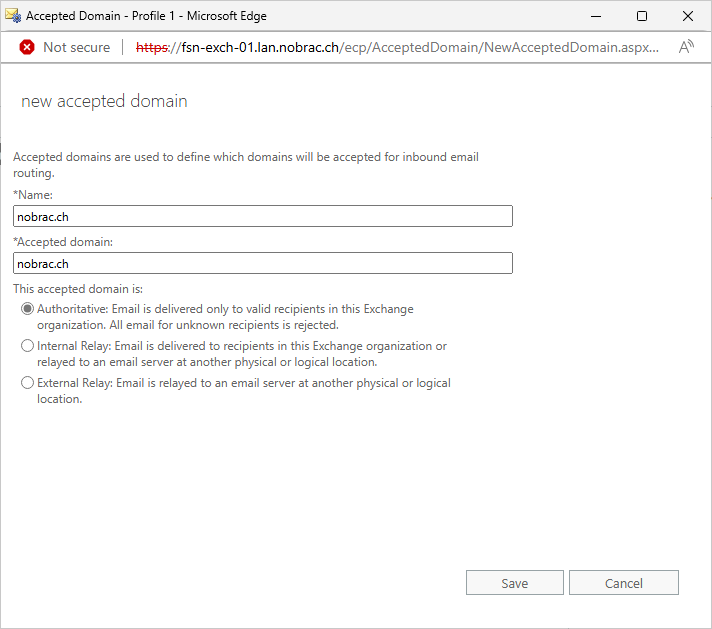
It should look like this.
Configure “E-Mail Address Policy”
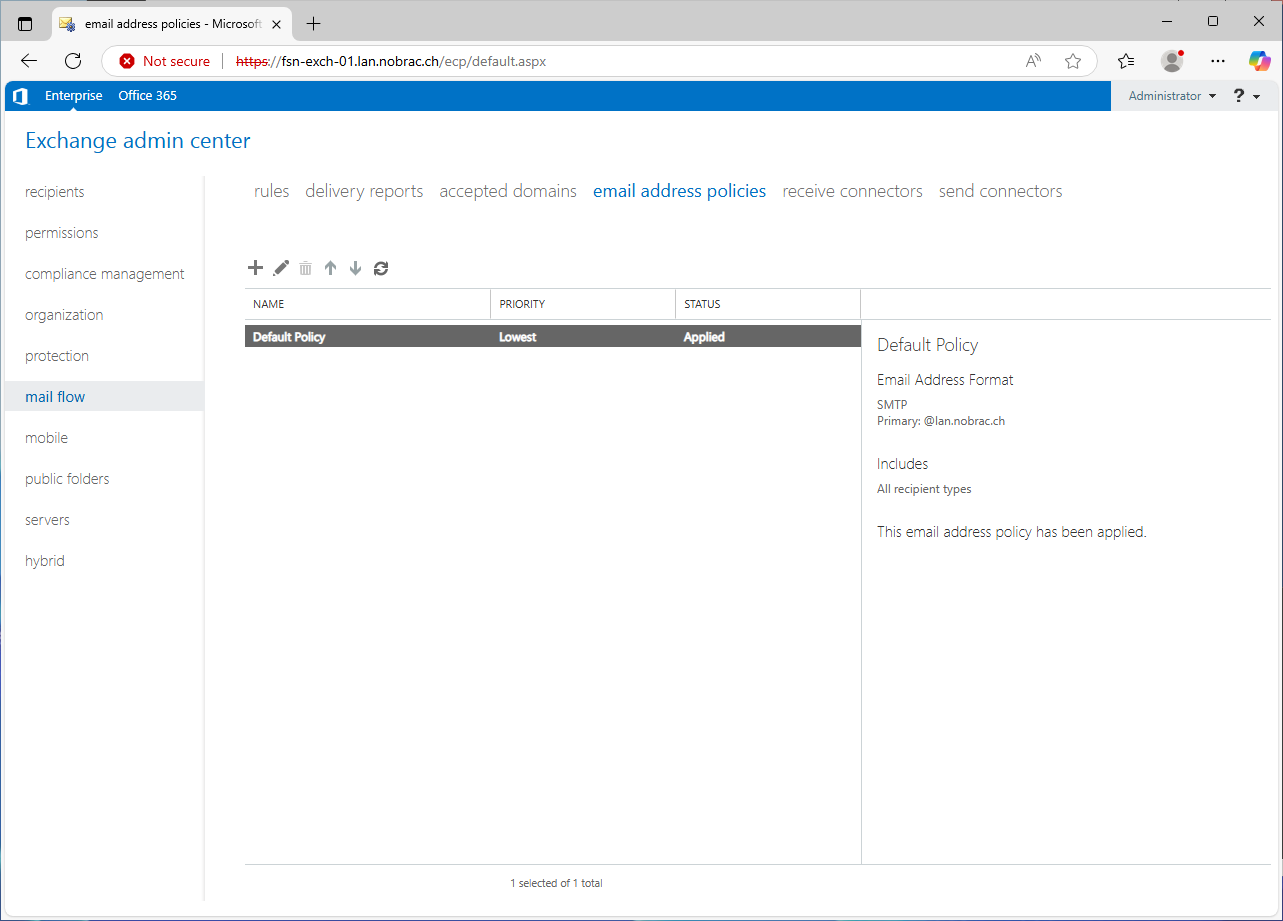
In the top menu bar, click on “email address policies”. You should be here.
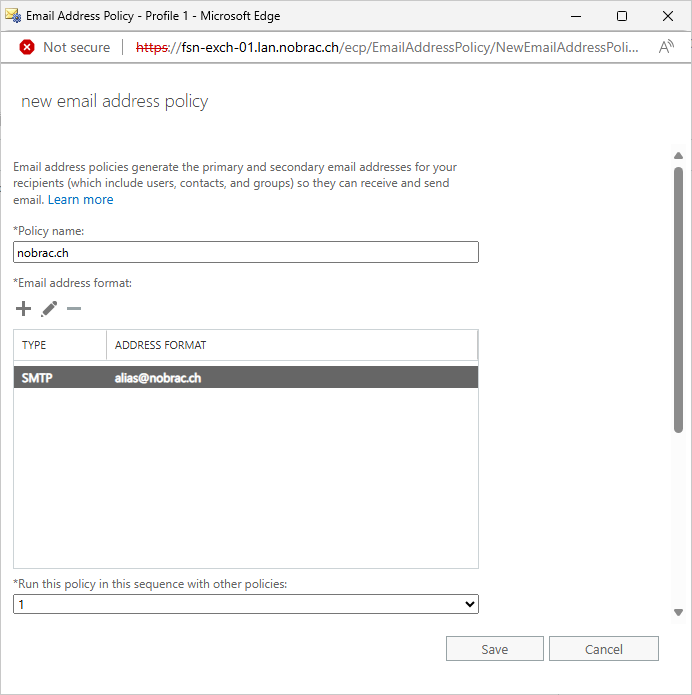
Click again on the plus symbol. Enter a name for your policy.
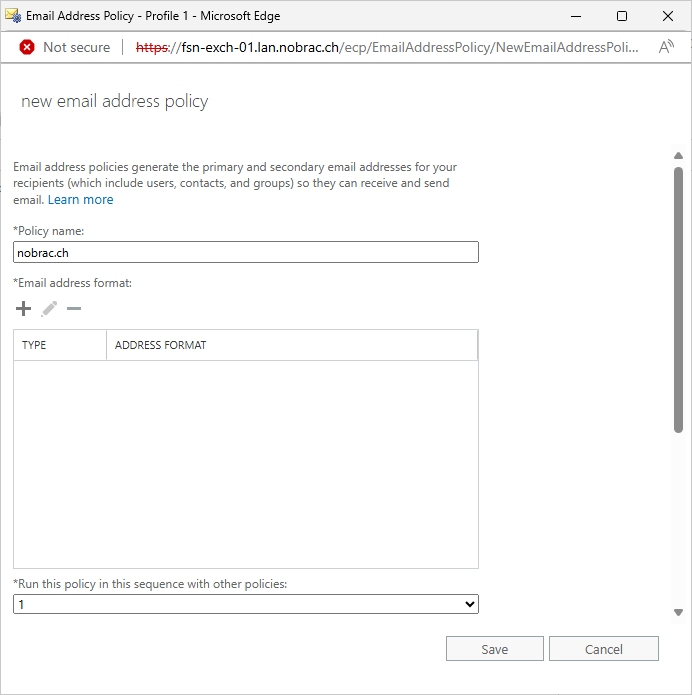
Then click again on the plus next to “Email address format”. Select the accepted domain that you created in the previous step. In my case, I select “alias@contoso.com” for the e-mail address format. This is name.surname@domain.com. Make sure that “Make this format the reply email address” is checked.
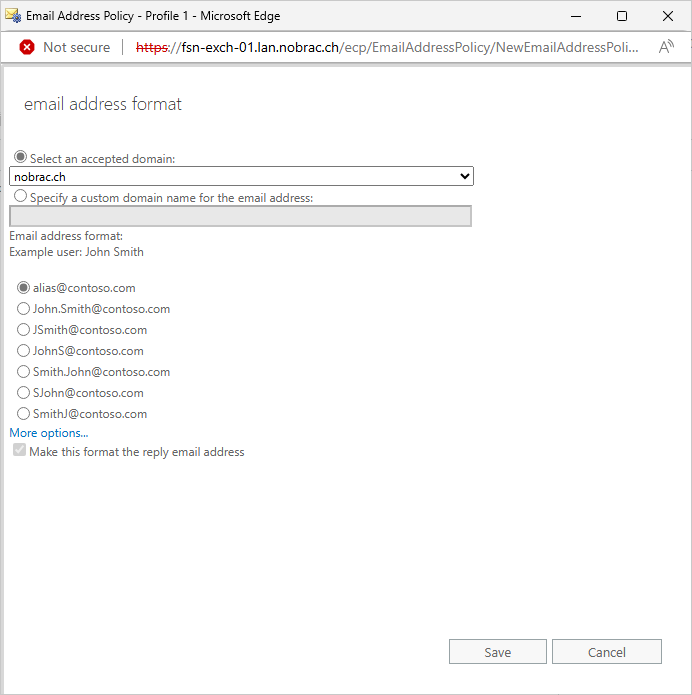
It should look like this. Click on save.
You will receive a warning that the policy is not yet active. Simply confirm.

The overview should now look like this.
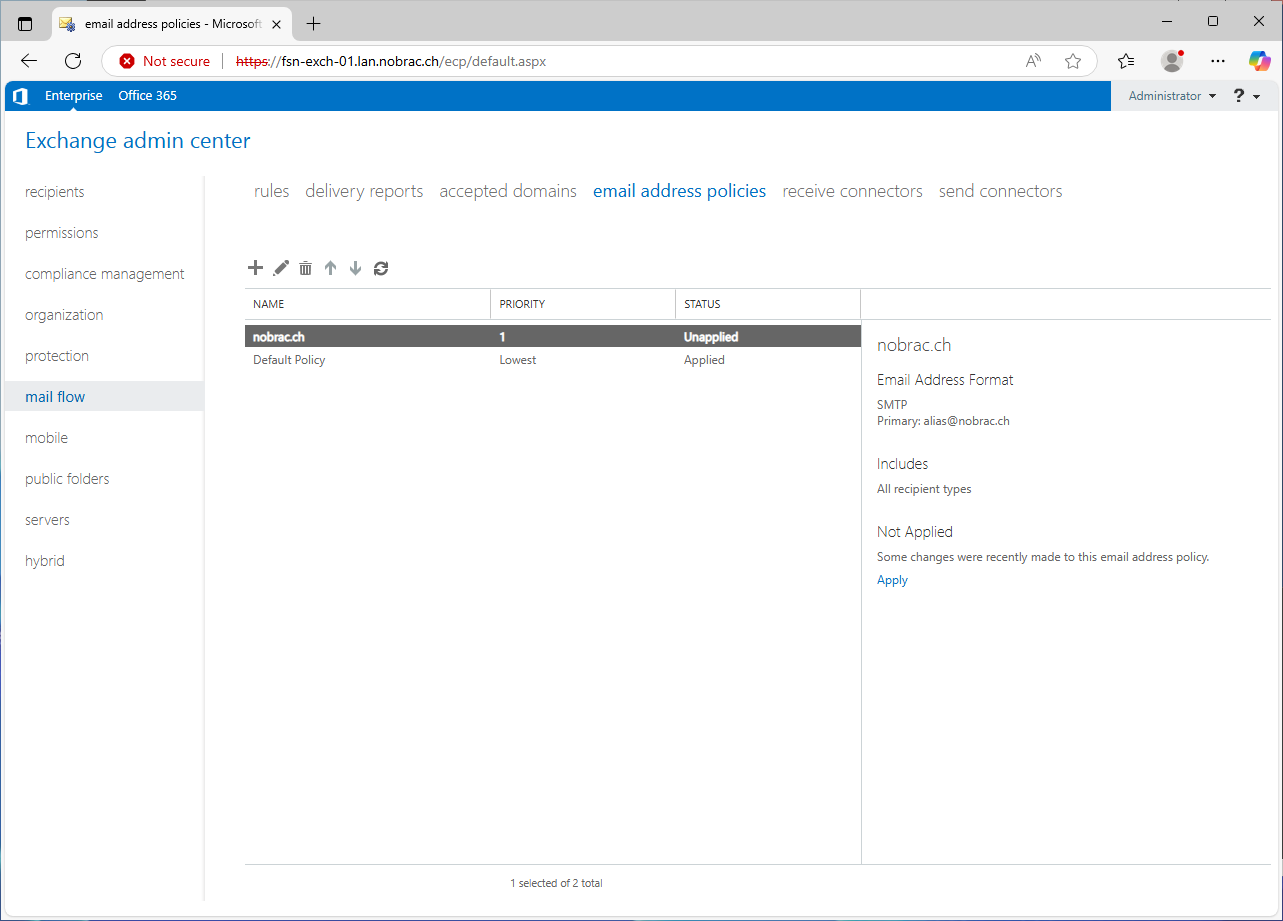
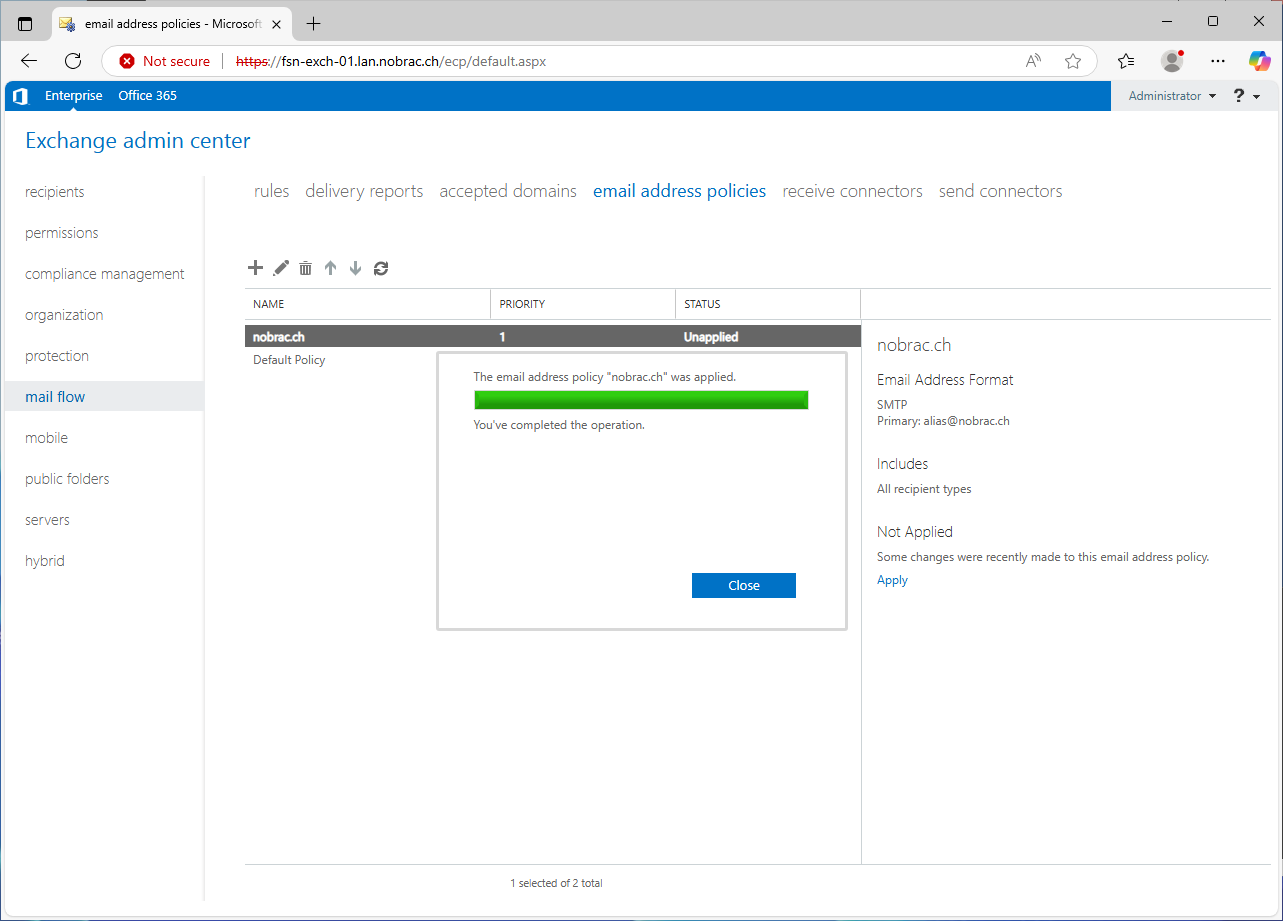
On the right side we see the status “Not Applied”. Here we now click on “Apply”. We receive another warning, which we simply confirm.

Click on close when it’s done.
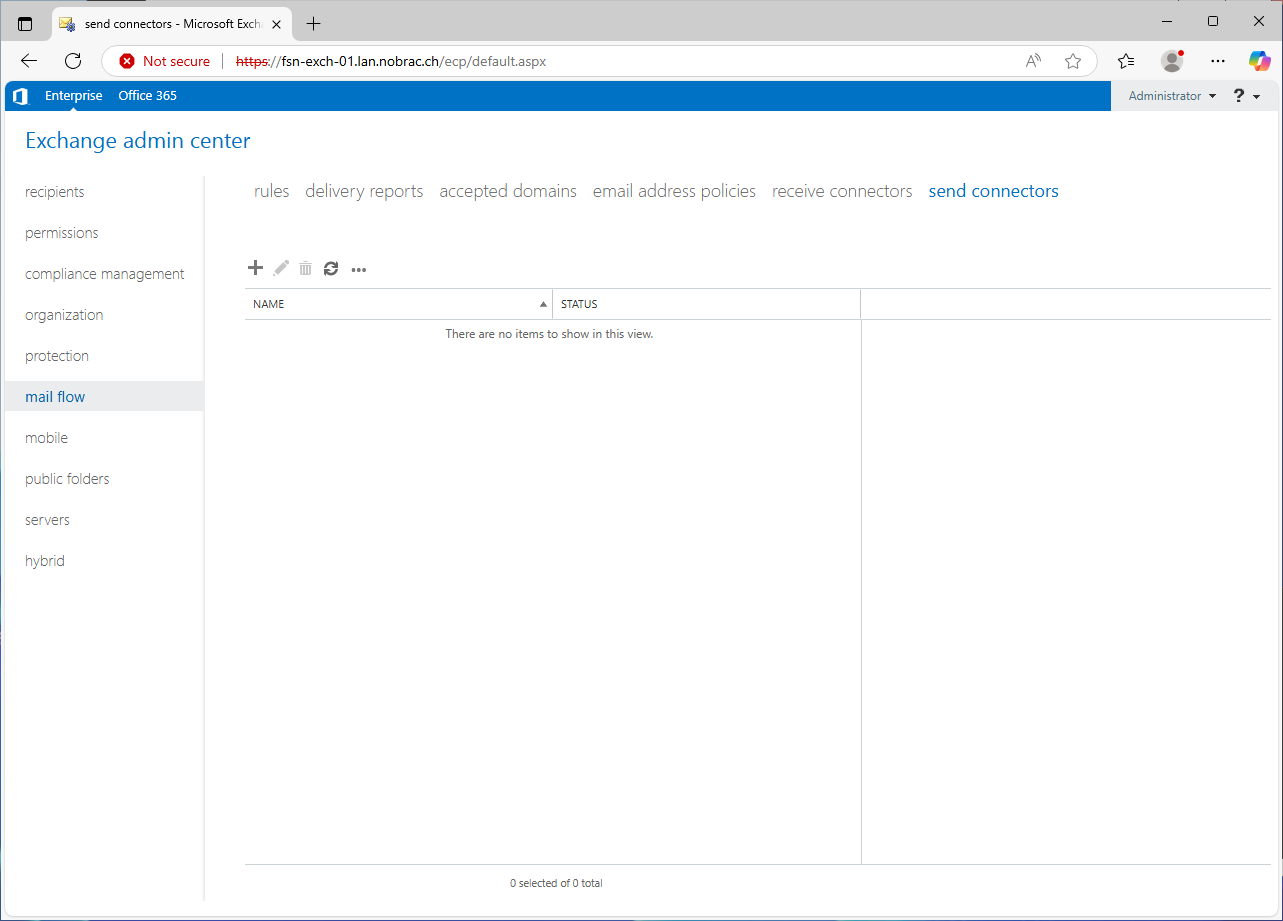
Configure “Send Connectors”
In the top menu bar, click on “send connectors”. You should be here. Click on the plus symbol.
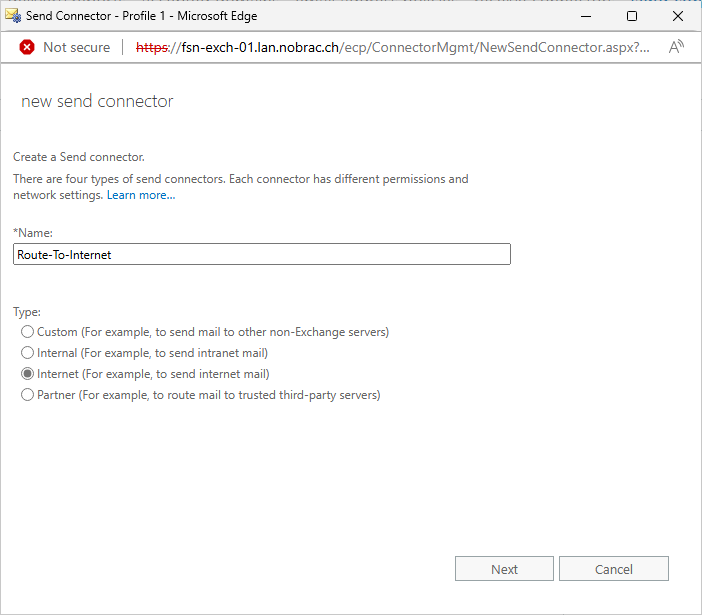
Enter a name of your choice. In my case, I use “Route-To-Internet”. We select “Internet” as the type.
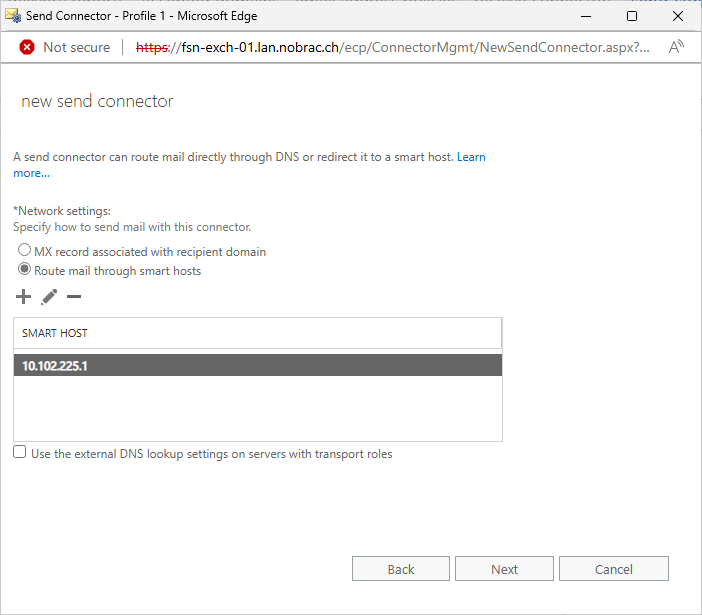
In this guide we will guide the mailflow through our Sophos XG Firewall. For this reason, we select the option “Route mail through smart hosts” in the “Network settings”.
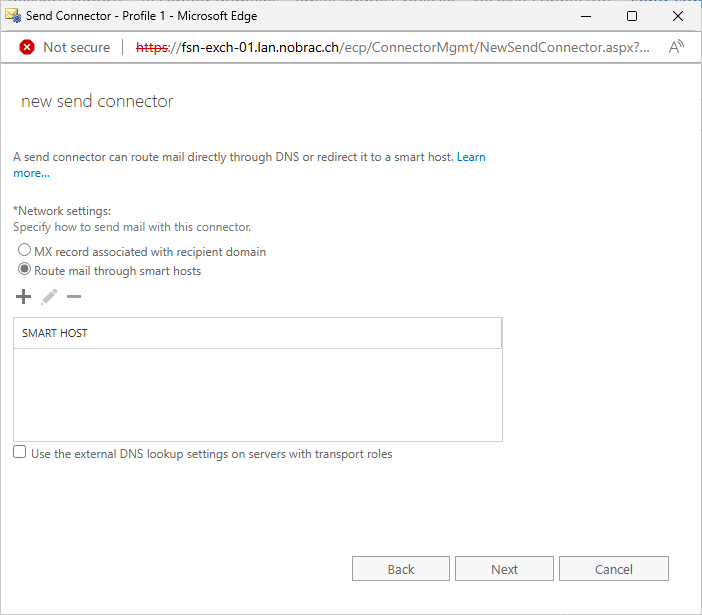
Then click on the plus symbol again and enter the IP of the gateway of the Exchange Server VLAN as the smart host.
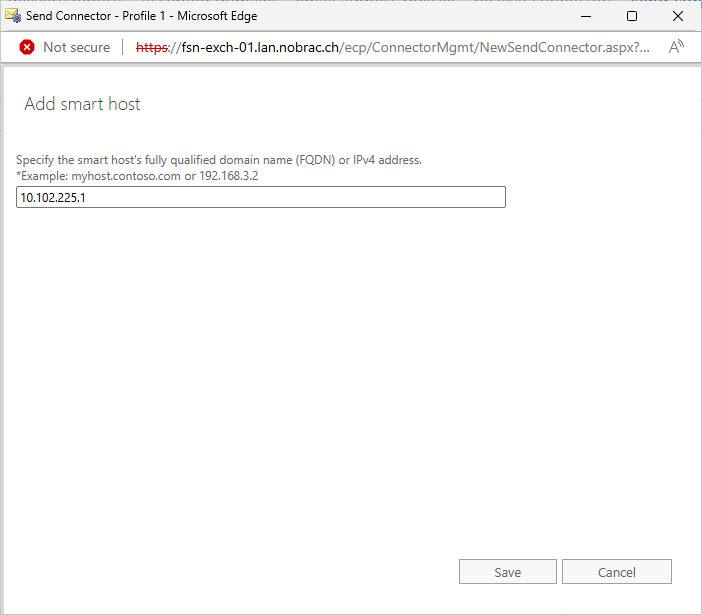
It should look like this.
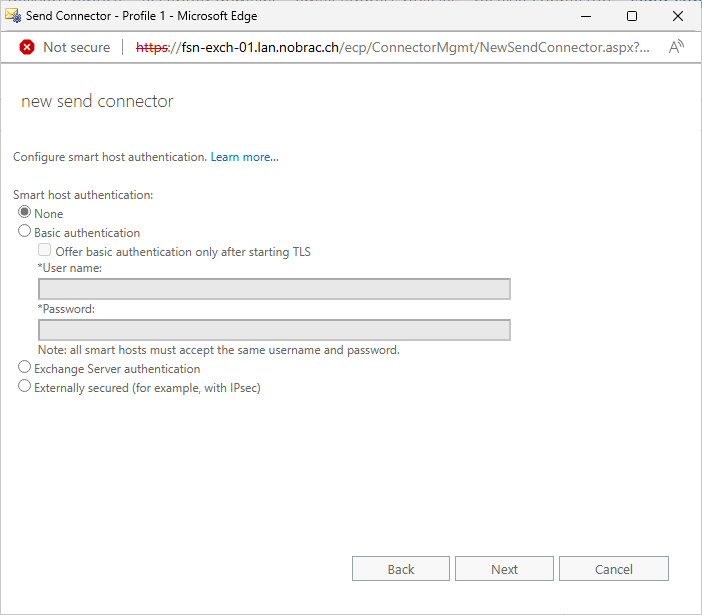
We don’t need authentication, so just click on next.
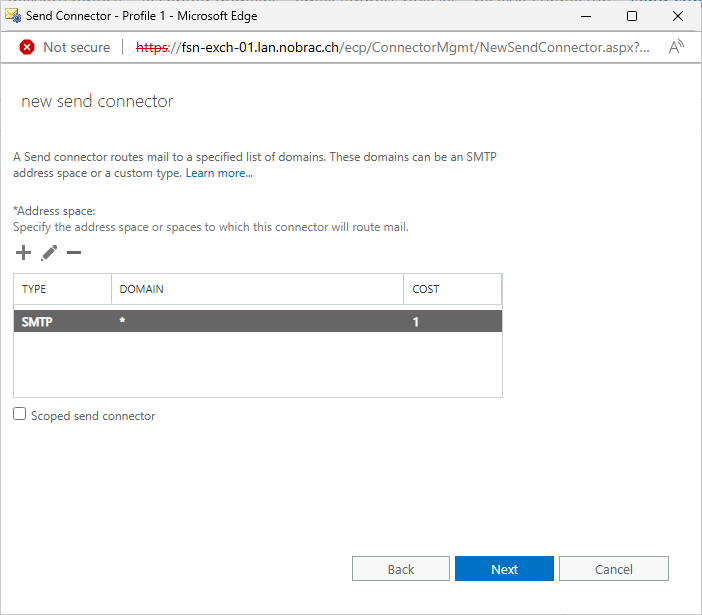
Click on the plus symbol for the “Address space” option.
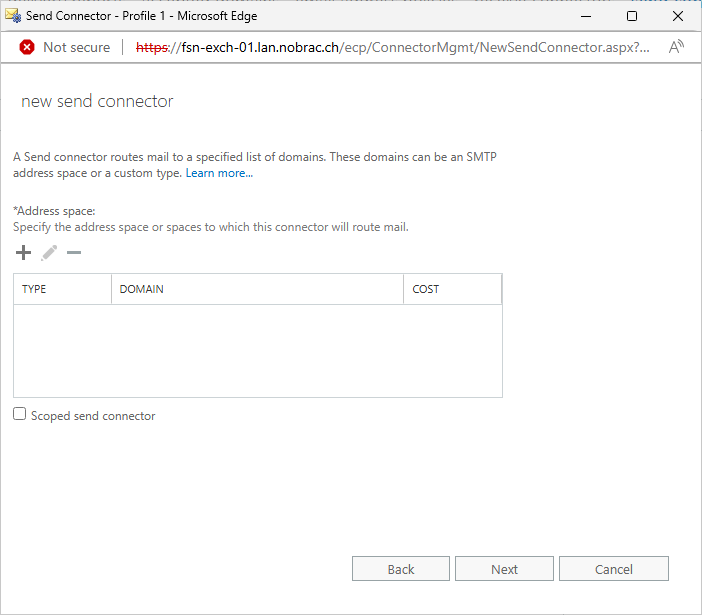
Simply copy all the options from the screenshot.
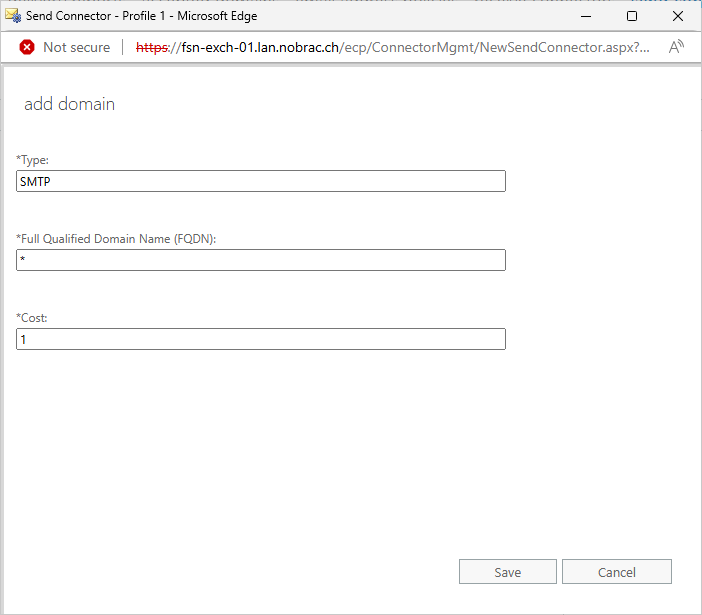
It should look like this.
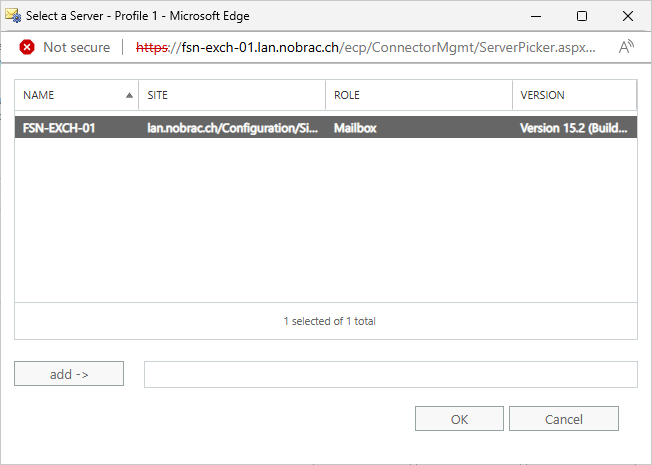
For the “Source server” option, click on the plus symbol again.
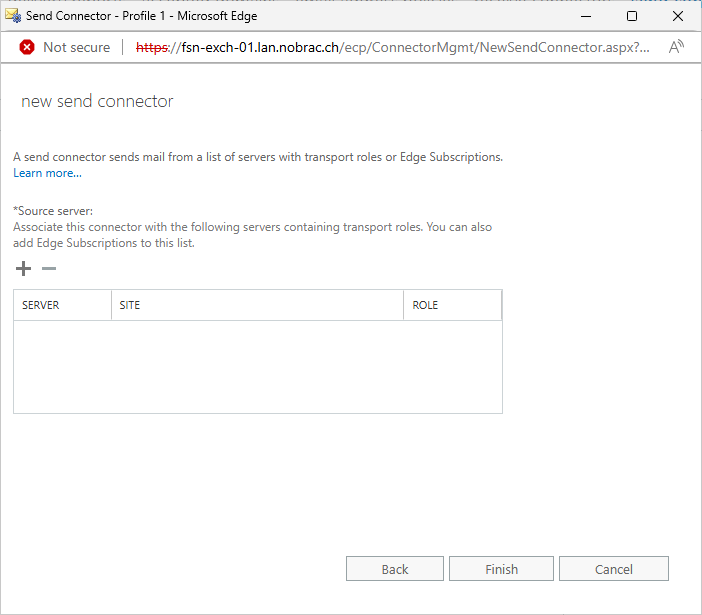
Select your Exchange Server and click on “Add”.
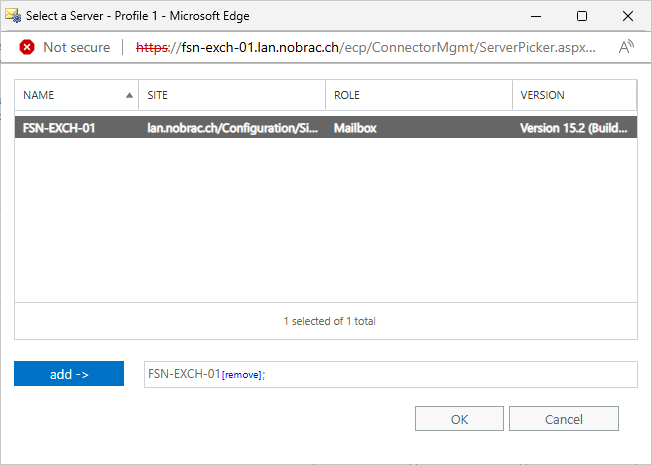
It should look like this. Click on finish.

The newly created send connector should now be displayed in the overview.

We select the entry and click on the pencil icon to edit the entry. The following window opens.
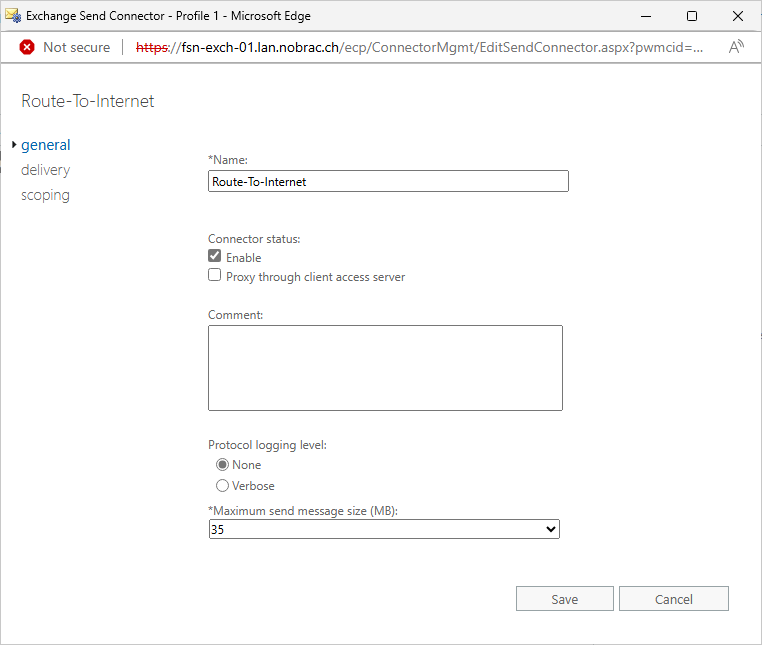
Click on “scoping” in the left bar and scroll all the way down. Enter the address of your mail server in the “FQDN” field.

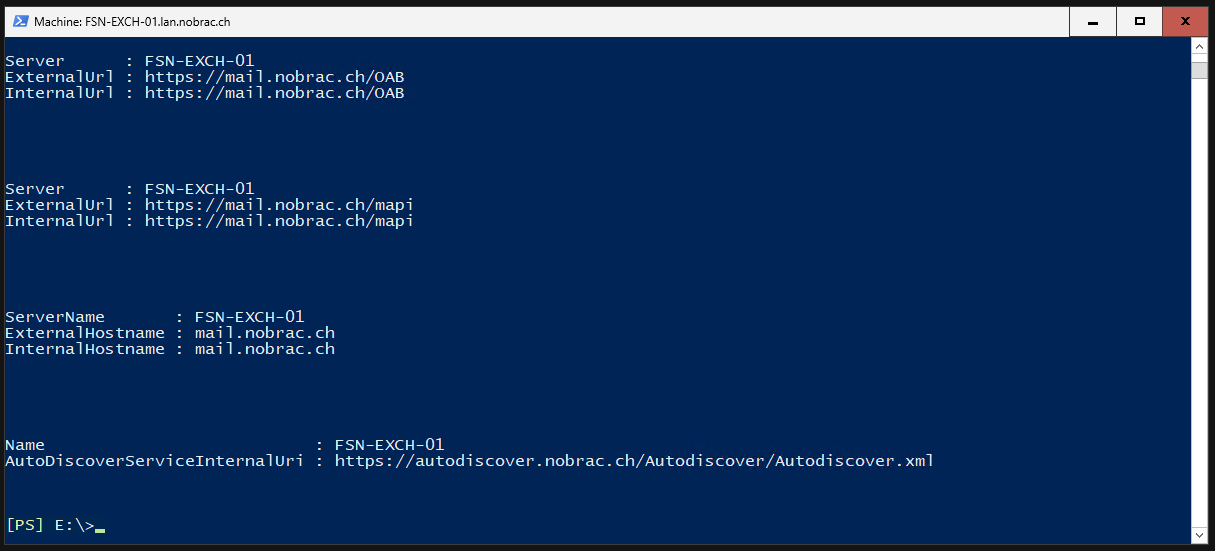
Configuration “Virtual Directories”
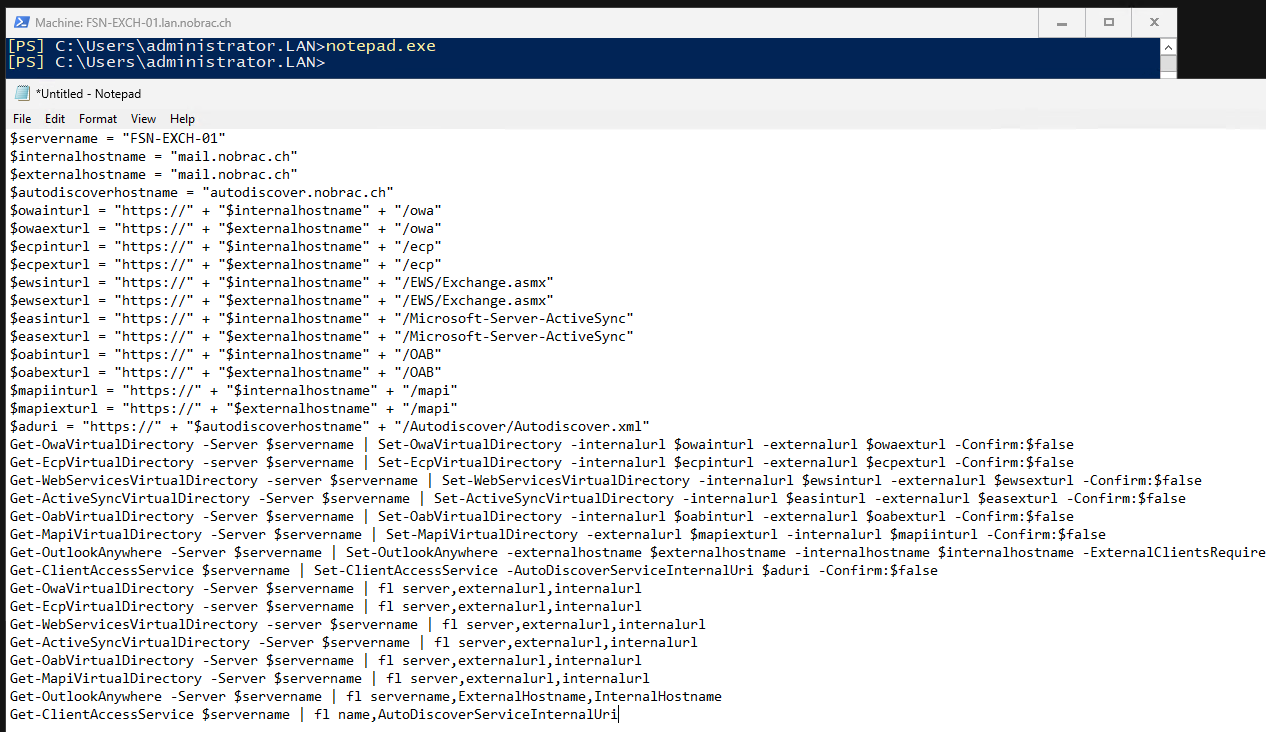
Open notepad.exe on your Exchange server.

Paste the following into the document. The following variables must be adjusted:
- $servername
- $internalhostname
- $externalhostname
- $autodiscoverhostname
It is recommended by Microsoft that the internal and external hostnames are identical.
|
|
It should look like this.
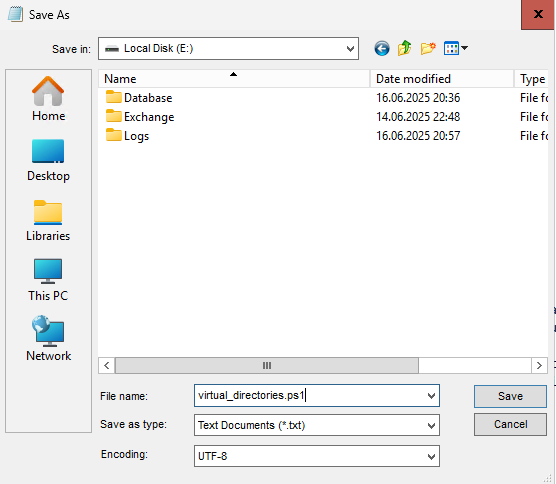
Then save the text document e.g. under drive E with a name of your choice. Make sure you save it as a .ps1 file as we want to run it with Powershell.
Open an Exchange Management Console with “LaunchEMS” if you don’t have one open.

Then change to the path where you saved the script and execute it.
|
|
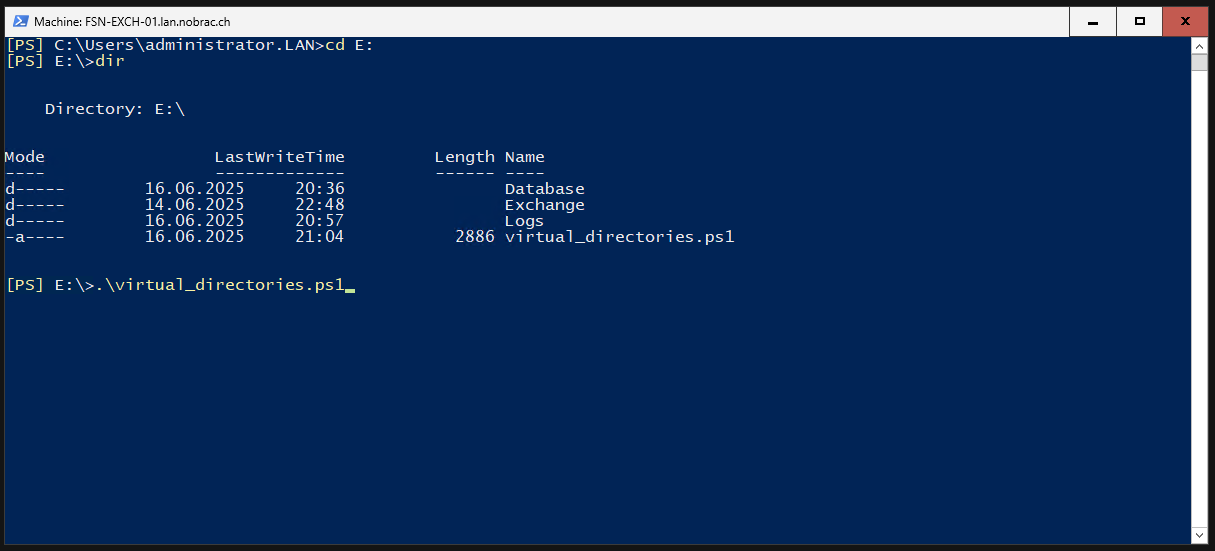
It should then run through without any problems.
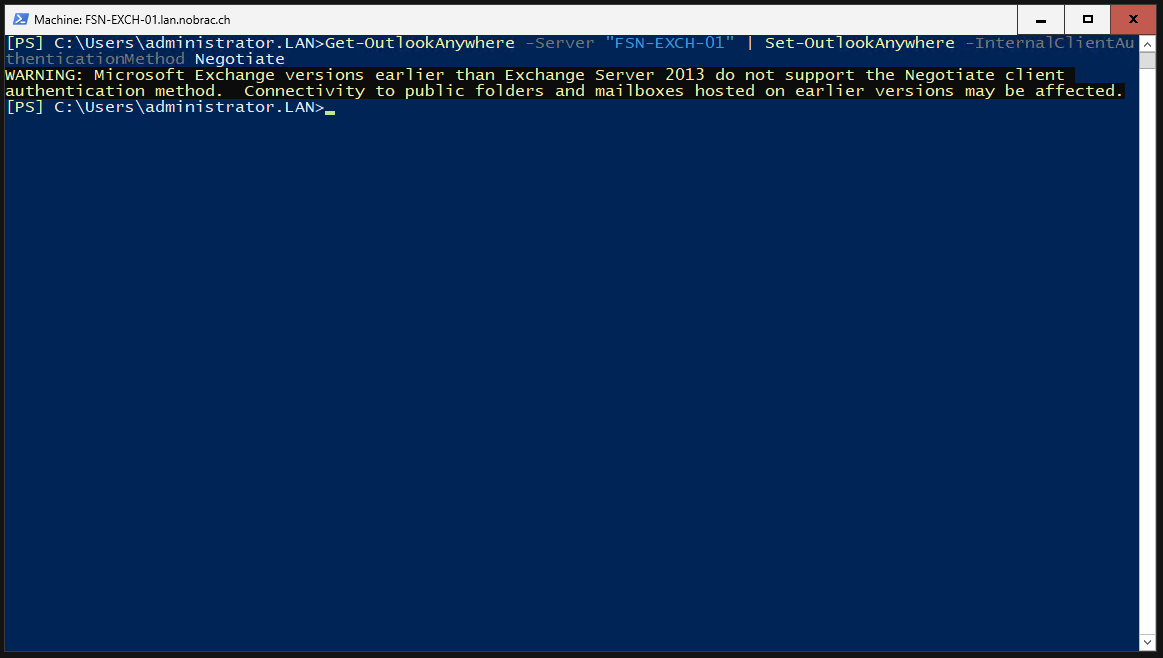
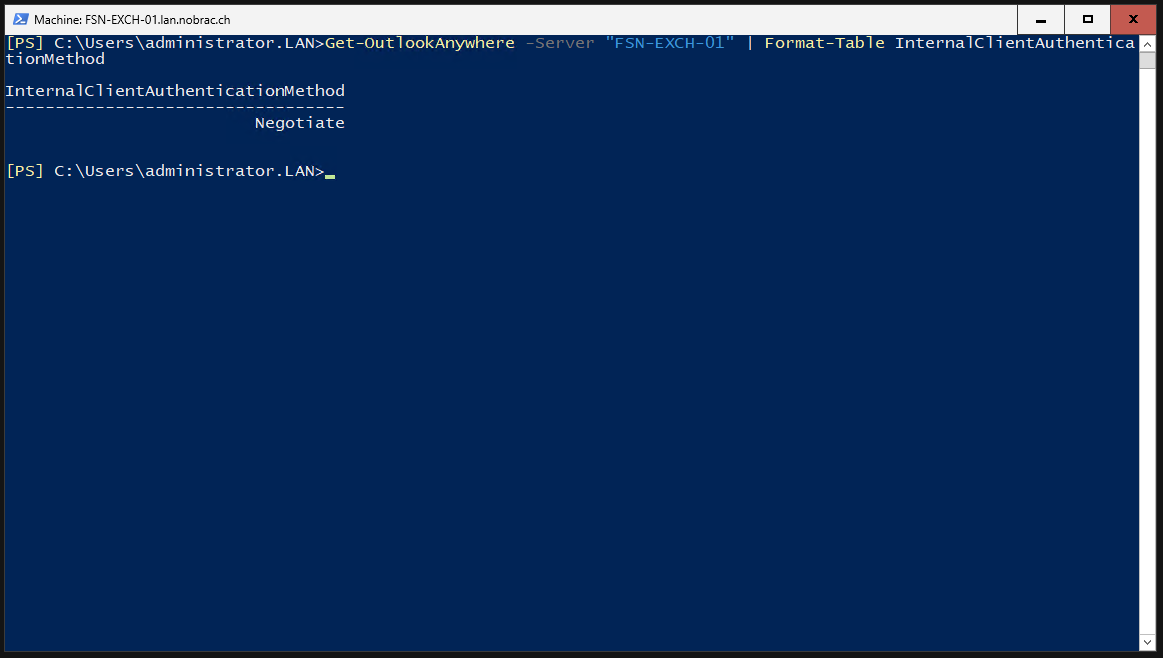
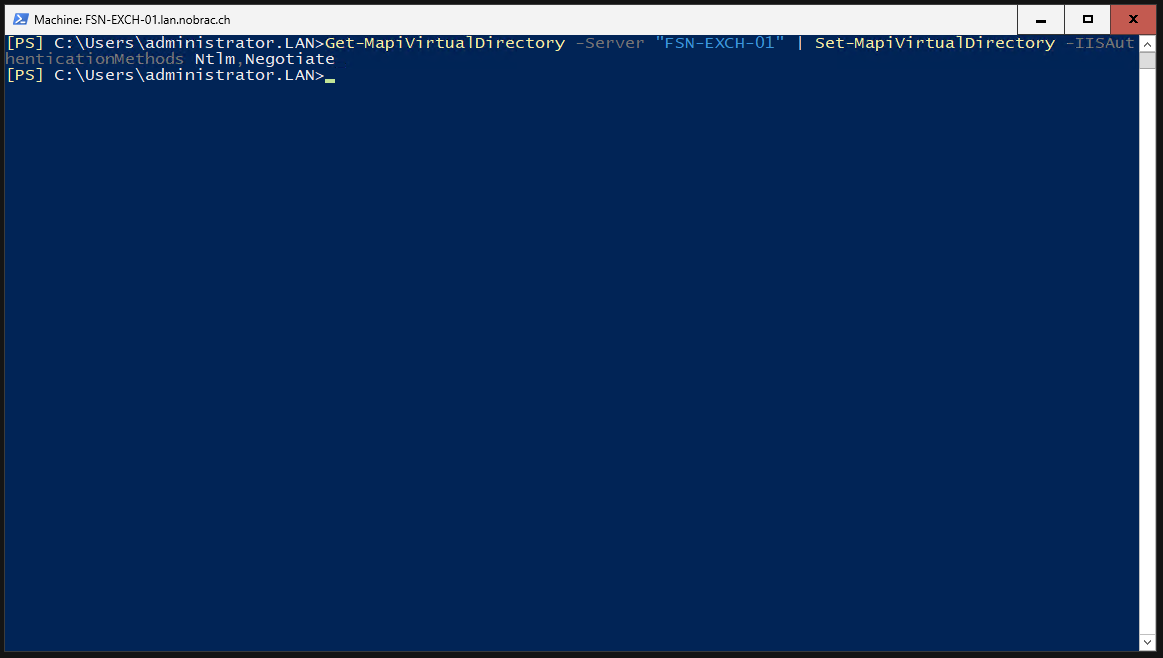
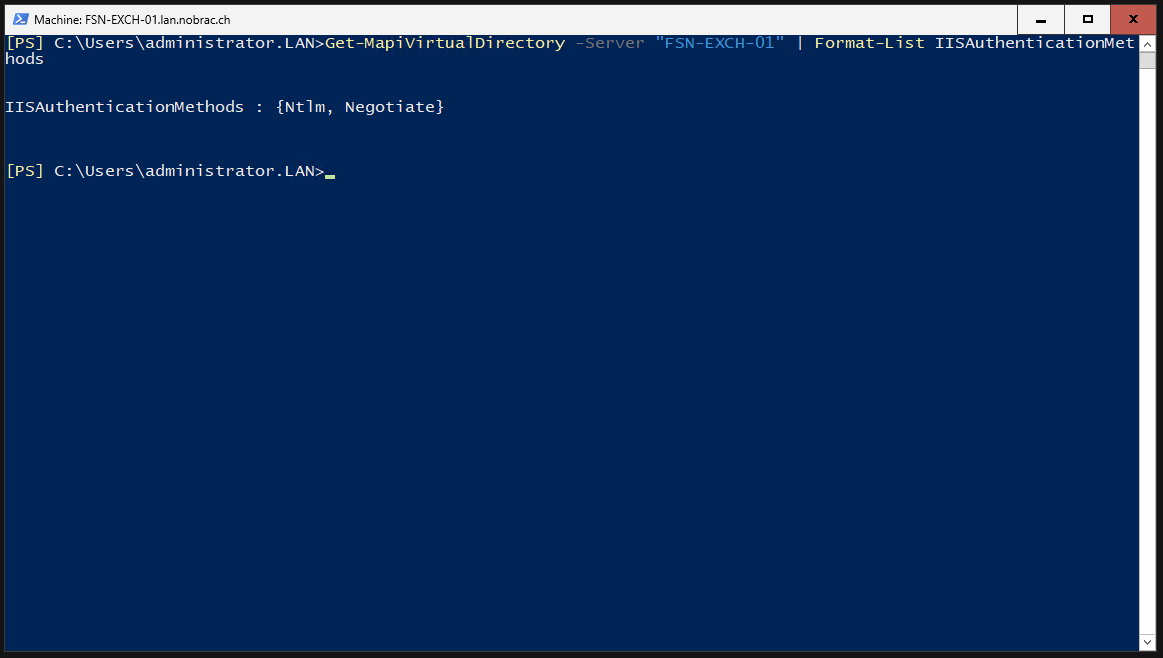
Configure MAPI Directory Authentication
Enter the following command in the Exchange Management Console to customize the IIS-Authentication-Methods for the MAPI Virtual Directory. You must adjust the domain in the command.
|
|

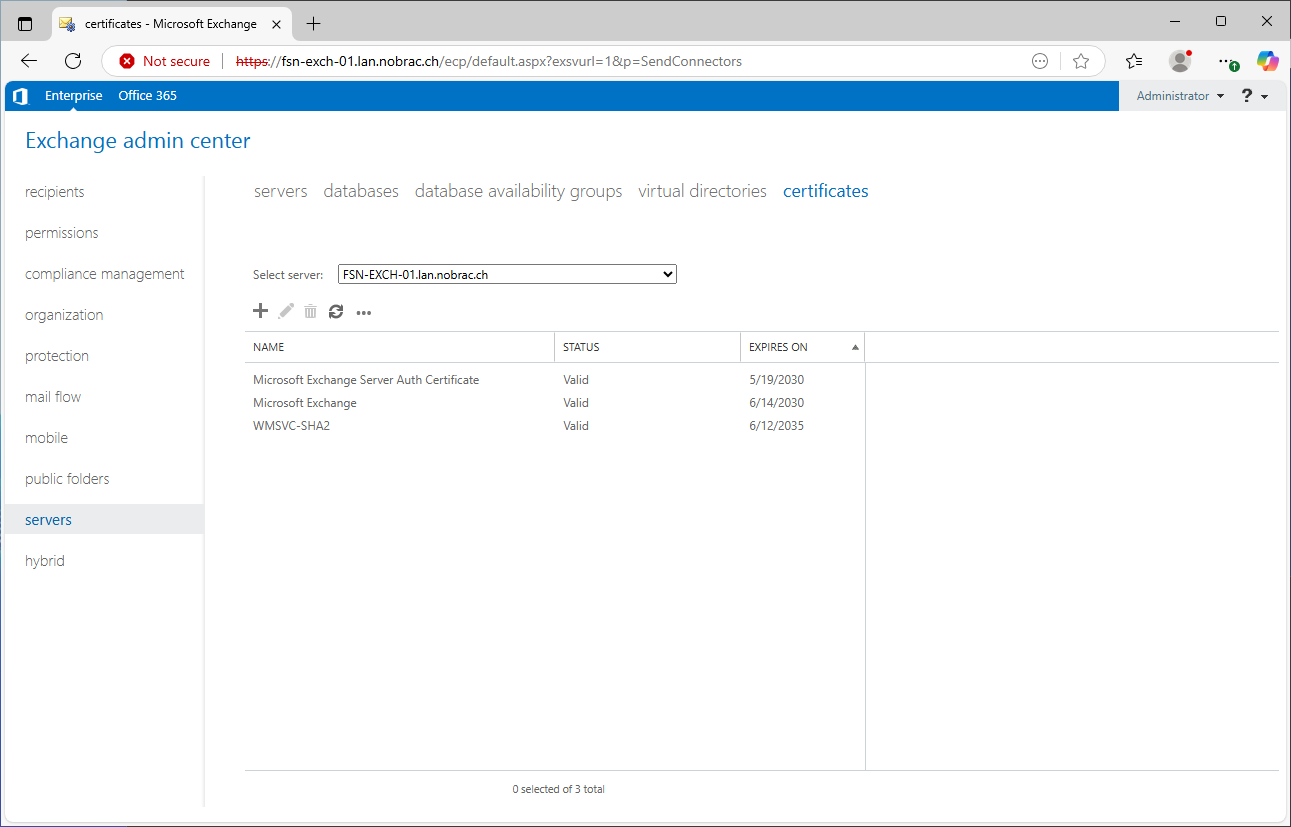
Configure Certificates
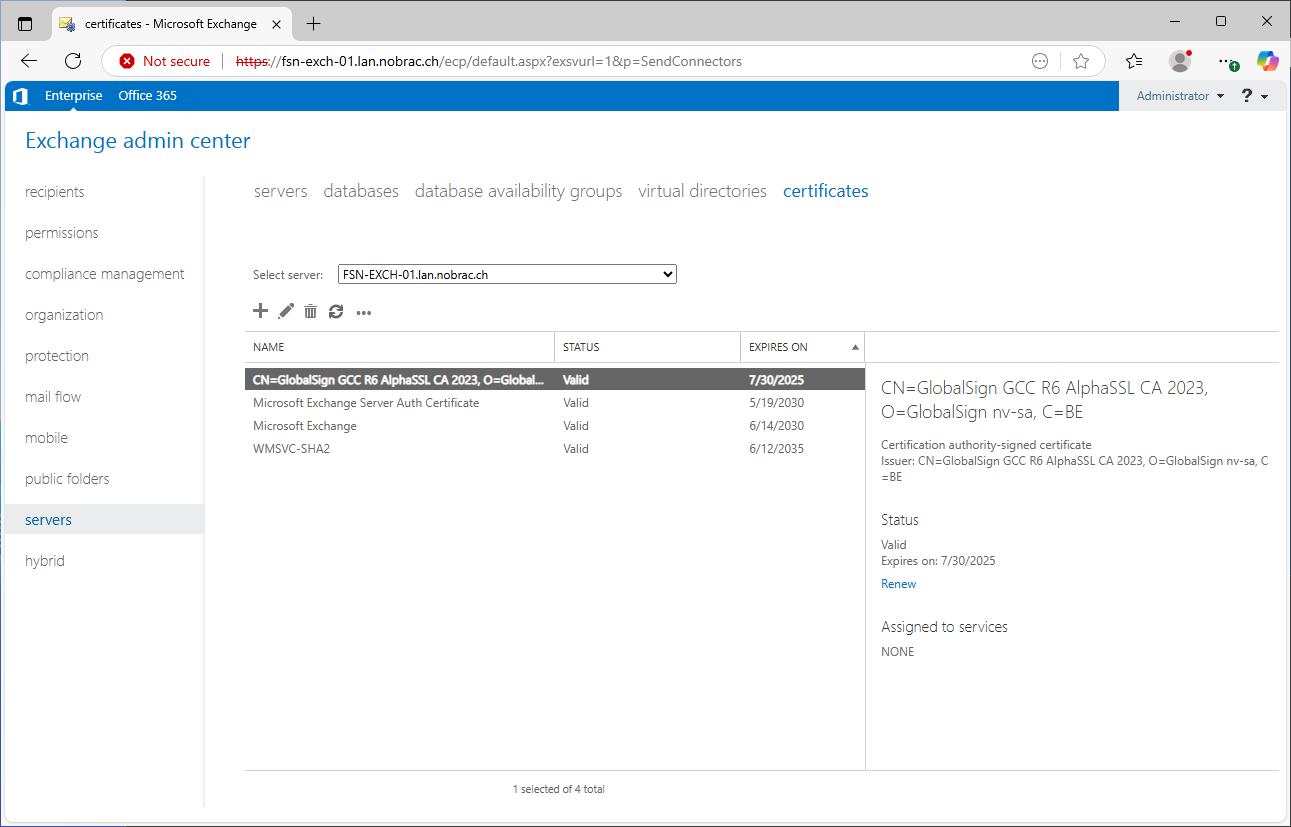
Back in ECP, we click on “servers” in the left-hand navigation bar and then on “certificates” in the top menu bar. The following overview page should be visible.
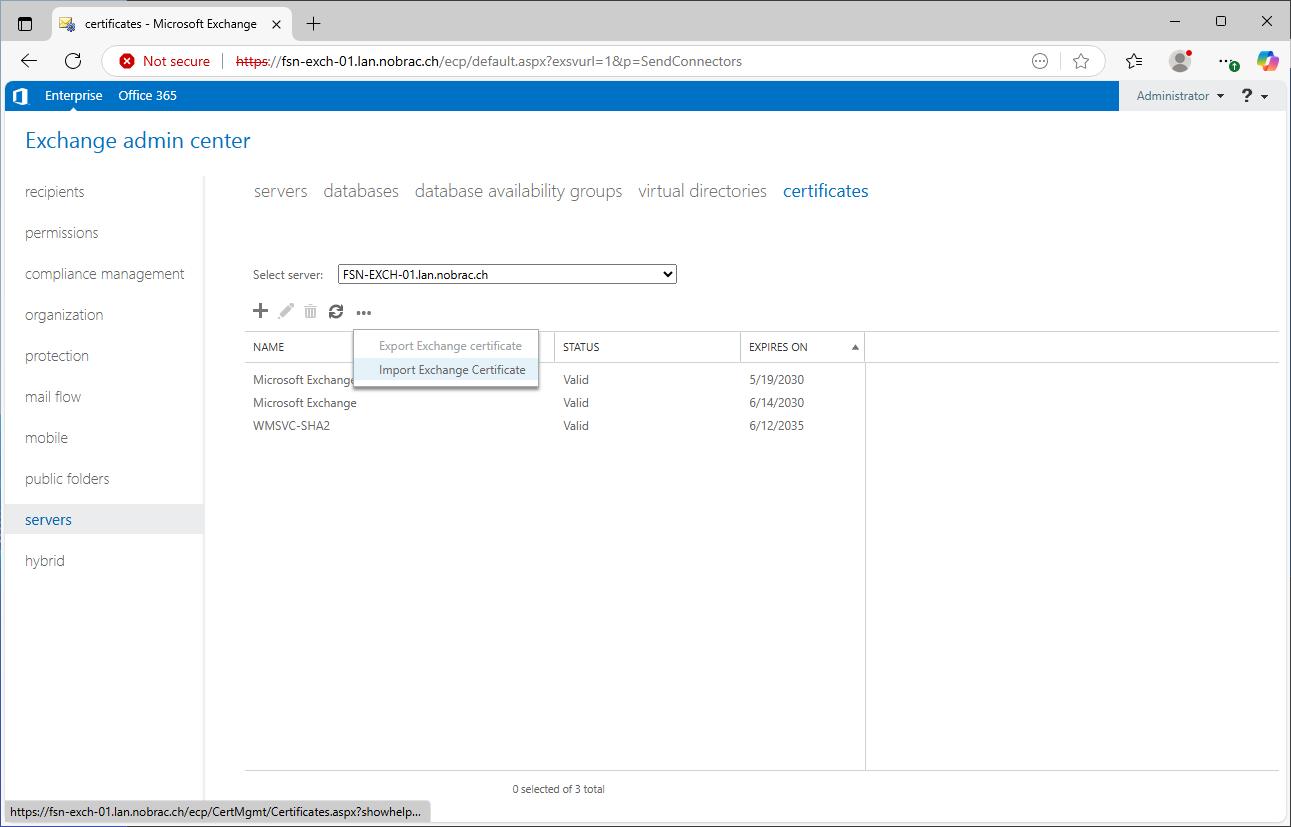
Now click on the symbol with the three dots and select “Import Exchange Certificate”.
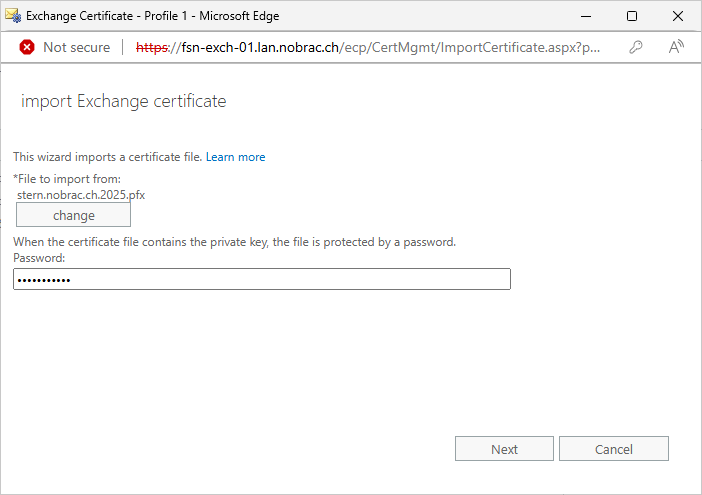
The following window opens. Click on “Choose File” to select your certificate.
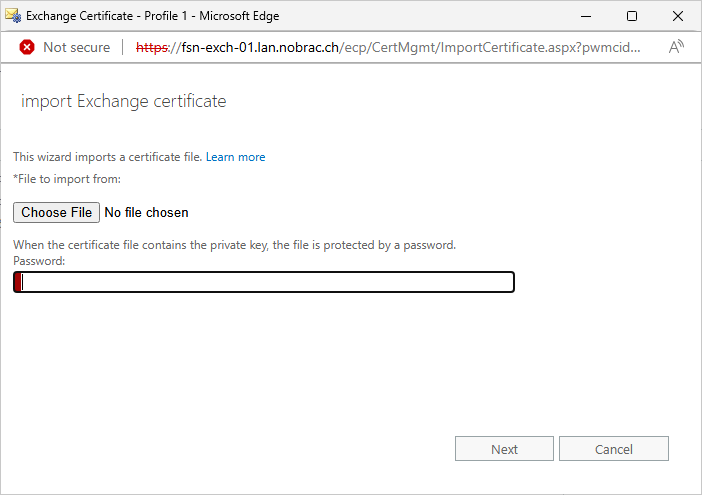
Select your certificate.

Also enter the password for the certificate.
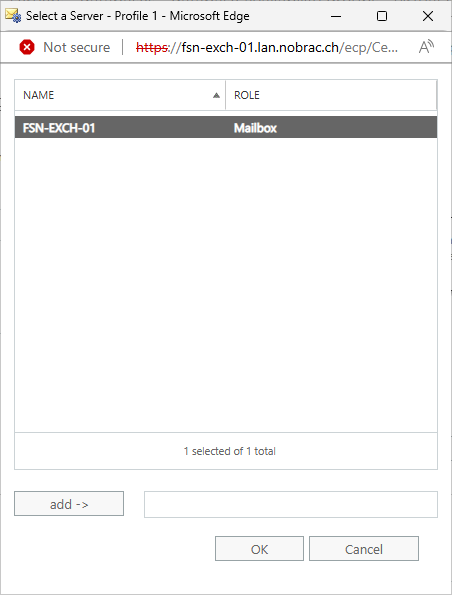
Now click on the plus.

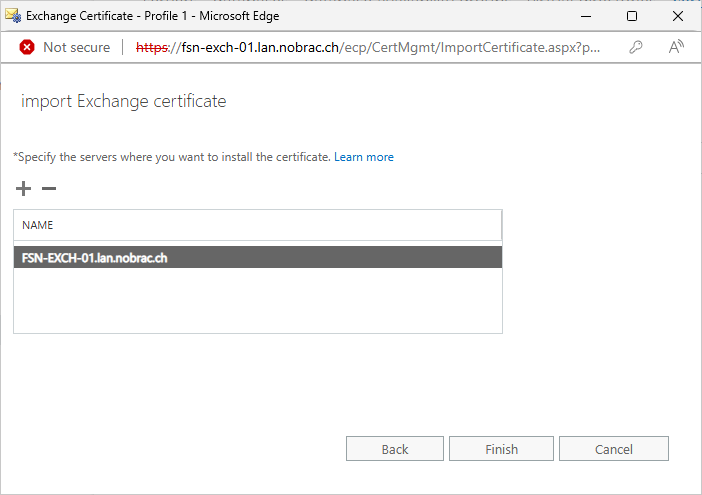
Select the Exchange server on which you want to install the certificate. Mark your Exchange and click on “Add”.

It should look like this.
We should then see our imported certificate on the overview page.

Bind Services
Select your imported certificate and click on the pencil icon to edit it.
The following window opens.
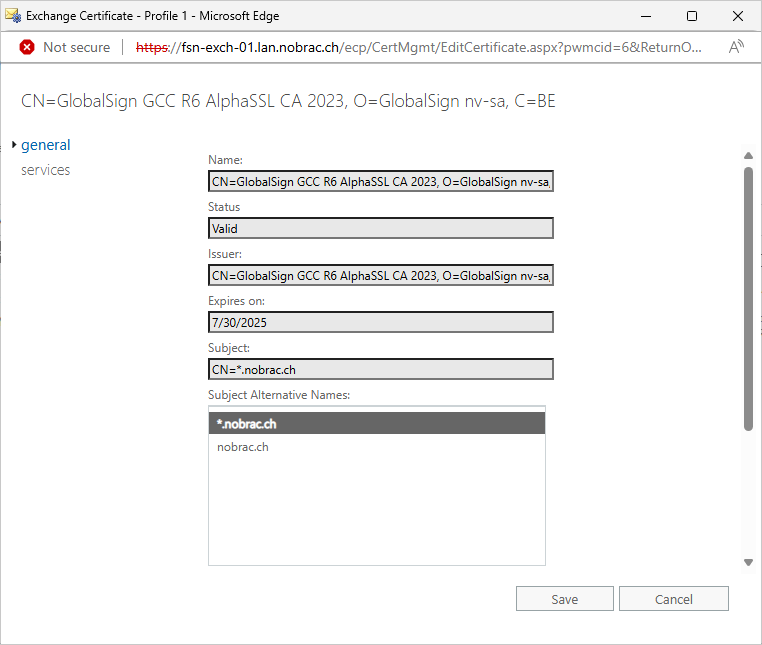
Click on “services” in the menu bar on the left.
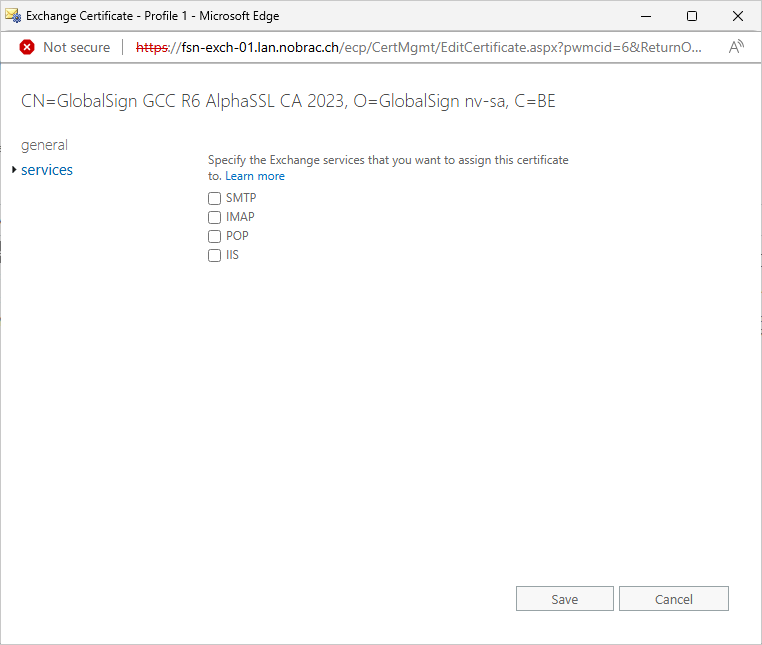
Check the “SMTP” and “IIS” boxes.
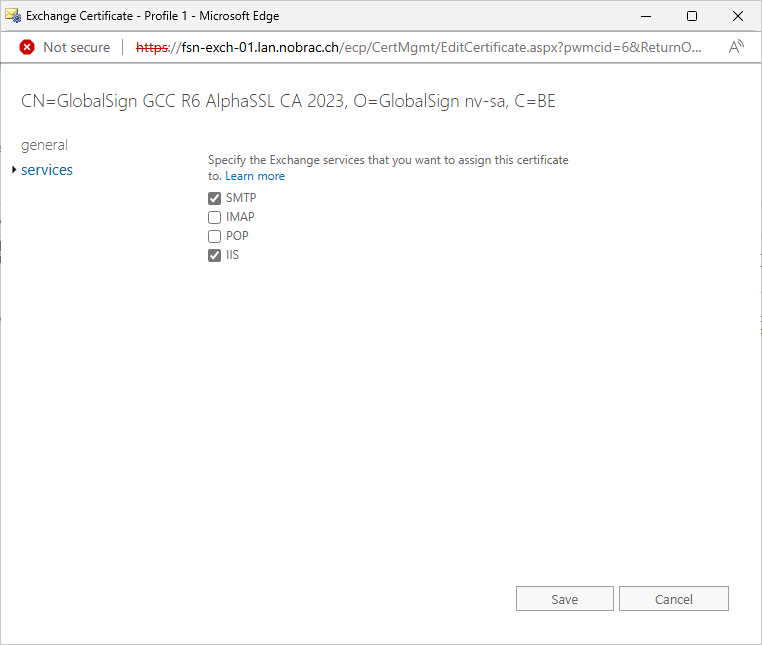
Click on save and confirm the warning.

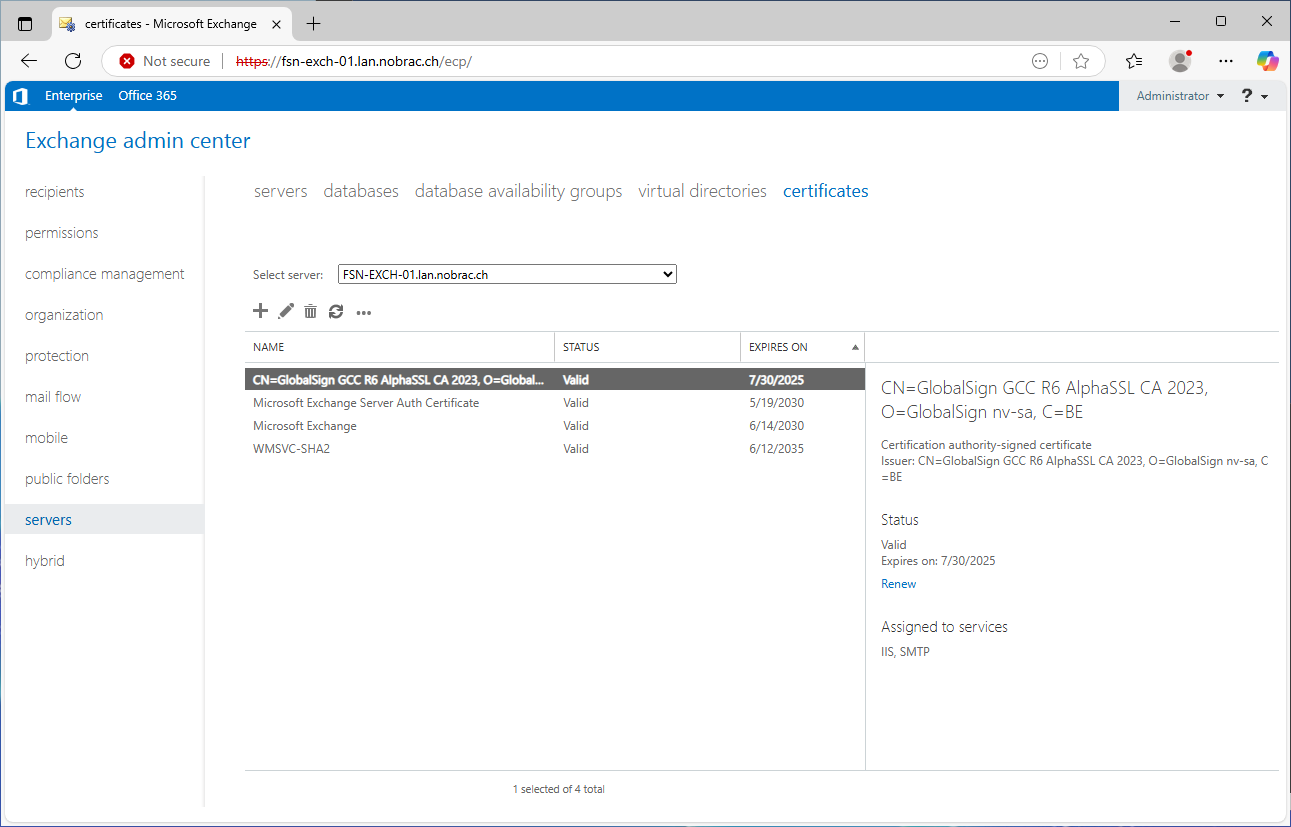
In the overview we can now see that the services “IIS” and “SMTP” are assigned to the certificate.

Open the Exchange Management Console on your Exchange server and enter the following commands for certificate POP and IMAP settings.
For POP:
|
|
For IMAP:
|
|

Back at the ECP, click again on the pencil icon to edit the certificate again.
Click on “services” again in the left menu.

Check the “IMAP” and “POP” boxes.

An error message appears stating that the certificate cannot be used and that we should configure the settings using the commands in Powershell. We have done this and the message can be ignored. This is a very old bug that has not yet been fixed. The POP and IMAP services are then also not displayed in the overview page for the certificate that the services are bound with the certificate. This is also normal (unfortunately).

Bind Services (CLI)
It should no longer be necessary, but sometimes there is a bug that the certificates for the SMTP service are not set correctly via the Exchange Admin Center. To be on the safe side, simply execute the following commands.
Open Exchange Management Shell.
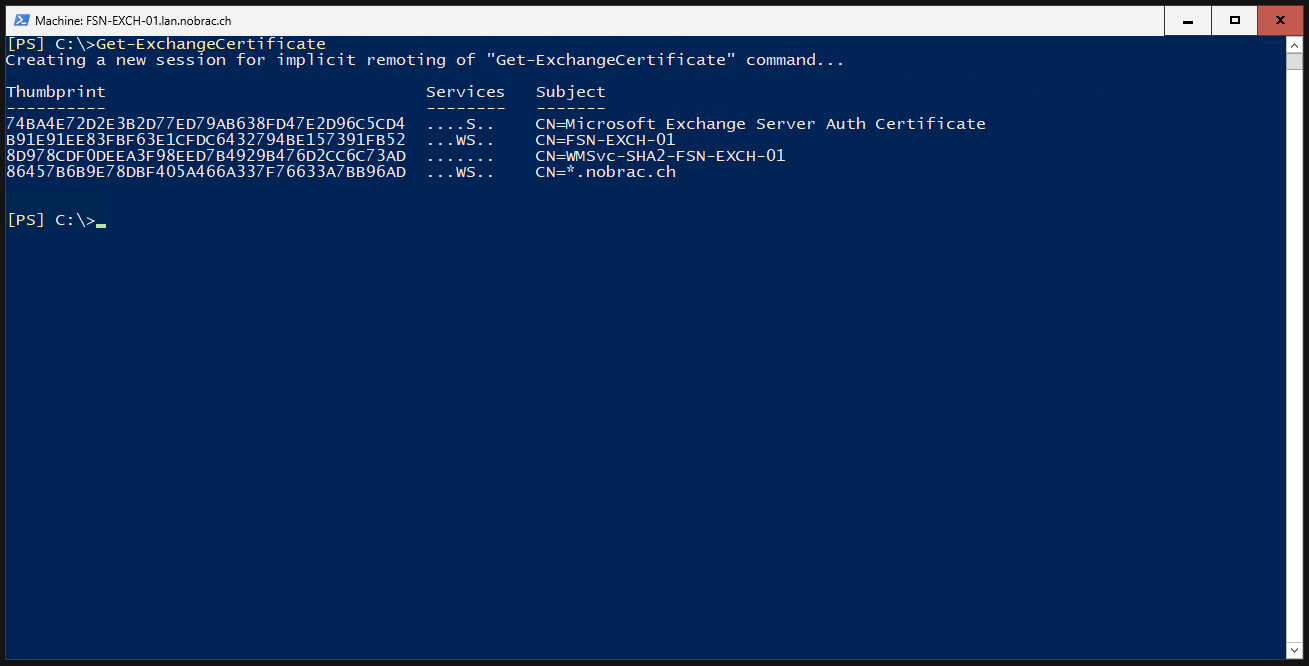
List the Exchange certificates. We should see our previously uploaded wildcard certificate. Save the thumbprint of your wildcard certificate.
|
|
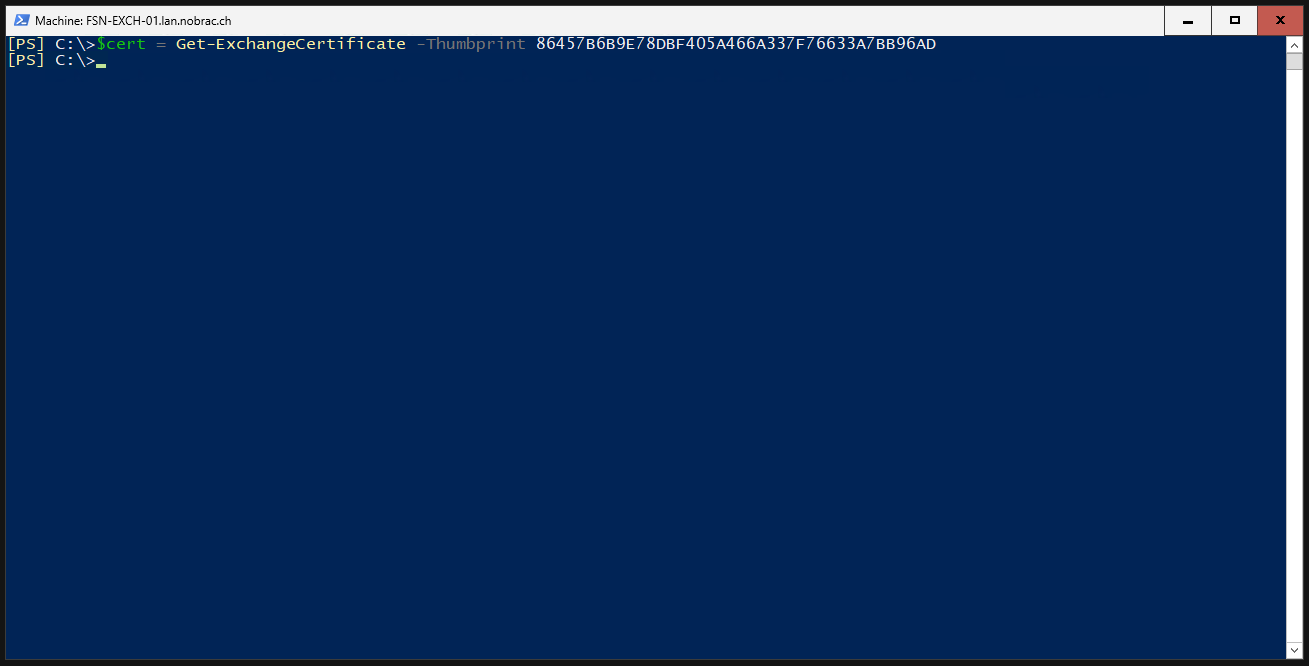
Insert the thumbprint into a variable.
|
|
Insert the hostname of your Exchange server into a variable.
|
|

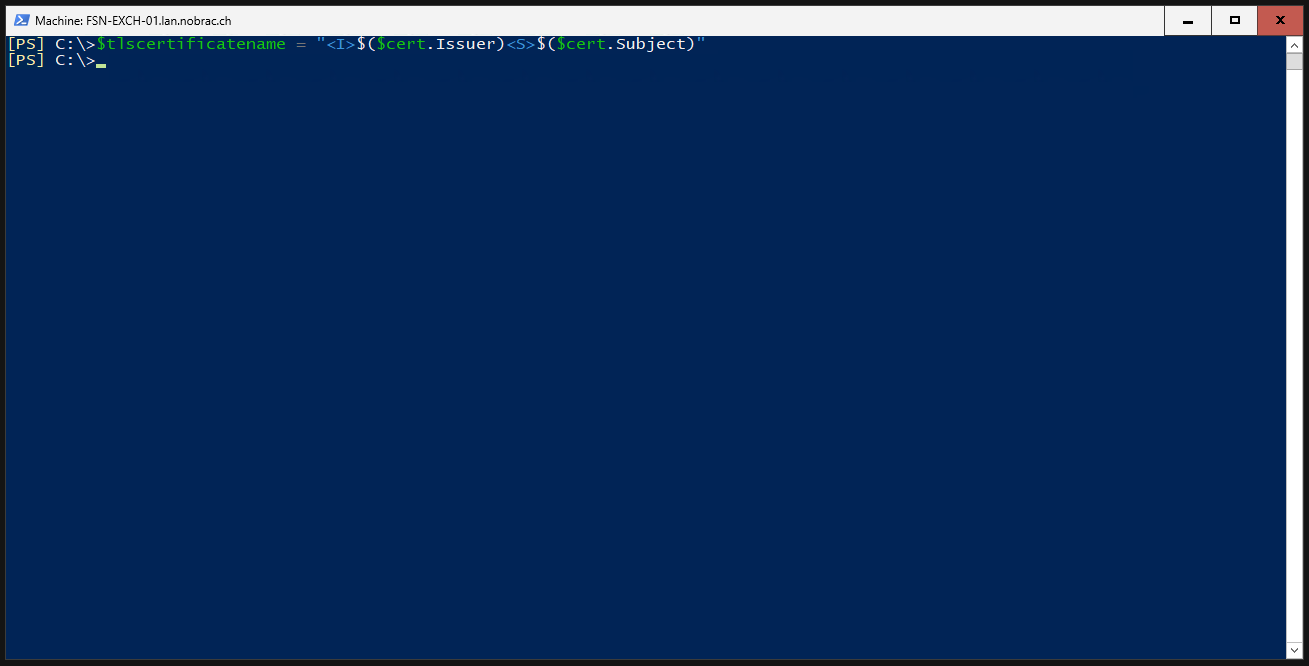
The same for the “TLS Certificate Name”.
|
|
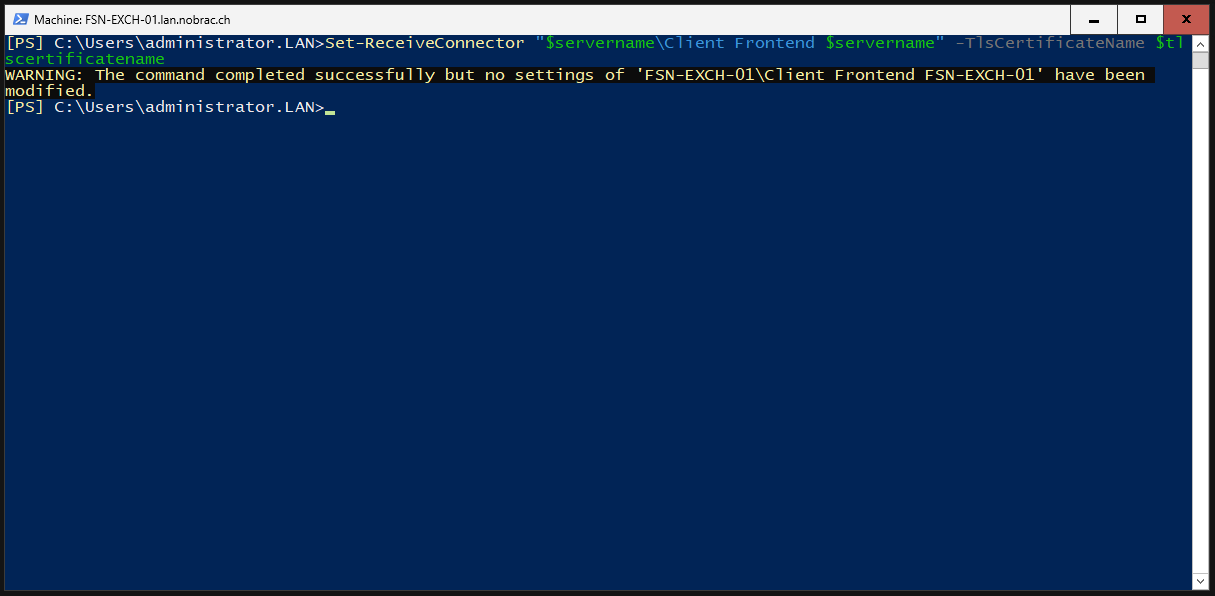
Bind to certificate to the Receive Connector (Client Frontend).
|
|
Bind to certificate to the Receive Connector (Default Frontend).
|
|

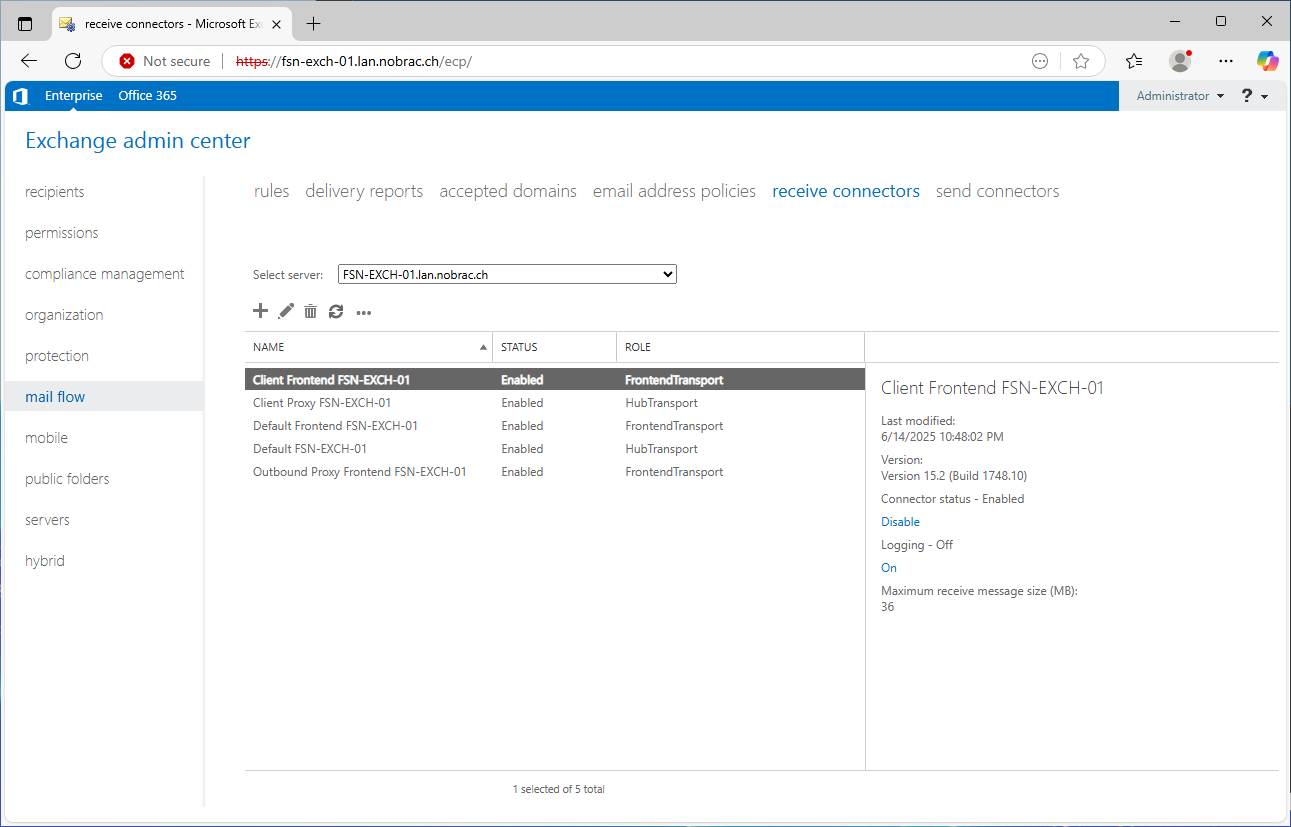
Configure Receive Connectors
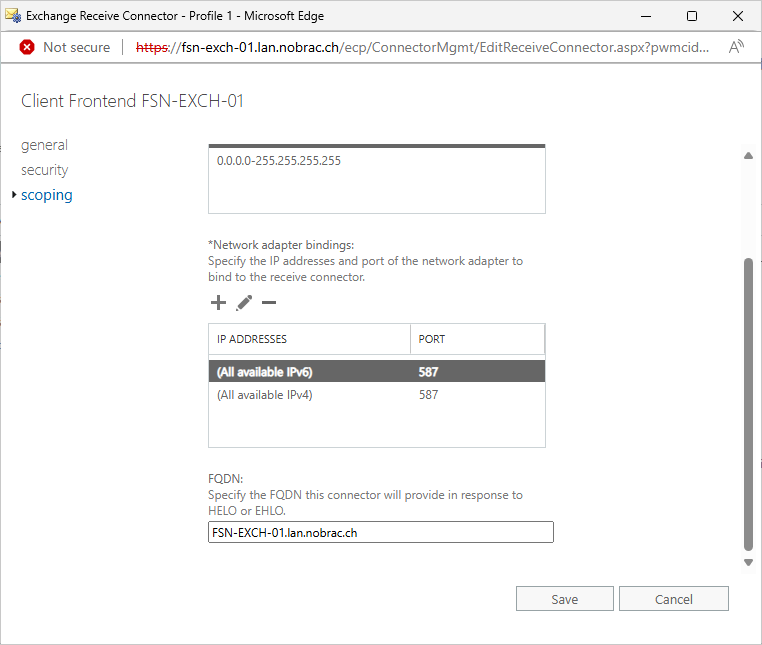
Select “mail flow” in the left menu bar and “receive connectors” in the top navigation bar. Select “Client Frontend” and then click on the pencil icon to edit it.
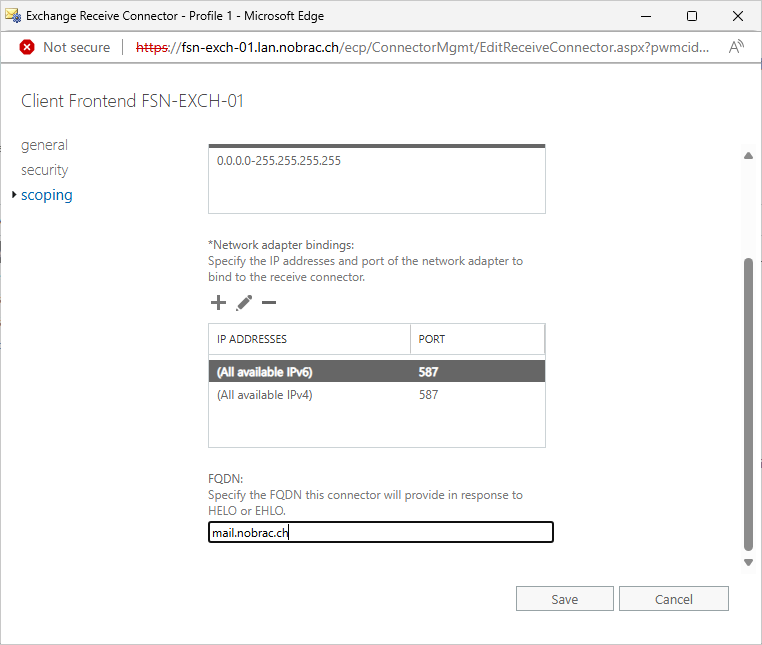
Click on “scoping” in the left menu bar and scroll all the way down. Change the FQDN accordingly. That’s it.
Configure Sophos XG
Enable SMTP-Relay for Zones
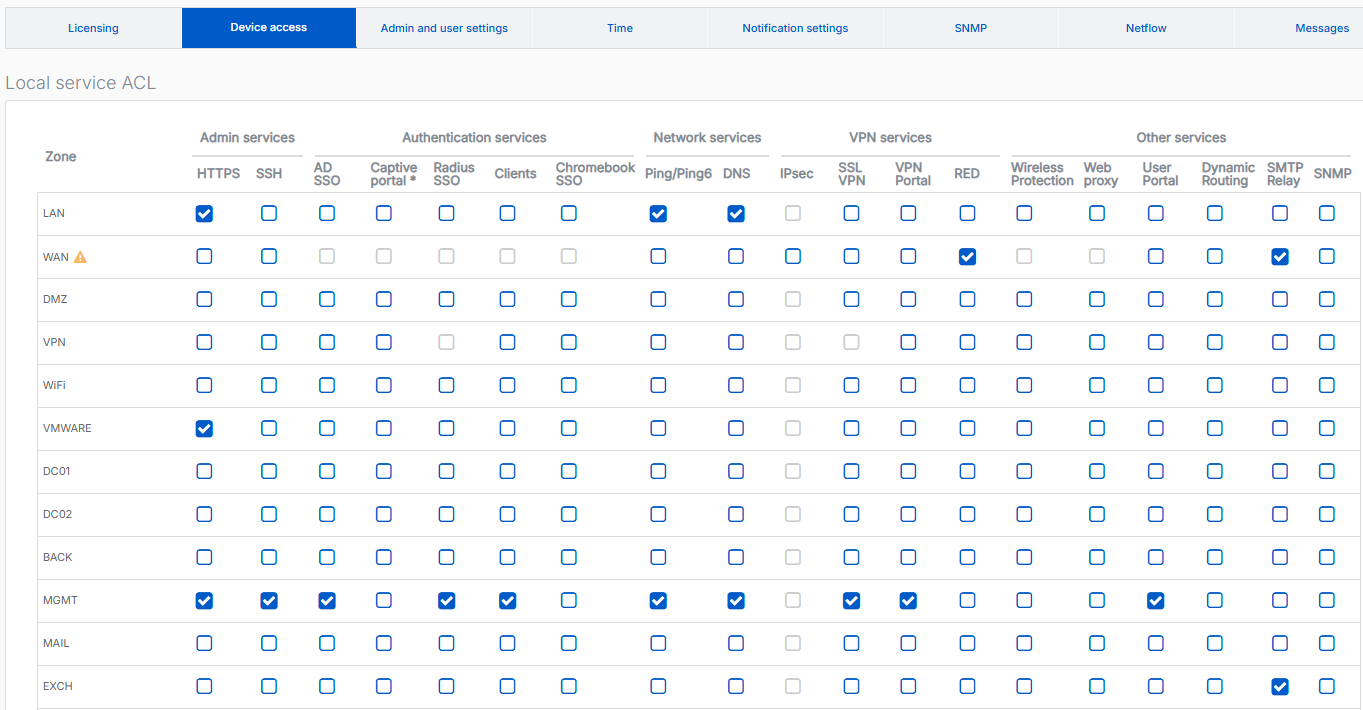
In your Sophos XG, navigate to “Administration” -> “Device Access” and activate the option “SMTP Relay” for your WAN zone and for the zone that you have created for your Exchange.
Create IP-Host
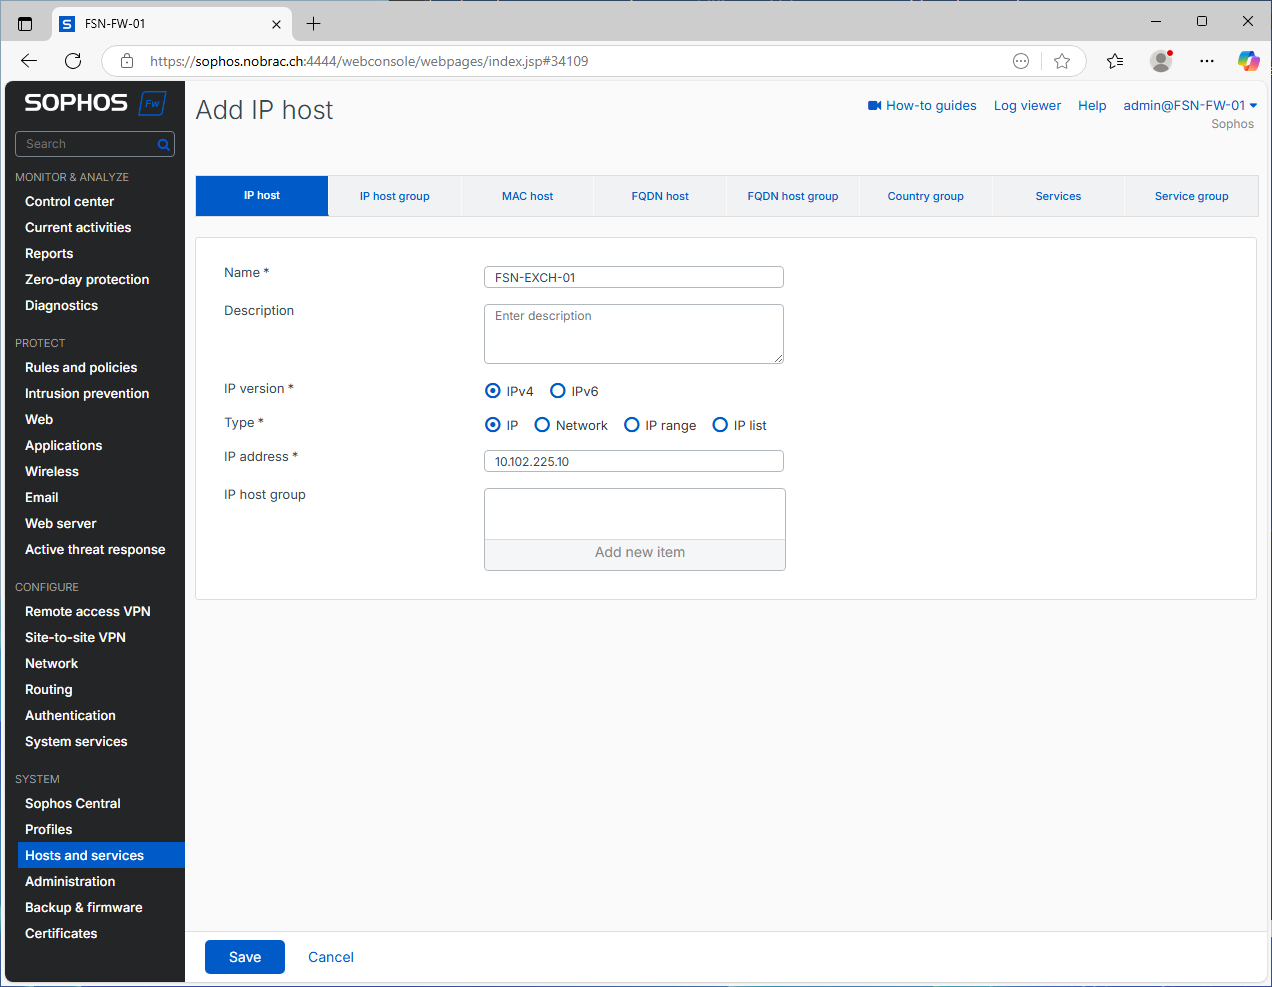
In your Sophos XG, navigate to “Hosts and Services” -> “IP host” and create a new host for your Exchange server.
Upload Certificate
In your Sophos XG, navigate to “Certificates” and upload your wildcard certificate.

Create Web Server
In your Sophos XG, navigate to “Web server” and click on “Add” to create a new object.

Assign a name, select your previously created Exchange host under “Host”. Select HTTPS for the “Type” and 443 as the “Port”. Set the “Time-out” option to 1850.

Create Protection Policies
Create Protection Policy for Autodiscover
In your Sophos XG, navigate to “Web server” -> “Protection policies”. There are ready-made protection policies for Exchange from Sophos, but these are extremely outdated. They are unusable.
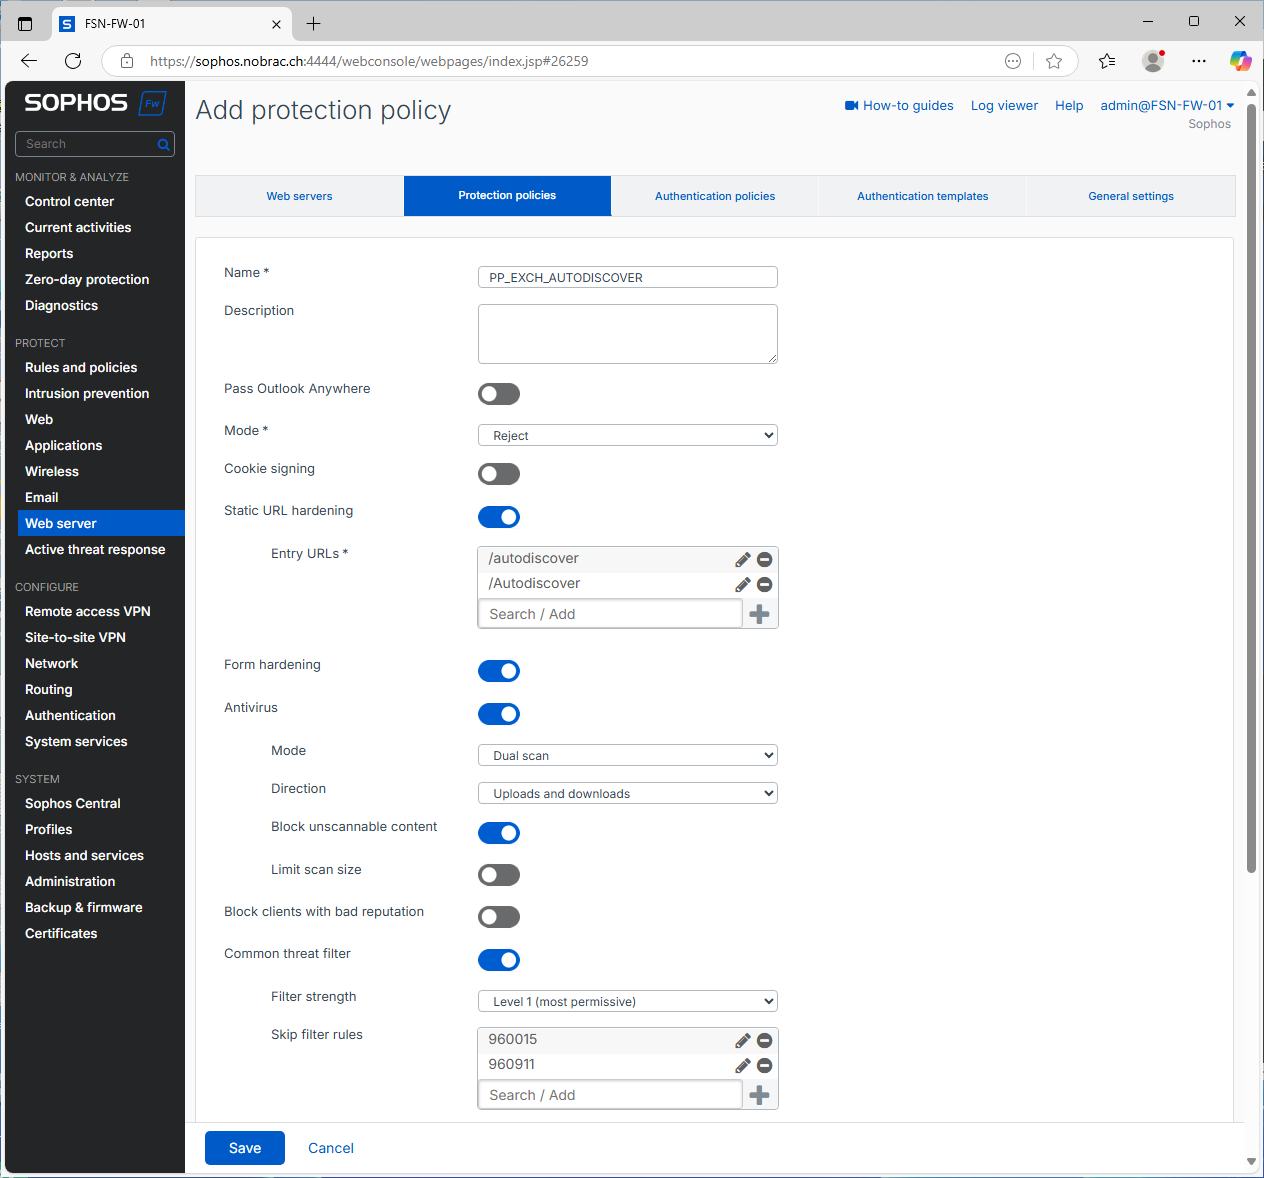
Create a new protection policy and apply the settings from the screenshot.
“Entry URLs” to copy:
- /autodiscover
- /Autodiscover
“Skip filter rules” to copy:
- 960015
- 960911

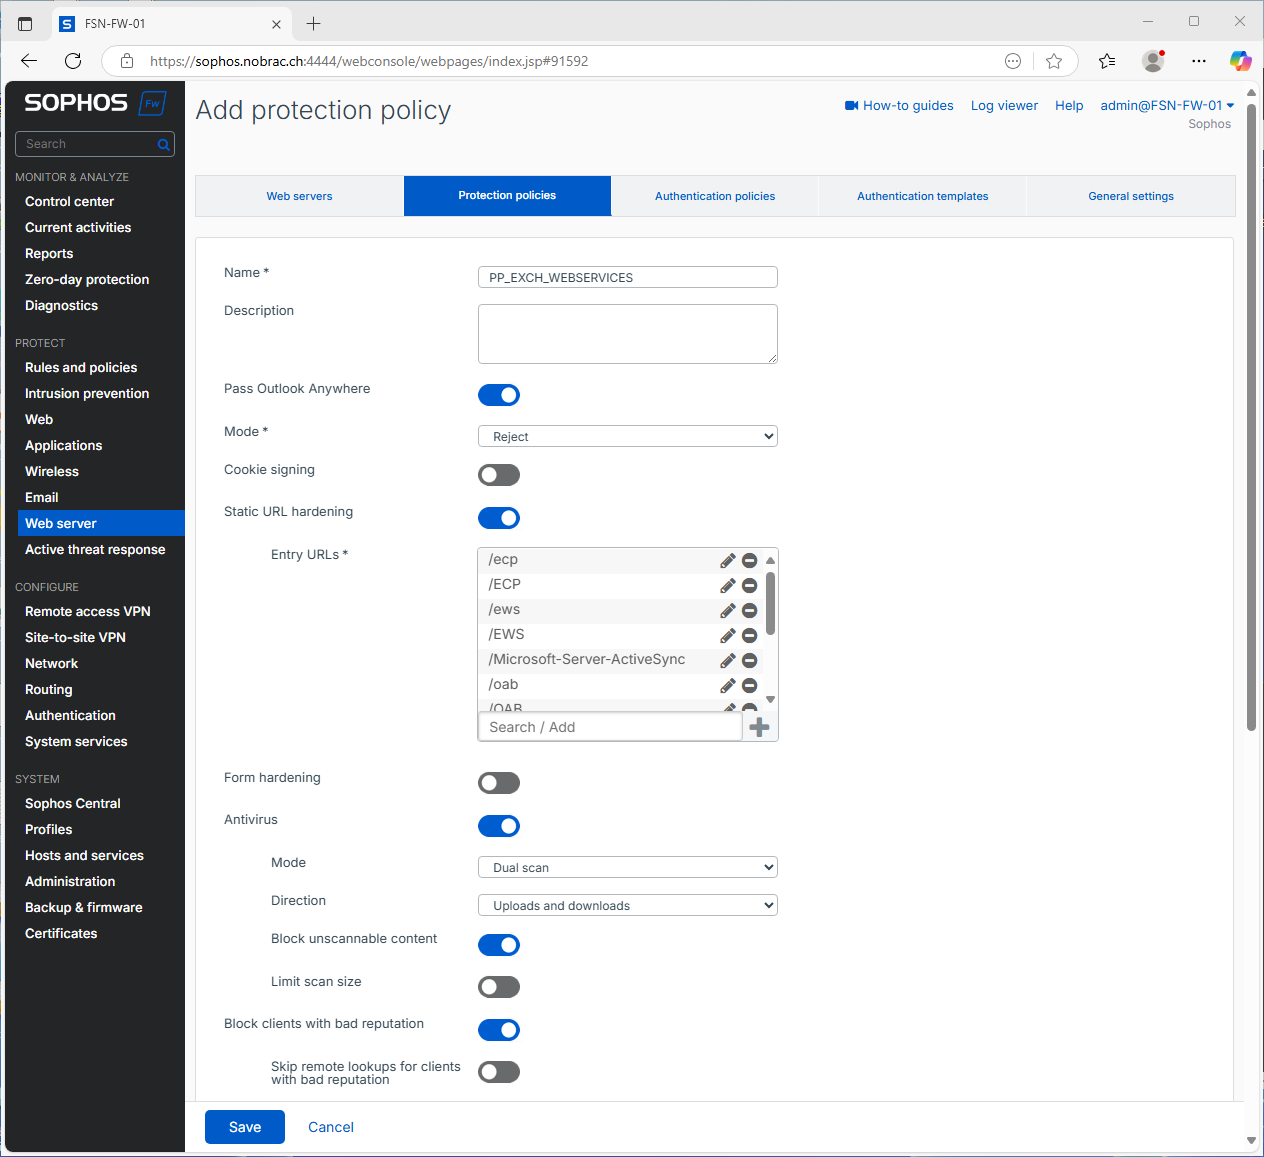
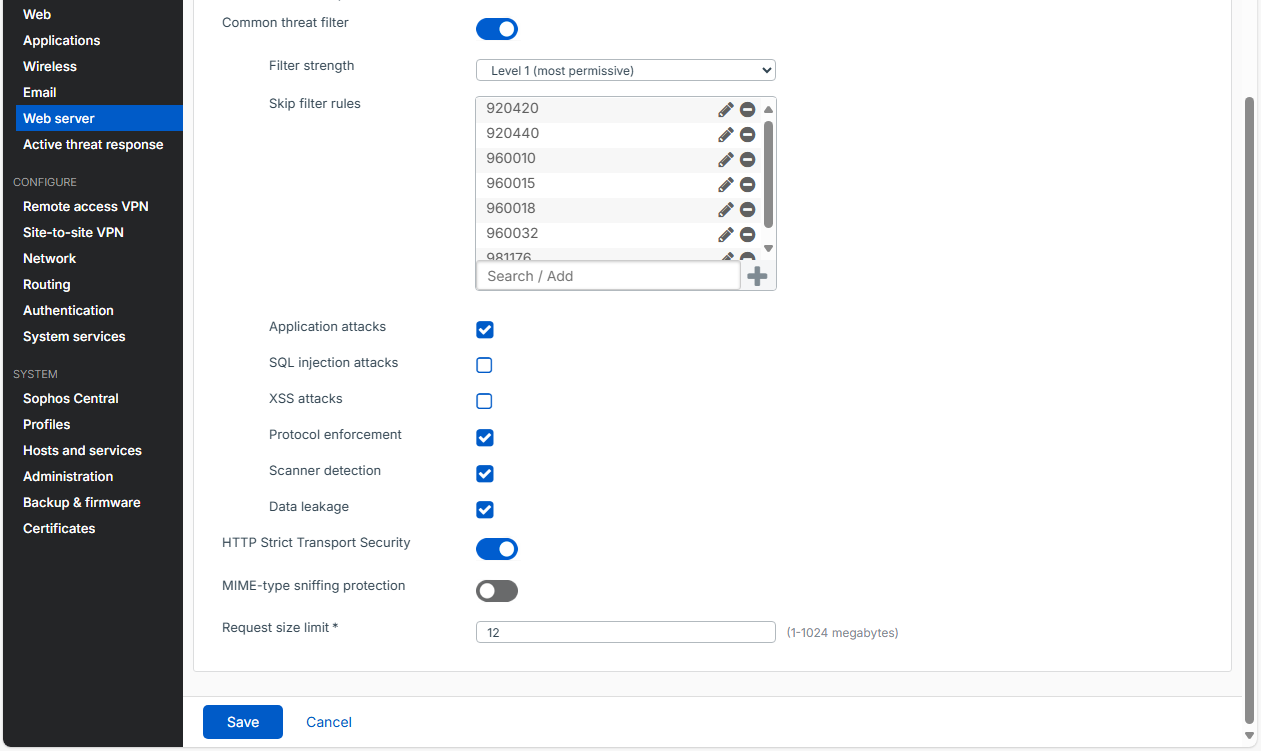
Create Protection Policy for Webservices
Create another protection policy and apply the settings from the screenshot.
“Entry URLs” to copy:
- /ecp
- /ECP
- /ews
- /EWS
- /Microsoft-Server-ActiveSync
- /oab
- /OAB
- /owa
- /OWA
- /
- /mapi
- /MAPI
“Skip filter rules” to copy:
- 920420
- 920440
- 960010
- 960015
- 960018
- 960032
- 981176
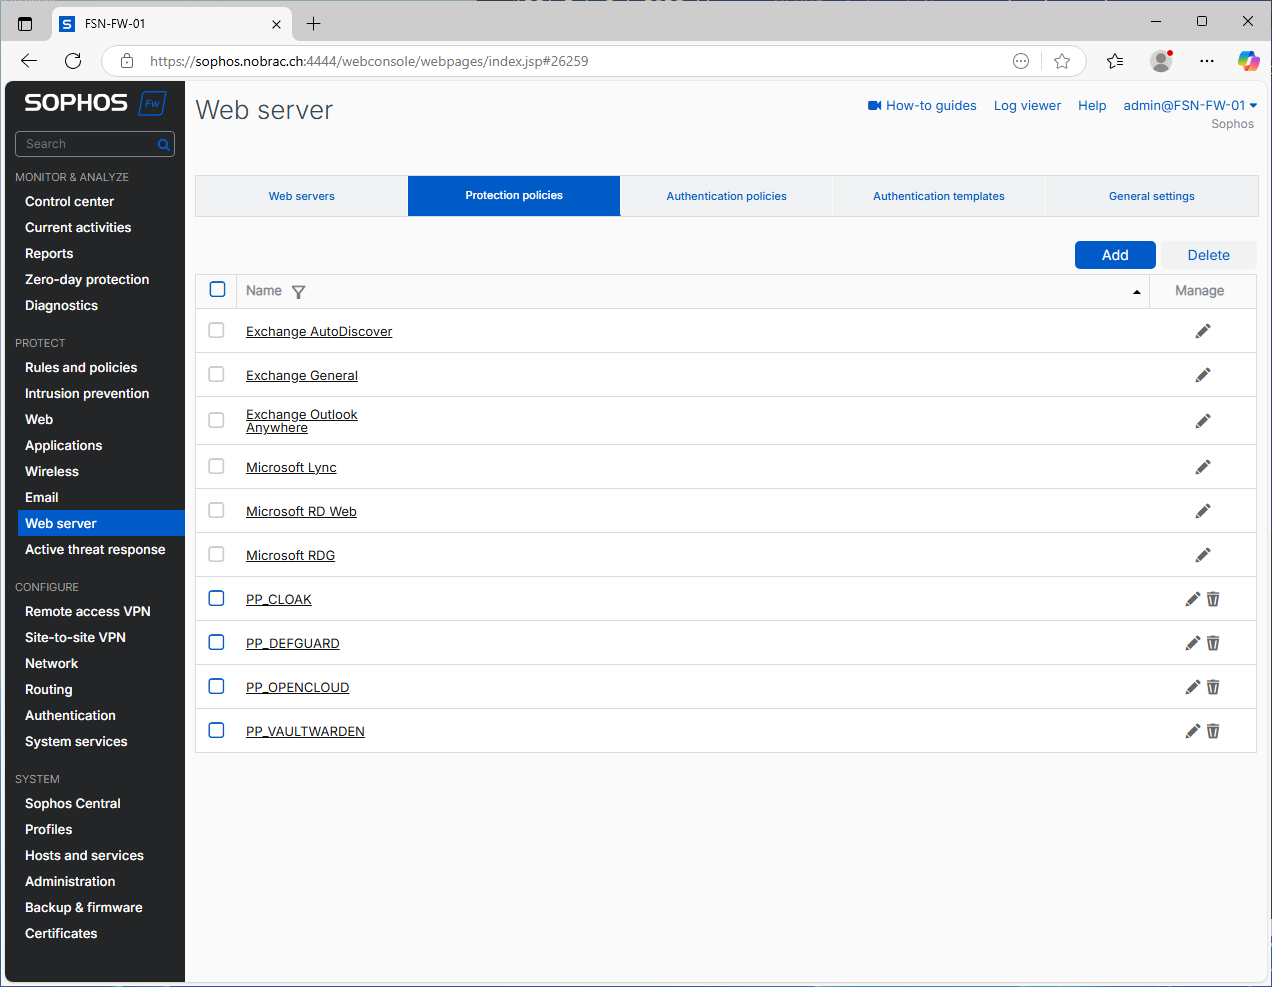
We should then see our new two protection policies in the overview.

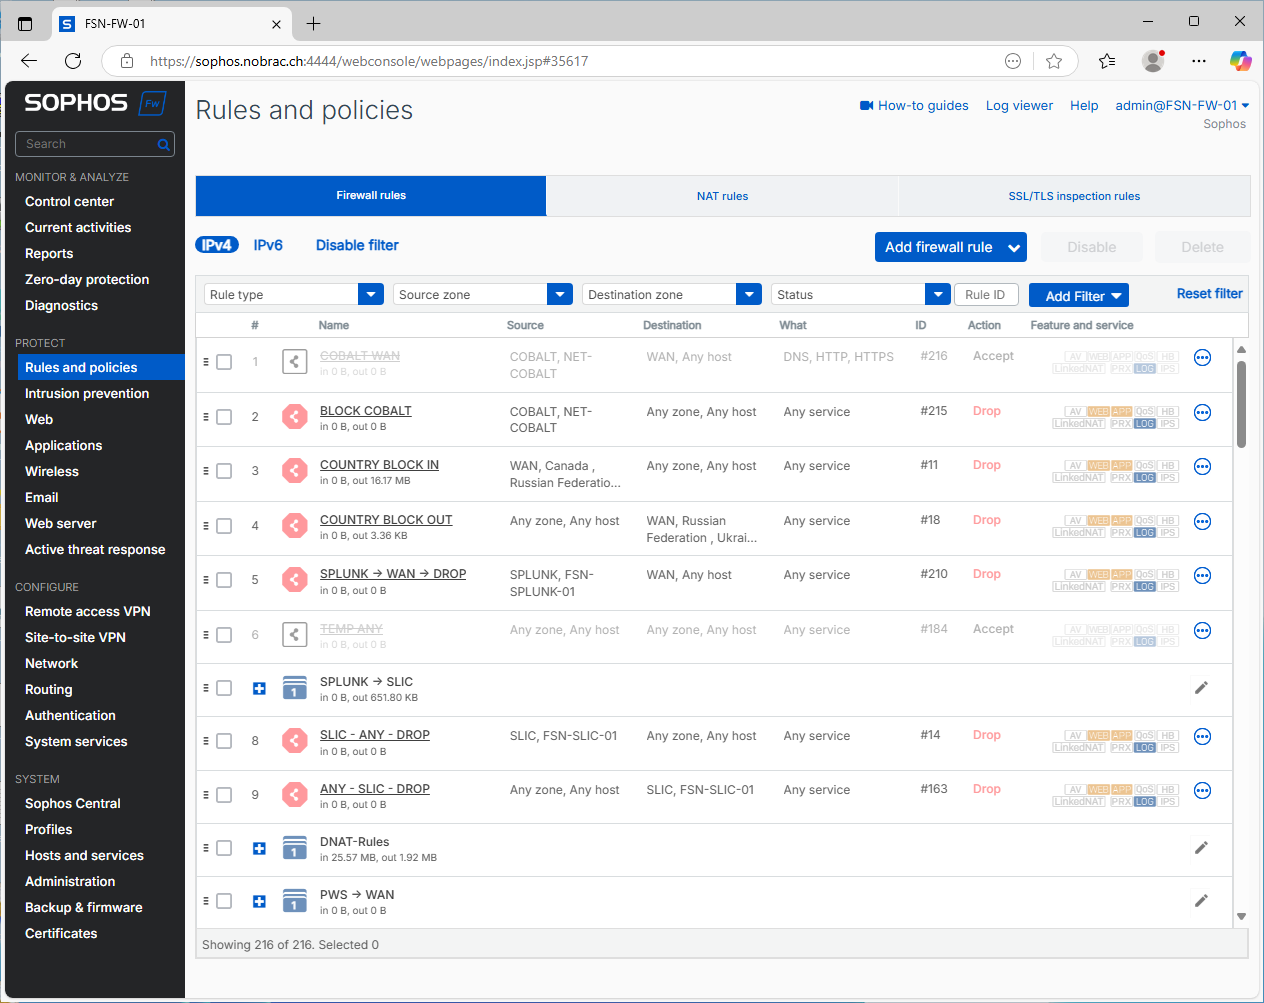
Create Firewall Rules
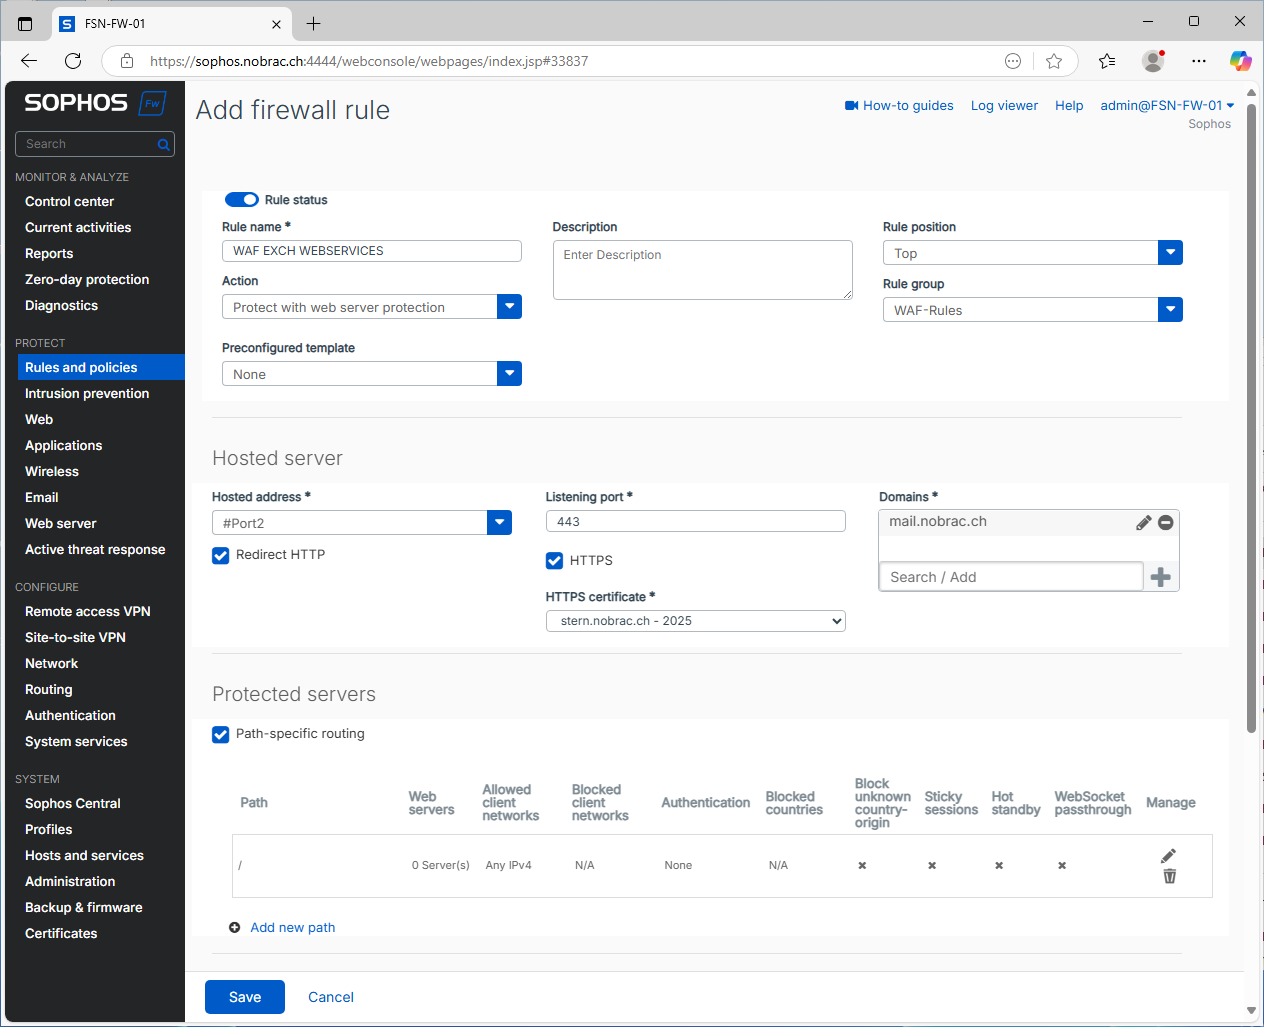
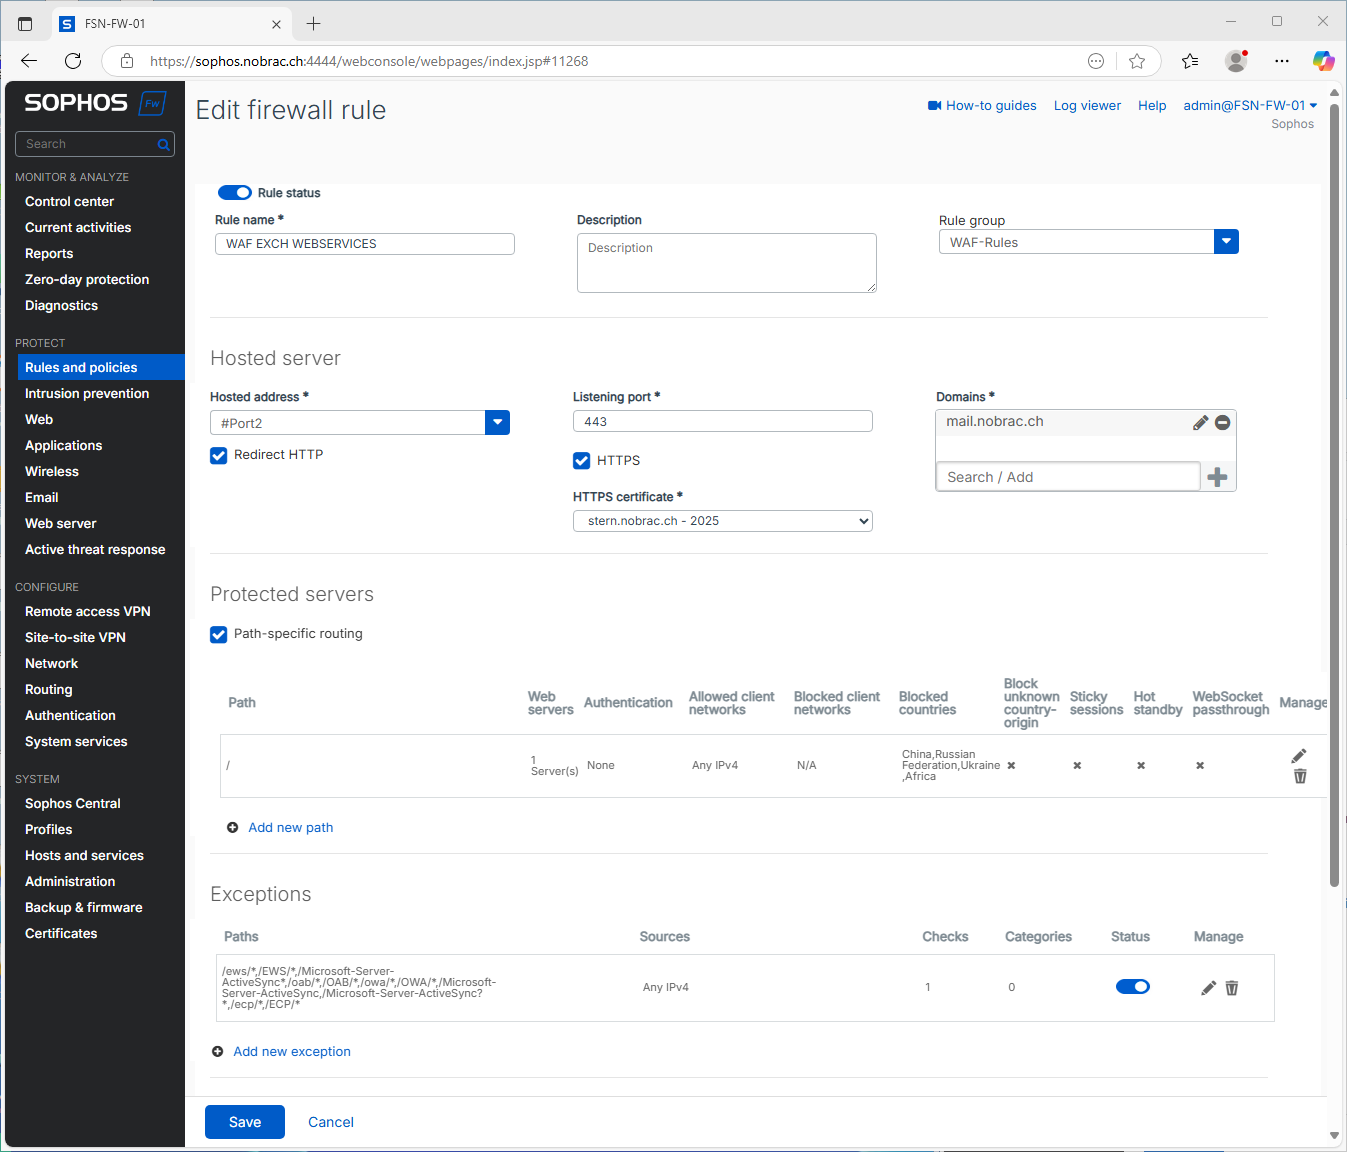
Firewall Rule for Webservices
In your Sophos XG, navigate to “Rules and policies” -> “Firewall rules”. Create a new firewall rule.
Under “Action”, select the option “Protect with web server protection”. The other settings can be taken from the screenshot. Make sure that you select your port with the public IP address for “Hosted address”. For the domain, enter your domain for your mail server. I have also created a dedicated group for WAF-Rules to make administration simpler.
Path-specific Routing
Under “Protected servers” -> “Path-specific routing”, click on the pencil icon to edit the entry. You can copy the settings from the screenshot. I have also entered a few countries directly under “Blocked countries”. This at least blocks all the bots.
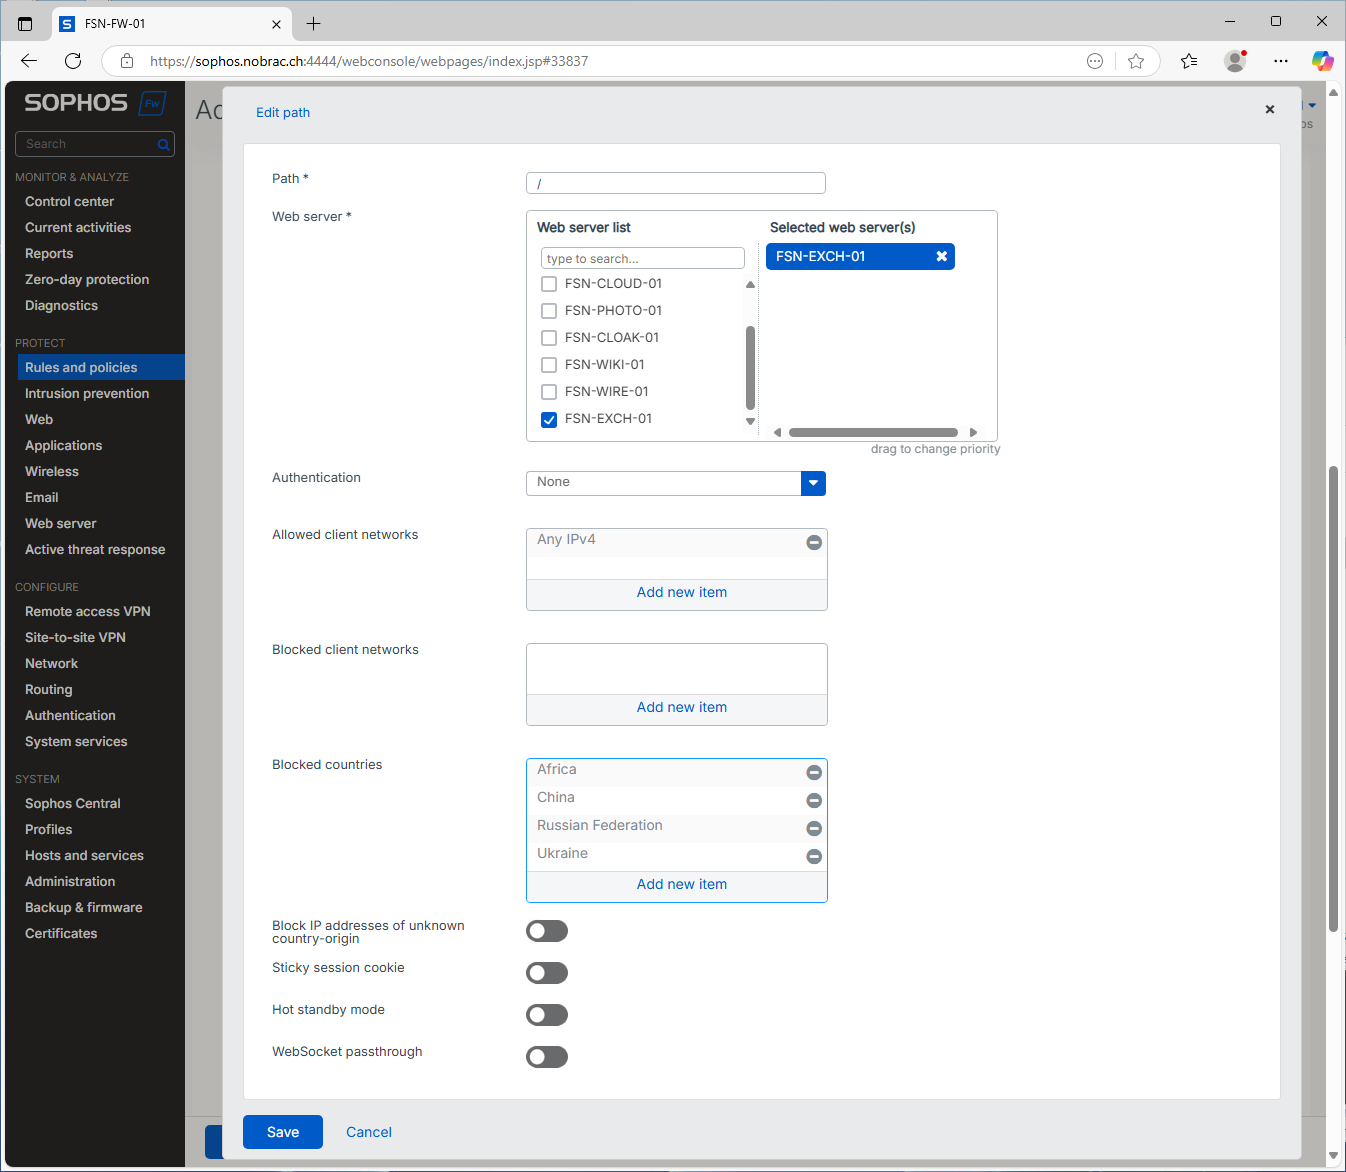
It should look like that.

Exceptions
Click on “Add new exception” under “Exceptions”. Enter the following paths.
“Paths” to copy:
- /ews/*
- /EWS/*
- /Microsoft-Server-ActiveSync*
- /oab/*
- /OAB/*
- /owa/*
- /OWA/*
- /Microsoft-Server-ActiveSync
- /Microsoft-Server-ActiveSync?*
- /ecp/*
- /ECP/*
Check the options “Static URL hardening” and “Never change HTML during static URL hardening or form hardening”.
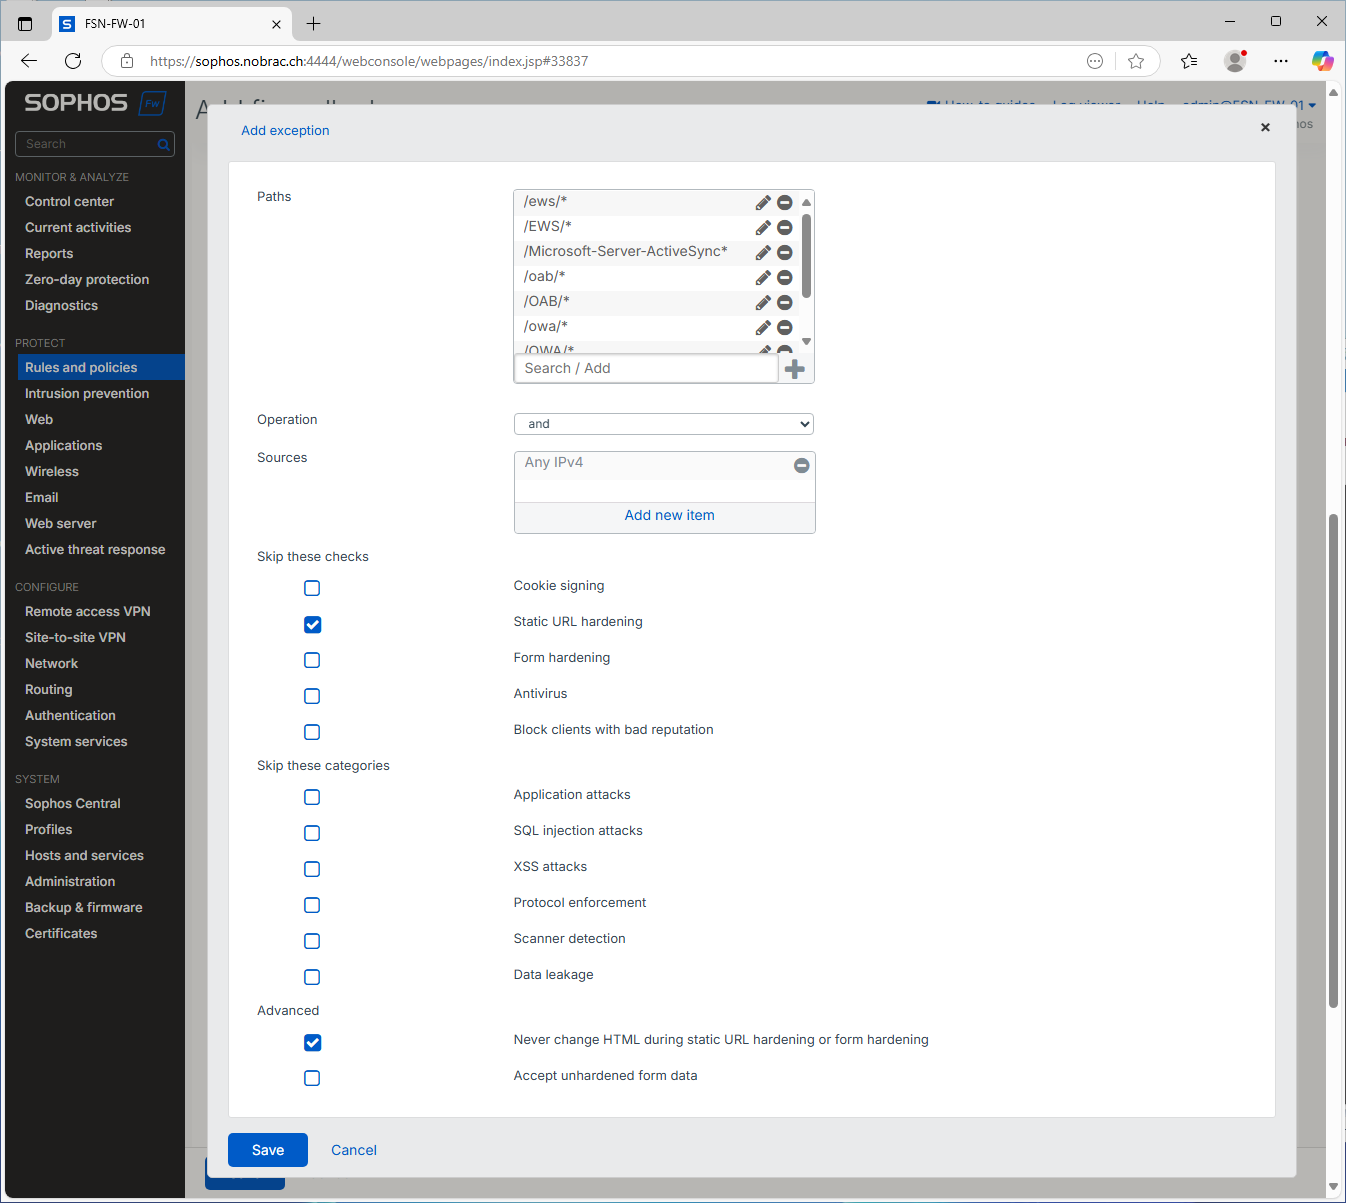
The overview should now look something like this.
Click again on “Add new exception”.
“Paths” to copy:
- /owa/ev.owa*
- /OWA/ev.owa*
Check the option “Antivirus”.
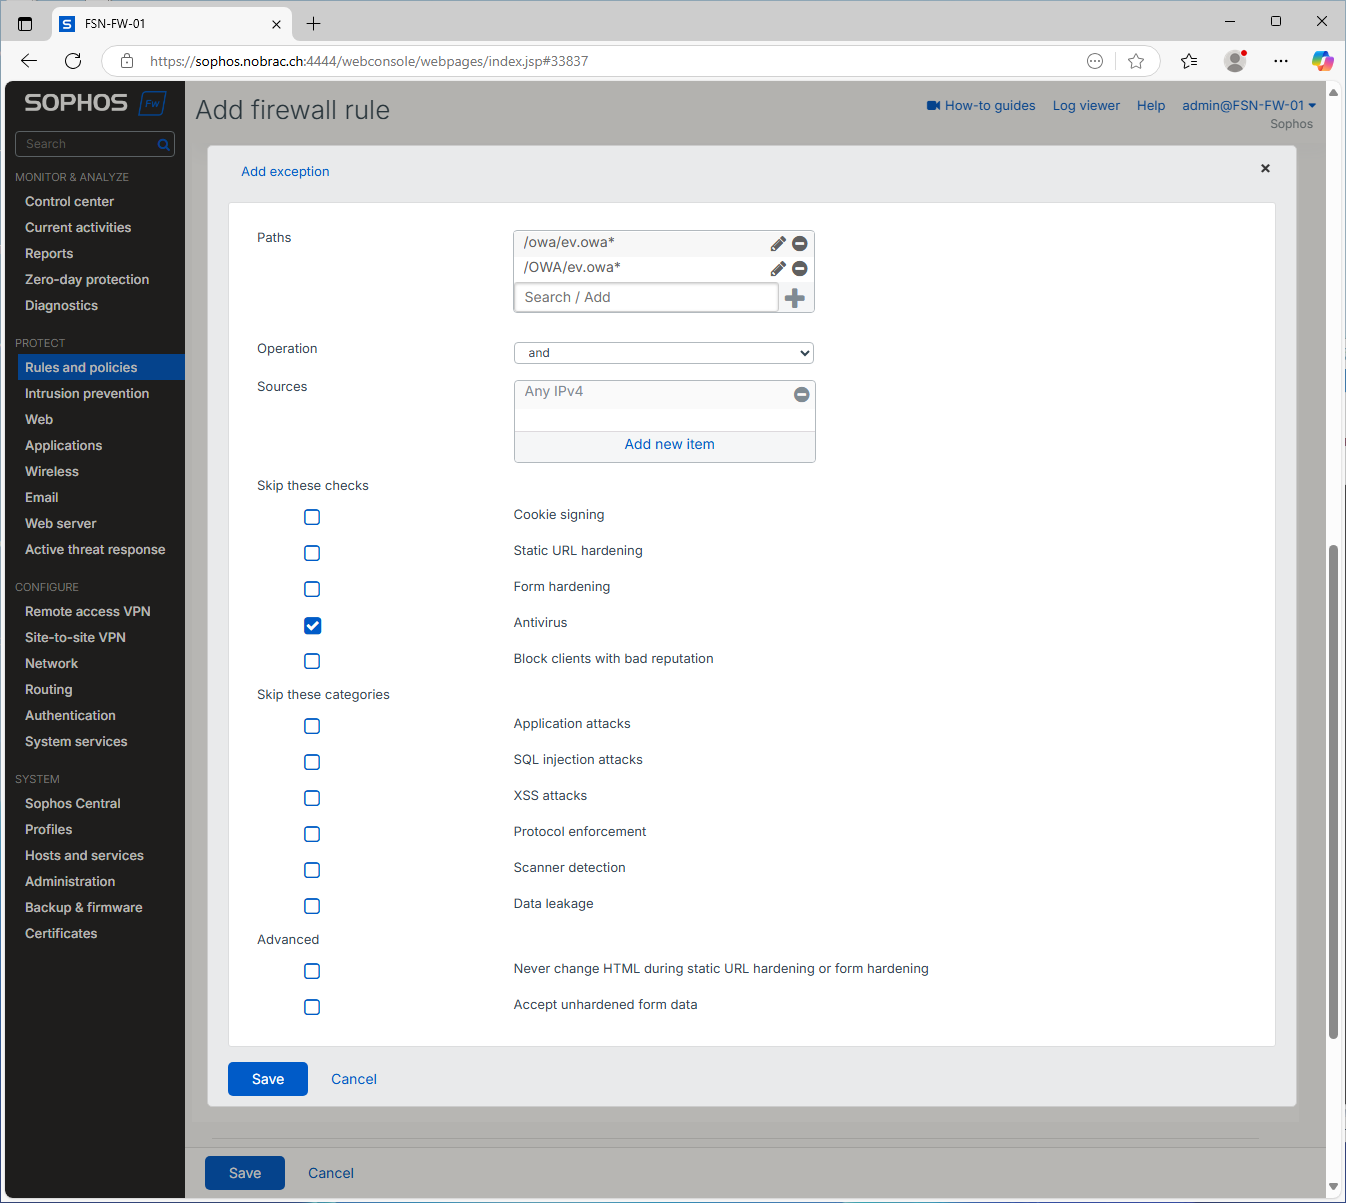
The overview should now look something like this.

Click once again on “Add new exception”.
“Paths” to copy:
- /rpc/*
- /RPC/*
- /mapi/*
- /MAPI/*
- /Rpc/*
Check all options except “Never change HTML during static URL hardening or form hardening” and “Accept unhardened form data”.
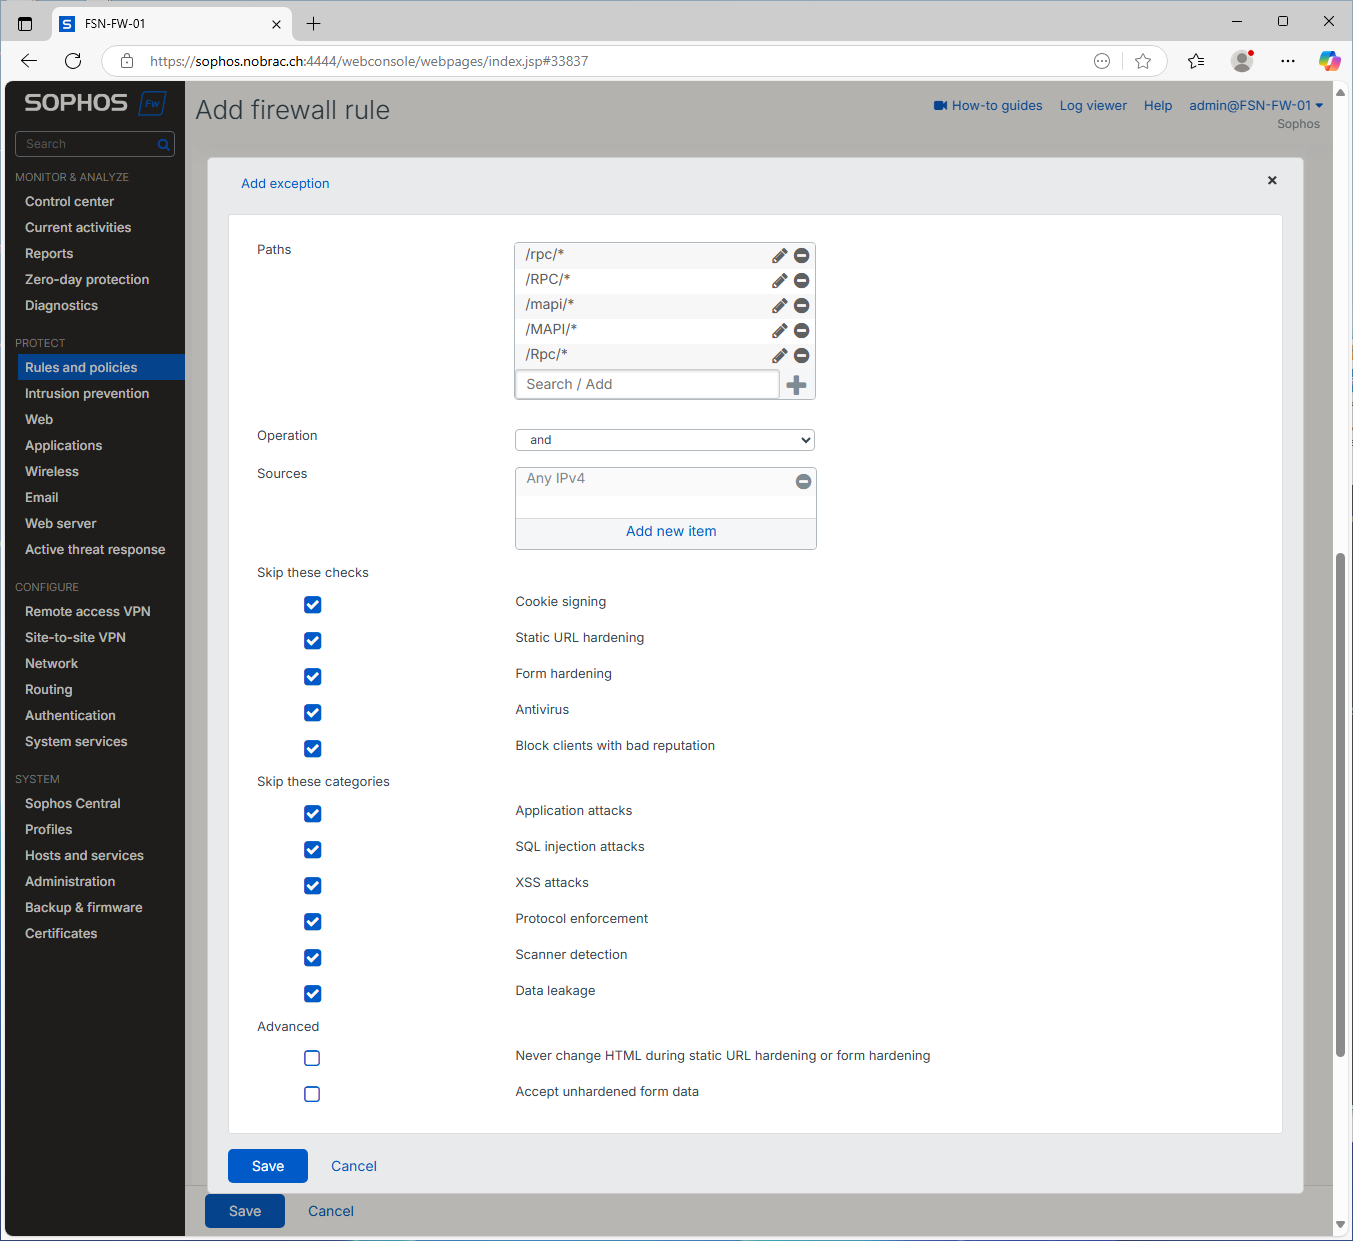
The overview should now look something like this.

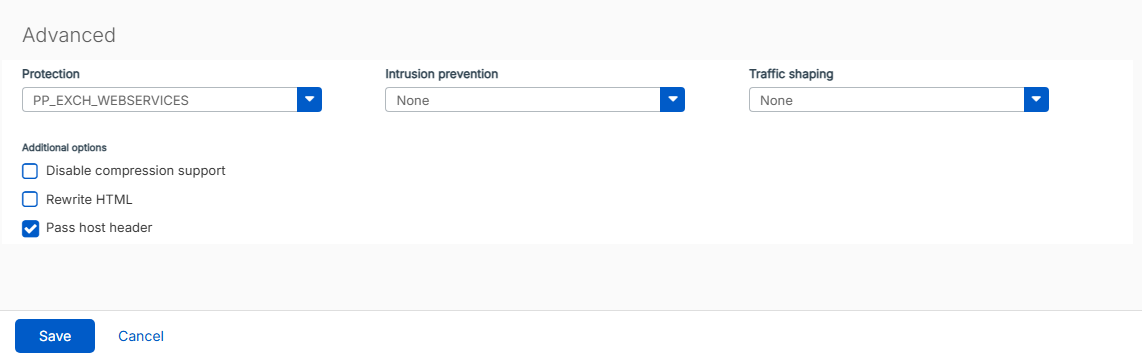
Now select your previously created protection policy under “Advanced” in the “Protection” option. In addition, check the “Pass host header” option.
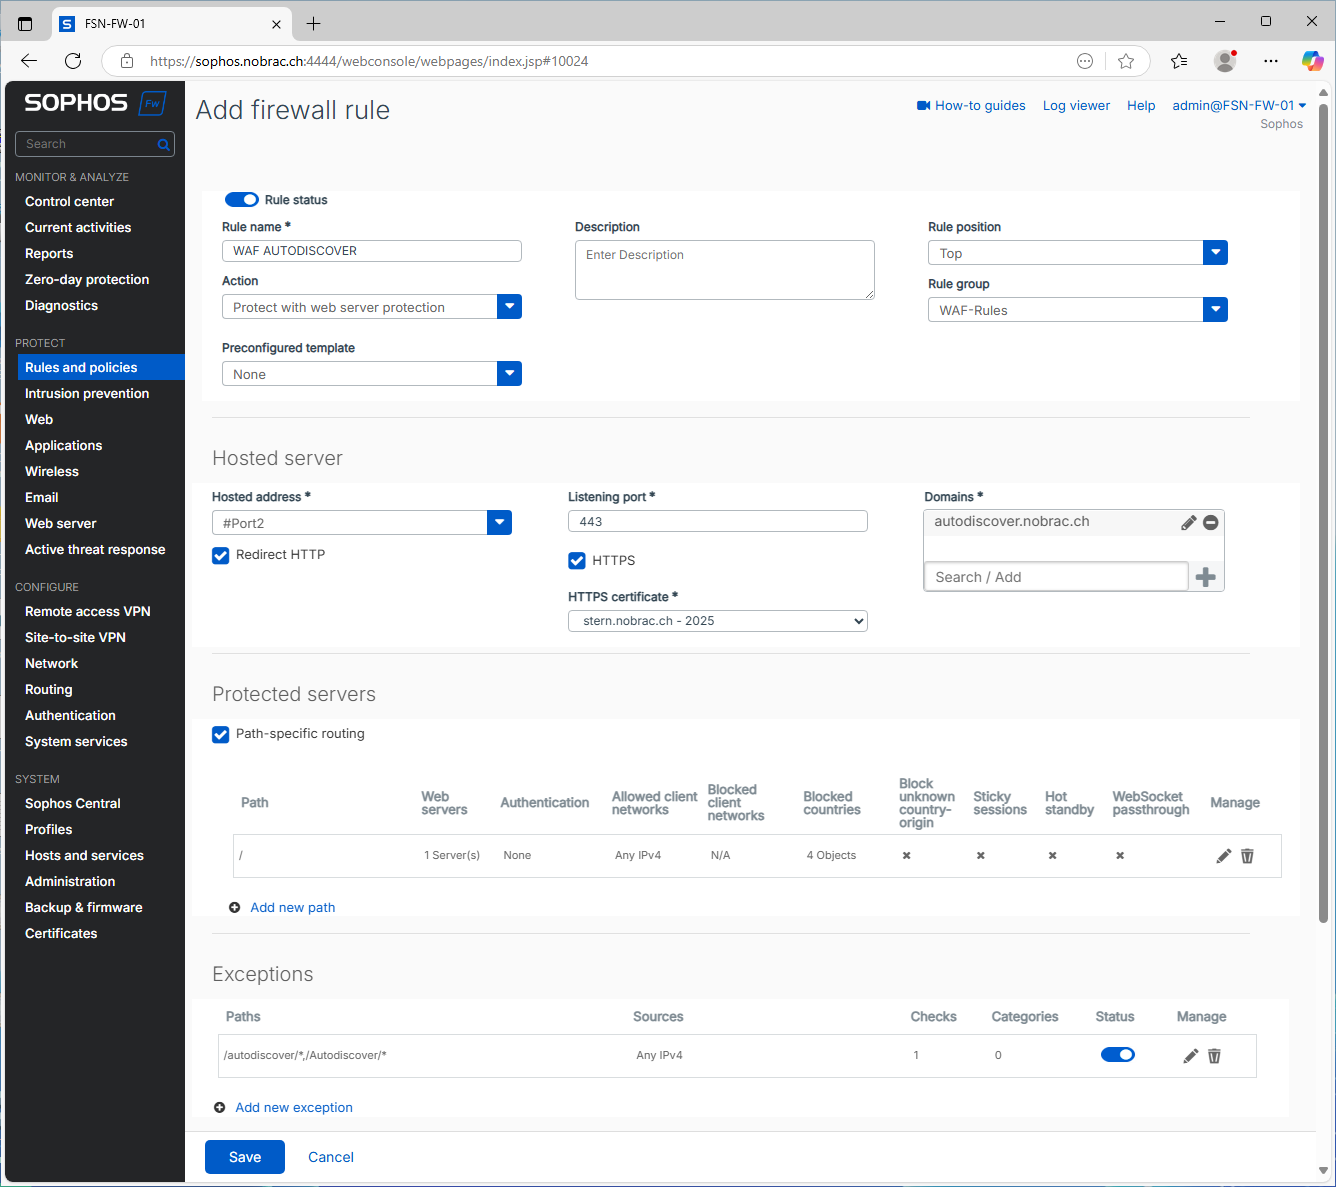
Firewall Rule for Autodiscover
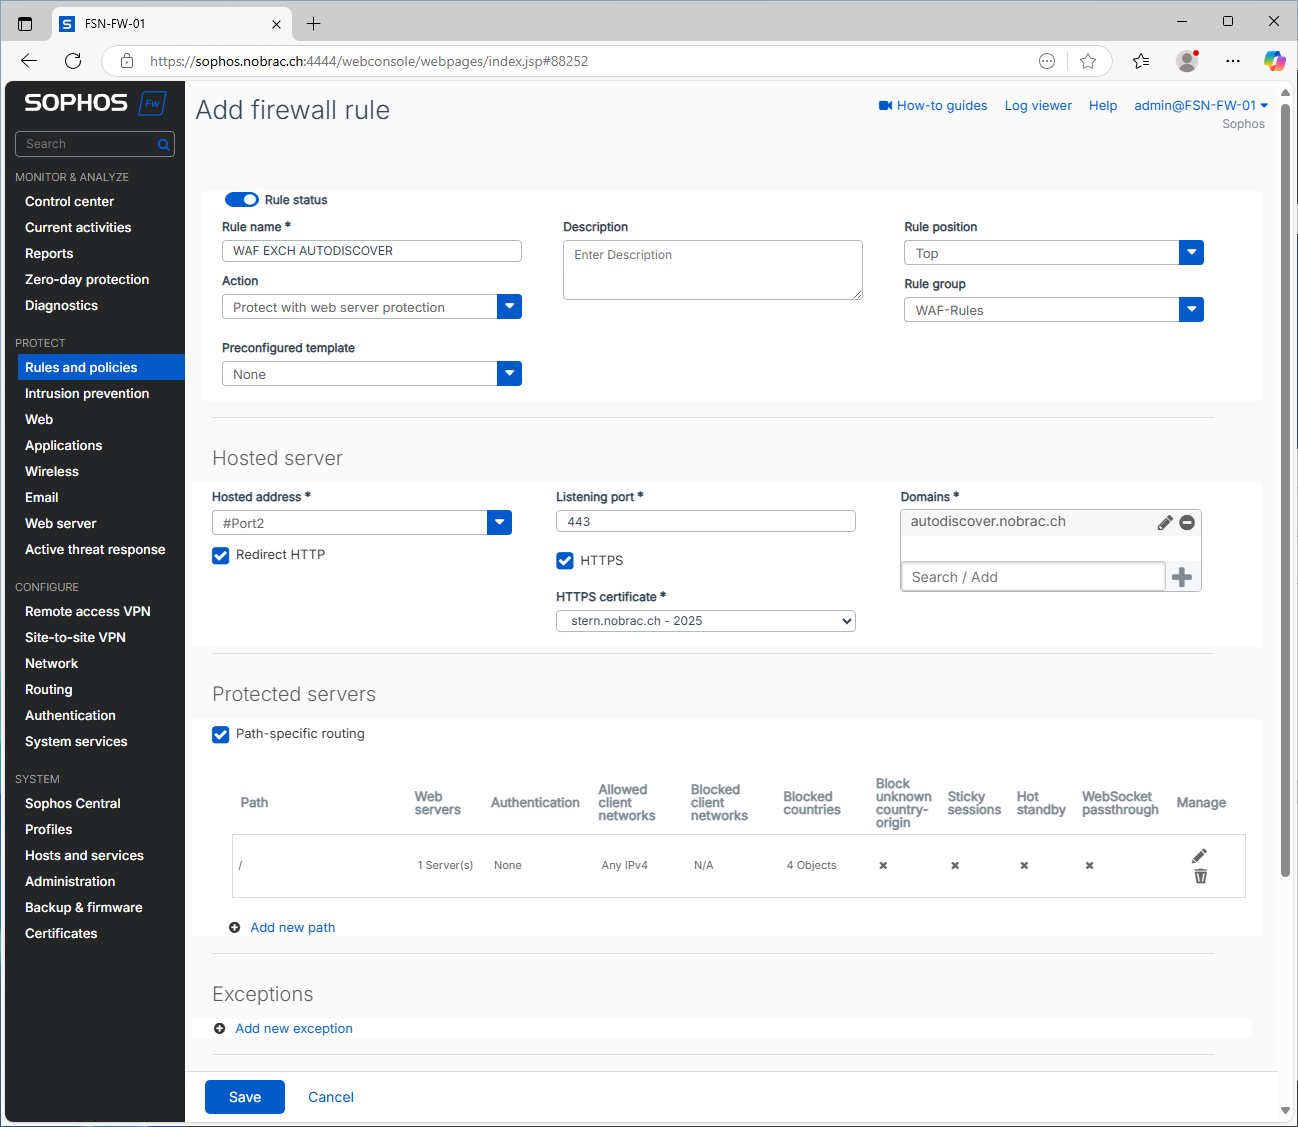
In your Sophos XG, navigate to “Rules and policies” -> “Firewall rules”. Create another firewall rule.
Under “Action”, select the option “Protect with web server protection”. The other settings can be taken from the screenshot. Make sure that you select your port with the public IP address for “Hosted address”. For the domain, enter your “autodiscover” domain.

Path-specific Routing
Under “Protected servers” -> “Path-specific routing”, click on the pencil icon to edit the entry. You can copy the settings from the screenshot. I have also entered a few countries directly under “Blocked countries”. This at least blocks all the bots.
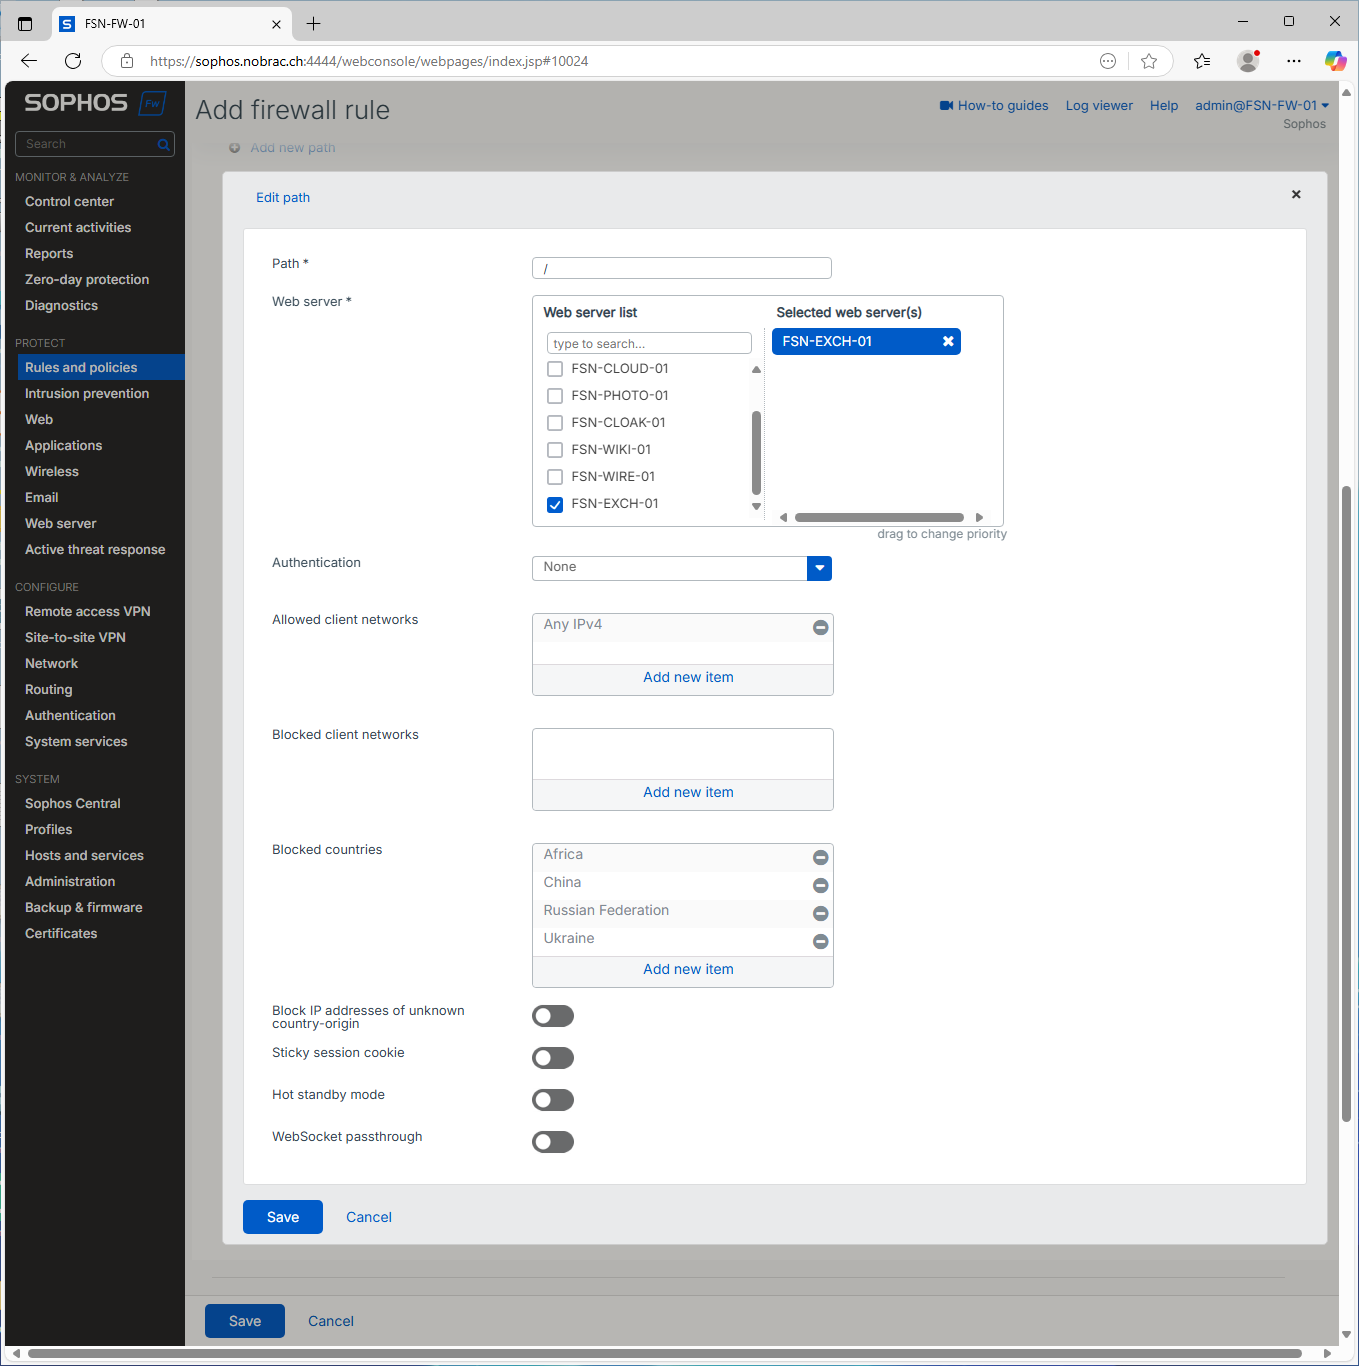
It should look like that.
Exceptions
Click on “Add new exception” under “Exceptions”. Enter the following paths.
“Paths” to copy:
- /autodiscover/*
- /Autodiscover/*
Check the options “Static URL hardening” and “Never change HTML during static URL hardening or form hardening”
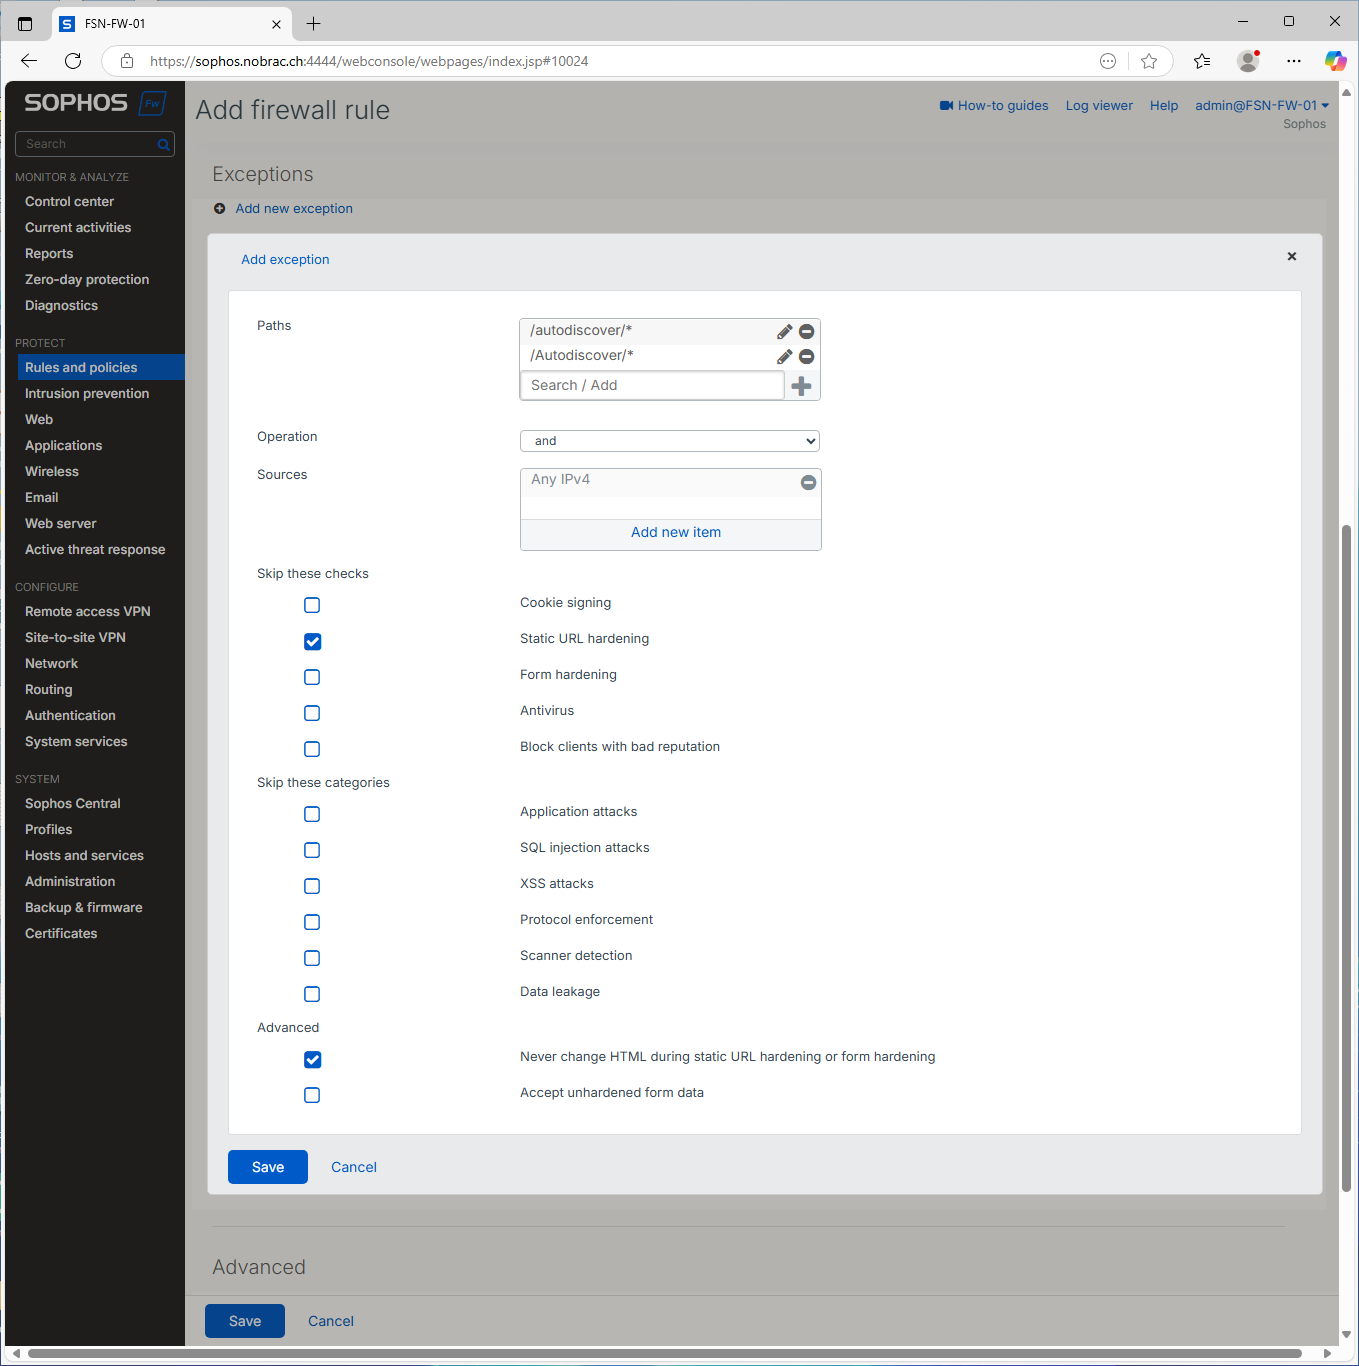
It should look like this.
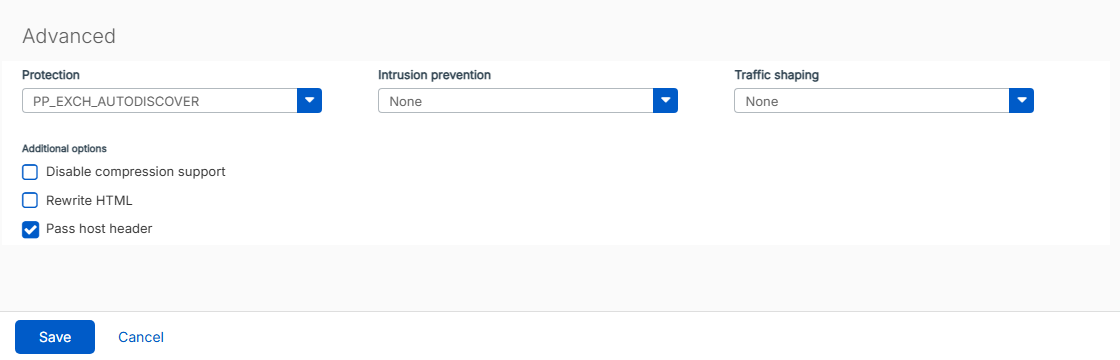
Now select your previously created protection policy under “Advanced” in the “Protection” option. In addition, check the “Pass host header” option.
Create DNAT Rule
We now create a DNAT rule for port forwarding to the Exchange server.
In your Sophos XG, navigate to “Rules and policies” -> “Firewall rules” -> “Add firewall rule” and select “Server access assistant (DNAT).
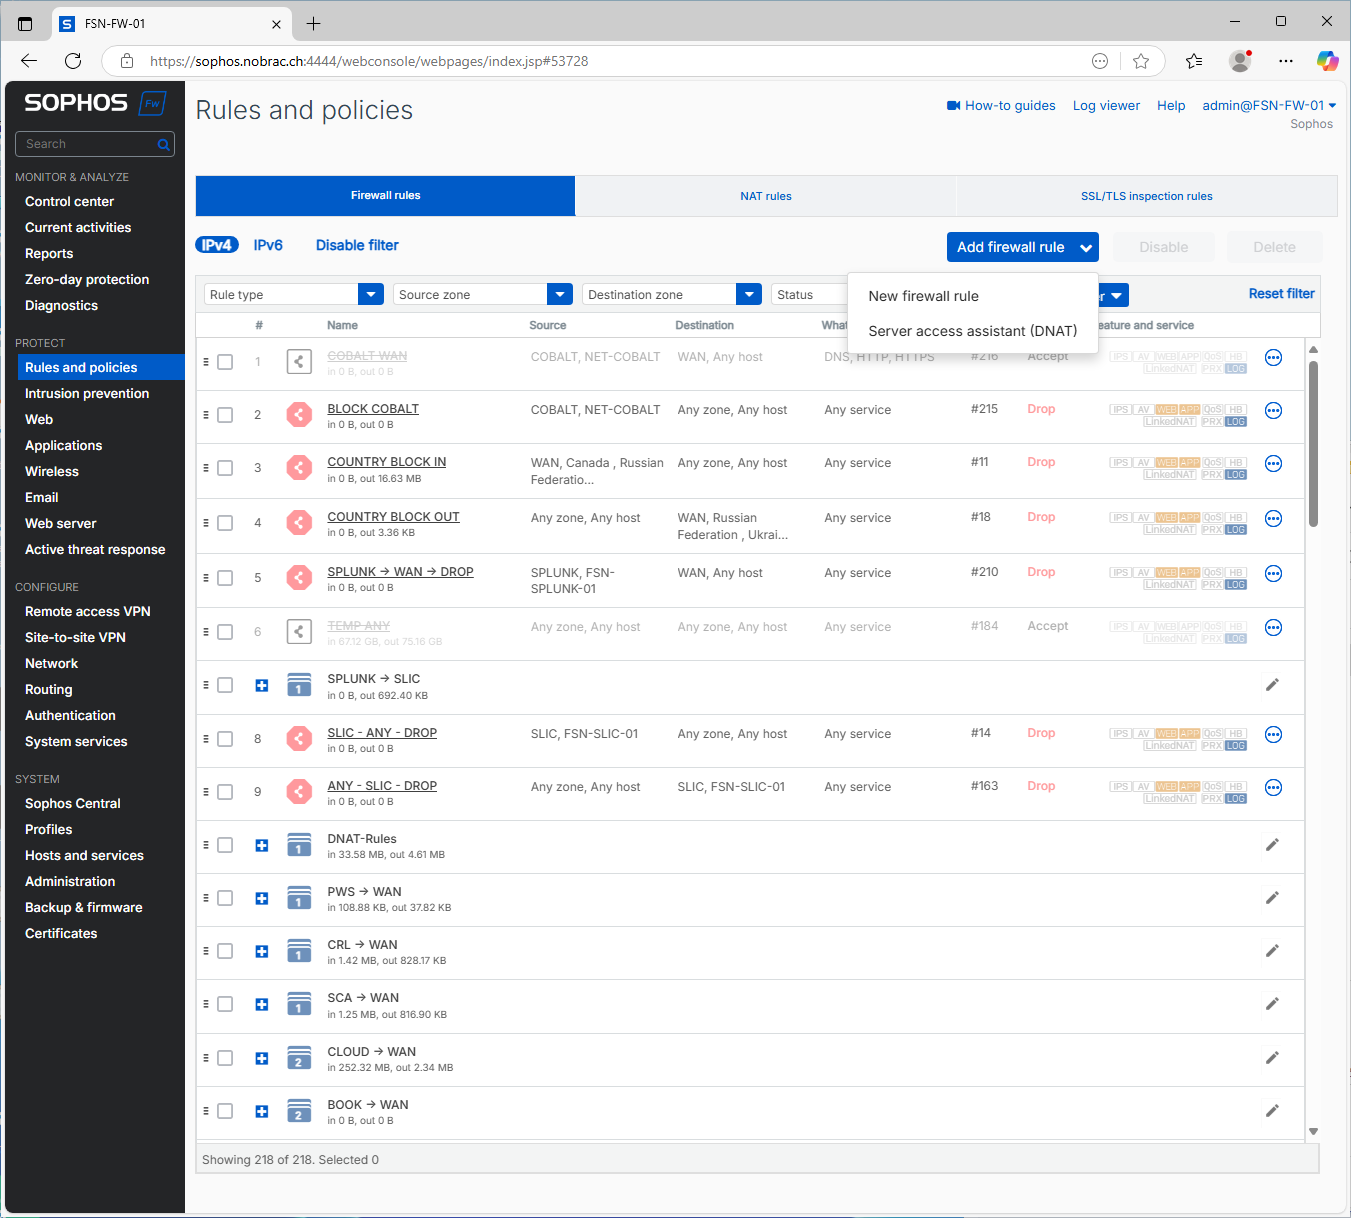
Select your Exchange for the internal server IP address.

Select your WAN-Port for the public IP address.

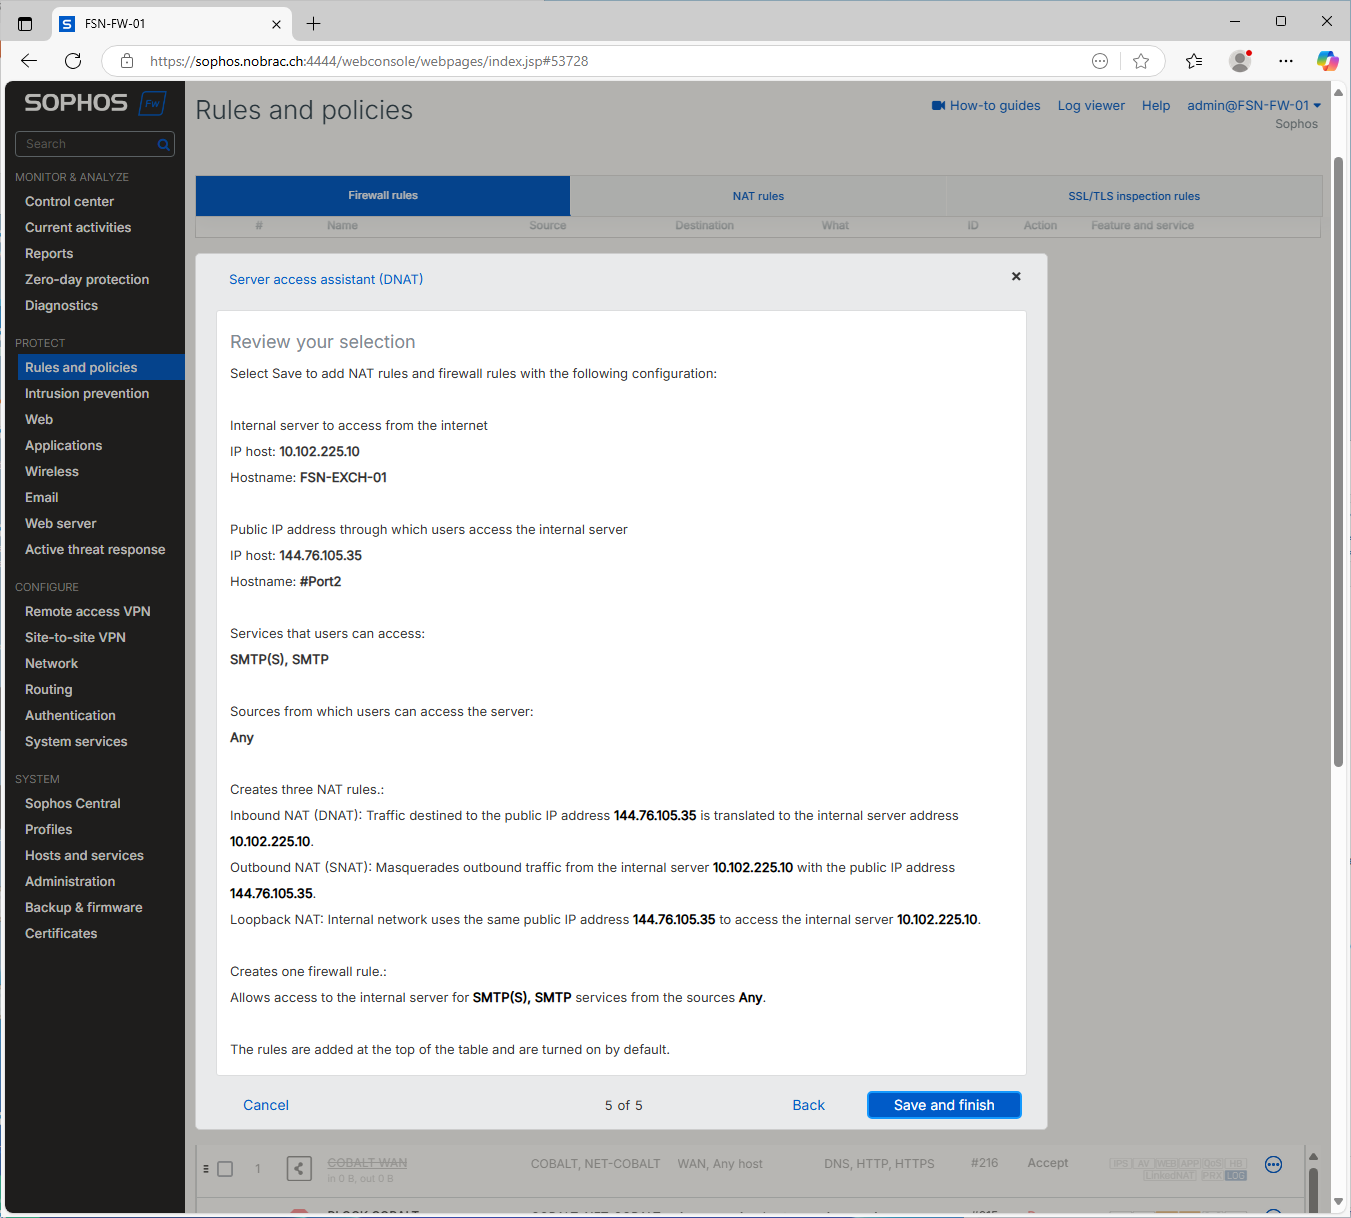
Select “SMTP” and “SMTP(S)” for the services.

Select “Any” for the external source networks and devices.
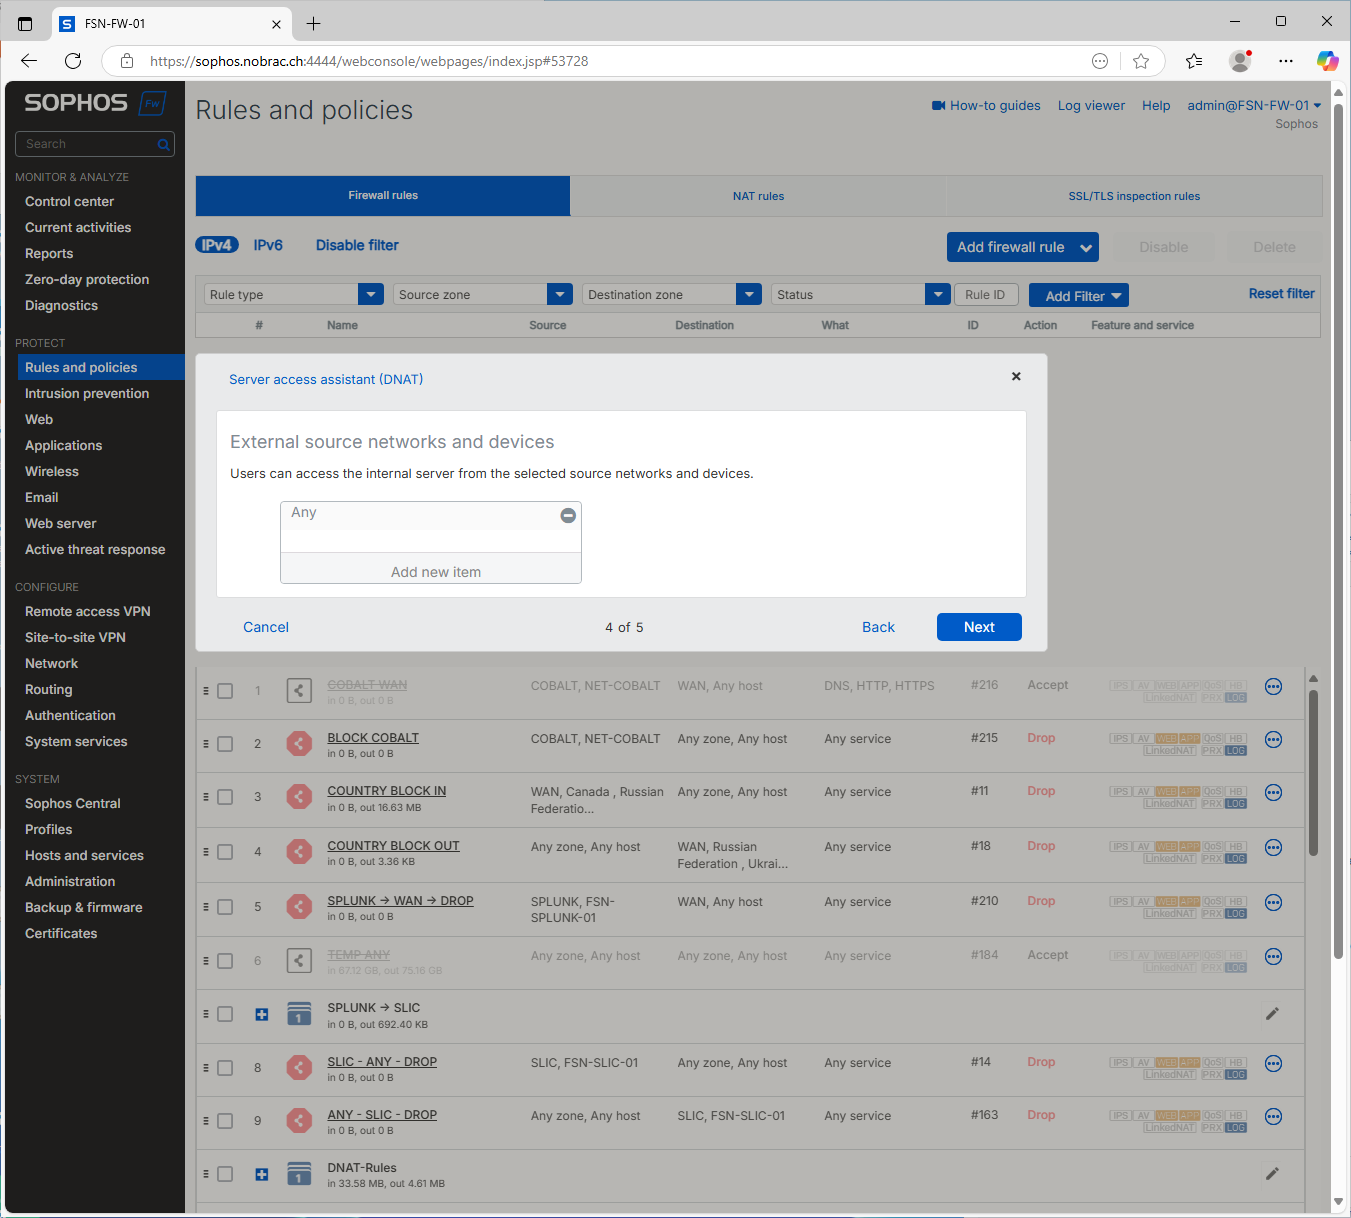
Review your selection and click on save.
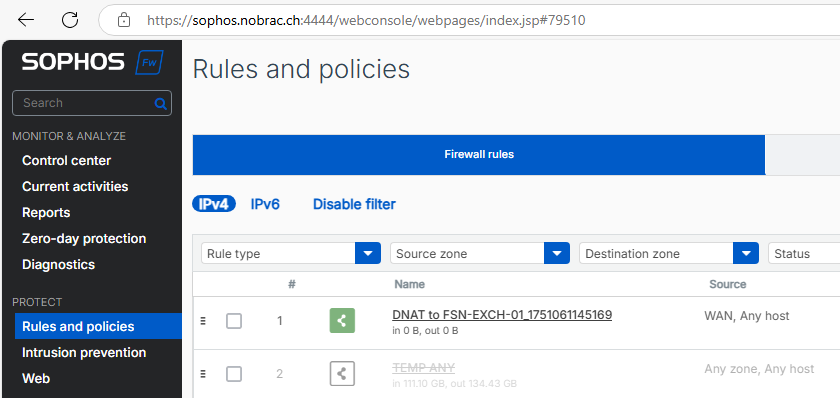
The firewall rule for the DNAT rule should then be visible on the overview page. You can change the name of the rule.
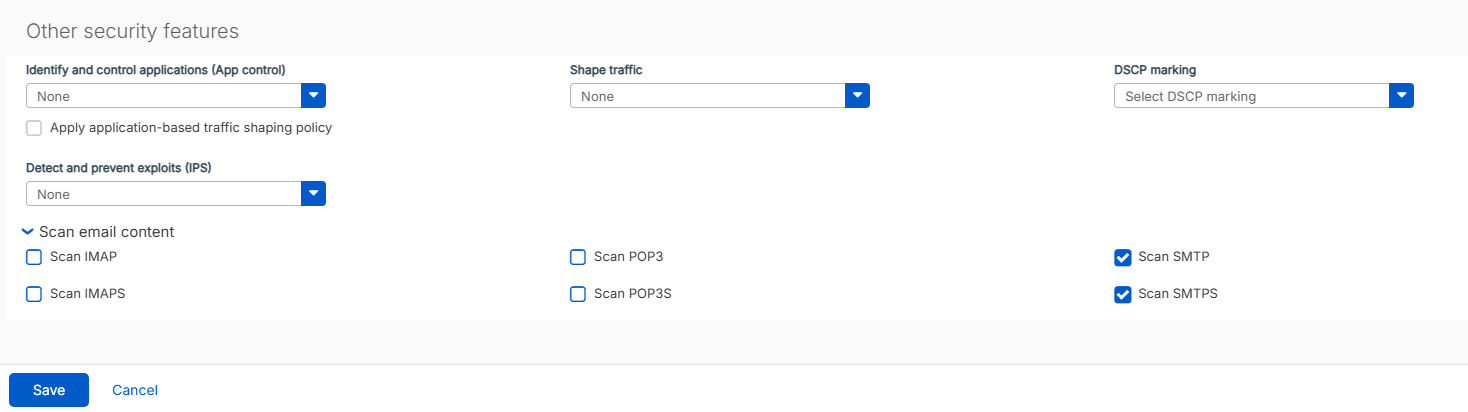
We now edit the rule and scroll all the way down. Here we then check the “Scan SMTP” and “Scan SMTPS” options under the “Scan email content” tab.
Configure Web Server TLS-Ciphers
By default, Sophos allows you to use either TLS 1.2 or TLS 1.3 as web server ciphers, but not both together. You have to configure this yourself.
In your Sophos XG, navigate to “Web server” -> “General settings”.

We are now configuring TLS 1.2 and TLS 1.3. At the bottom there is the “TLS version settings” tab.
Configure the following:
TLS version: Custom TLS
Protocols:
|
|
Cipher suite:
|
|
TLS v1.3 cipher suite only:
|
|
It should look like this.

Configure E-Mail Security
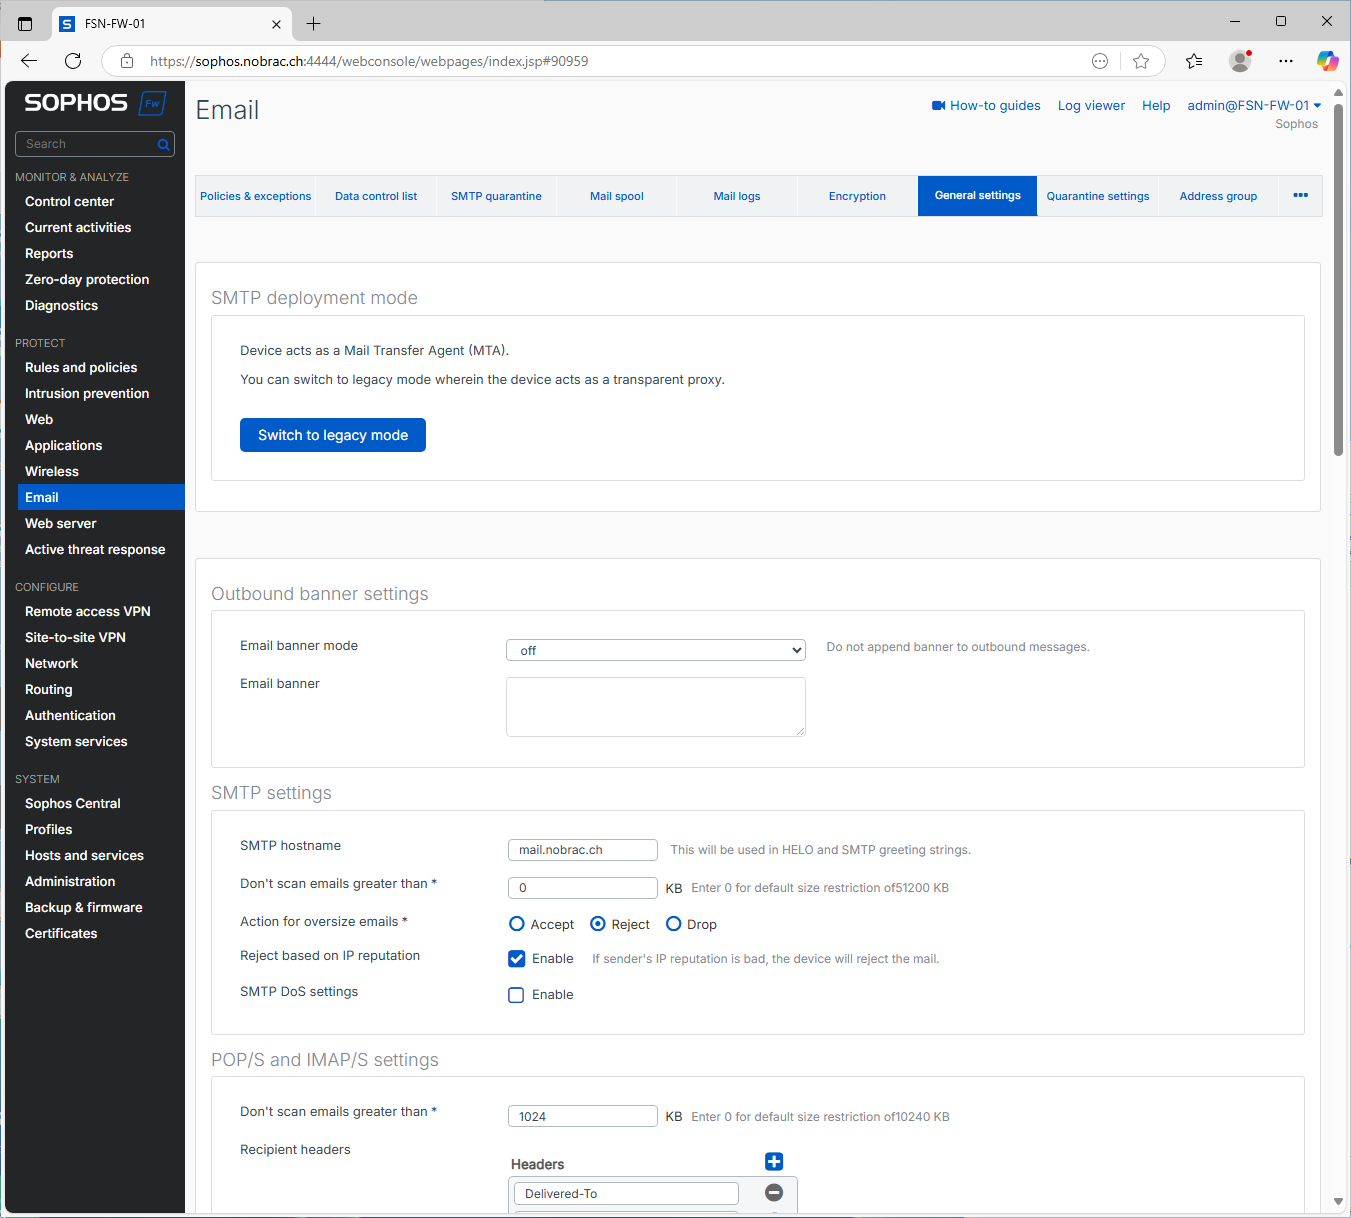
In your Sophos XG, navigate to “Email” -> “General settings”.
General settings
SMTP Settings
Under the “General settings” tab there is an item with “SMTP settings”. Here you enter your SMTP hostname (in my case again mail.nobrac.ch). I have set “Action for oversize emails” to reject, but you can of course adjust this as you wish. “Reject based on IP reputation” should be checked. Don’t forget to save the settings by clicking on “Apply”.
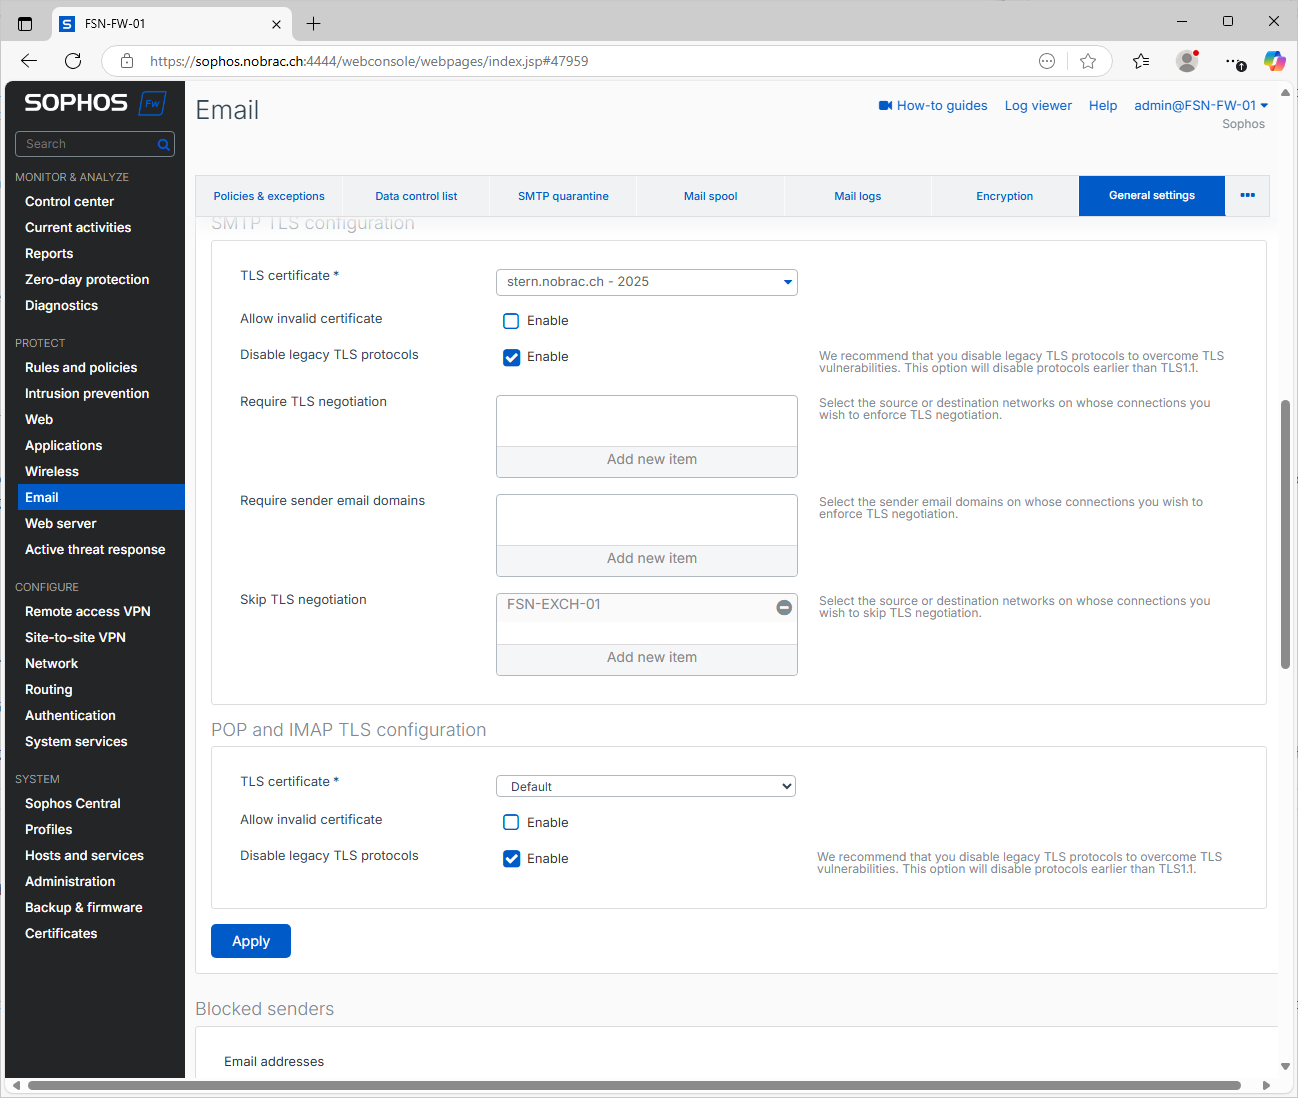
SMTP TLS Configuration
A little further down you will find the item “SMTP TLS configuration”. Now select your wildcard certificate under “TLS certificate”. Uncheck “Allow invalid certificate” and check “Disable legacy TLS protocols”.

POP and IMAP TLS Configuration
This is only optional, as we don’t need it for the tutorial, but uncheck the “Allow invalid certificate” box for the POP and IMAP options.
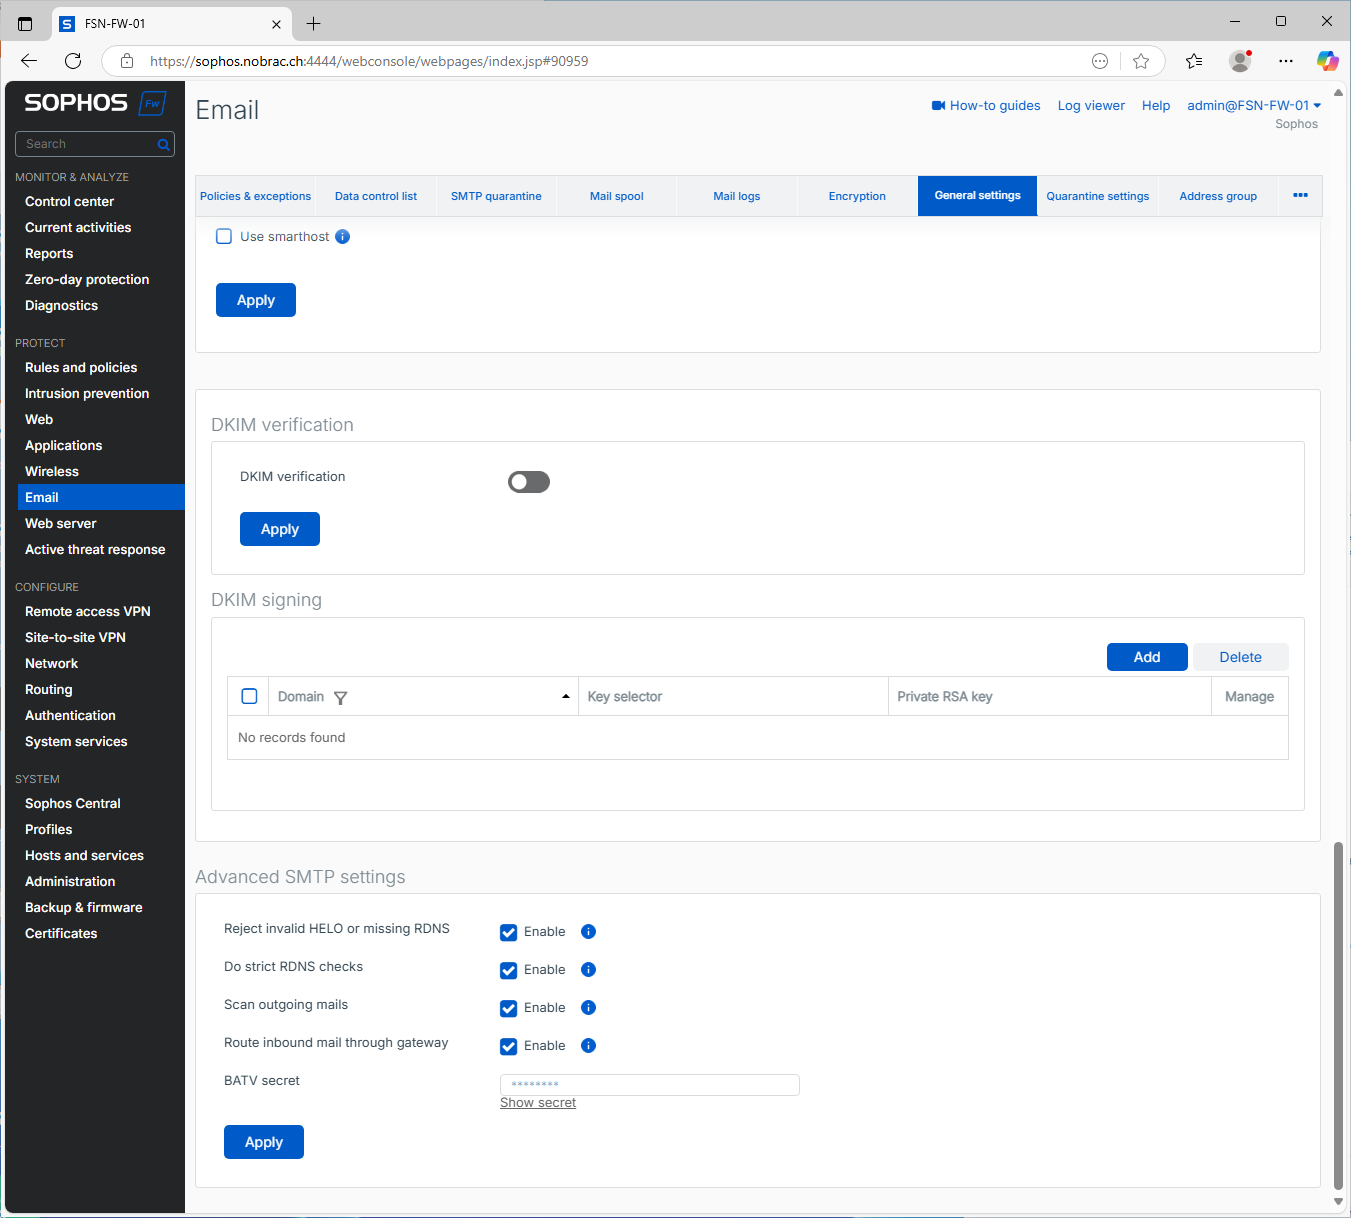
Advanced SMTP Settings
A little further down you will find the item “Advanced SMTP settings”. Simply check all options here.
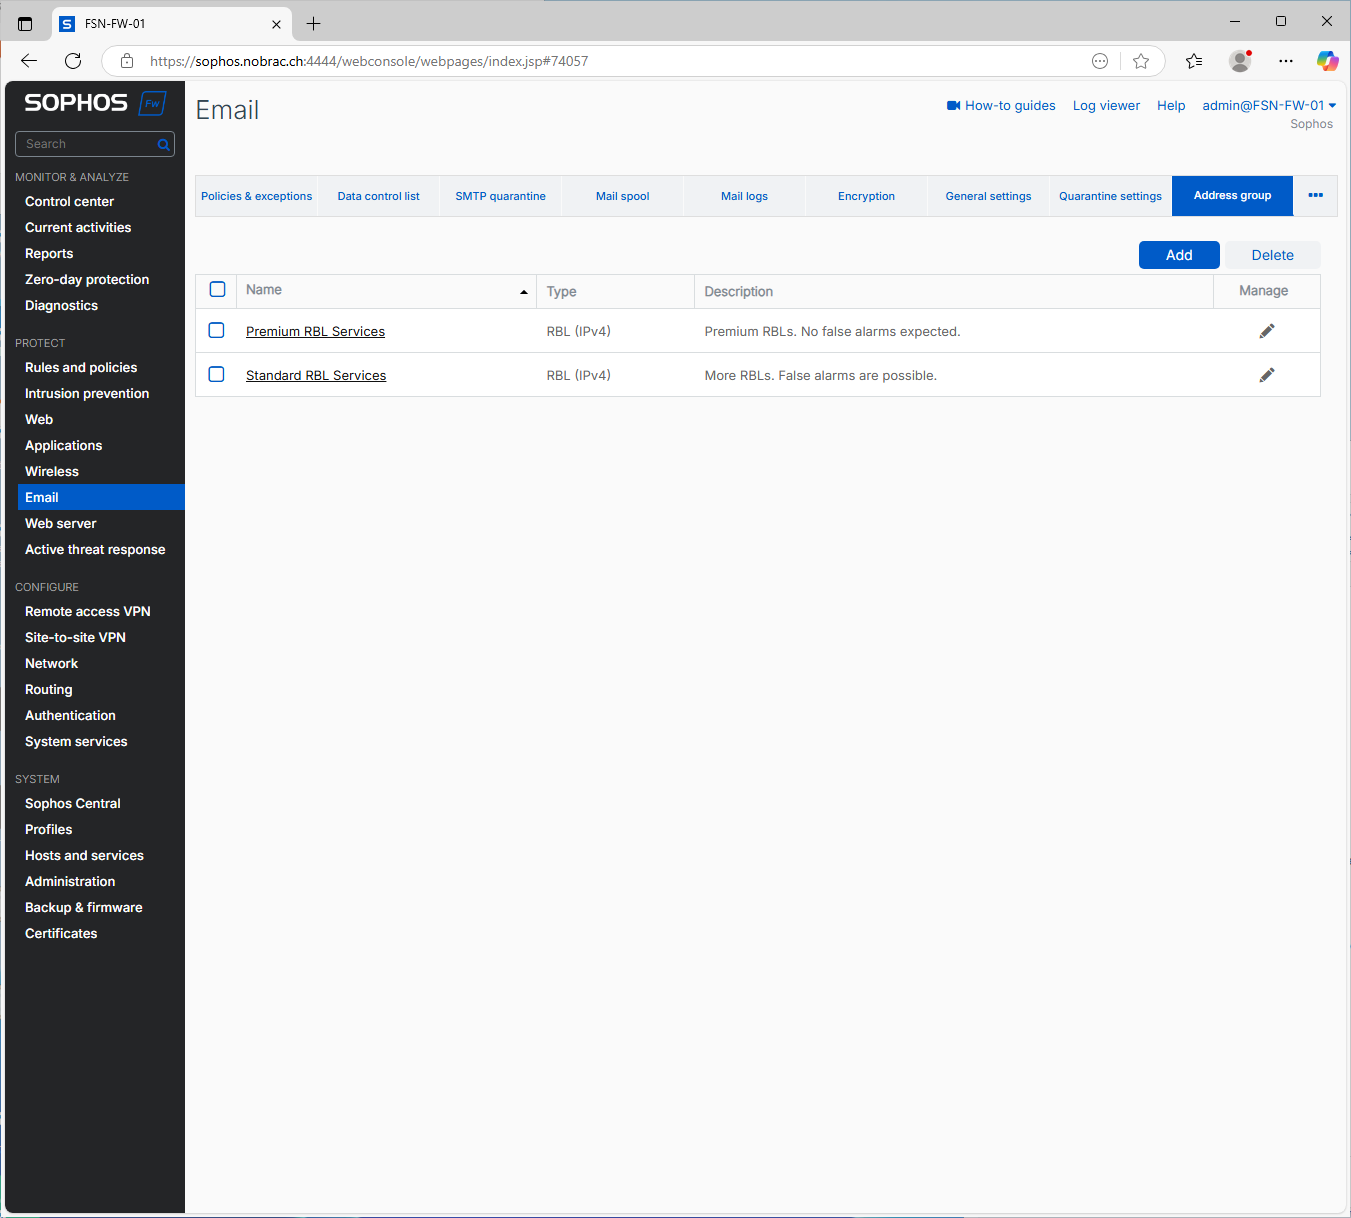
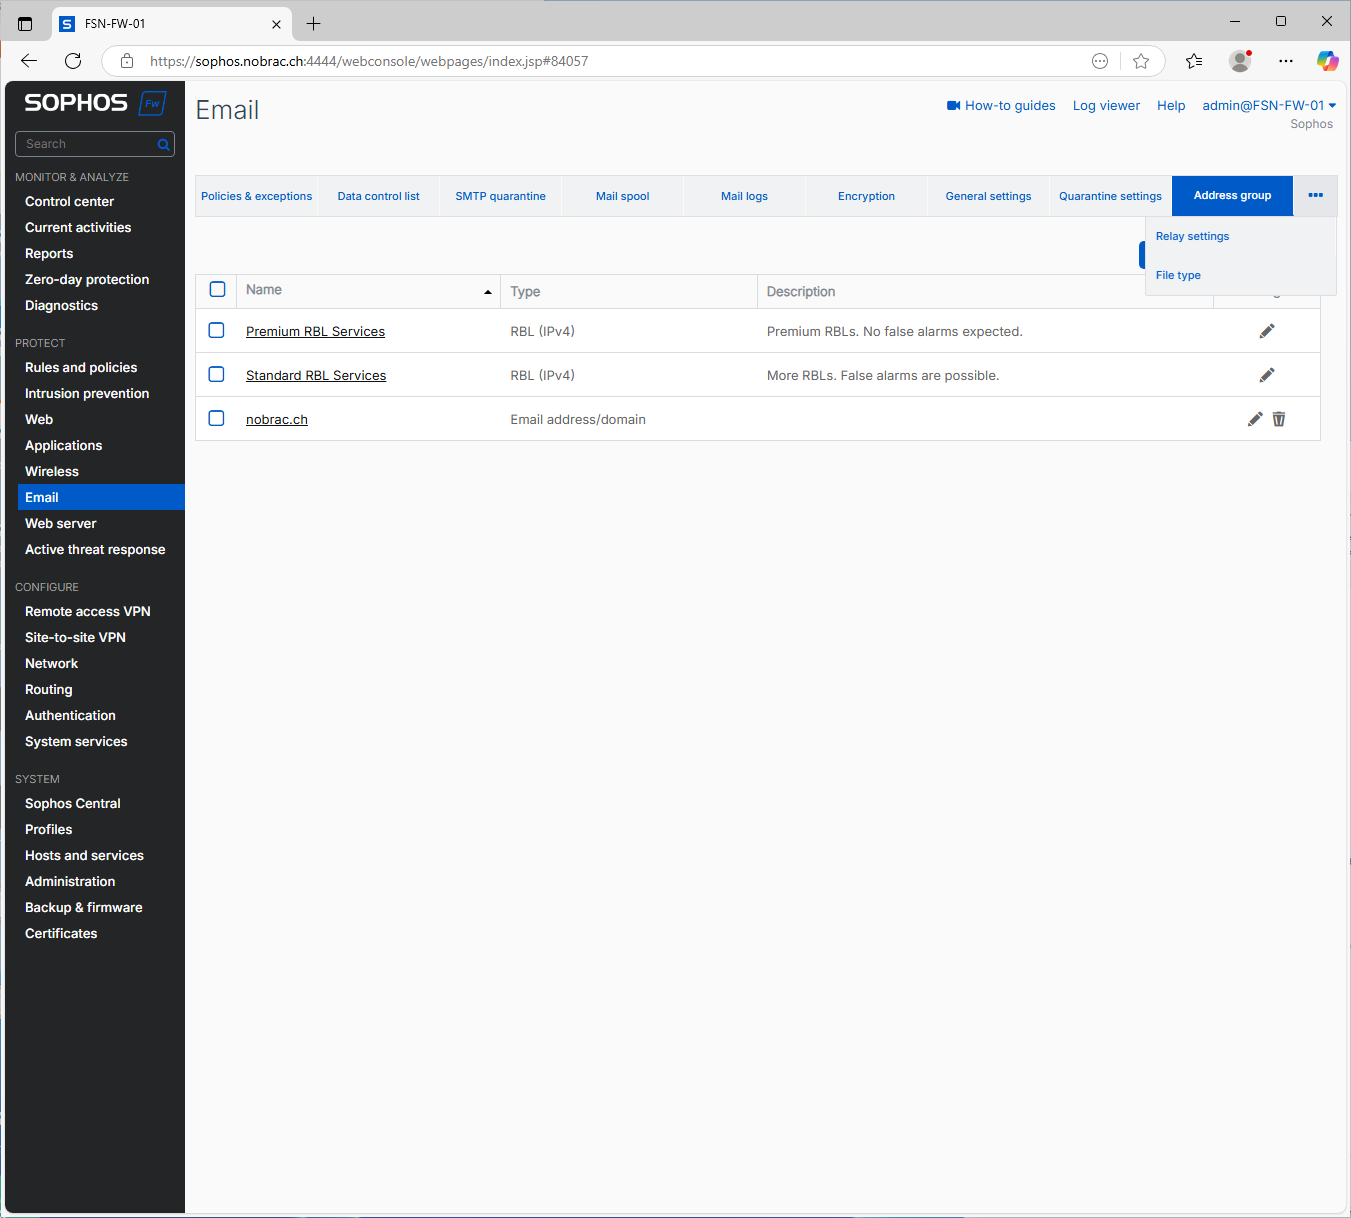
Address group
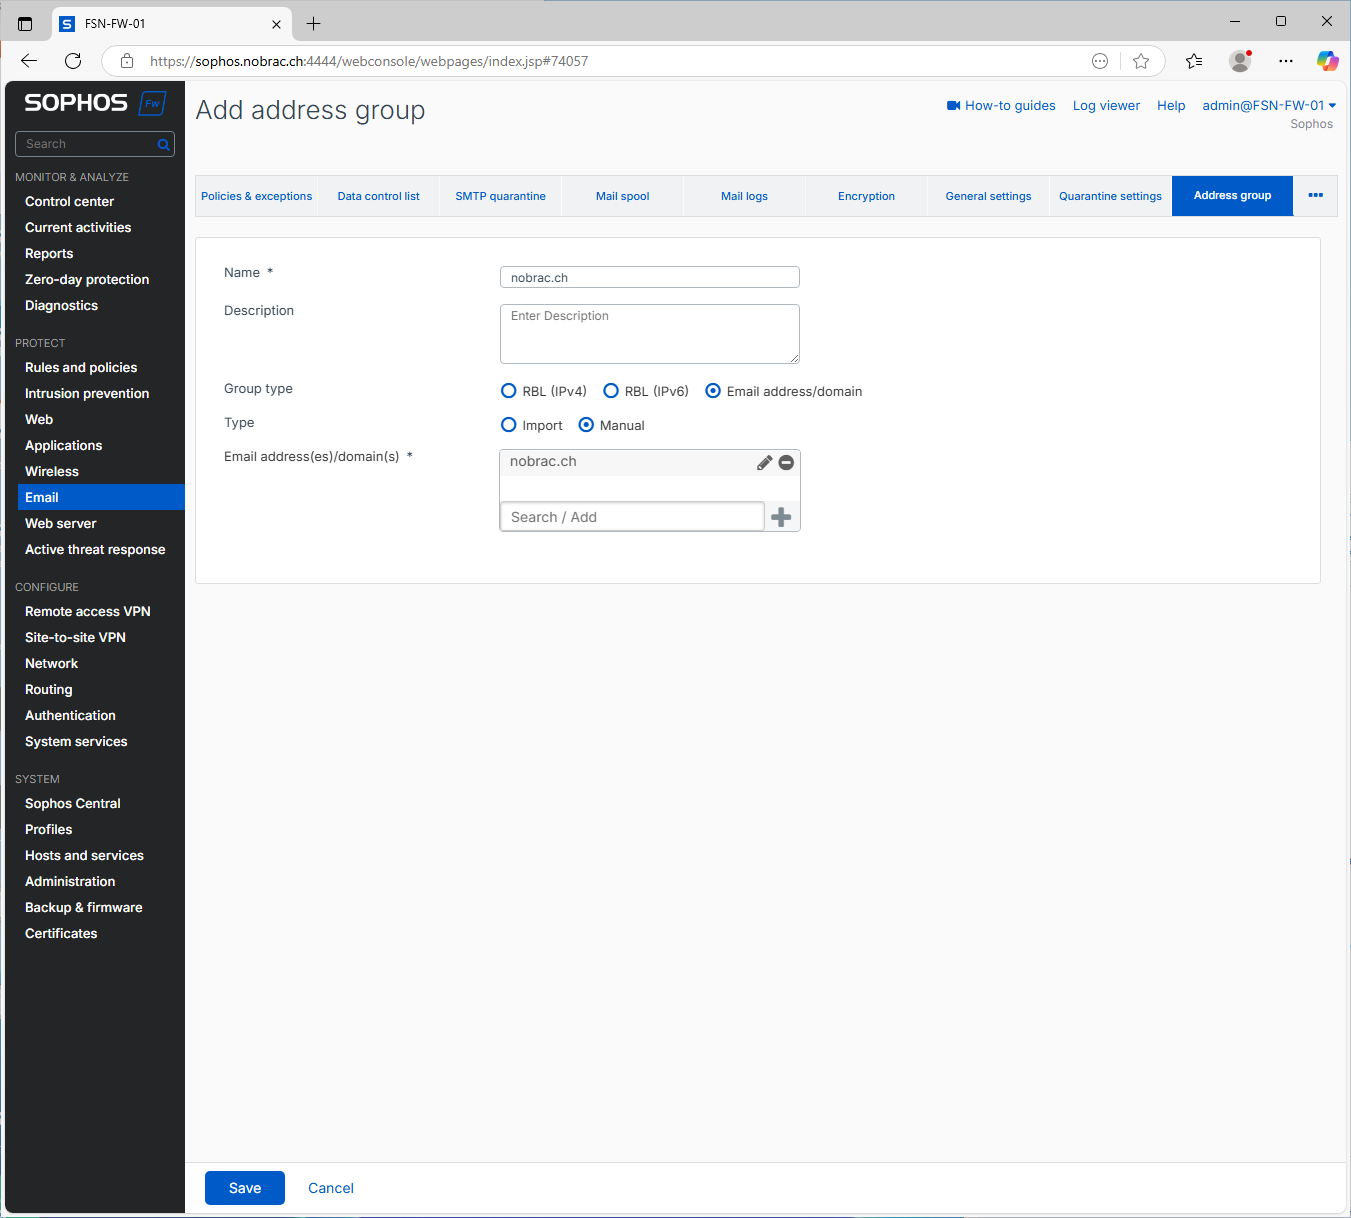
In the top menu bar, we now switch to the “Address group” tab. Here we click on “Add” to create a new address group.
Assign any name, I always use my domain here. Select “Email address/domain” as the group type and “Manual” as the type. Then enter your domain at the bottom.
We should then see our newly created address group in the address group overview.

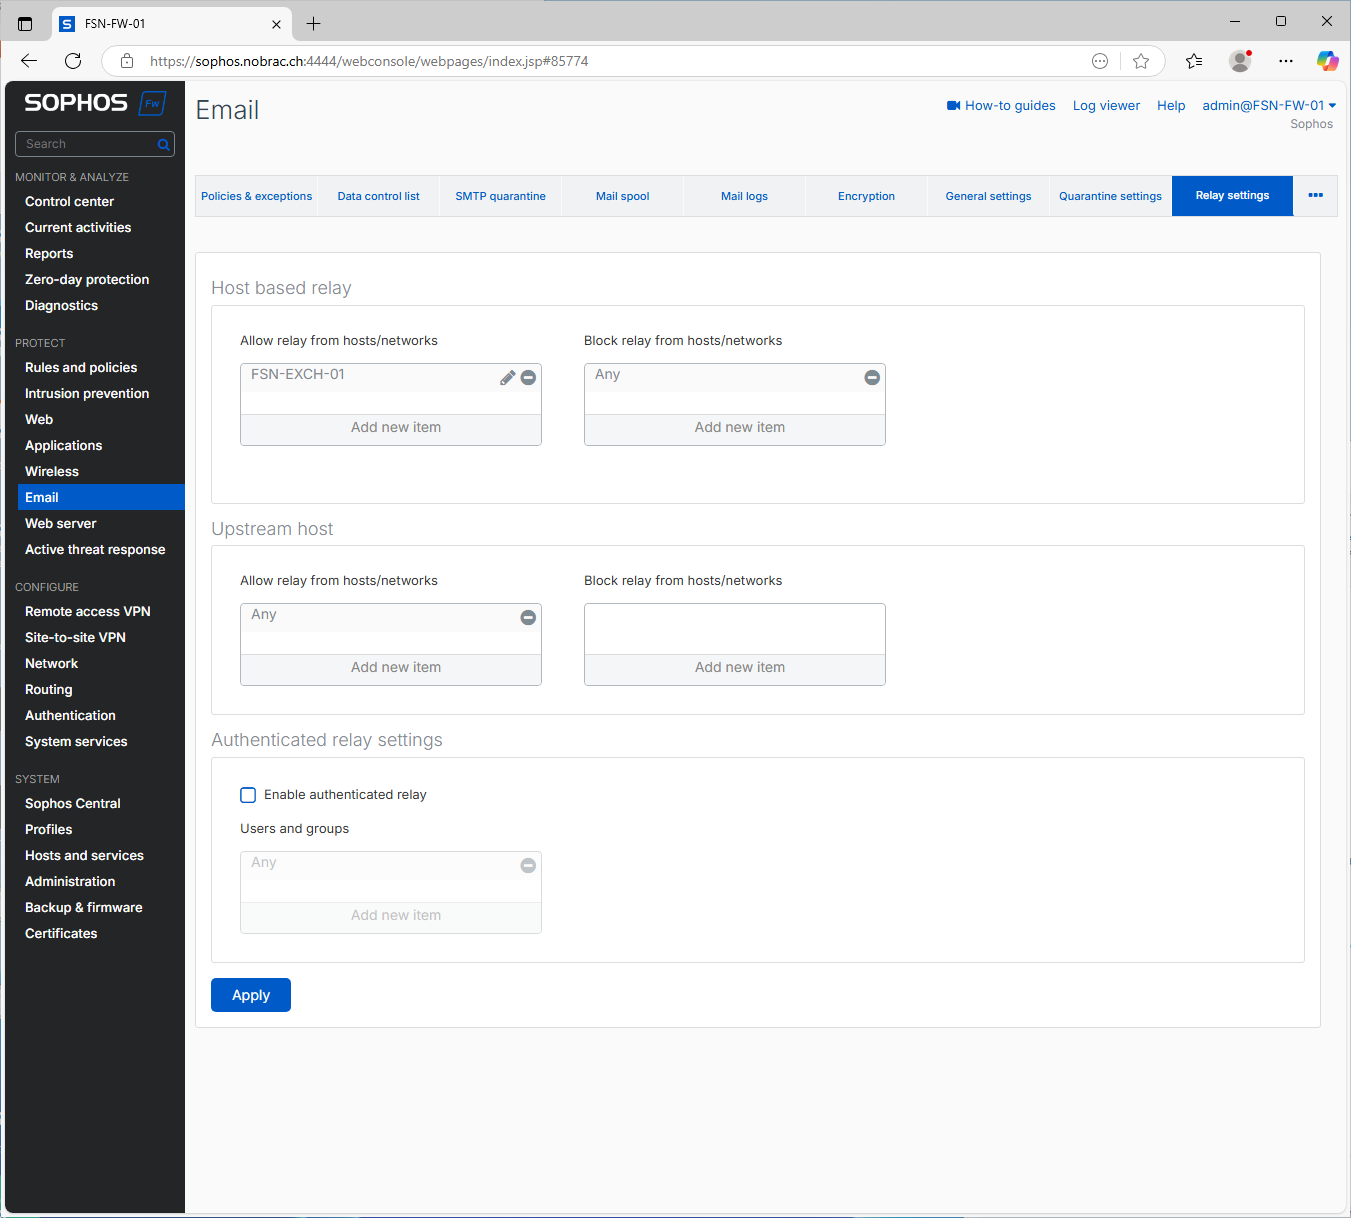
Relay Settings
In the top menu bar there is a tab with three dots (far right). Below this is the “Relay settings” tab. Open it.
Enter your Exchange server as a permitted relay (Allow relay from hosts/networks). The remaining options can be left as they are.
Policies & Exceptions
In the top menu bar on the far left there is the “Policies & Exceptions” tab.
Policies
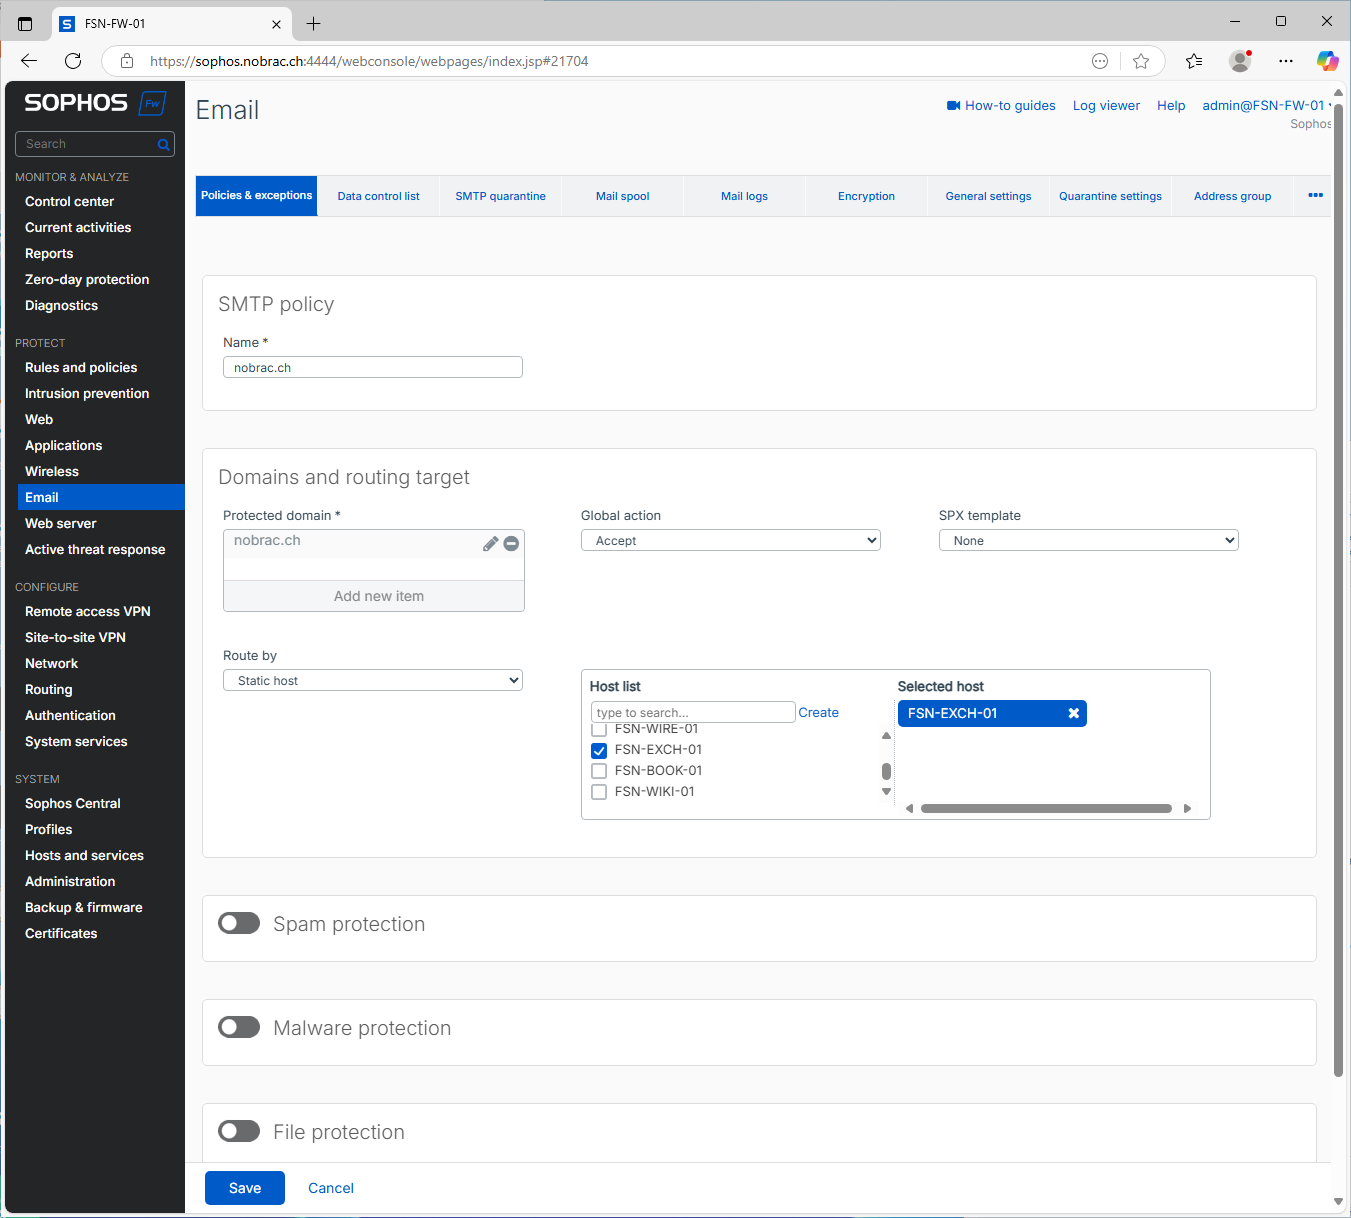
Click on “Add policy” under “Policies” and then on “SMTP route & scan”.
SMTP Policy
You can assign any name you like.
Domains and Routing Target
Enter your domain and select accept in the “Global action”. Under “Routy by”, select the “Static host” option and then select your Exchange from the list.
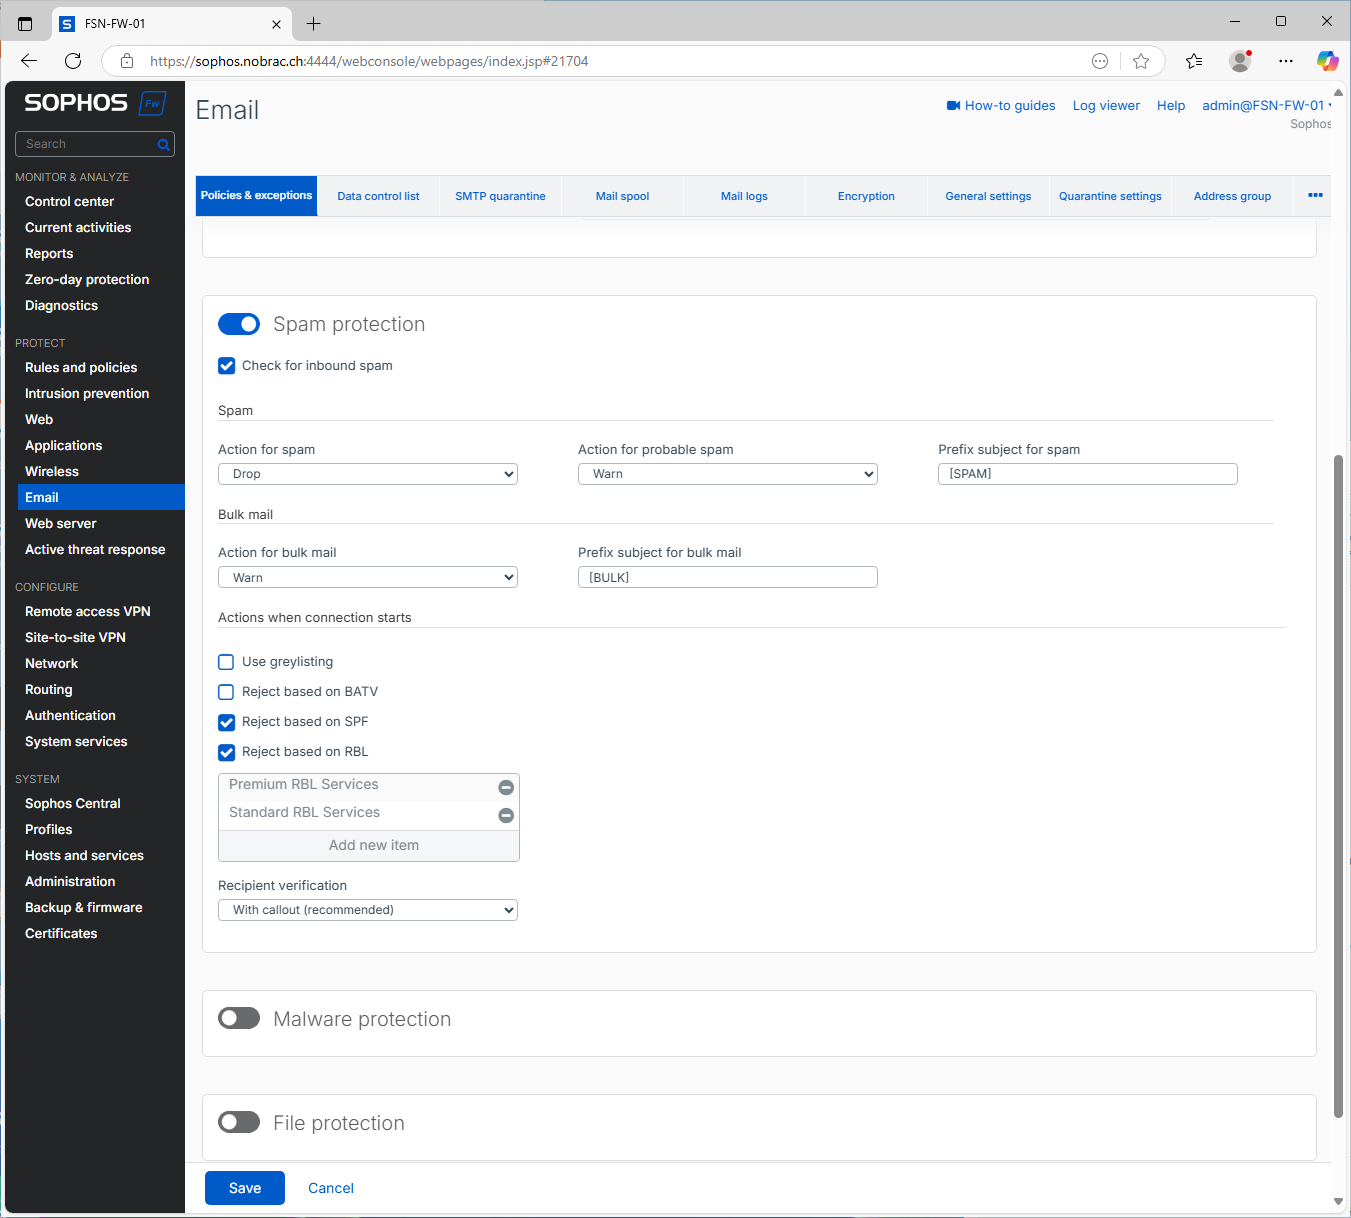
Spam Protection
You can of course change the spam settings as you wish. Otherwise, simply apply the settings as shown in the screenshot.
Malware Protection
For malware protection, I opted for maximum protection and configured everything as strictly as possible. I would recommend this to everyone.
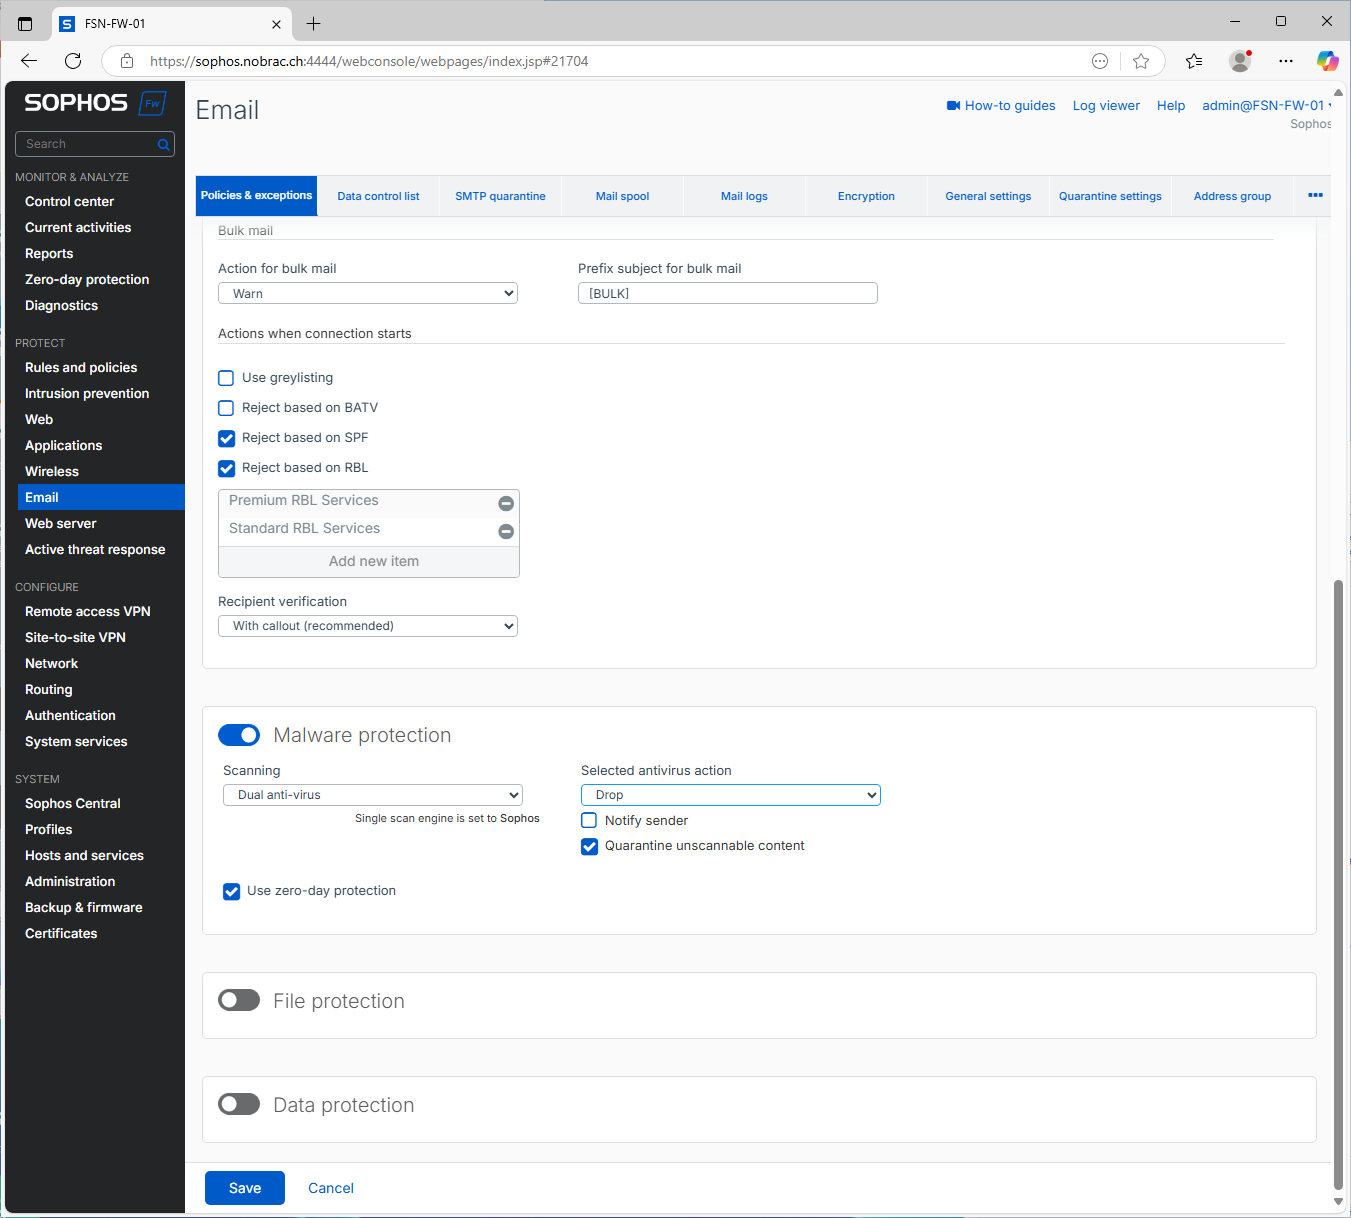
Optionally, you can also look at the “File protection” and “Data protection” options. I didn’t need these functions myself. Click on save when you are done.
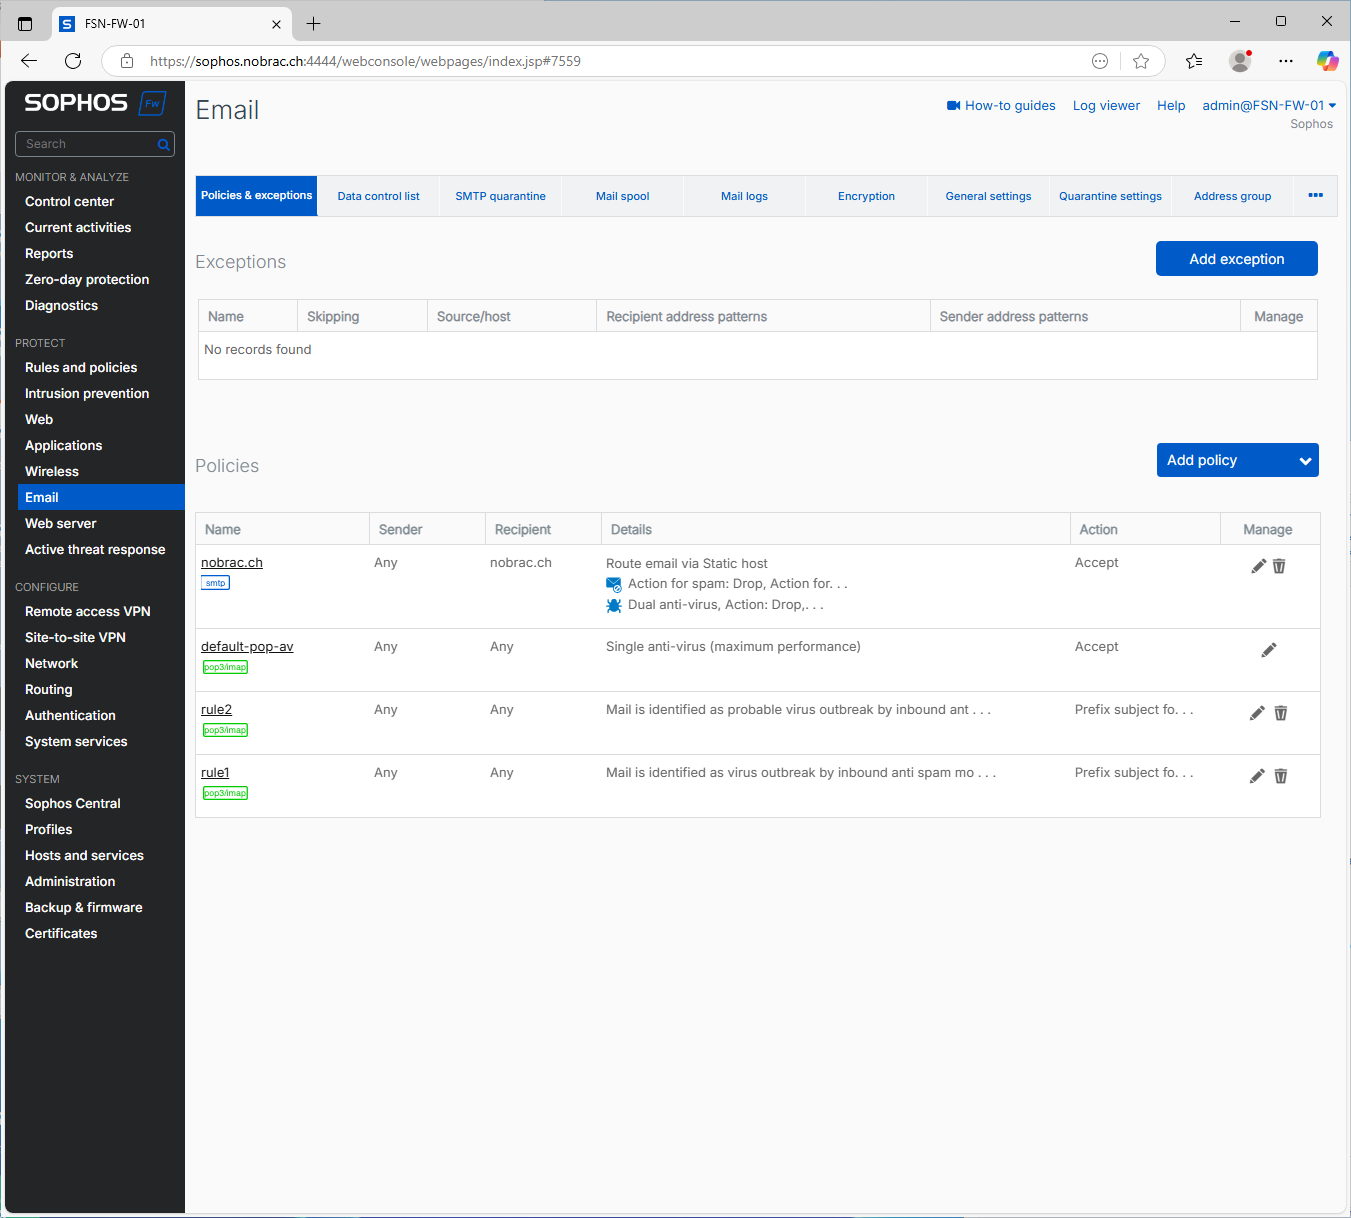
The new policy should now be visible in the overview.
First Tests
Inbound Mails
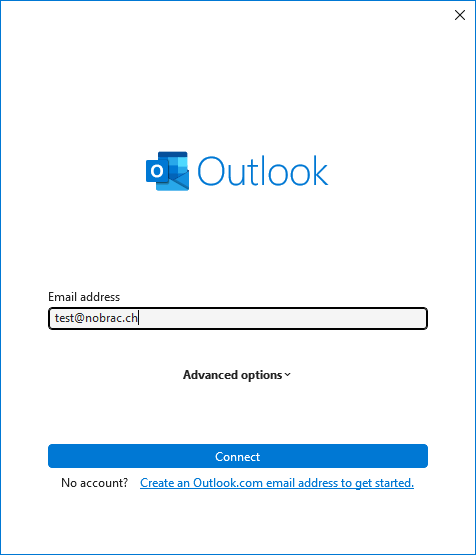
I now log in to Outlook with an AD account. If you don’t have Outlook, you can of course also use the OWA website.
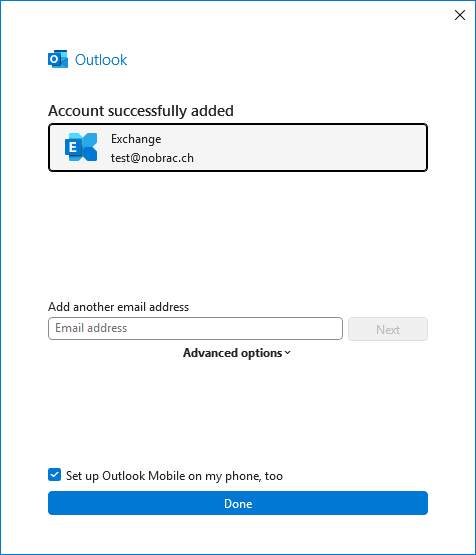
The account was added without any problems.
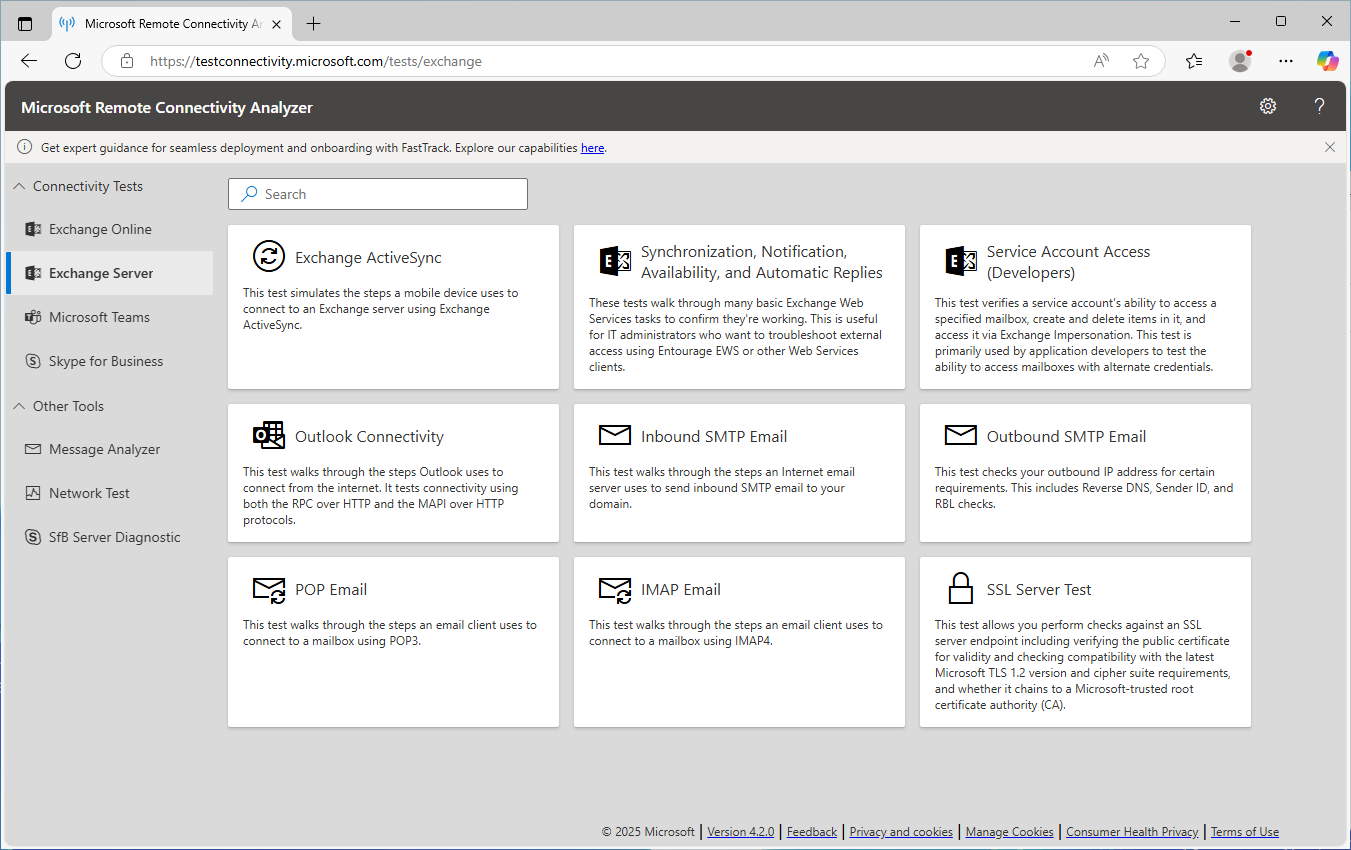
To test the mail reception, we can go to https://testconnectivity.microsoft.com/tests/exchange. Then we click on “Inbound SMTP Email”.
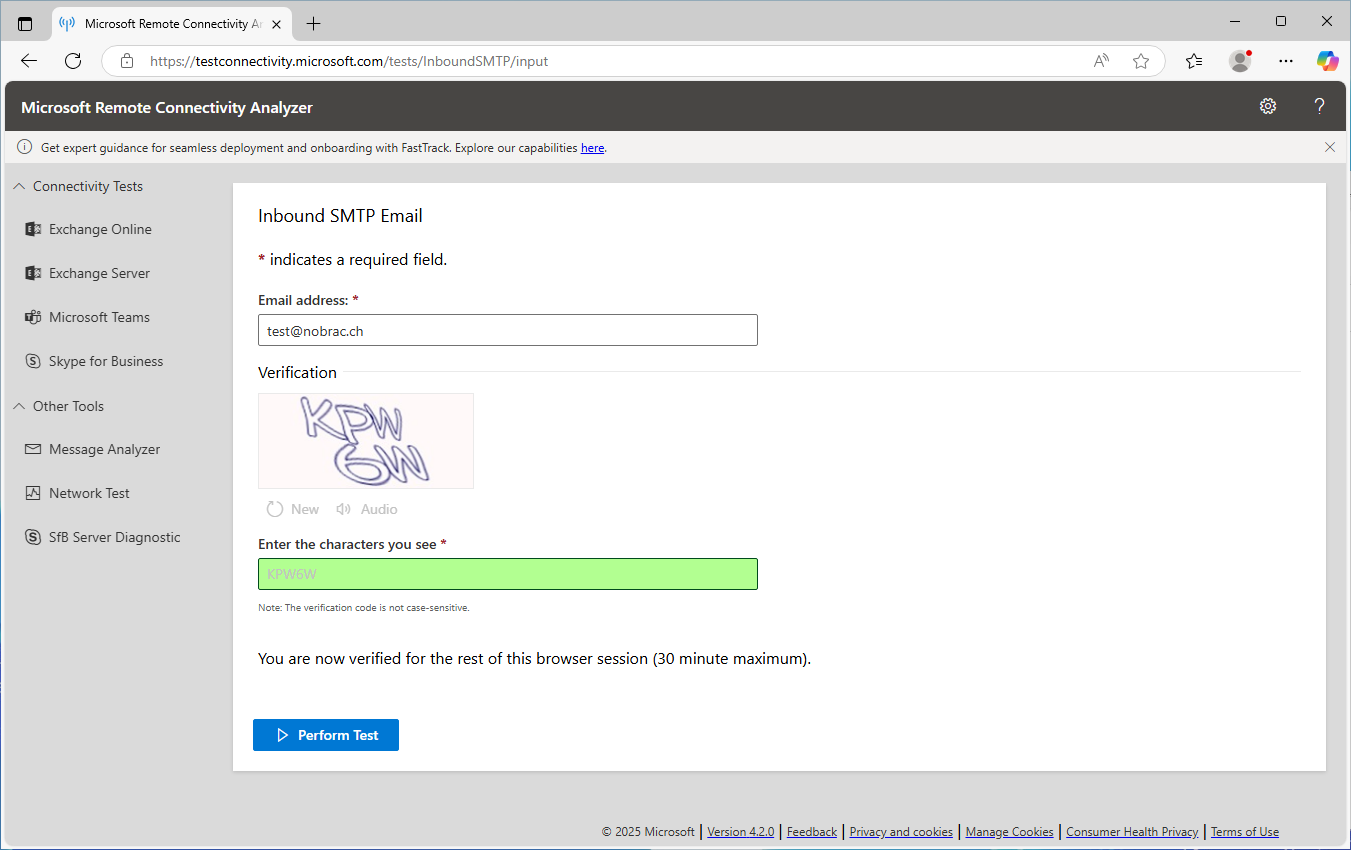
We then enter our e-mail and the captcha.
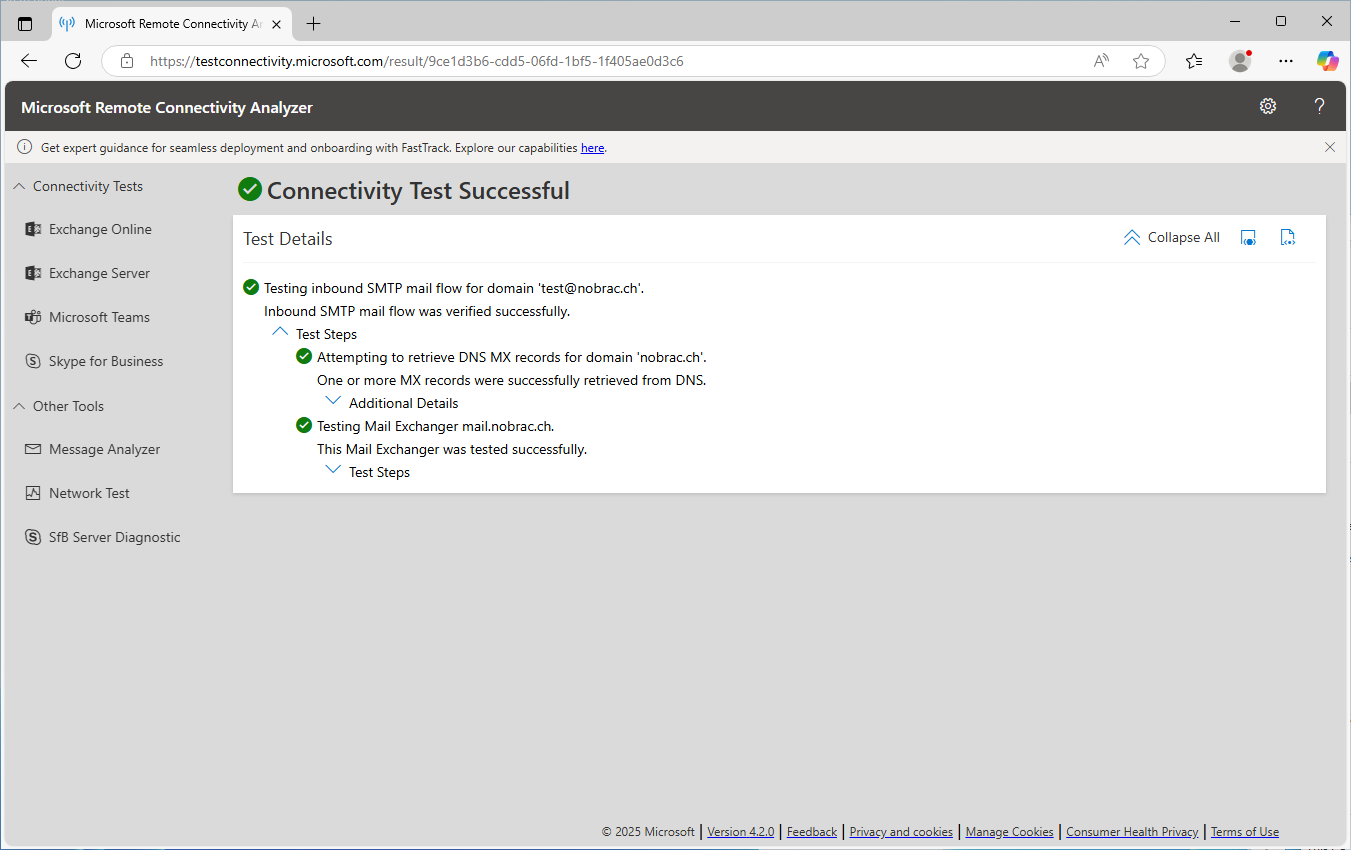
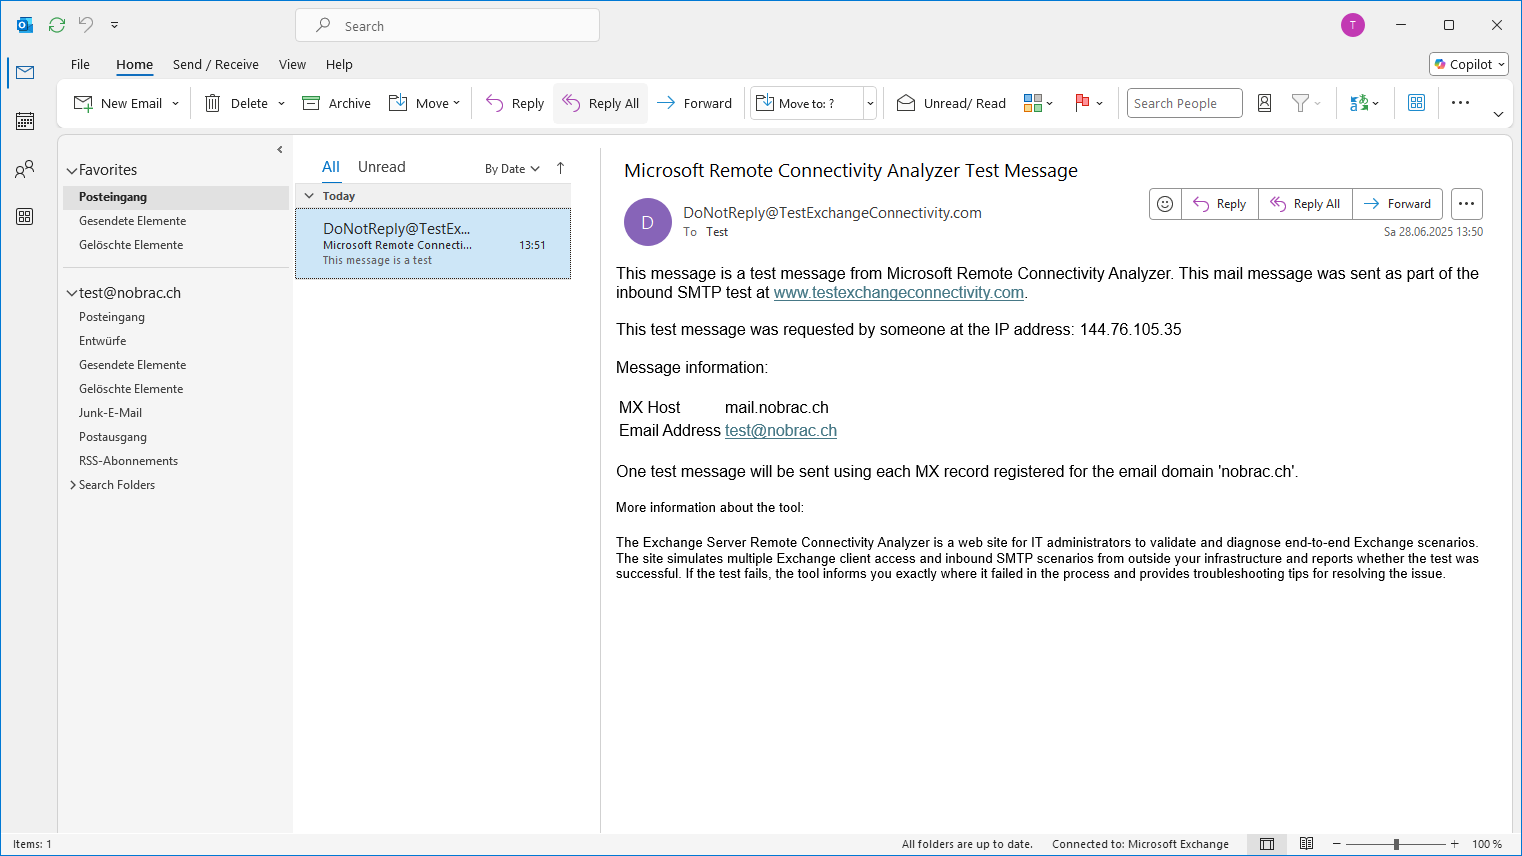
According to Microsoft, everything looks fine.
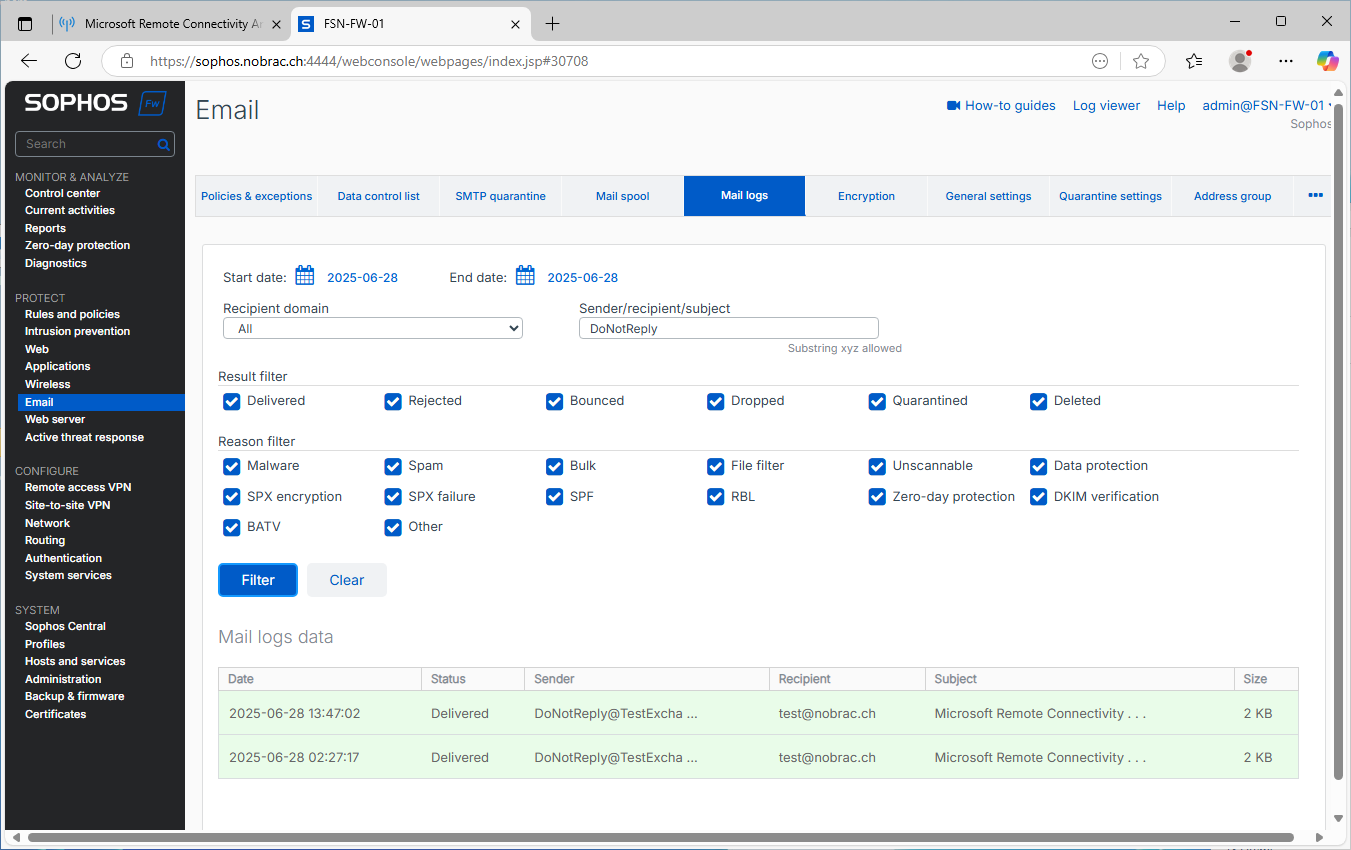
In the Sophos firewall, we can now see the incoming test mails from Microsoft in the “Mail logs” tab.
And the mail also arrived successfully in Outlook.
ActiveSync
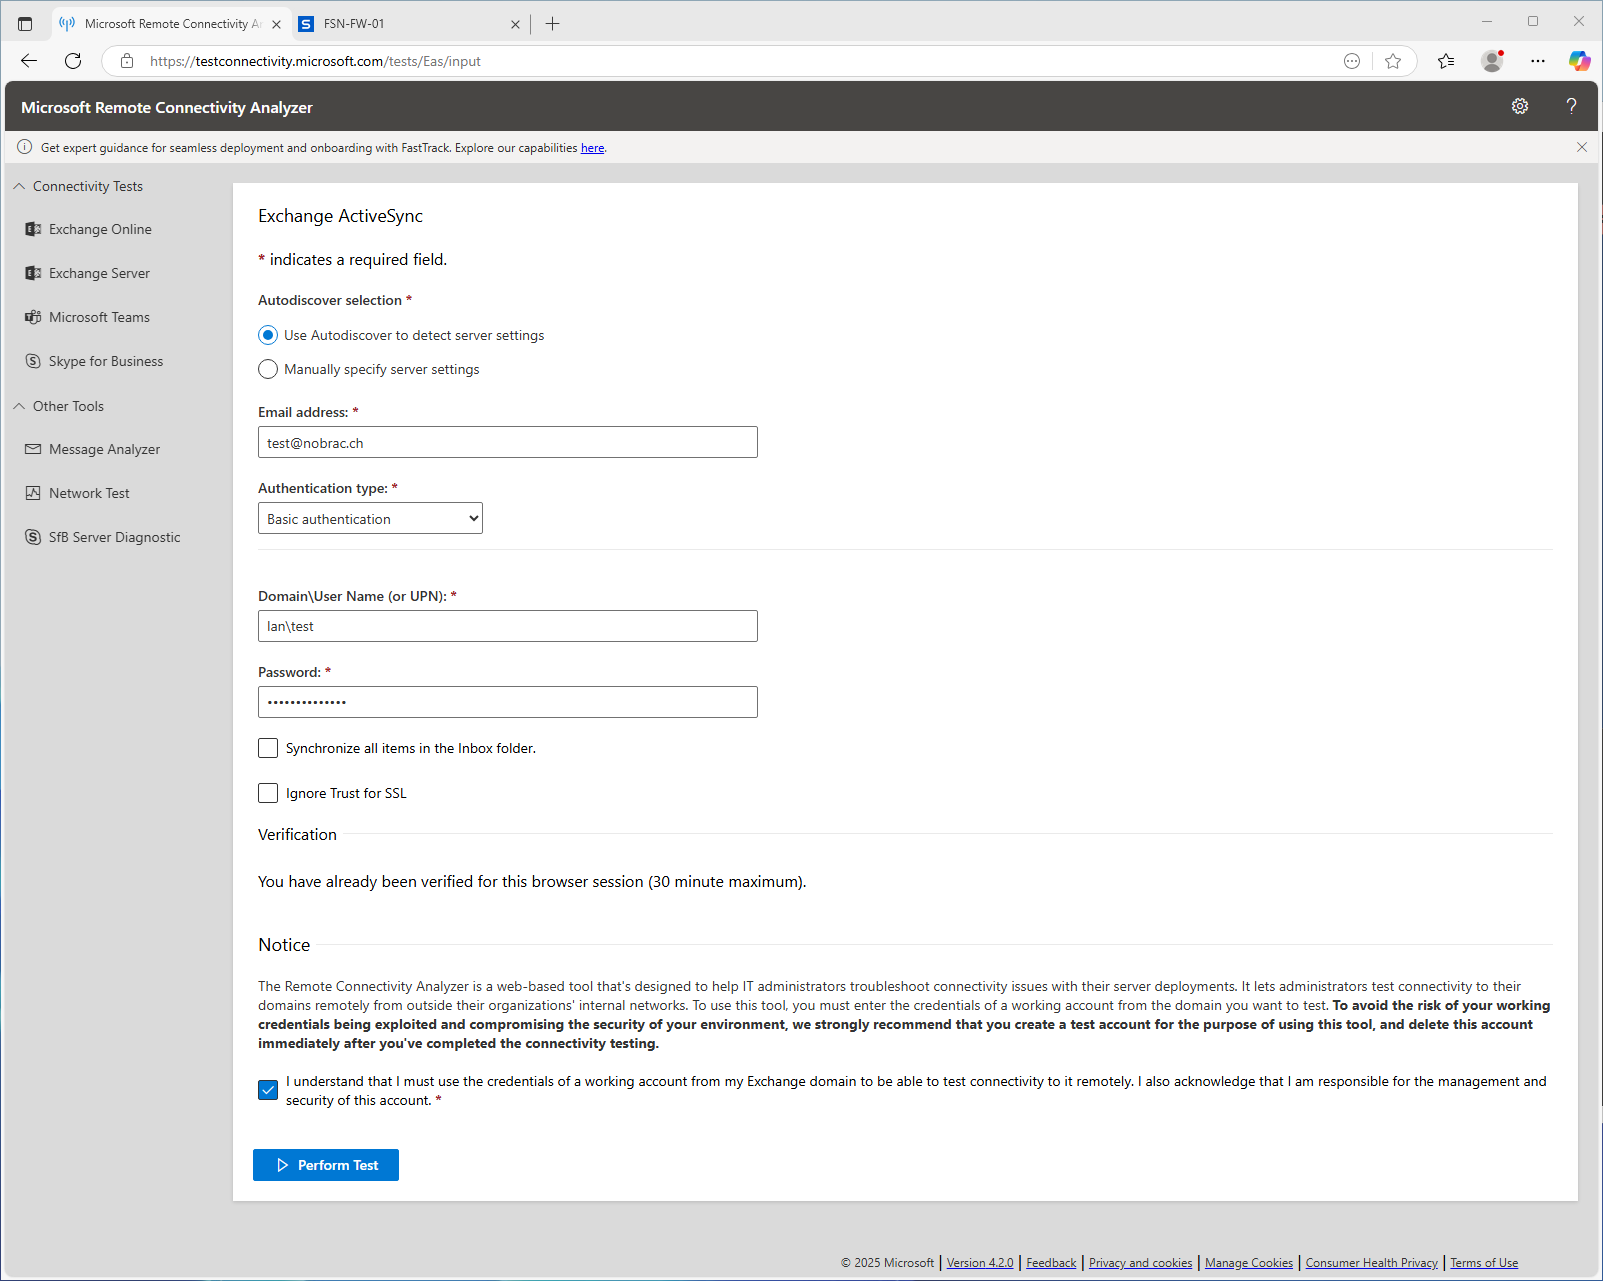
To test ActiveSync, we can go again to https://testconnectivity.microsoft.com/tests/exchange. Then we click on “Exchange ActiveSync”.
Select that our server settings are obtained by Autodiscover. Then enter your credentials again and confirm the warning below. After the test, you should change your account access data or delete the entire account.
The result may initially look worse than it actually is. Let’s take a closer look.
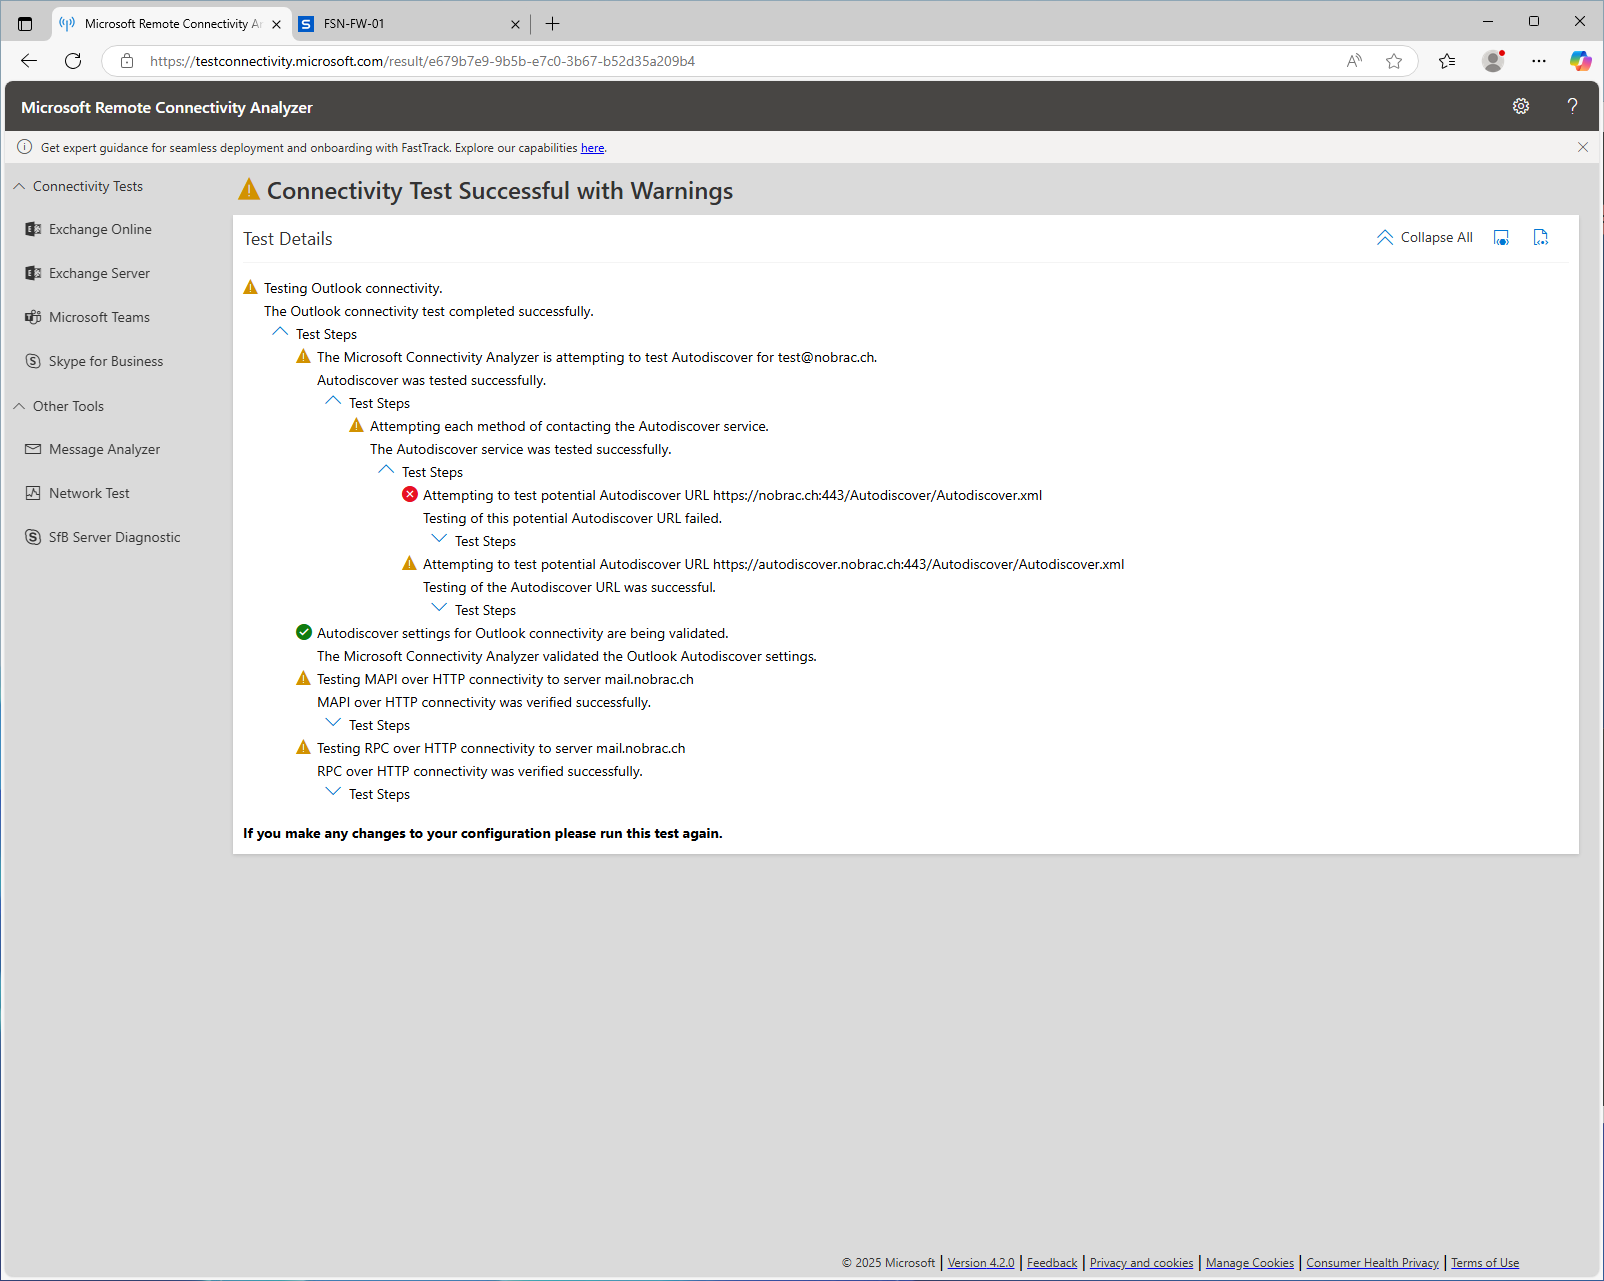
The red error indicates that it cannot obtain the Autodiscover XML file via the URL https://nobrac.ch/443/Autodiscover/Autodiscover.xml. This is also correct and intended, as our Autodiscover URL is “autodiscover.nobrac.ch”. So we can ignore that.
With the warning below, it now tries to obtain the XML file via “autodiscover.nobrac.ch”. Let’s open the message.
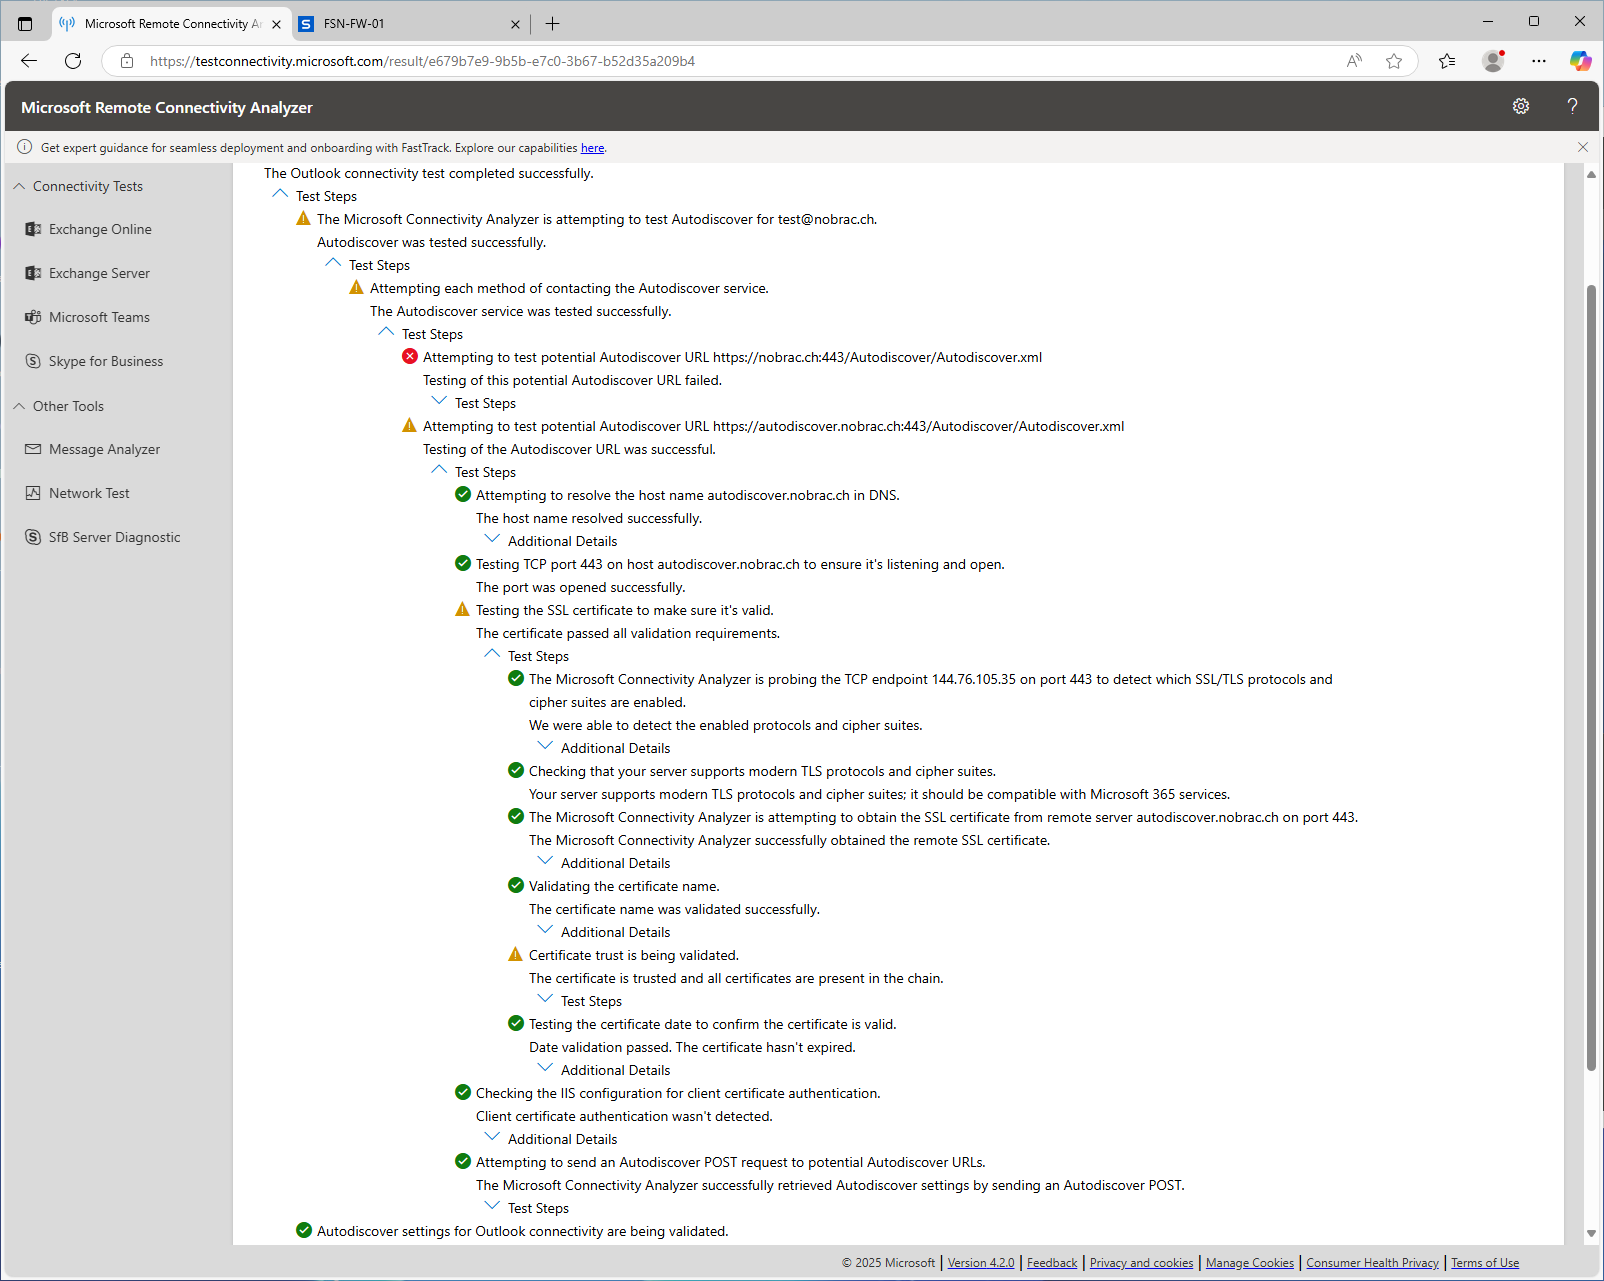
Except for a warning on the certificate, everything looks good. Let’s now check the warning as well and expand the message.
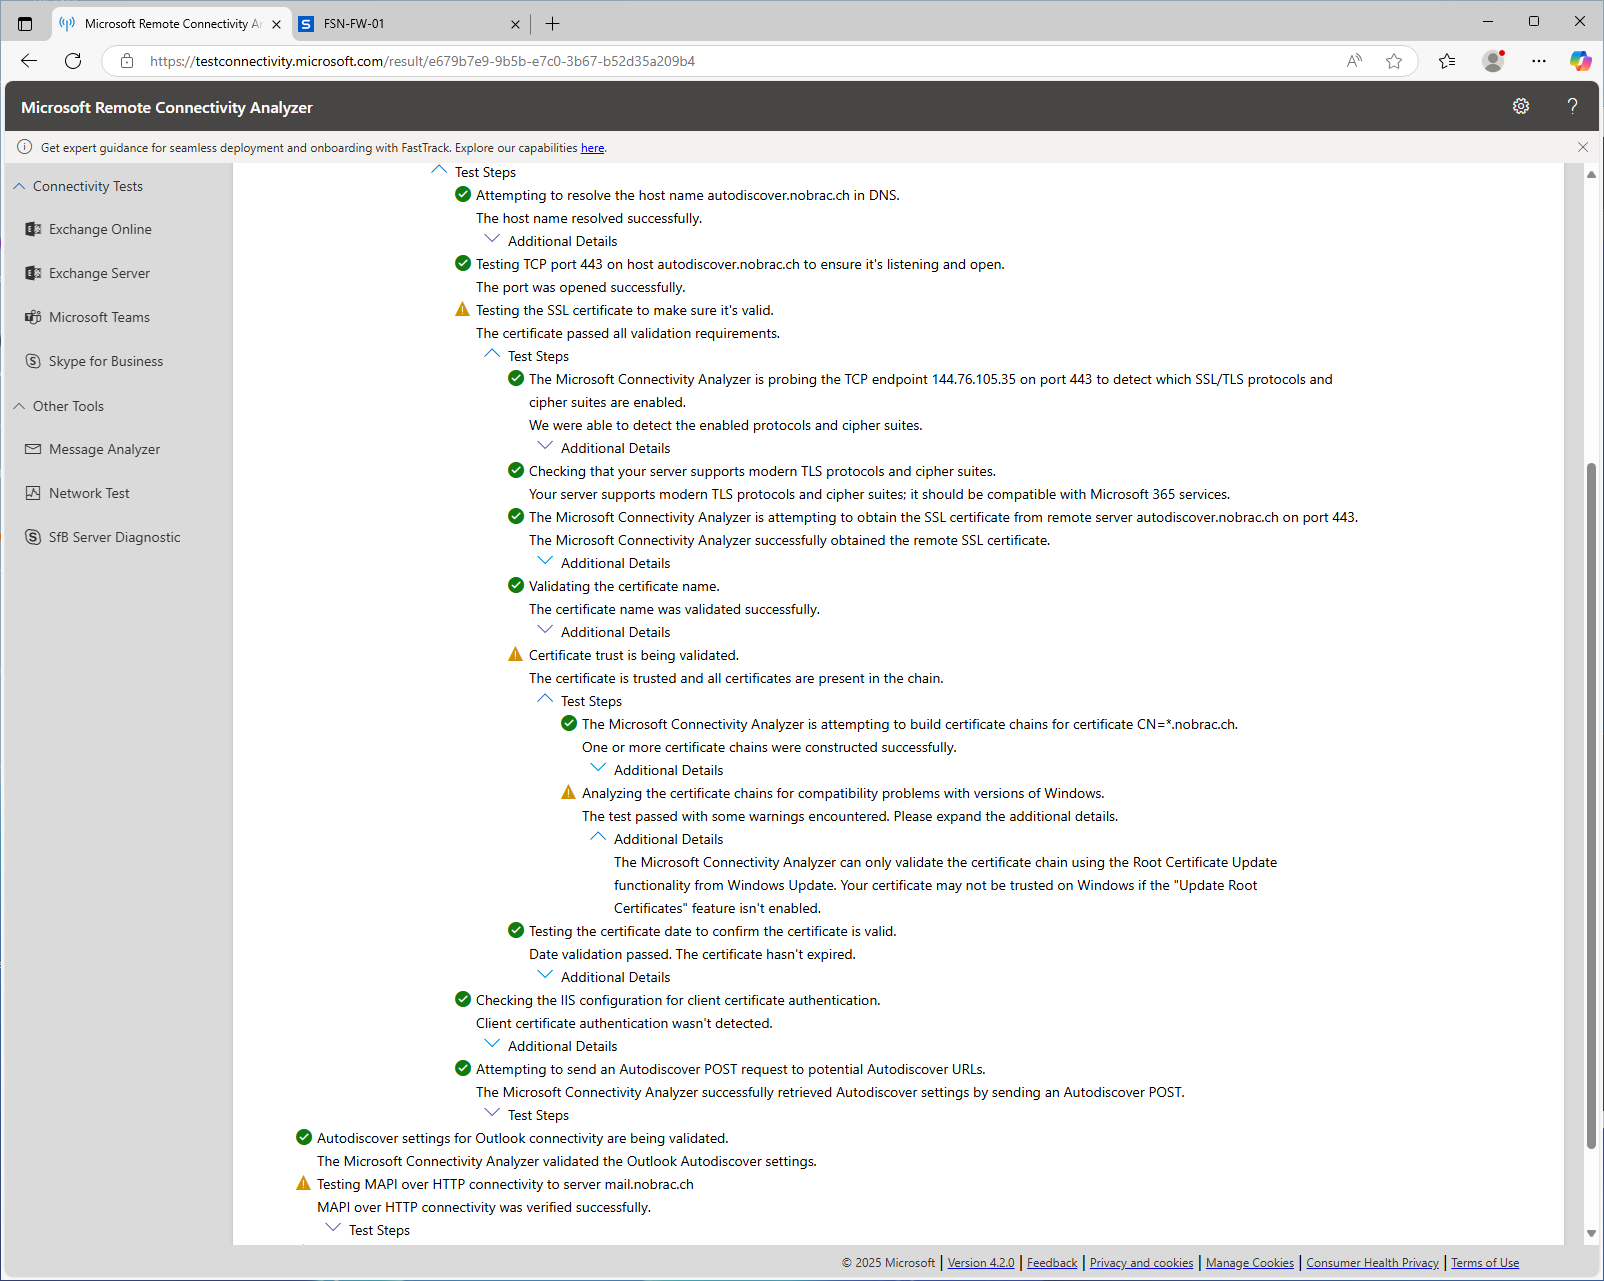
The warning says: “The Microsoft Connectivity Analyzer can only validate the certificate chain using the Root Certificate Update functionality from Windows Update. Your certificate may not be trusted on Windows if the “Update Root Certificates” feature isn’t enabled.”
It’s a warning that impacts older machines or those that don’t allow root certificate updates. It means that machines that don’t have the latest root certificates might not trust your certificate. We can safely ignore the warning. All other warning symbols refer to the same warning message regarding the certificate. Everything is therefore OK.
Troubleshooting
Mail Spool
If you have mails in the Sophos Mail Spooler with the message “No route to host” and they are stuck there, you may need to define an exception on Sophos.
In your Sophos XG, navigate to “Email” -> “General settings”.
Scroll down to the category “SMTP TLS configuration”. Here there is an item with “Skip TLS negotiation”. Enter your Exchange server here and check the mails in the spooler. Restart Sophos if necessary.
Configure DKIM
In the next step, we will now configure DKIM.
Download the DKIM-Signer Tool from Github:
|
|
Expand (unzip) the ZIP-File:
|
|
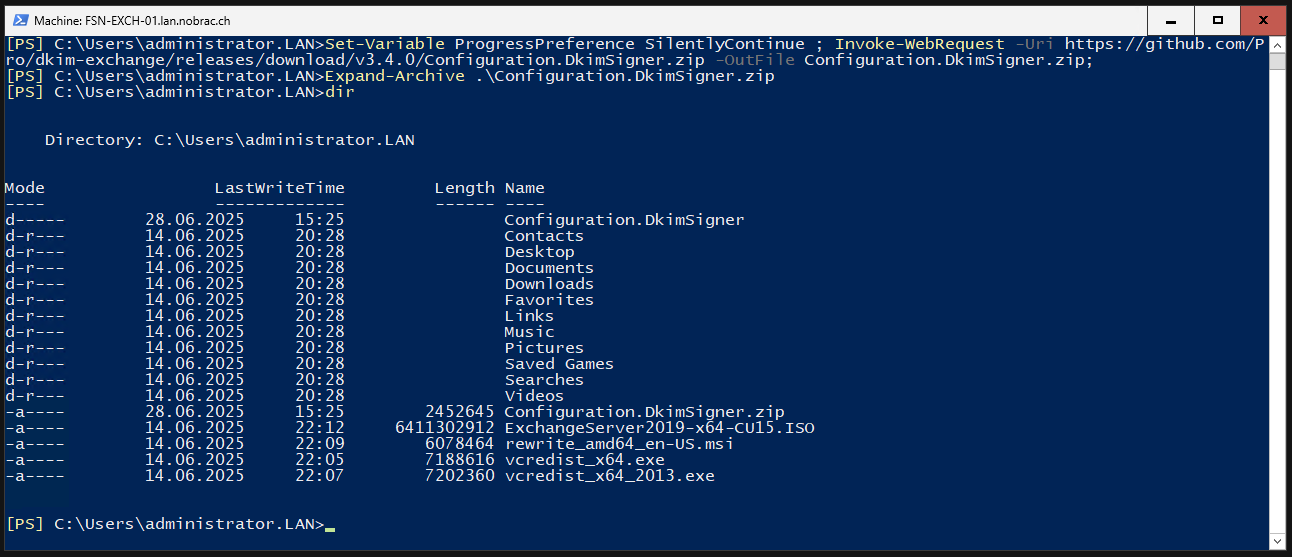
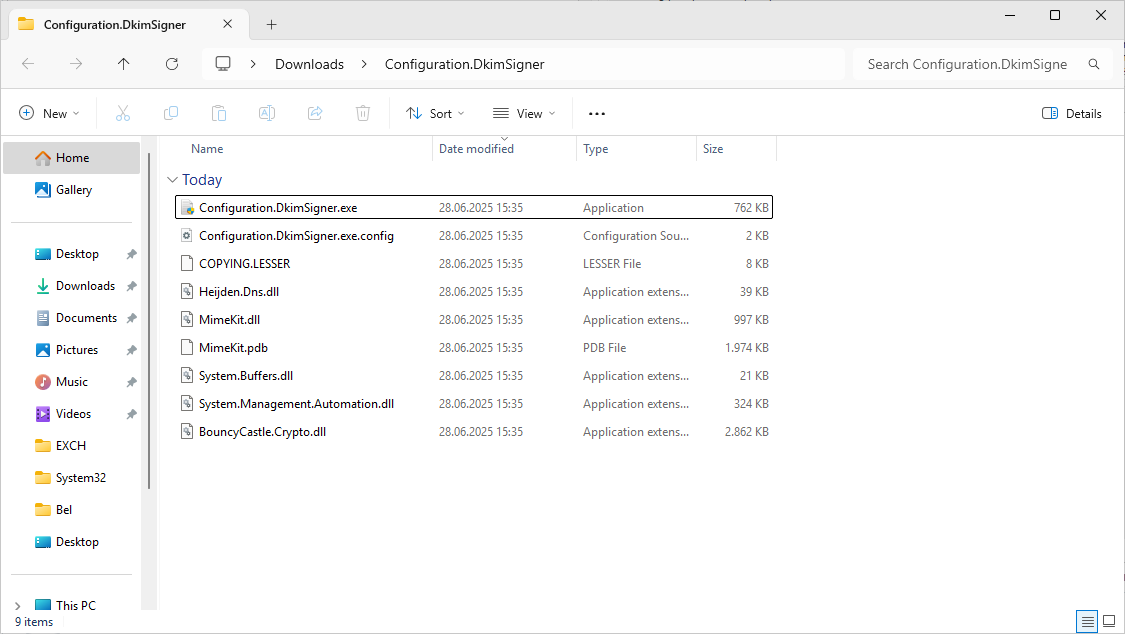
Change to the directory of the unpacked DKIM signer.
|
|
Execute the Configuration.DkimSigner.exe:
|
|
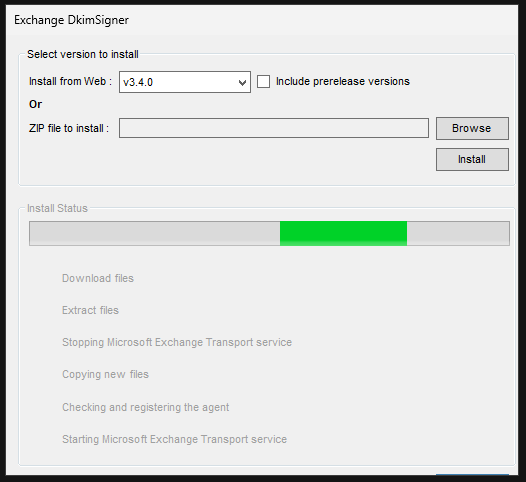
The following window should open.
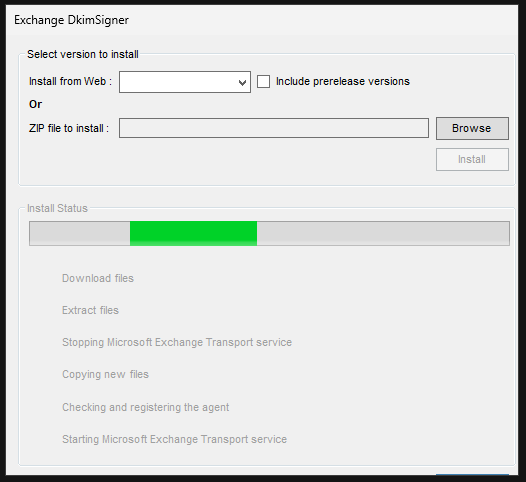
Select version 3.4.0 from the drop-down menu at the top and click on install.
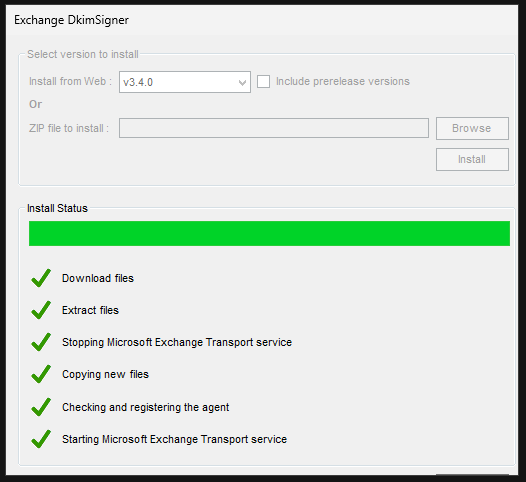
The application may hang after the initial installation. If this happens to you, you must close the application using the Task Manager. Just enter “taskmgr” in Powershell or CMD on the Exchange server to open it. Then simply run the exe again.
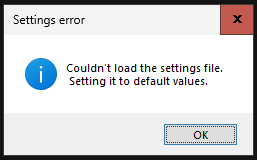
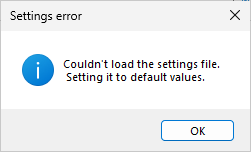
At the first start the message appears that it could not load a settings file. Simply confirm this message.
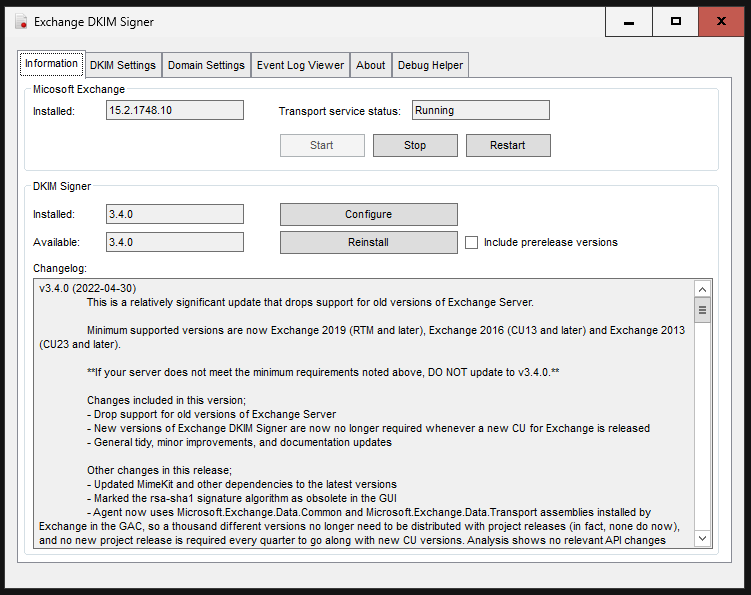
The first tab at the top, “Information”, should now display the installed versions of Exchange and the DKIM-Signer.
In the top menu bar, switch to the “Domain Settings” tab. If we now enter our domain here and click on “Generate new key”, we receive an error. The problem is due to the fact that the application does not support a server without a GUI. Click on continue.
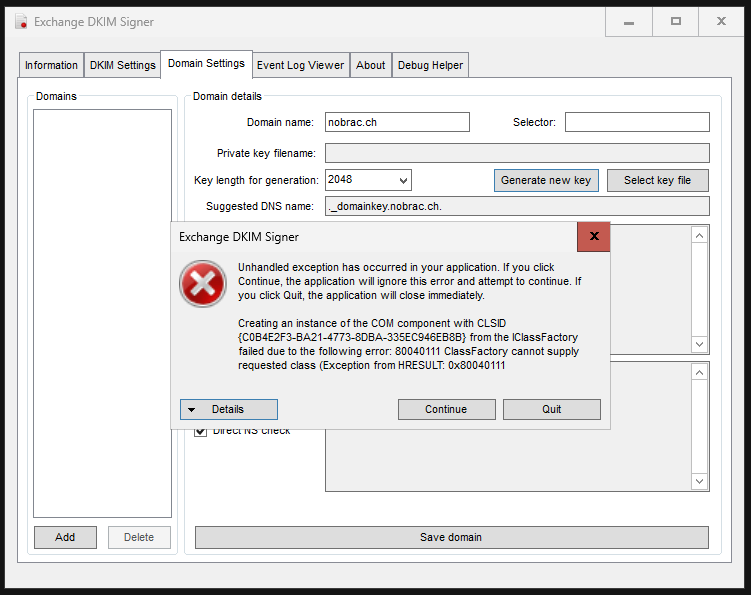
We will solve the problem with a workaround by starting the application on a PC/server with a GUI and generating the private key there and then copying it over to the Exchange server.
Download the program to your management PC, for example, and start it.
An error message will appear because the software cannot find an installed Exchange. Just click on OK.
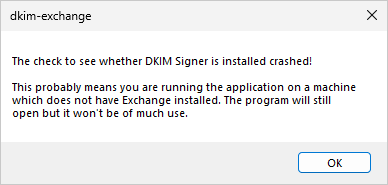
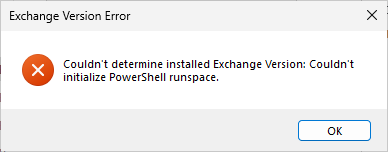
Another error message regarding missing Exchange installation appears. Confirm this again with OK.
Because it is the first start on this PC, the message appears again that it could not load a settings file. Simply confirm this message.
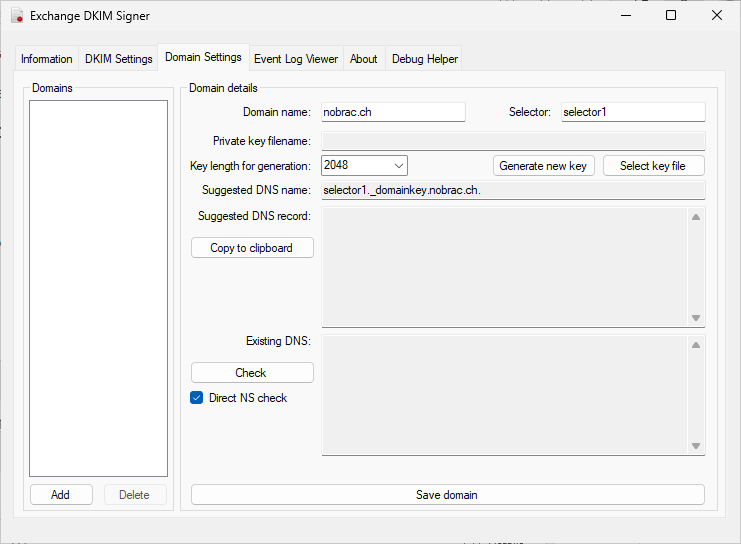
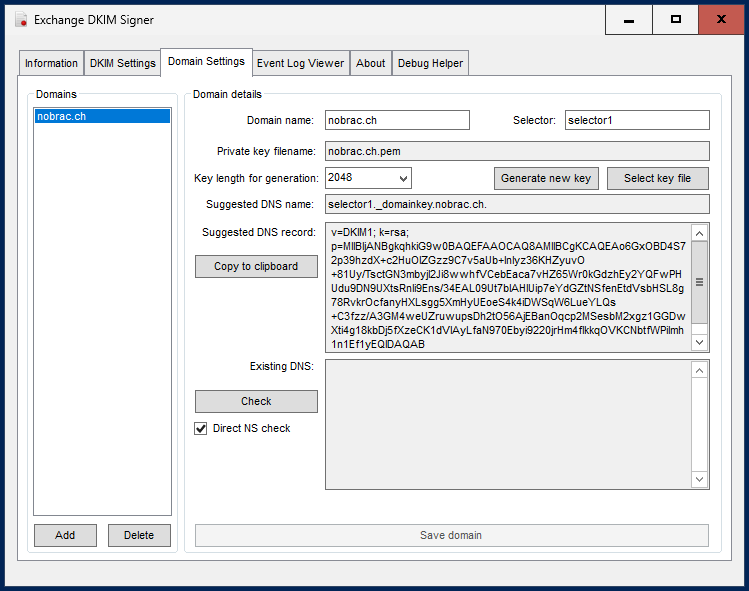
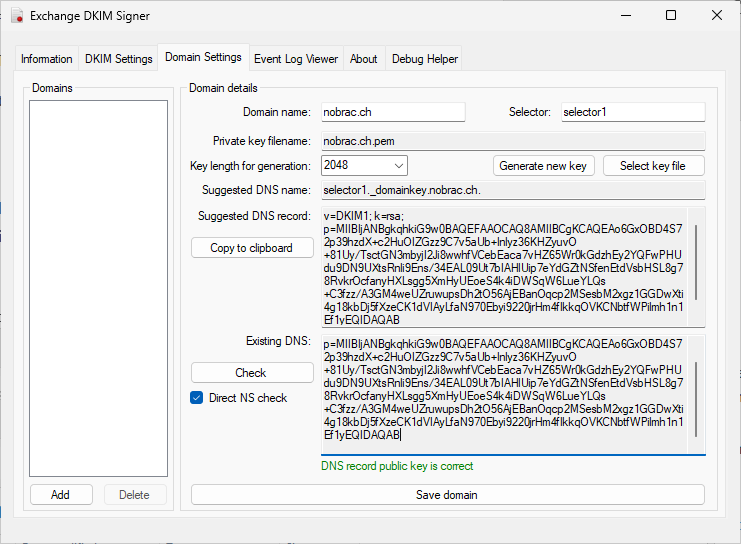
We go to the “Domain Settings” item in the top menu bar. Here we now enter our domain, assign a name for the selector (in my case selector1 - I would also recommend this) and select “2048” for the key length. We then click on “Generate new key”.
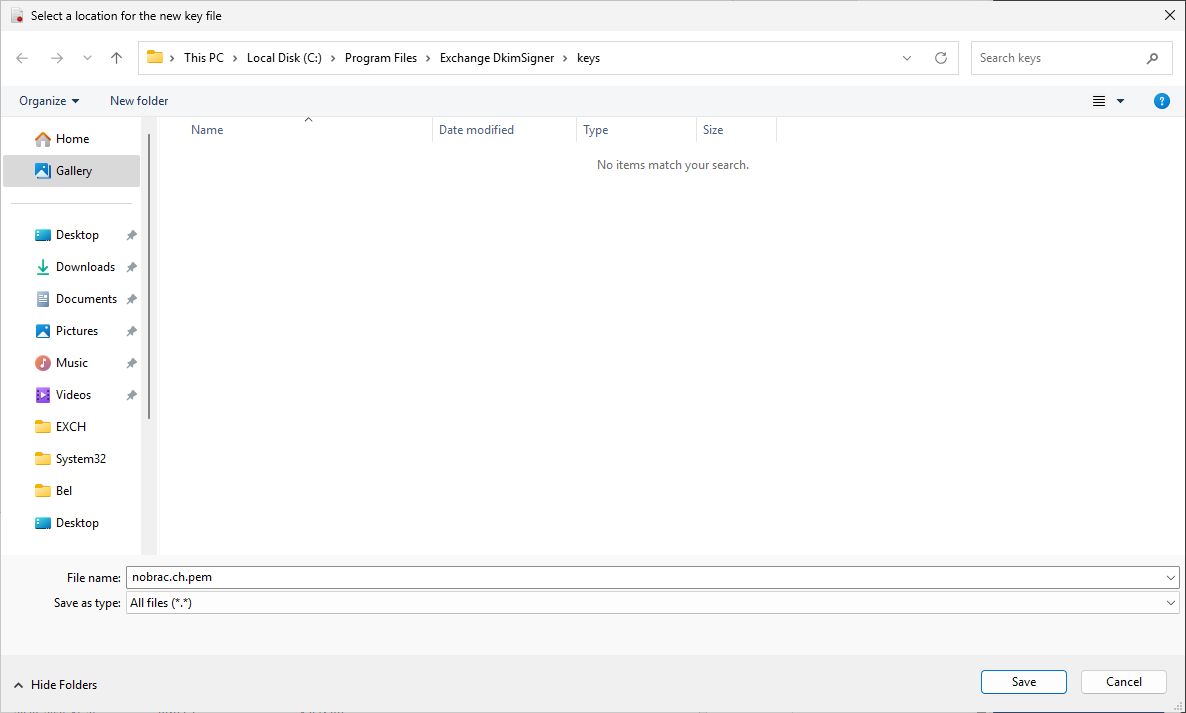
You will then be asked for a storage location for the PEM-File. You can simply leave the default one.
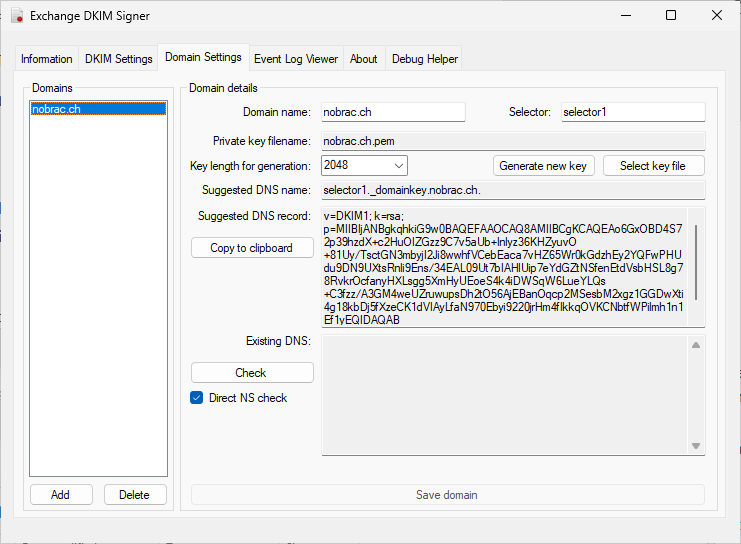
A key should now have been generated.
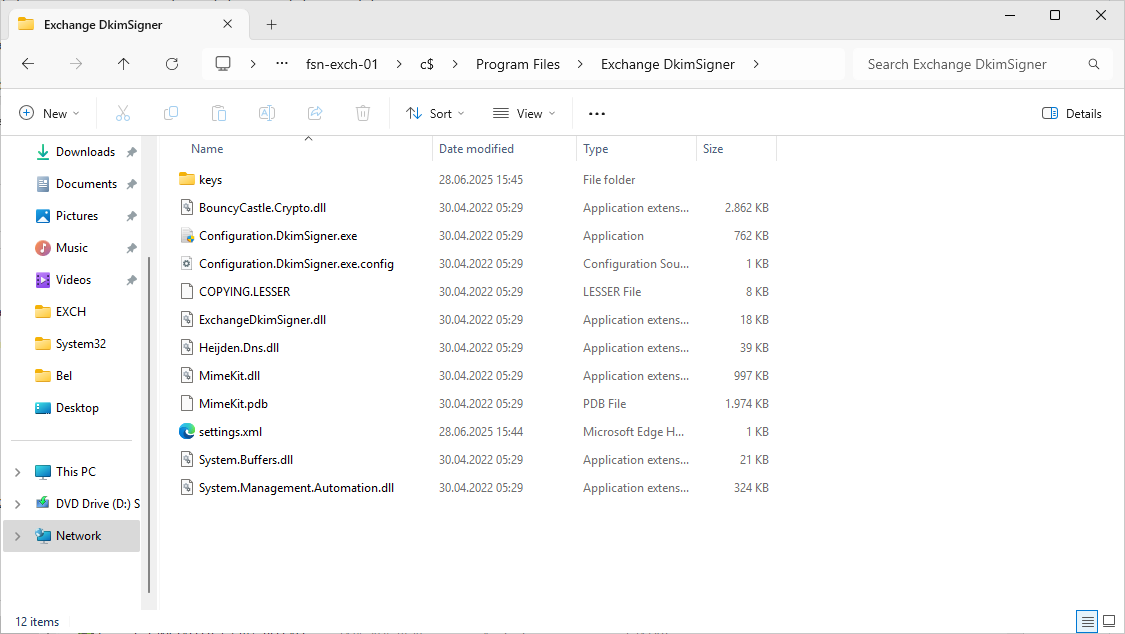
Now navigate to “C:\Program Files\Exchange DkimSigner” on your PC.
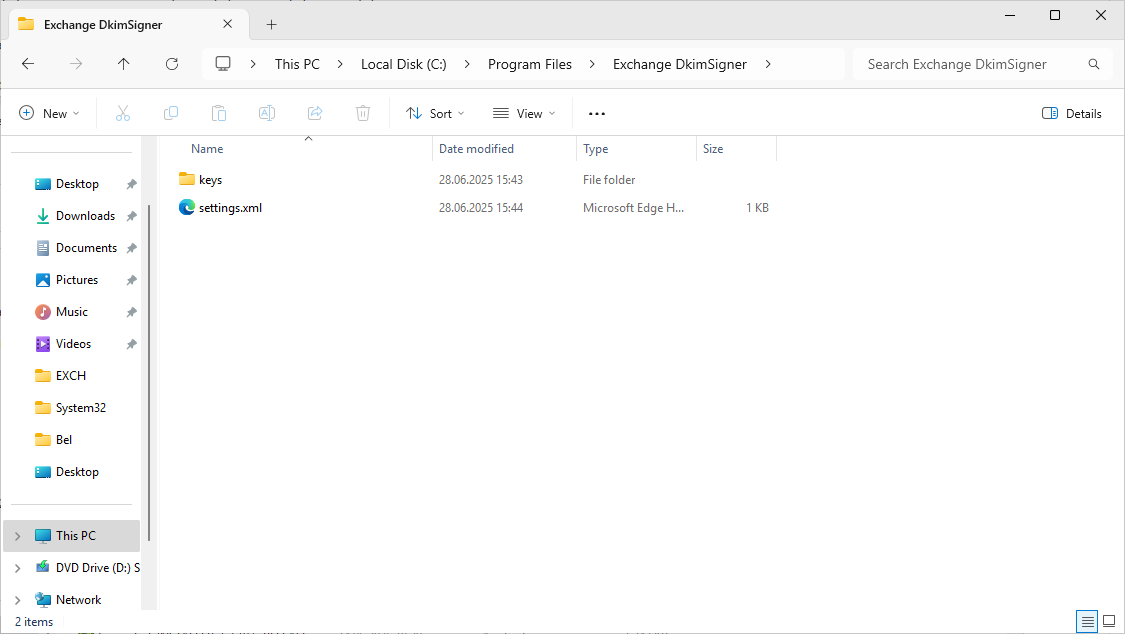
Completely replace the “keys” folder and the “settings.xml” file with the one from your PC. I use the C$ share from the Exchange server to transfer the data.
Restart the DKIM-Signer software on the Exchange server. Your generated key should then be displayed under the “Domain Settings” tab.
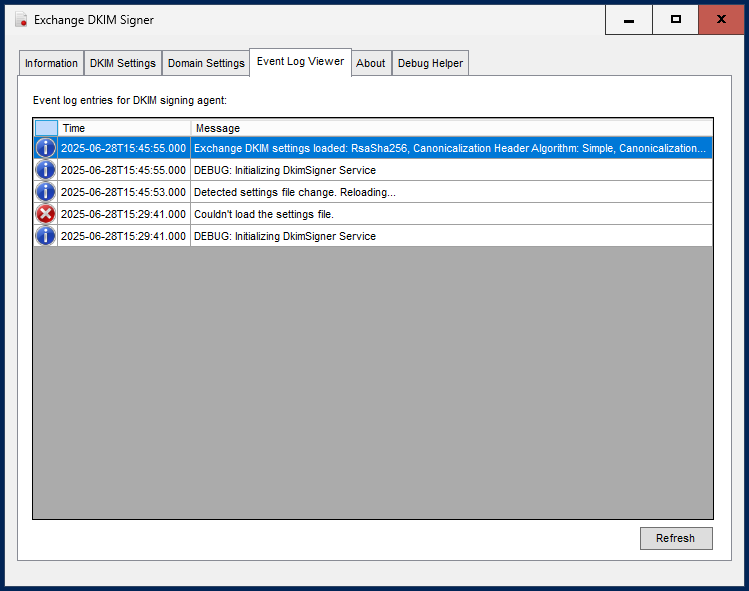
In the “Event Log Viewer” tab at the top, we should also be able to see that it has loaded new settings.
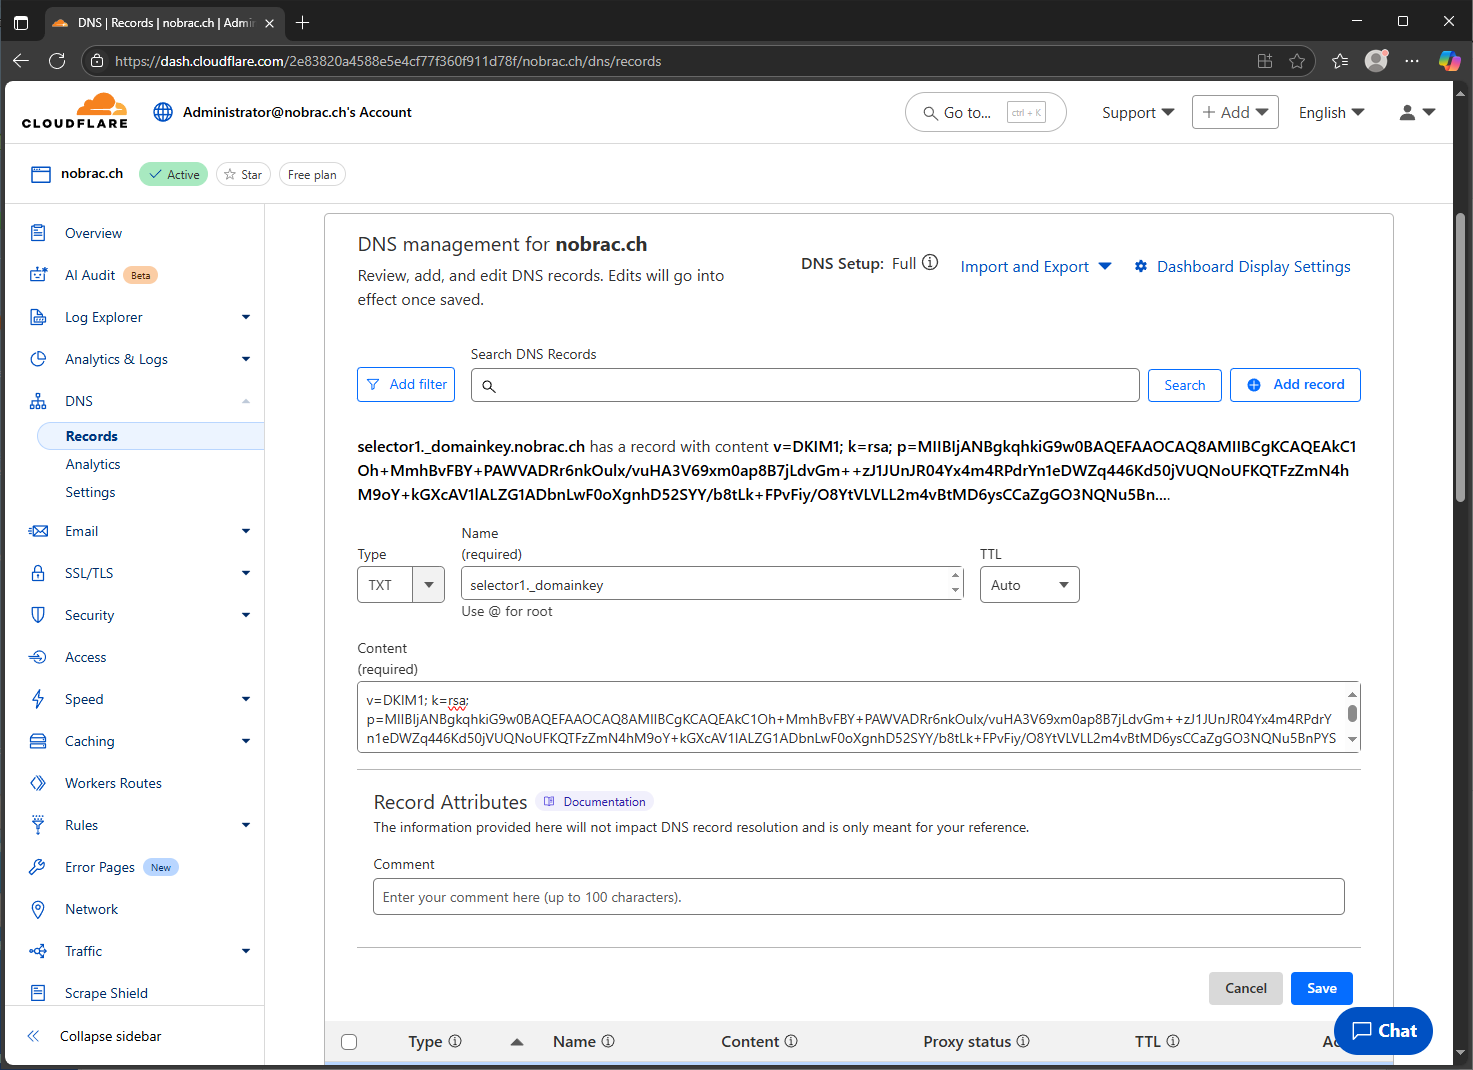
Now create a new DNS record with the type “TXT” with your provider. Enter “selector1._domainkey” for the name. The DKIM-Signer Tool will show “selector1._domainkey.nobrac.ch”, but the domain does not have to be in the record.
For the “Content” field, copy the complete content of the “Suggested DNS record” field from the DKIM signer tool. There is also an extra button directly for this.
It should look like this.
After a few minutes (can sometimes take longer) we can click on “Check” in the DKIM-Signer Tool. The software then checks directly whether the record has been set correctly.
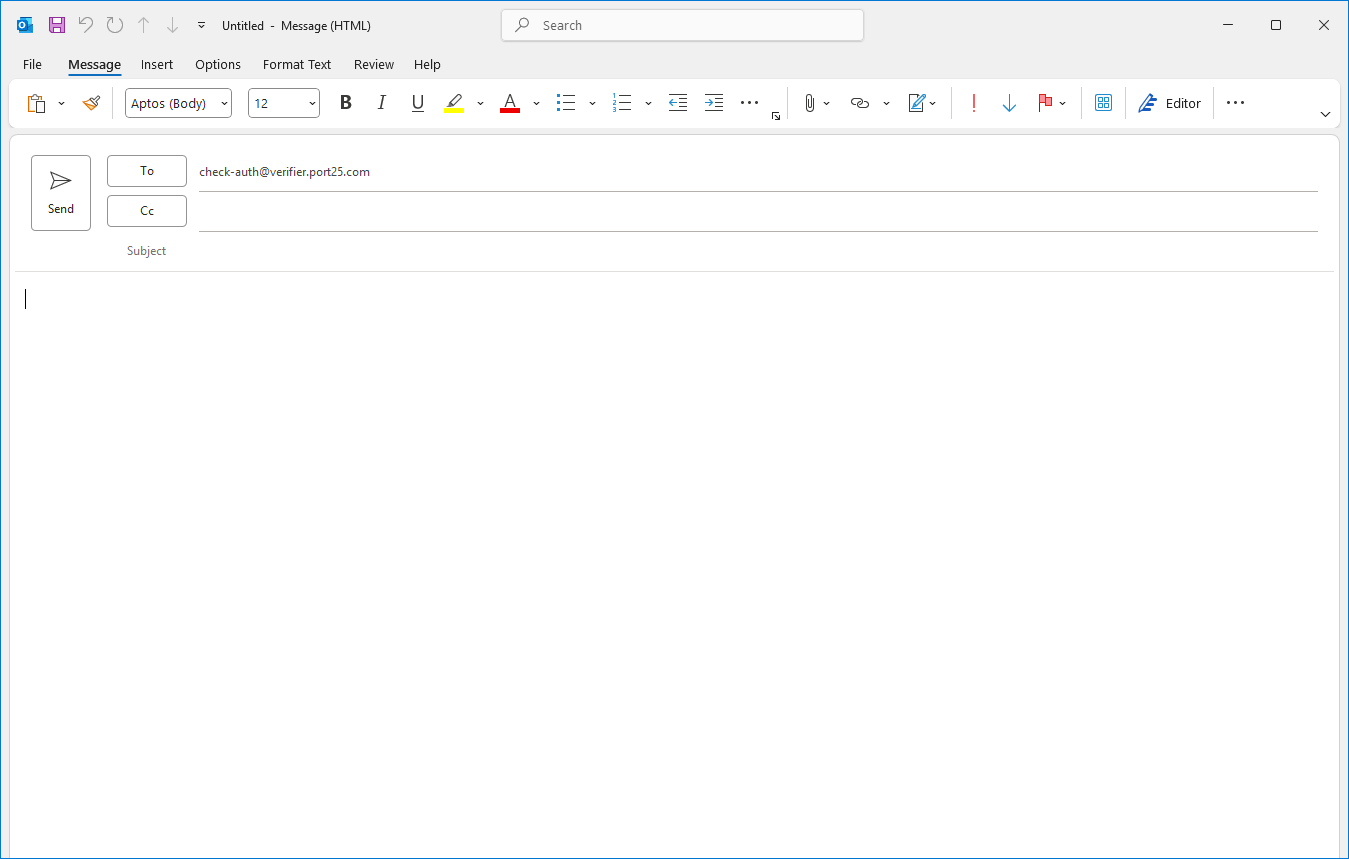
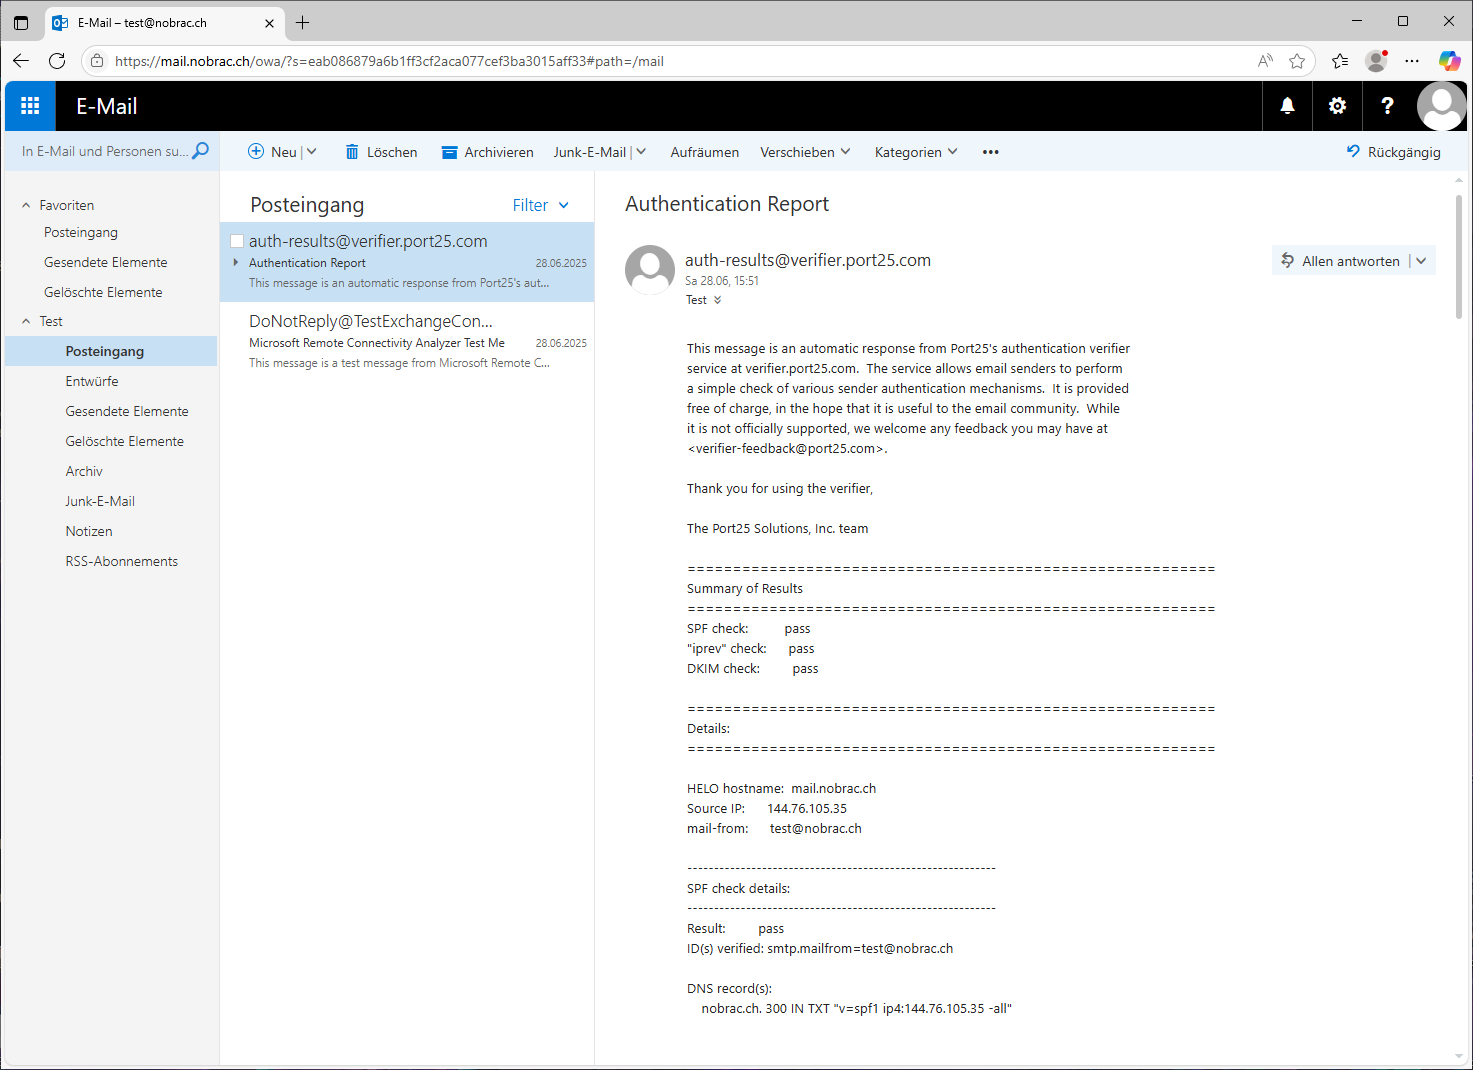
Now let’s check that DKIM is working correctly. To do this, we simply write an email to “check-auth@verifier.port25.com”, for example. There are also other providers here with which you can test this, I have simply used this one. The mail can simply be sent blank. Does not need a subject or content.
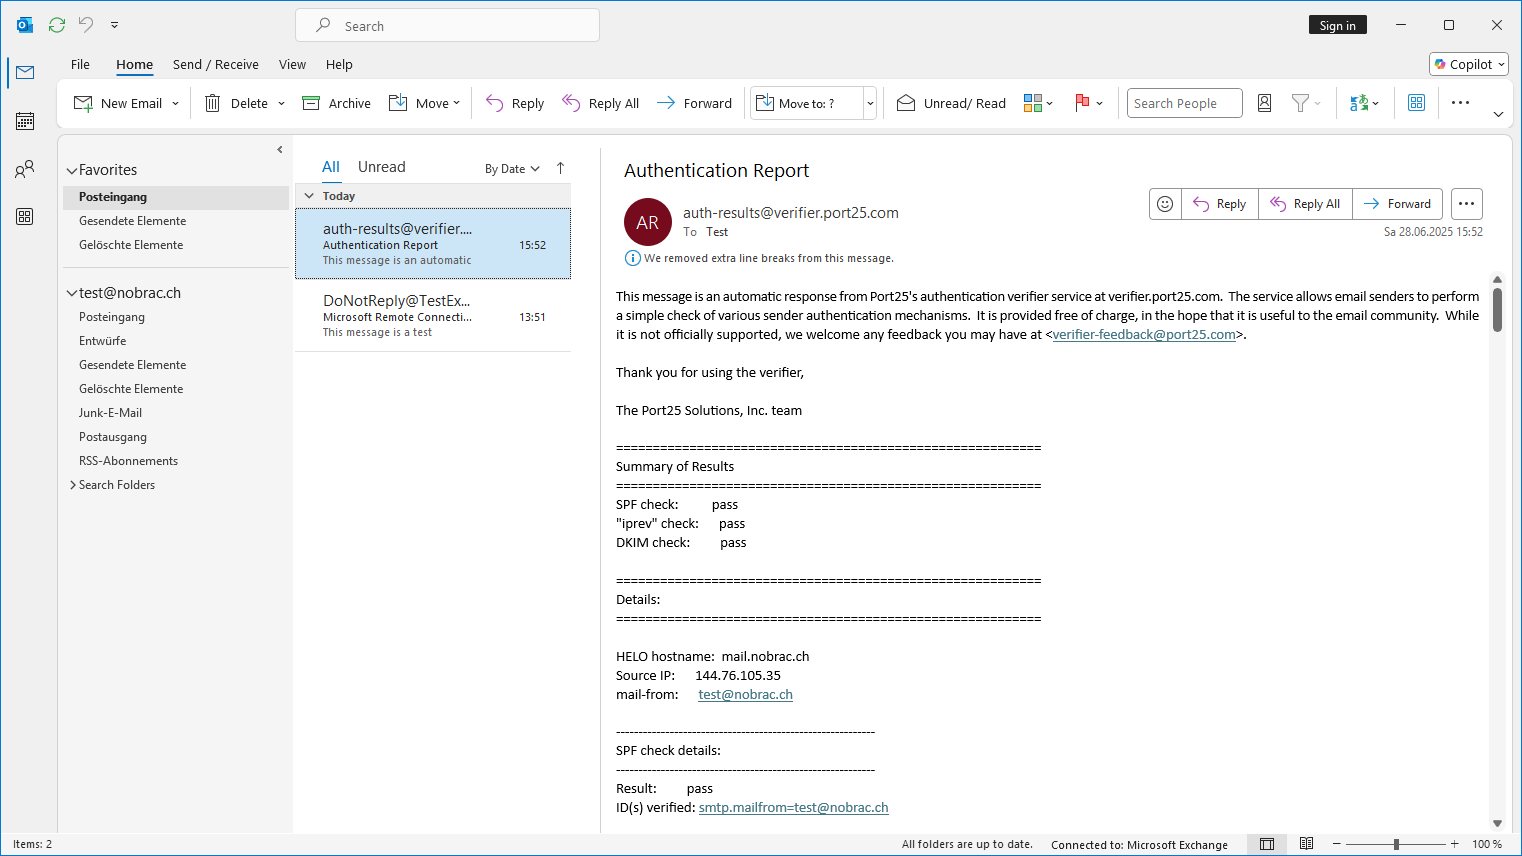
A few minutes later we should receive a reply to our email. Everything looks great.
Configure DMARC
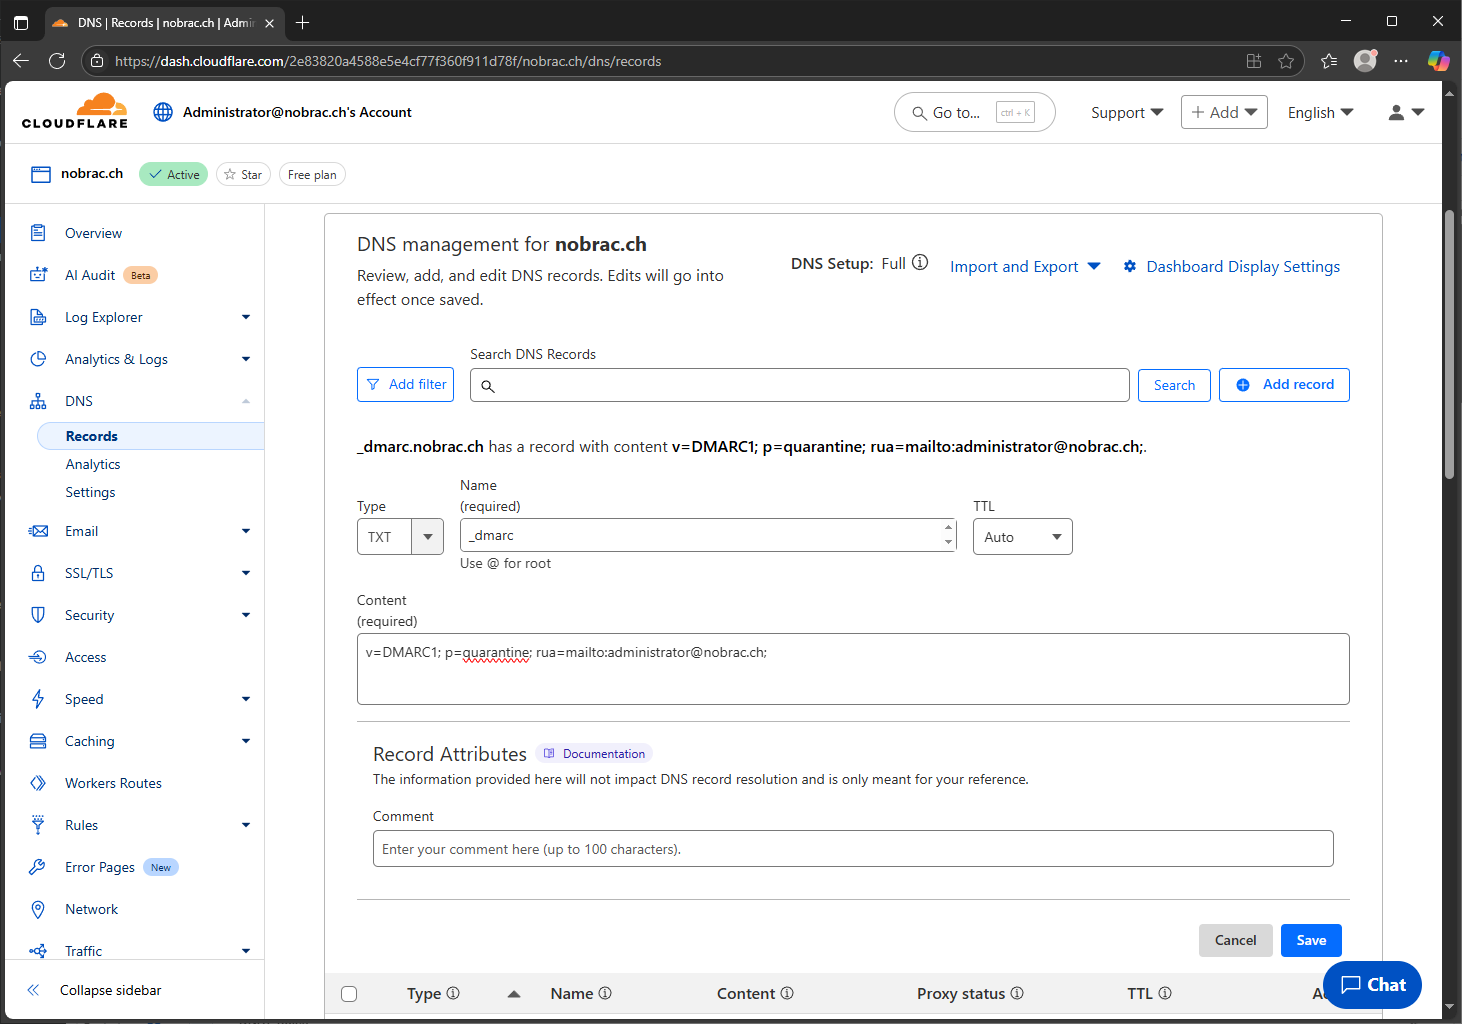
Now create another DNS record with the type “TXT”.
Enter “_dmarc” as the name.
Enter the following for the “Content” field. Make sure that you enter a valid e-mail address. It is best to create a dedicated mailbox for this.
|
|
General system improvements
TCP KeepAliveTime
Microsoft recommends configuring the TCP KeepAliveTime registry setting on Exchange Server to a decimal value between 900000 and 1800000 milliseconds (which equals 15 to 30 minutes). If the KeepAliveTime entry is not present in the registry, the system will use the default value of 2 hours.
The Exchange Health Checker (more on this later) will otherwise show it as faulty.
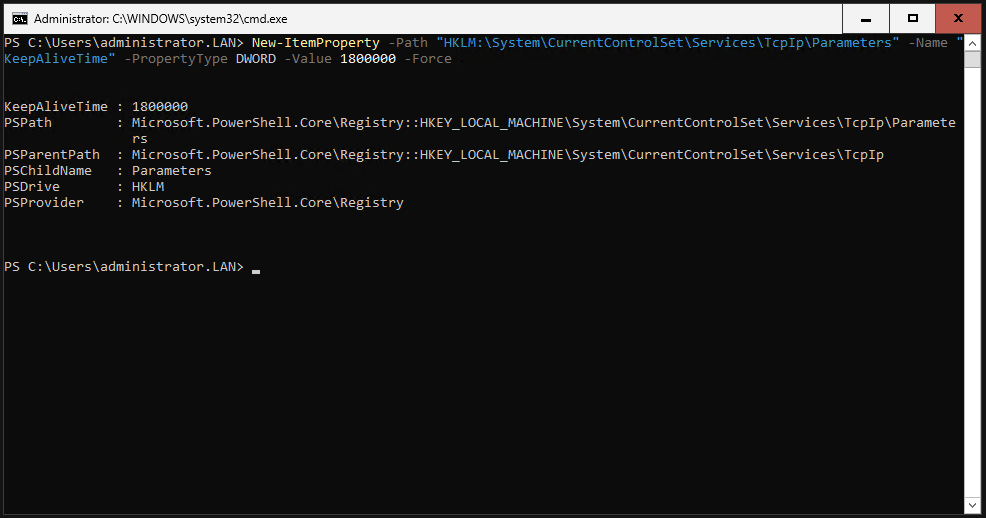
Just enter the following command in Powershell.
|
|
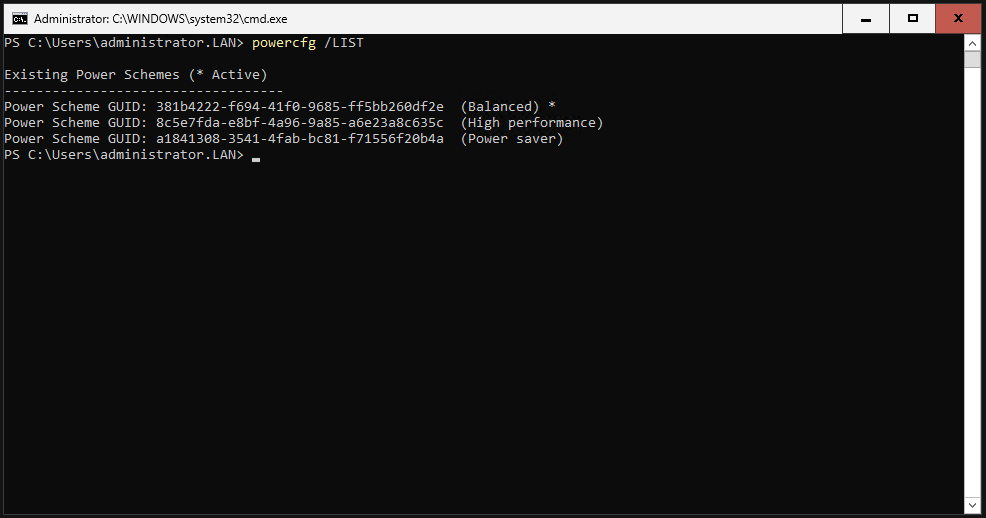
Adjust Power Plan
Microsoft recommends changing the power plan to “High Performance” on the Exchange server.
First, let’s take a look at our current configuration.
|
|
Set the power plan to “High Performance”.
|
|
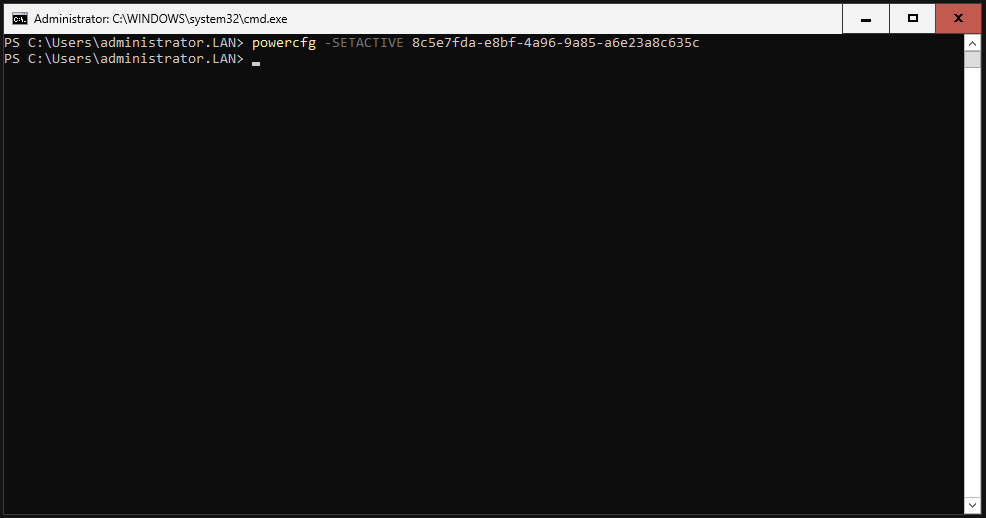
Check the settings again.

Defender AV Exclusions
It is recommended by Microsoft to add certain paths and file extensions on an Exchange server to the Windows Defender exception list.
Download the script from Microsoft from here: https://github.com/microsoft/CSS-Exchange/releases/latest/download/Set-ExchAVExclusions.ps1
Copy it to your Exchange server (I simply used the C$-Share).
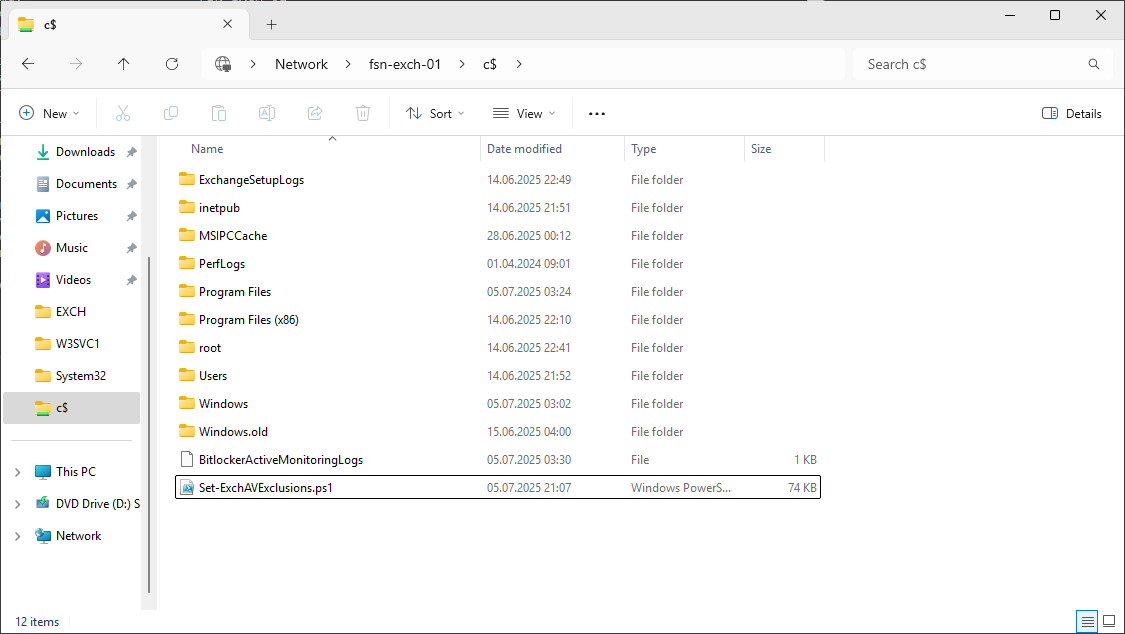
You then simply have to run the script on your Exchange server. The rest happens completely automatically.
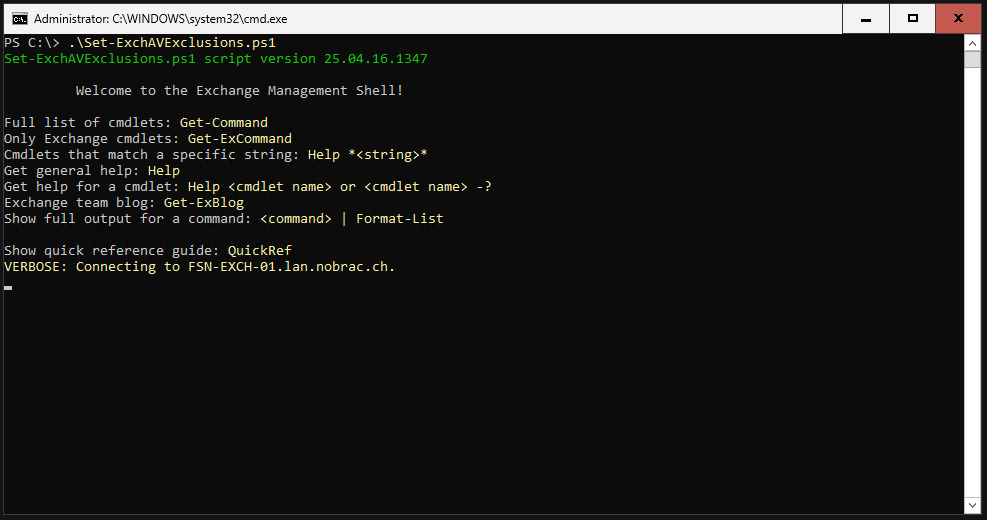
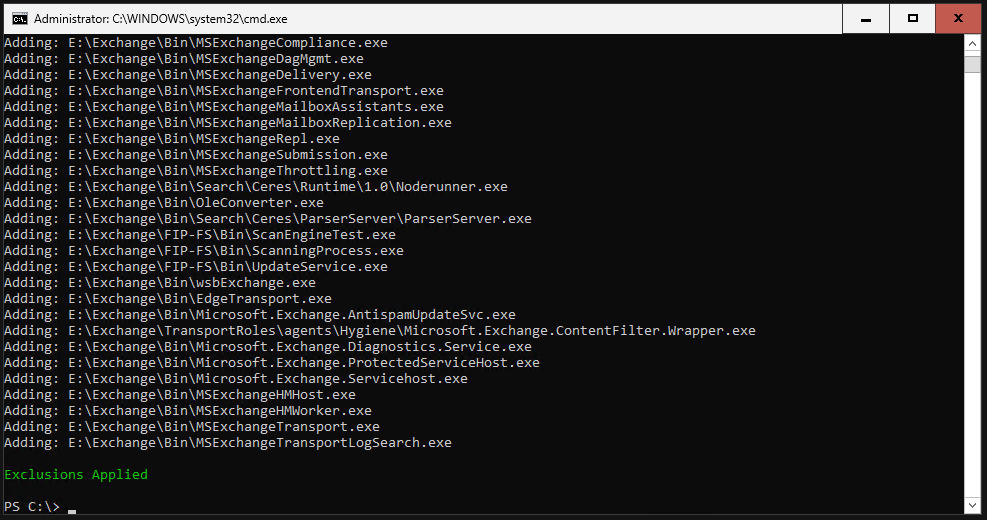
That’s it.
Disable NIC Sleeping
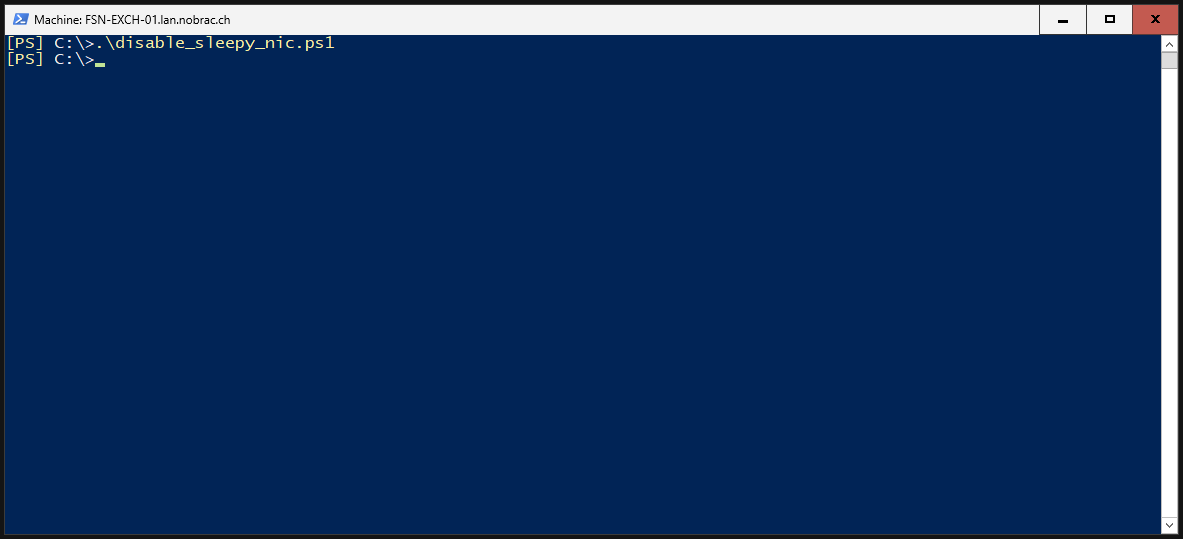
Copy the following code and save it as a Powershell script (.ps1). Save it on your Exchange server. In my case, I called it “disable_sleepy_nic”.
|
|
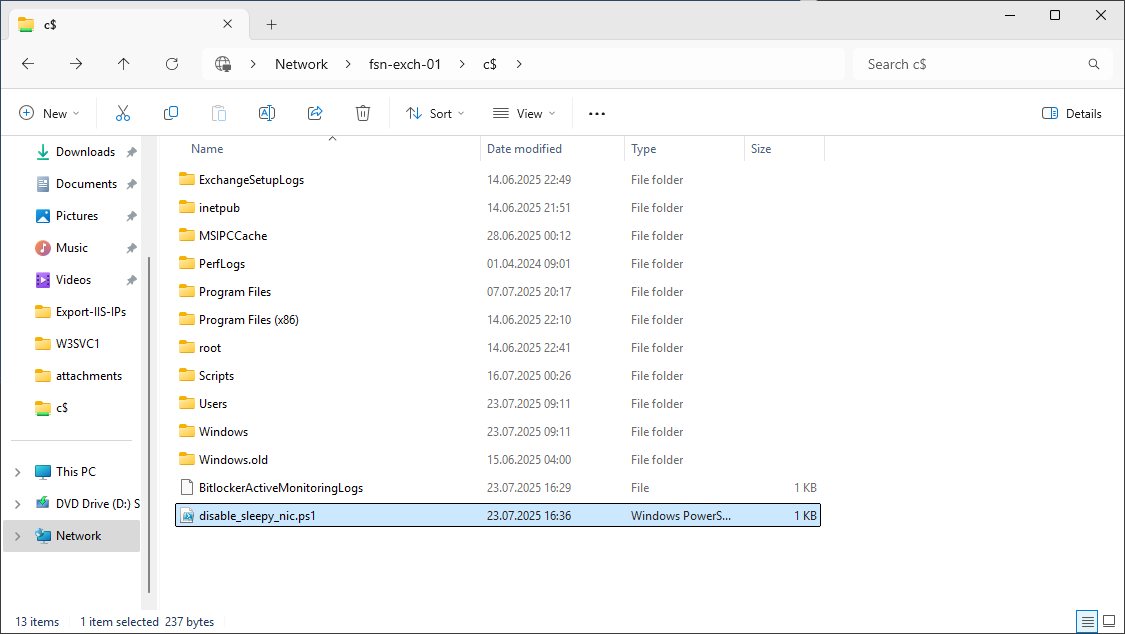
Then simply run the script on your Exchange server. You will temporarily lose the connection to the server, this is normal.
Done.
Unified Content Path Logs
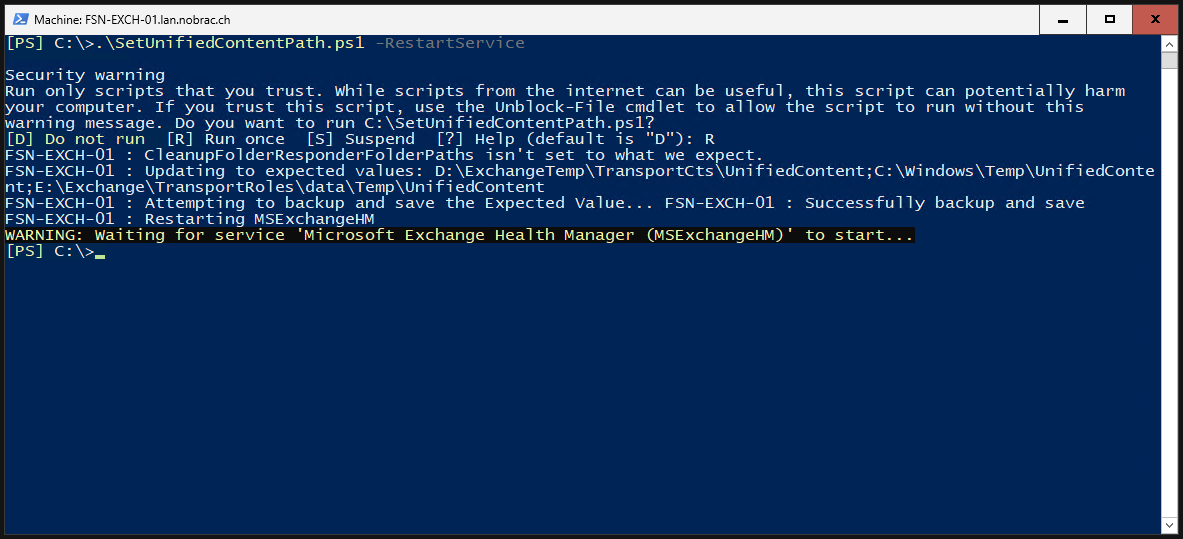
Exchange Server creates and manages temporary files in the UnifiedContent folder to assist antimalware scanning. Since we have not installed the Exchange under the C: drive, the path for the automatic cleanup is incorrect.
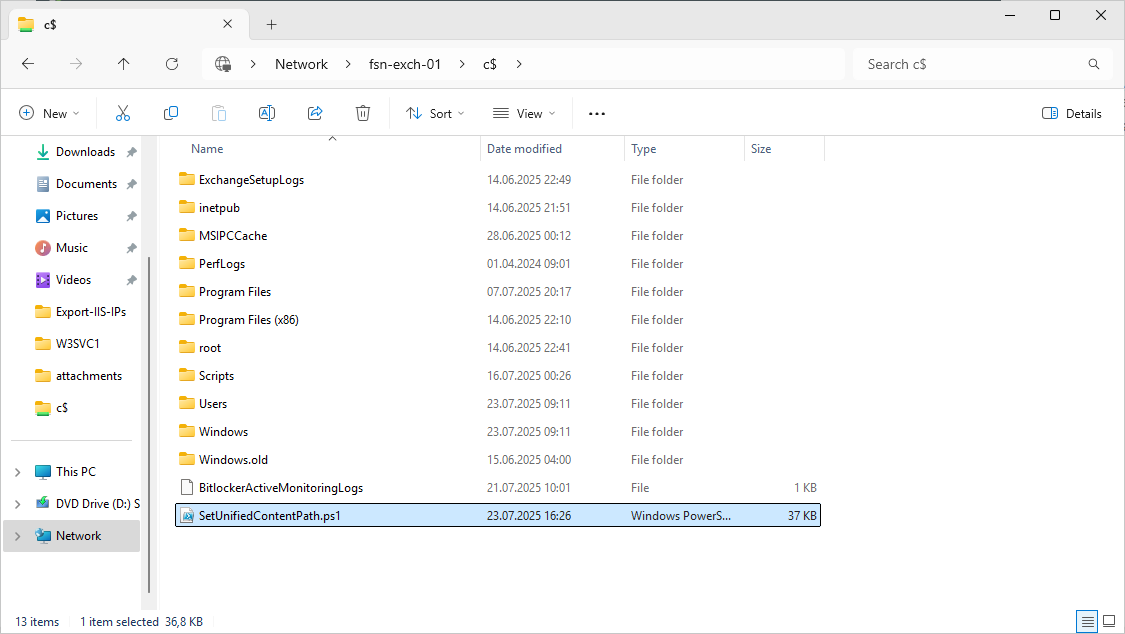
Simply download the following script from Microsoft and save it on your Exchange server: https://microsoft.github.io/CSS-Exchange/Admin/SetUnifiedContentPath/
You don’t have to adjust anything else in the script.
Then simply execute it with the “-RestartService” flag.
|
|
That’s it.
Uninstall Old Services
The MSMQ services can be uninstalled. They are not needed anymore. They will otherwise be marked later in the Exchange HealthCheck script.
First we check whether they are installed.
|
|

We then simply uninstall them.
|
|
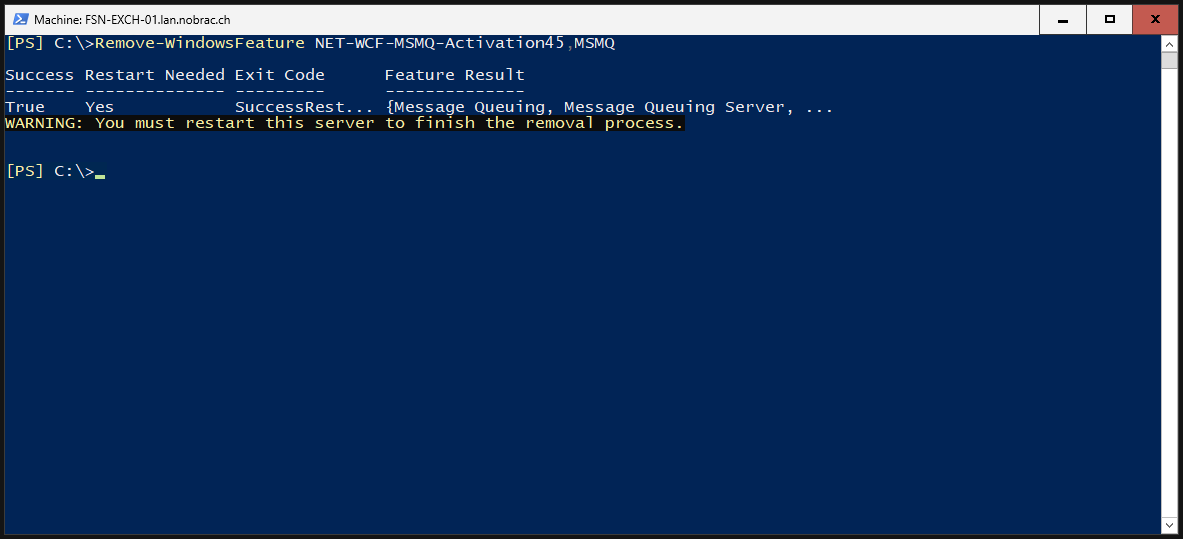
Reboot your server after it. That’s it.
Hardening
Configure Kerberos Authentication Support
Unfortunately, most companies don’t use Kerberos enough for authentication, and virtually nobody has configured it for Exchange. In this step we will do this, it is actually hardly any effort.
Microsoft advises using A-Records rather than CNAME records. This approach ensures that clients request the correct Kerberos ticket based on the shared name instead of the server’s fully qualified domain name (FQDN).
In my homelab, and following the configuration steps from this Exchange setup guide, we’ve implemented the following DNS configuration for the Exchange server:
- A-Record for “mail.nobrac.ch” (Exchange Webservices)
- A-Record for “autodsicover.nobrac.ch” (Exchange Autodsicover)
Based on the FQDNs listed above, the following SPNs need to be associated with the ASA credential:
- http/mail.nobrac.ch
- http/autodiscover.nobrac.ch
We’ll walk through the steps below to configure Kerberos authentication for the Exchange server.
Create Alternate Service Account (ASA)
All Exchange servers running Client Access services that share the same namespaces and URLs must use the same Alternate Service Account (ASA) credential. Typically, a single ASA account per forest is sufficient for each version of Exchange.
Open Active Directory Users and Computers. If you do not already have one, create a separate OU for the Exchange server.
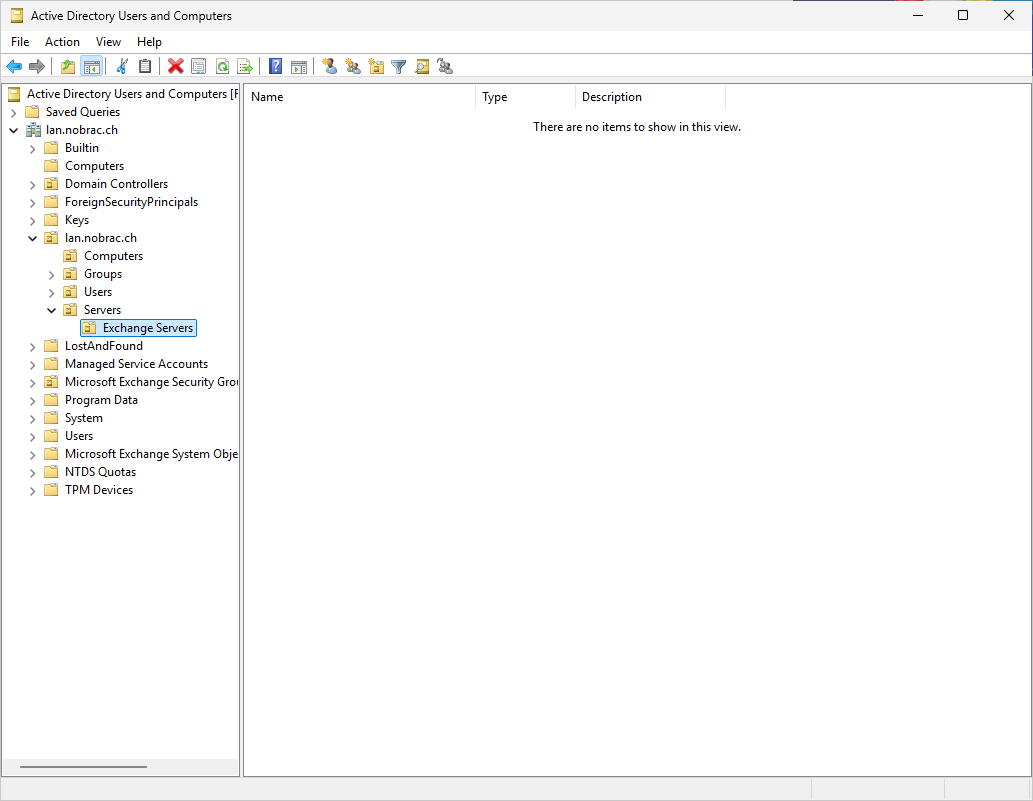
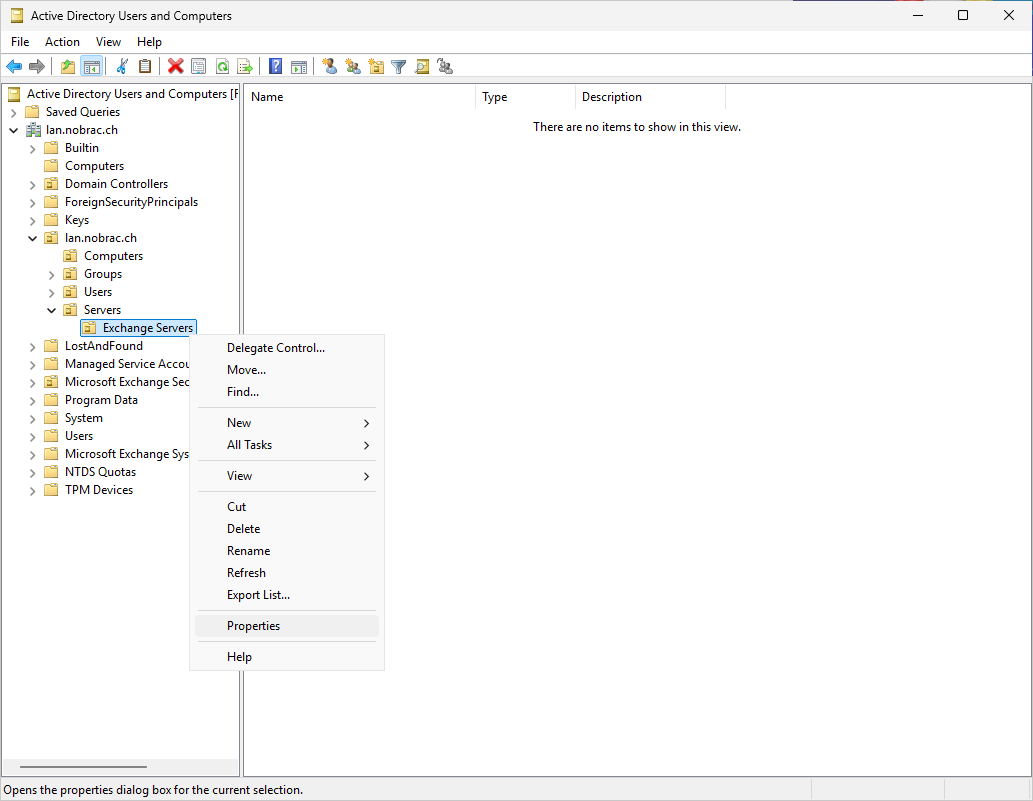
Right-click on the OU and select “Properties”. First make sure that you have activated “Advanced Features” in the menu bar at the top under “View”.
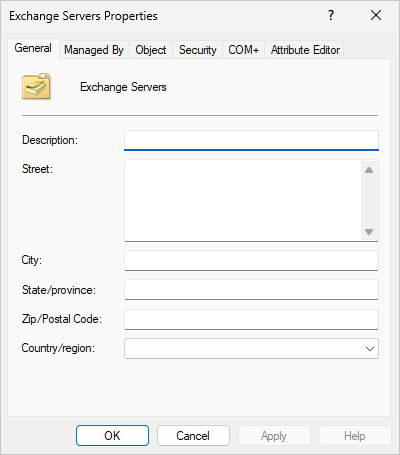
The following window opens.
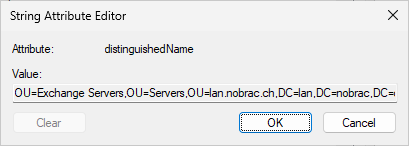
Switch to the upper menu item “Attribute Editor” and search for the “distinguishedName” entry.
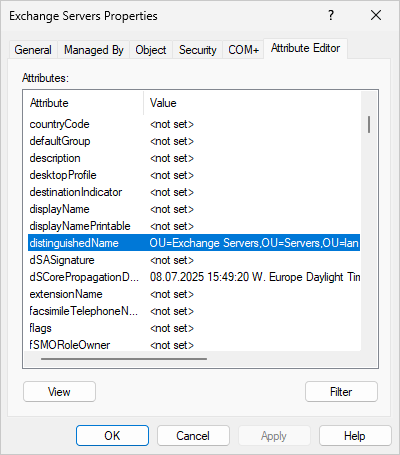
Double-click the entry and copy out the DN.
Open an Exchange Management Shell on the Exchange server.
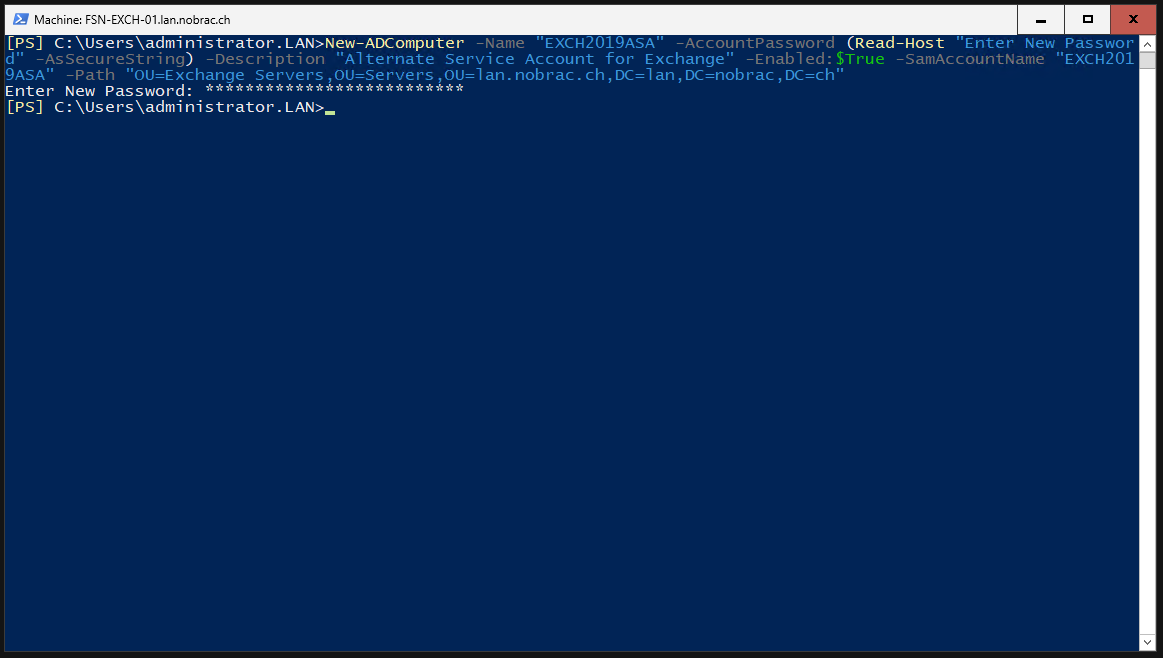
You can adapt the computer name “EXCH2019ASA” as you wish, but I will leave it as I find it very suitable. You then have to adjust the OU at the end of the command to match yours.
|
|
Please enter a secure password when prompted.
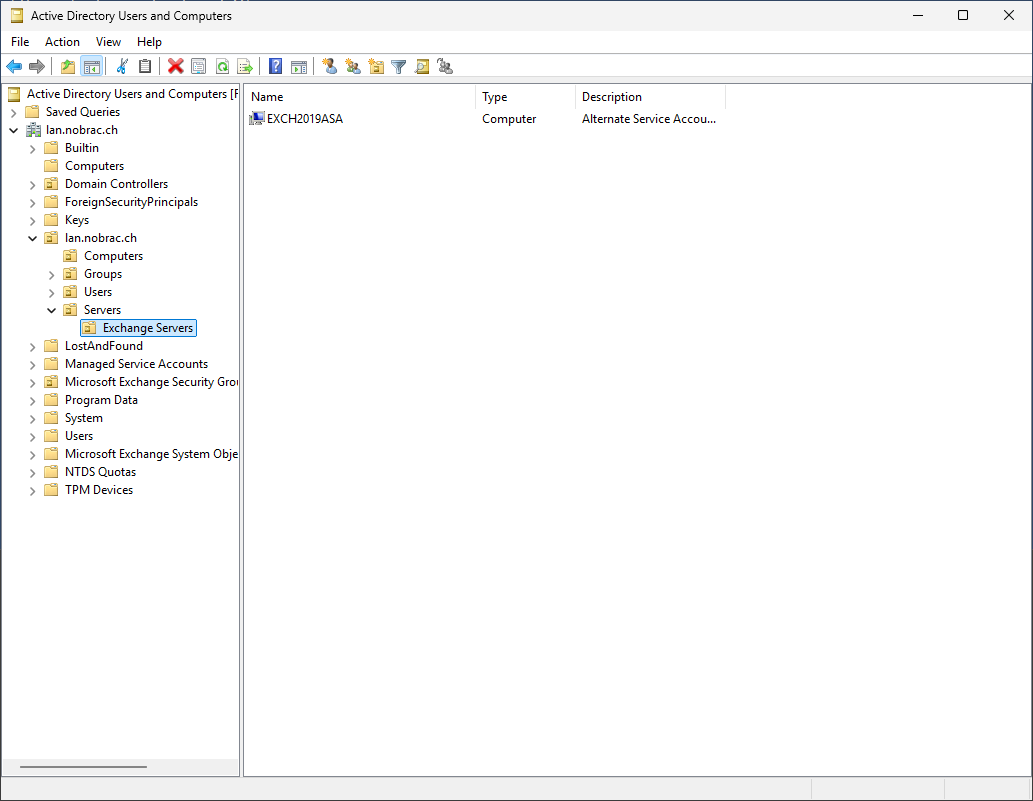
The new computer account should then appear in the Active Directory Users and Computer after a refresh.
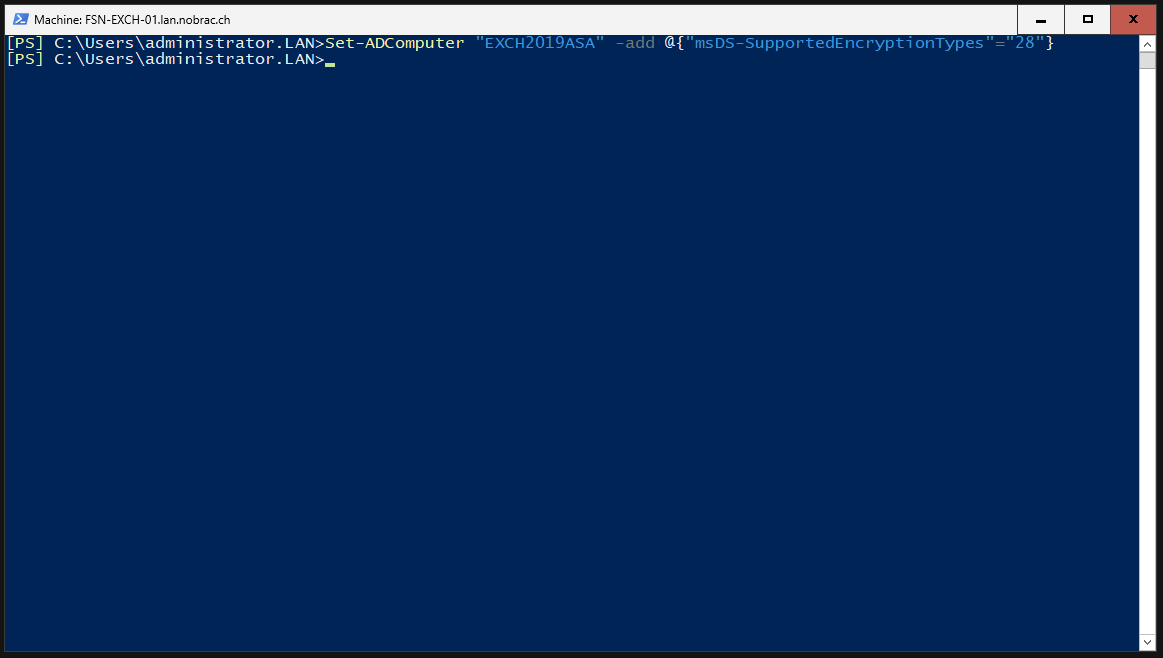
Activate RC4, AES 128, AES 256 encryption for the computer account for Kerberos support.
|
|
Let’s check the computer account with Powershell too.
|
|

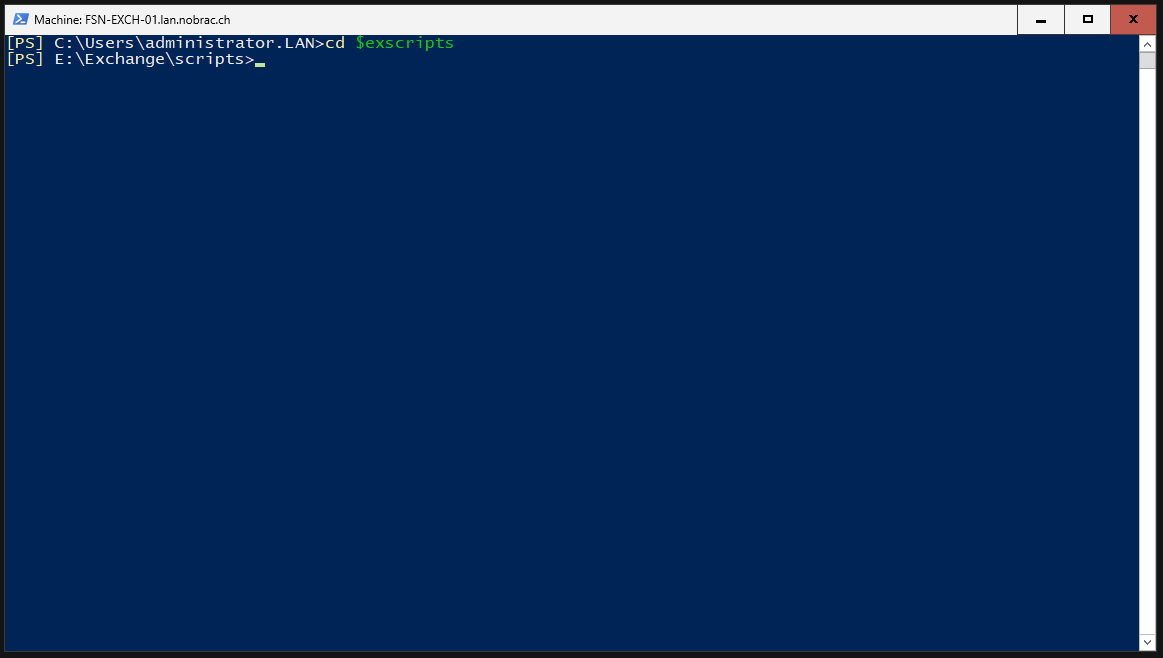
Now we change to the Exchange Script directory.
|
|
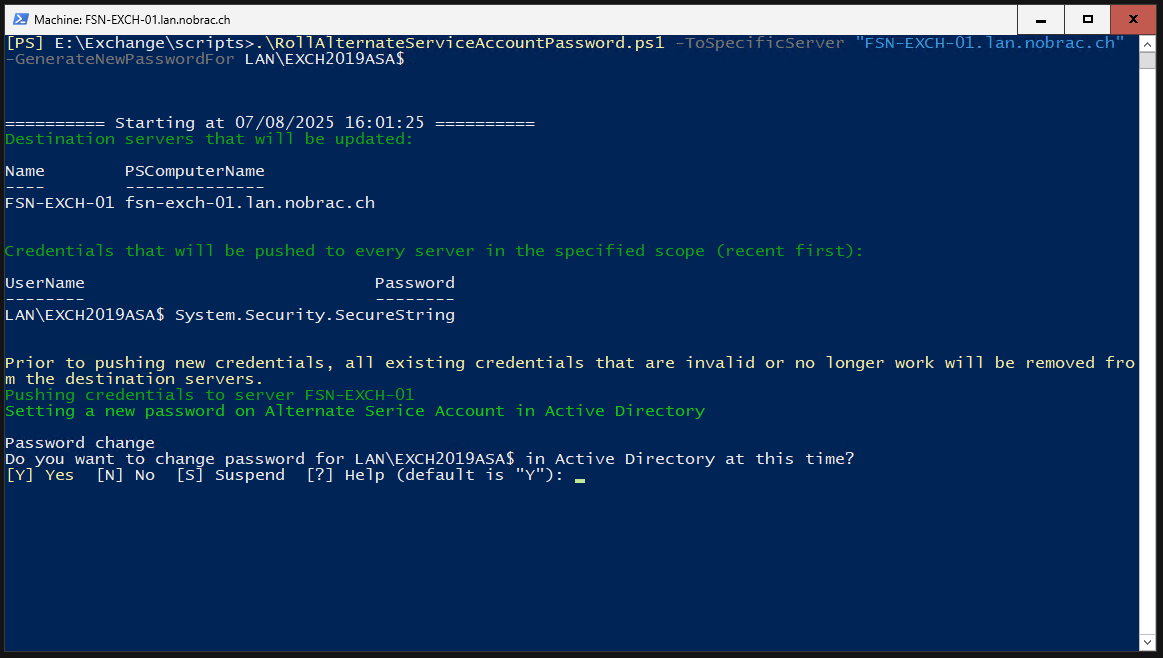
Deploy ASA Credential to Exchange
Deploy the ASA credential to the Exchange server. Adjusts the FQDN accordingly and the domain suffix at the end of the command. Accept the changes with “Y”.
|
|
After a short time, the script should have run successfully.
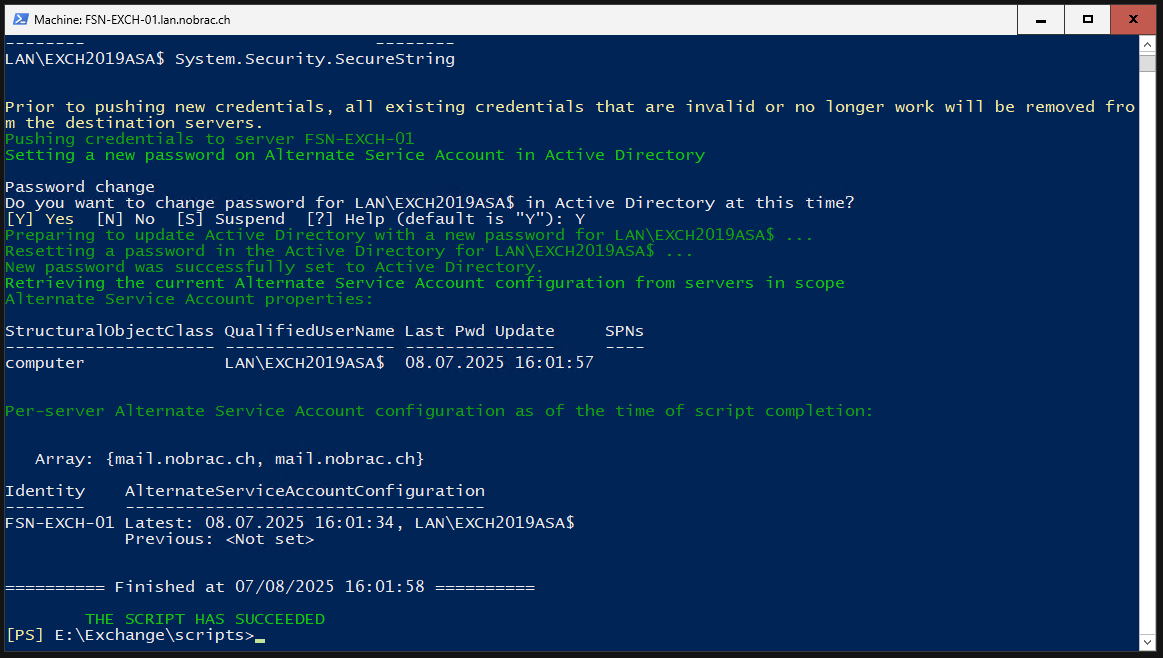
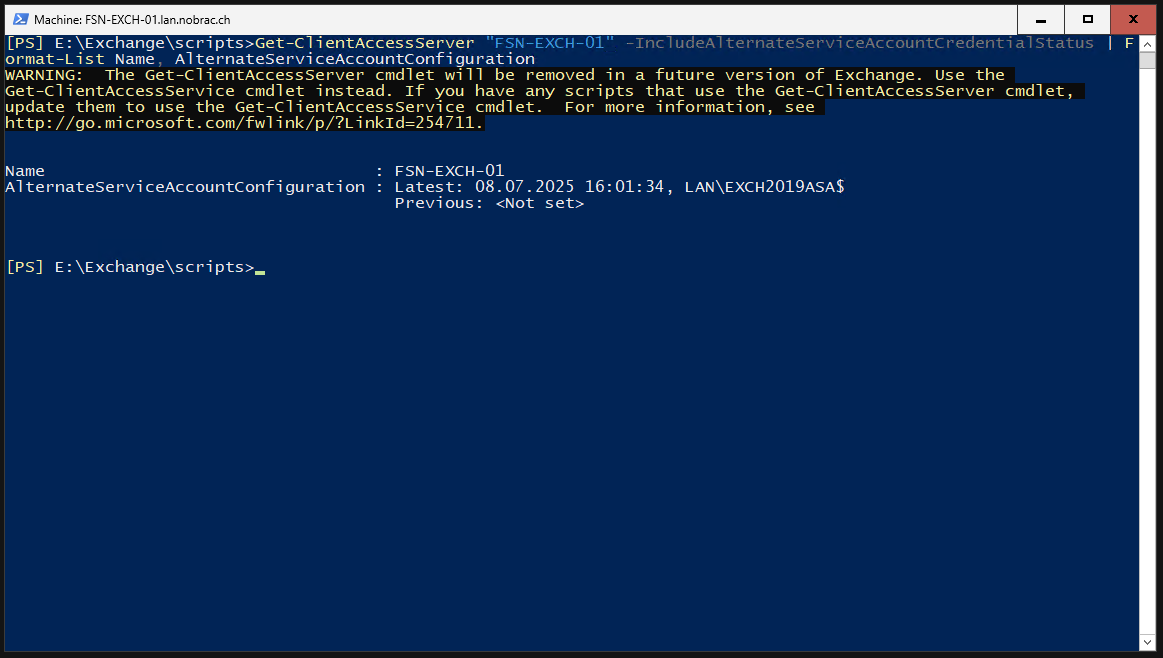
Check the changes with Powershell. Change the hostname accordingly.
|
|
Configure SPNs
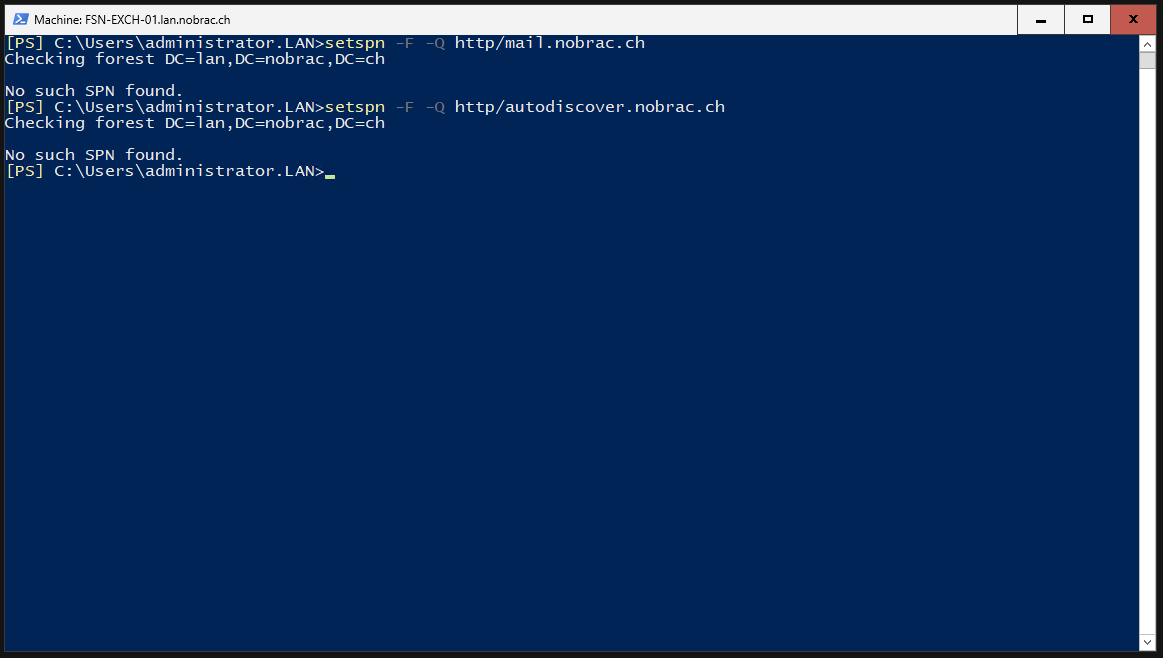
We are now checking whether the SPNs already exist in our domain. The output for both SPNs is “No such SPN found.”. So everything is fine and we can use them.
Mail:
|
|
Autodiscover:
|
|
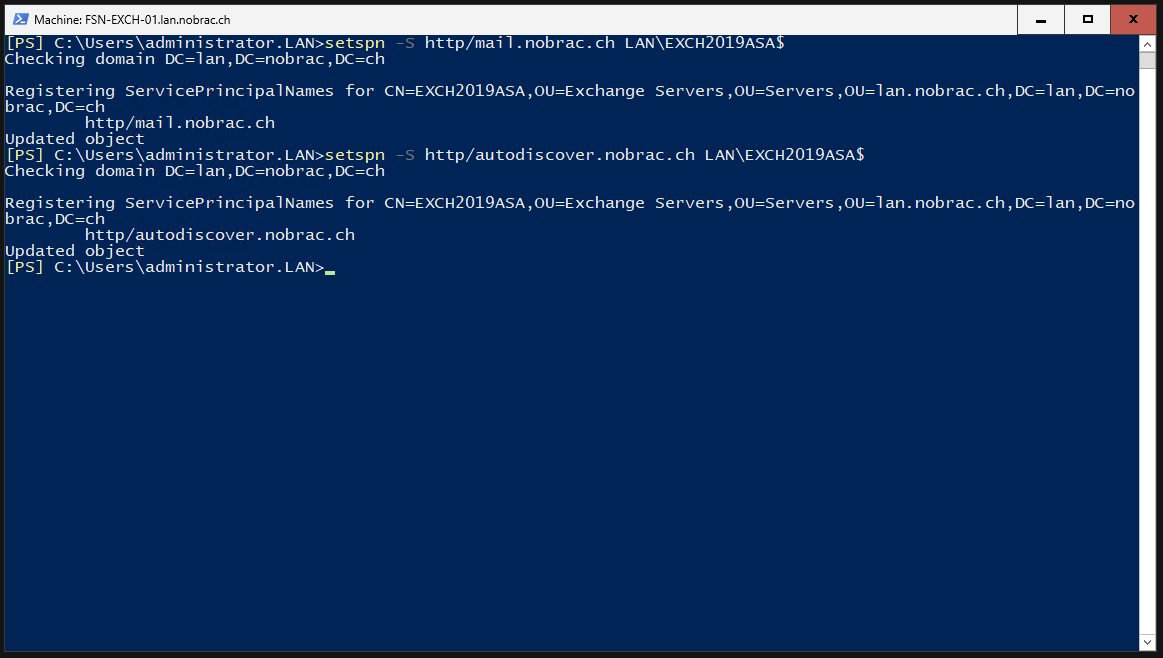
Now we add the SPNs to the computer account.
Mail:
|
|
Autodiscover:
|
|
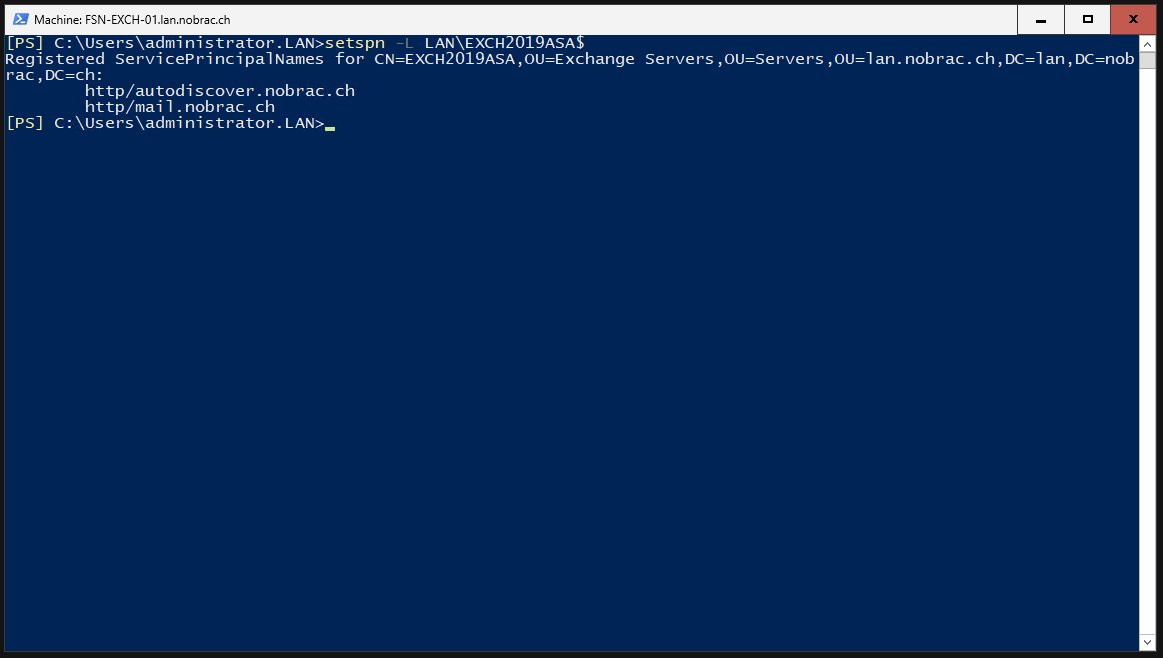
We check whether the changes have been adopted.
|
|
Enable Kerberos Authentication
We enable Kerberos authentication for Outlook clients.
|
|
We check whether the changes have been adopted.
|
|
We enable Kerberos authentication for MAPI-over-HTTP clients for the Exchange Server.
|
|
We check whether the changes have been adopted.
|
|
Verify if Kerberos works
Reboot the Exchange server now.
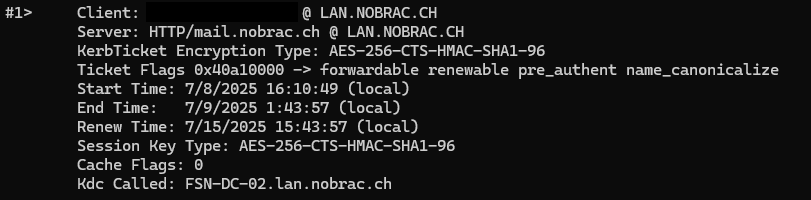
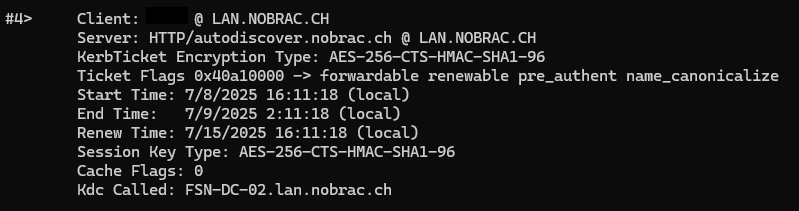
Now we start Outlook on a computer that is also part of the domain. We will now check the Kerberos tickets. Open “cmd” and enter “klist”.
|
|
We should see two Kerberos tickets. One for “mail.nobrac.ch” and one for “autodiscover.nobrac.ch”.
Restrict Exchange Admin Center (ECP) Access
The Exchange Admin Center should of course not be accessible from the Internet. In the next step, we will regulate access to the ECP.
First we install the IIS feature “Web-IP-Security” via Powershell on the Exchange server.
|
|

We now need a server or PC on which we can install the IIS and then manage the IIS from the Exchange server. I use my management VM again for this. You could also take a snapshot before installing the IIS and restore the snapshot after the settings have been made.
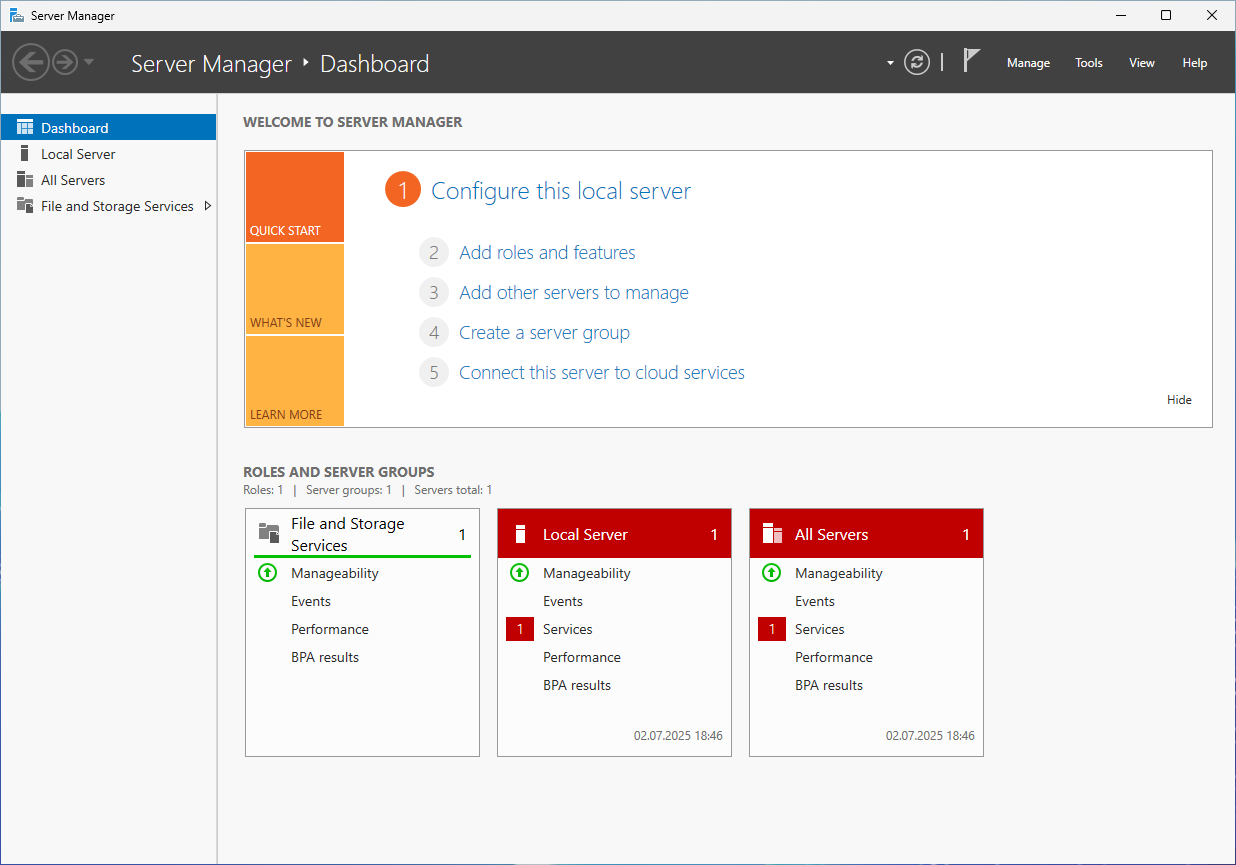
Open the Server Manager.
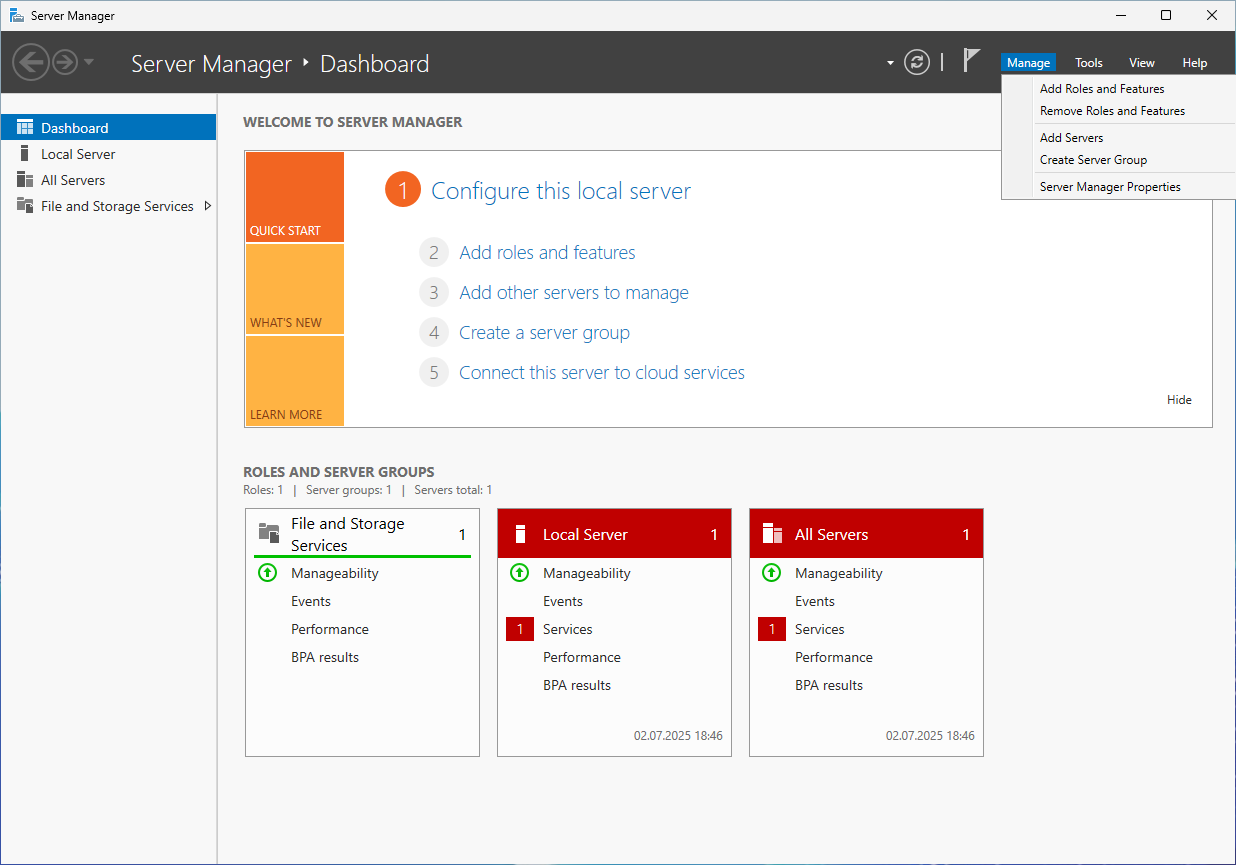
Click on “Manage” -> “Add Roles and Features” in the top right corner.
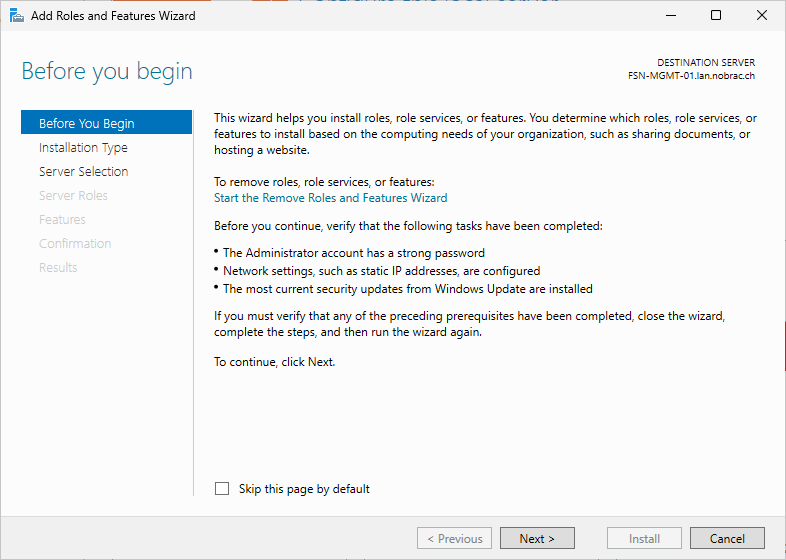
Click on next.
Select “Role-based or feature-based installation”.
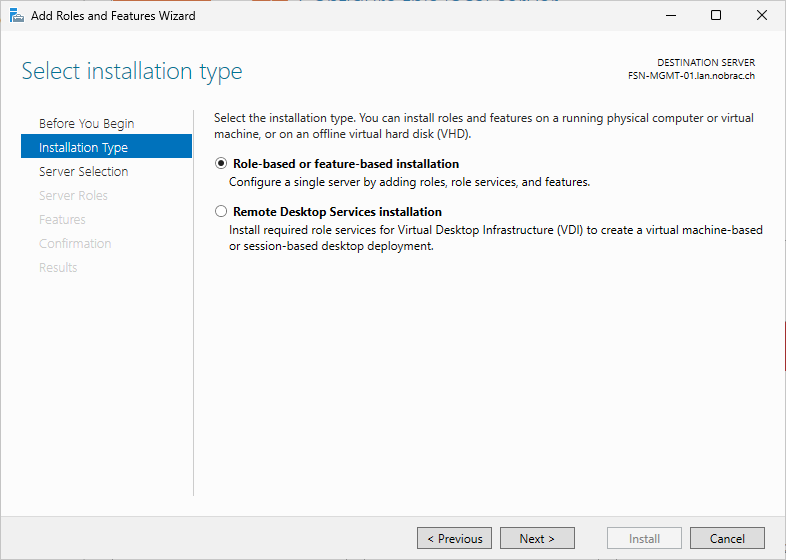
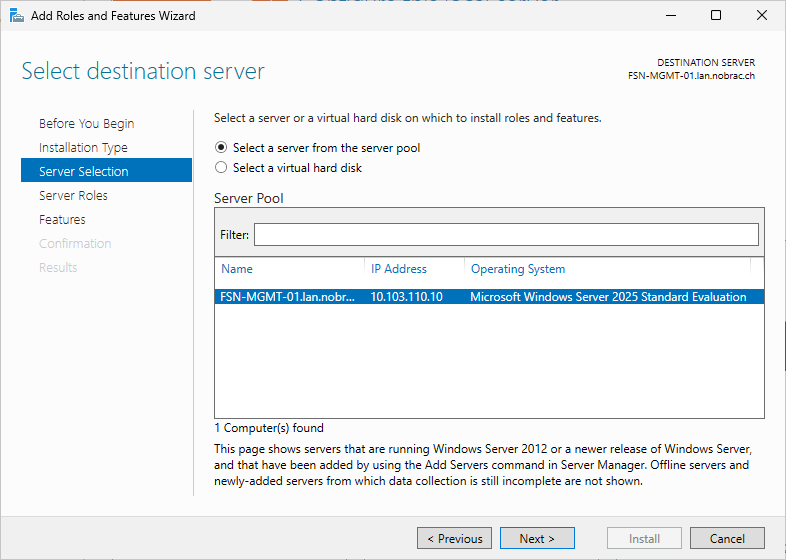
Click on next.
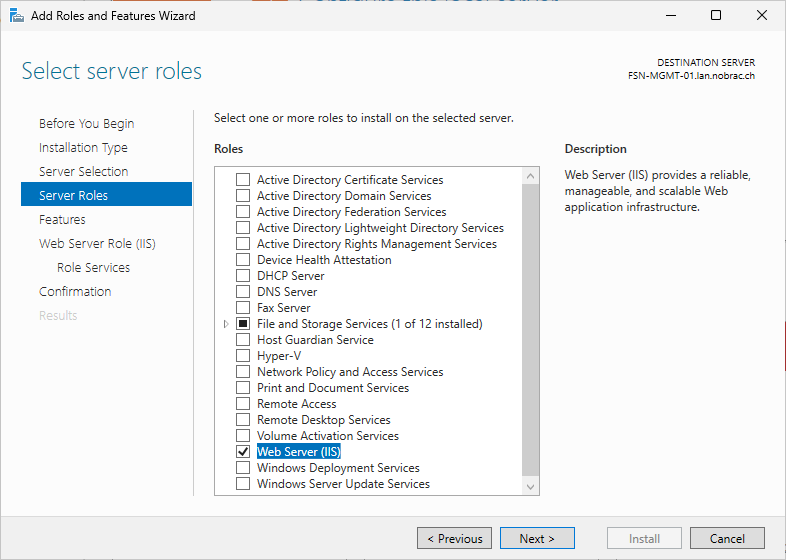
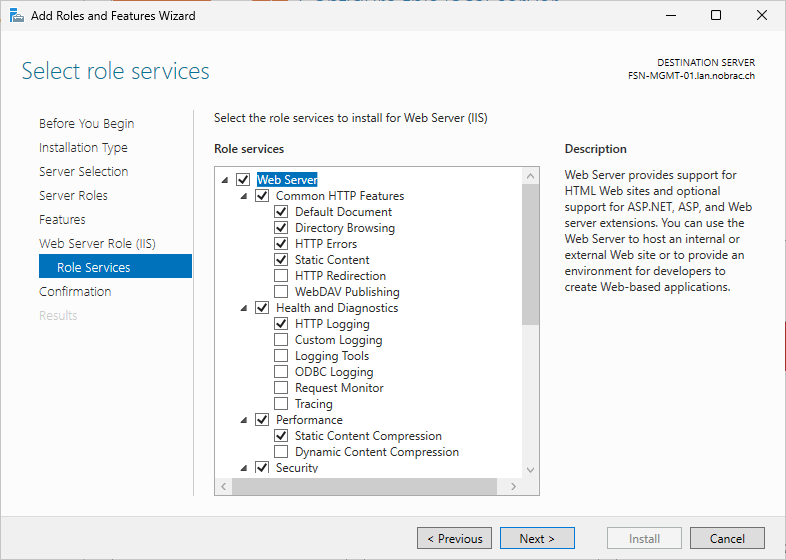
For the server roles, we select “Web Server (IIS)”.
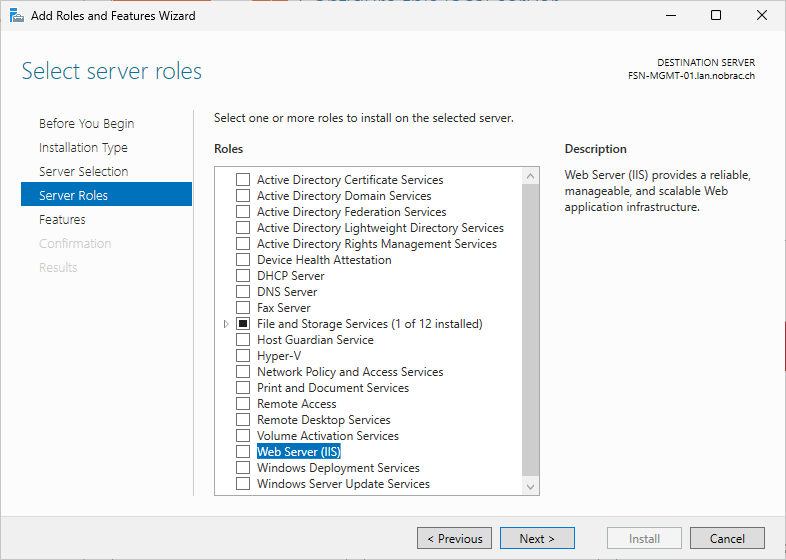
Click on “Add Features”.
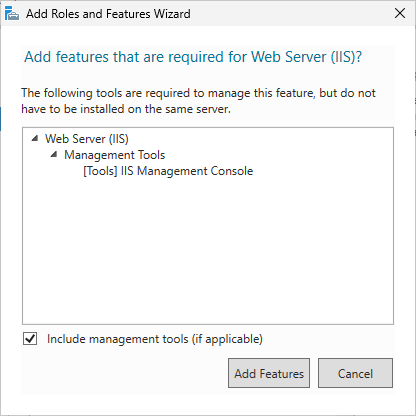
It should look like this. Click next.
We don’t need any additional features so just click next.
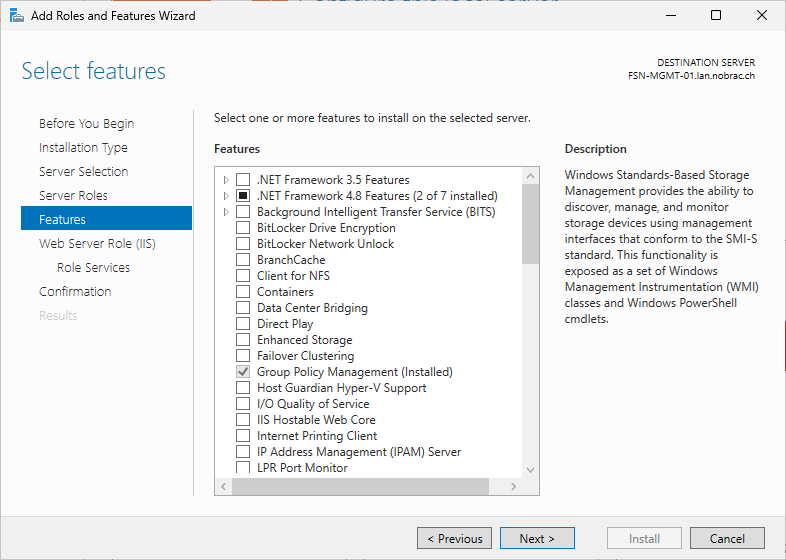
Just click on next.
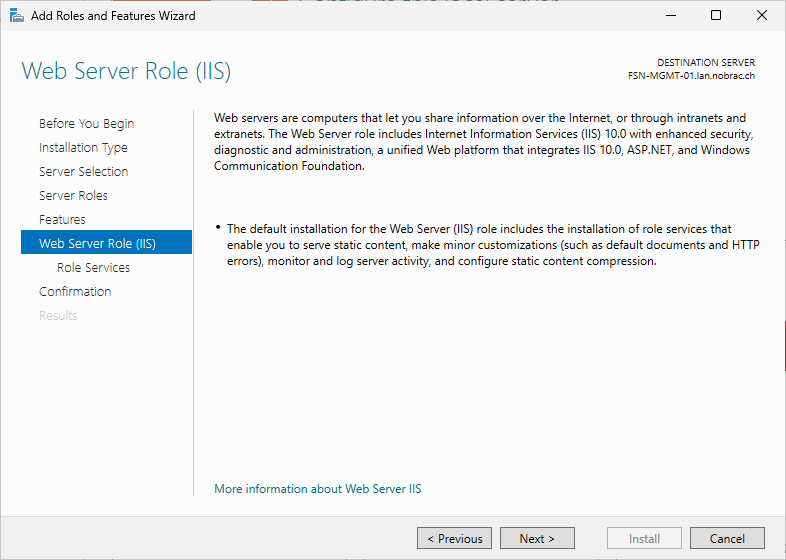
Simply click on next again.
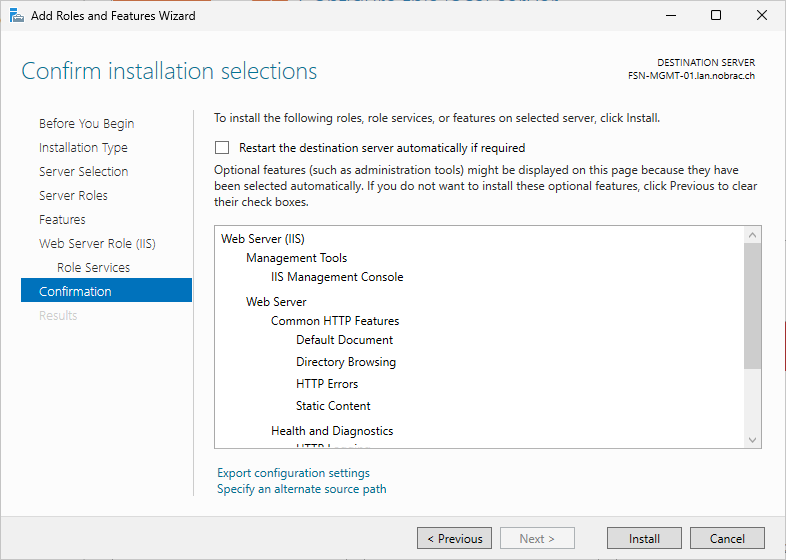
Click on install.
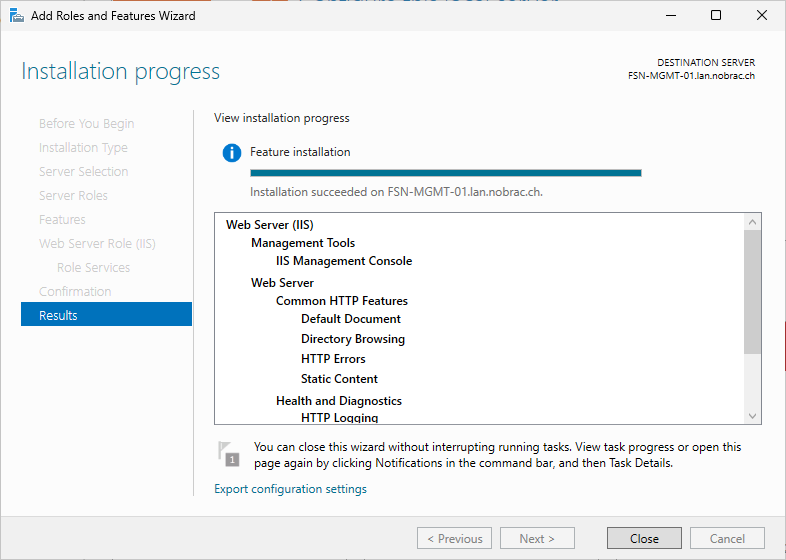
Wait until the installation is complete.
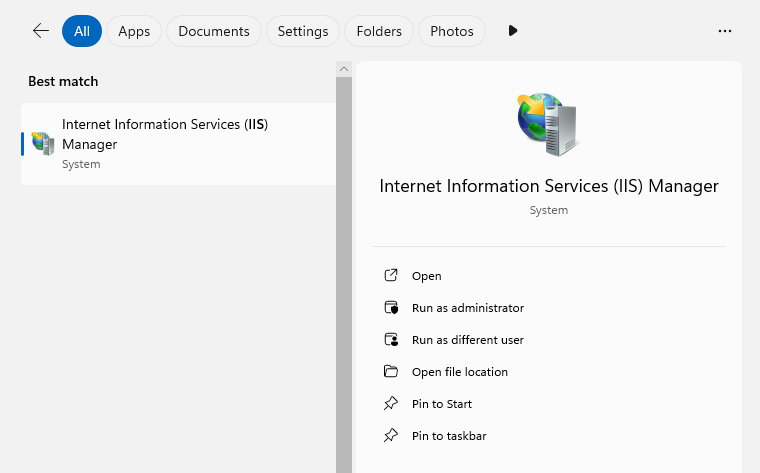
Start the IIS-Manager.
You will see the following window.
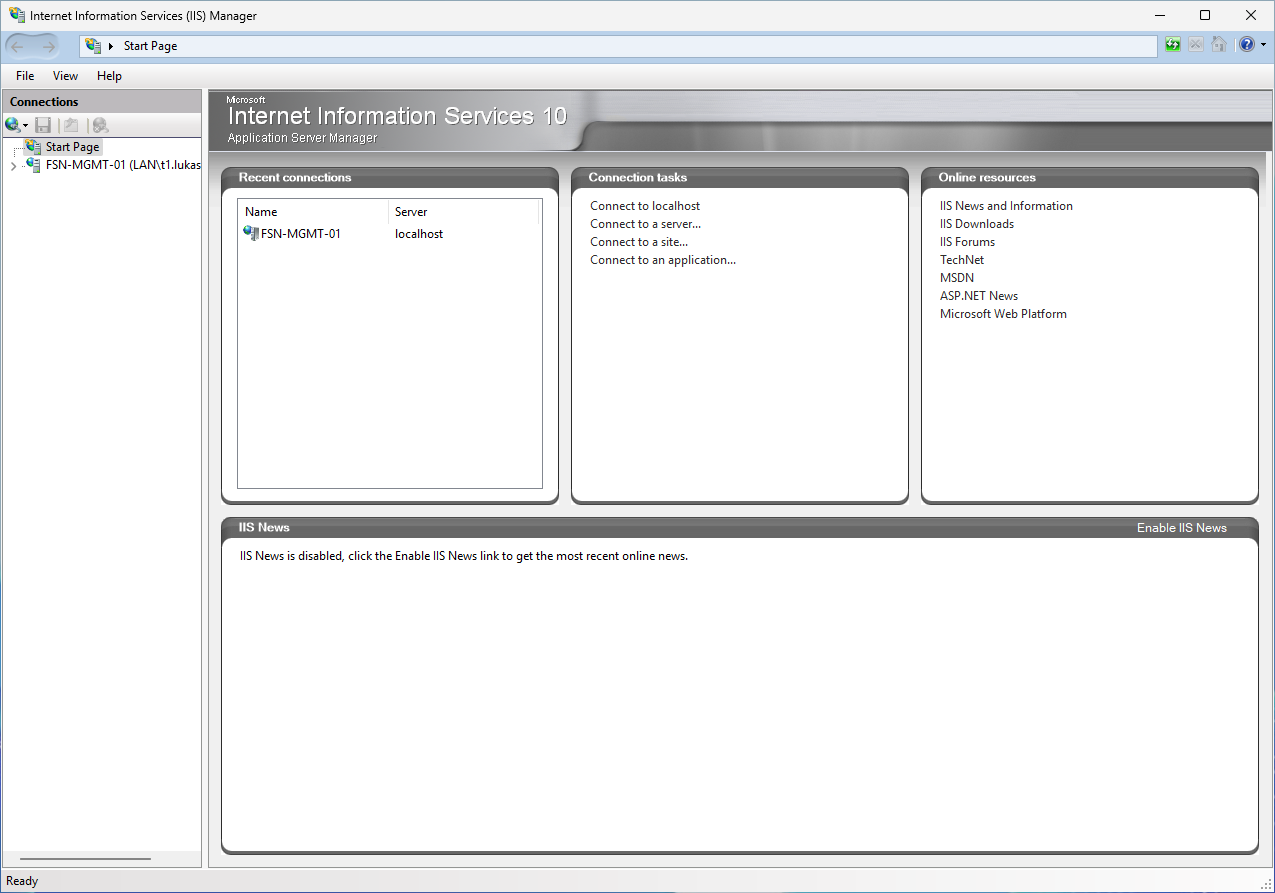
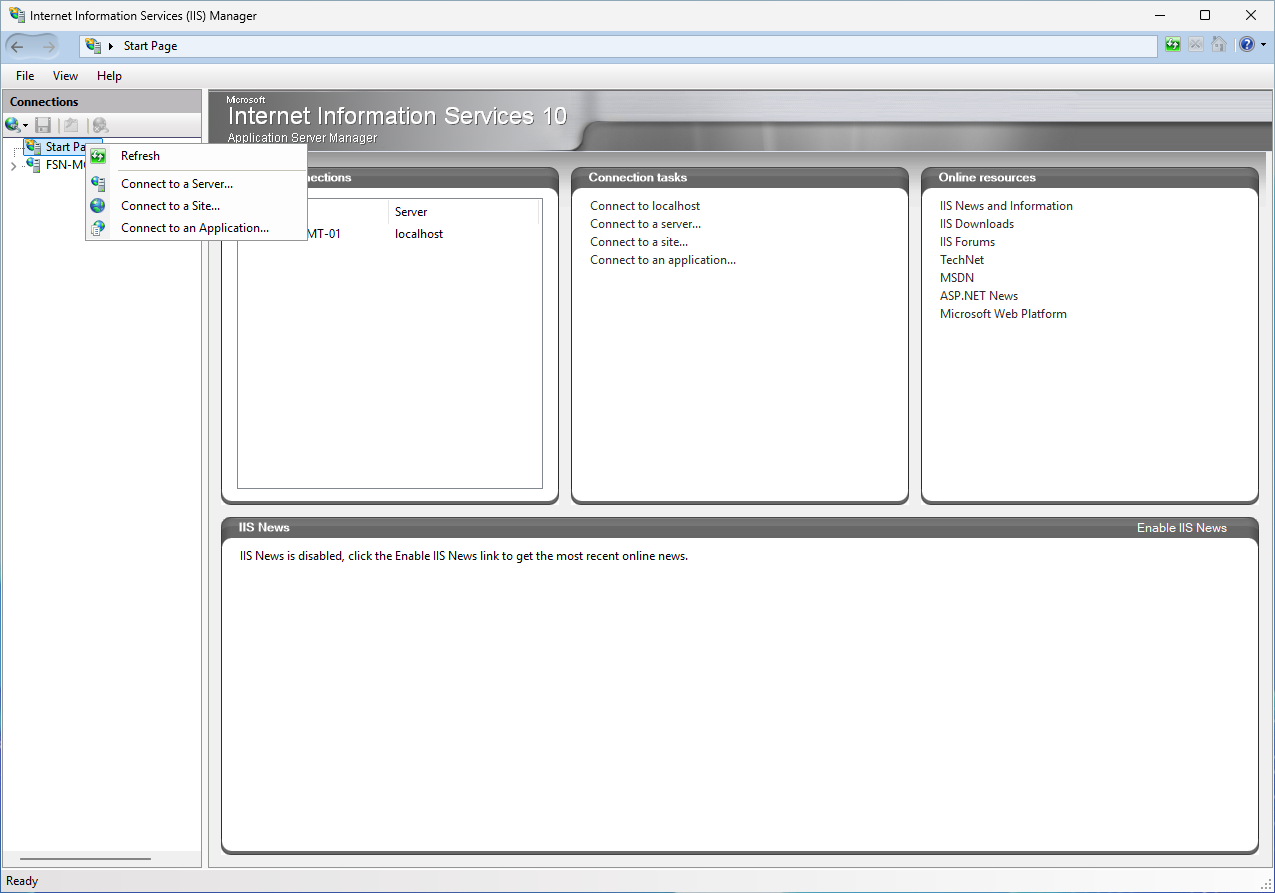
Right-click “Start Page” at the top left and select “Connect to a Server…”.
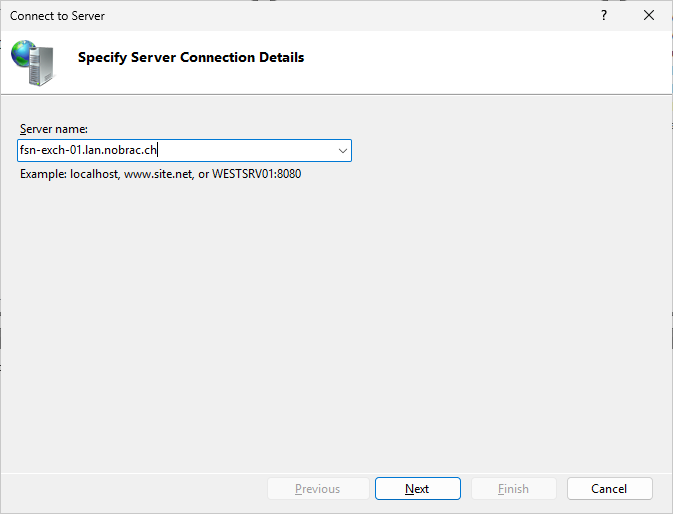
Enter the IP-Address or FQDN of your Exchange server.
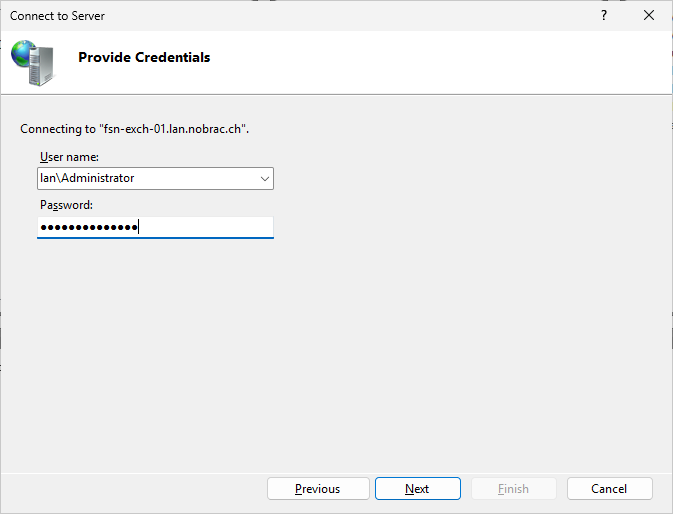
Enter the access data of an account with admin rights on the Exchange server.
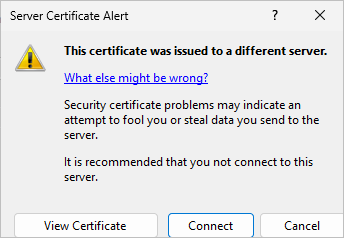
Ignore the warning about the certificate. Simply click on connect.
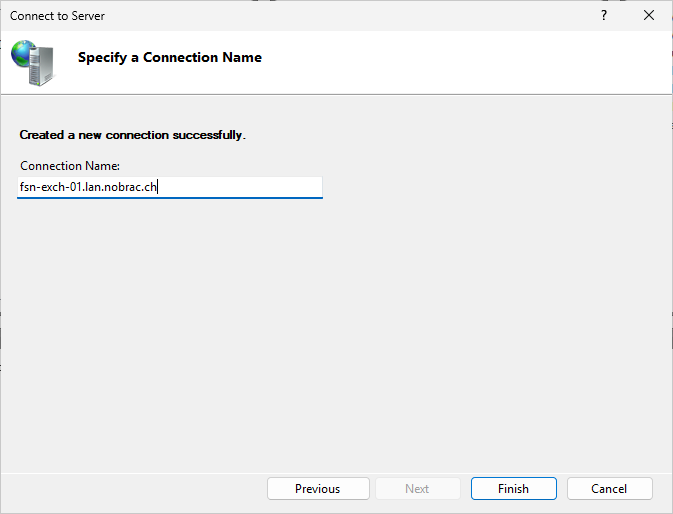
Assign a name for the connection. I just left it like that. Click on finish.
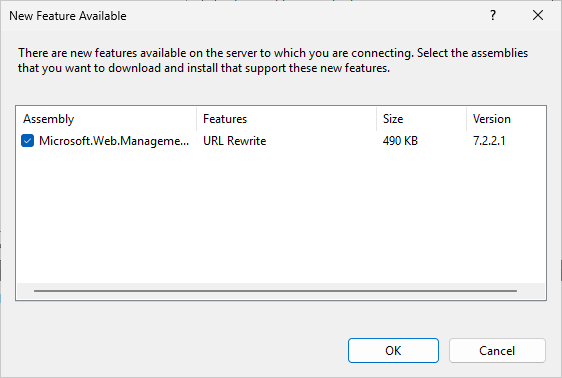
If a message regarding new features pops up, check the feature and click okay.
Click on run.

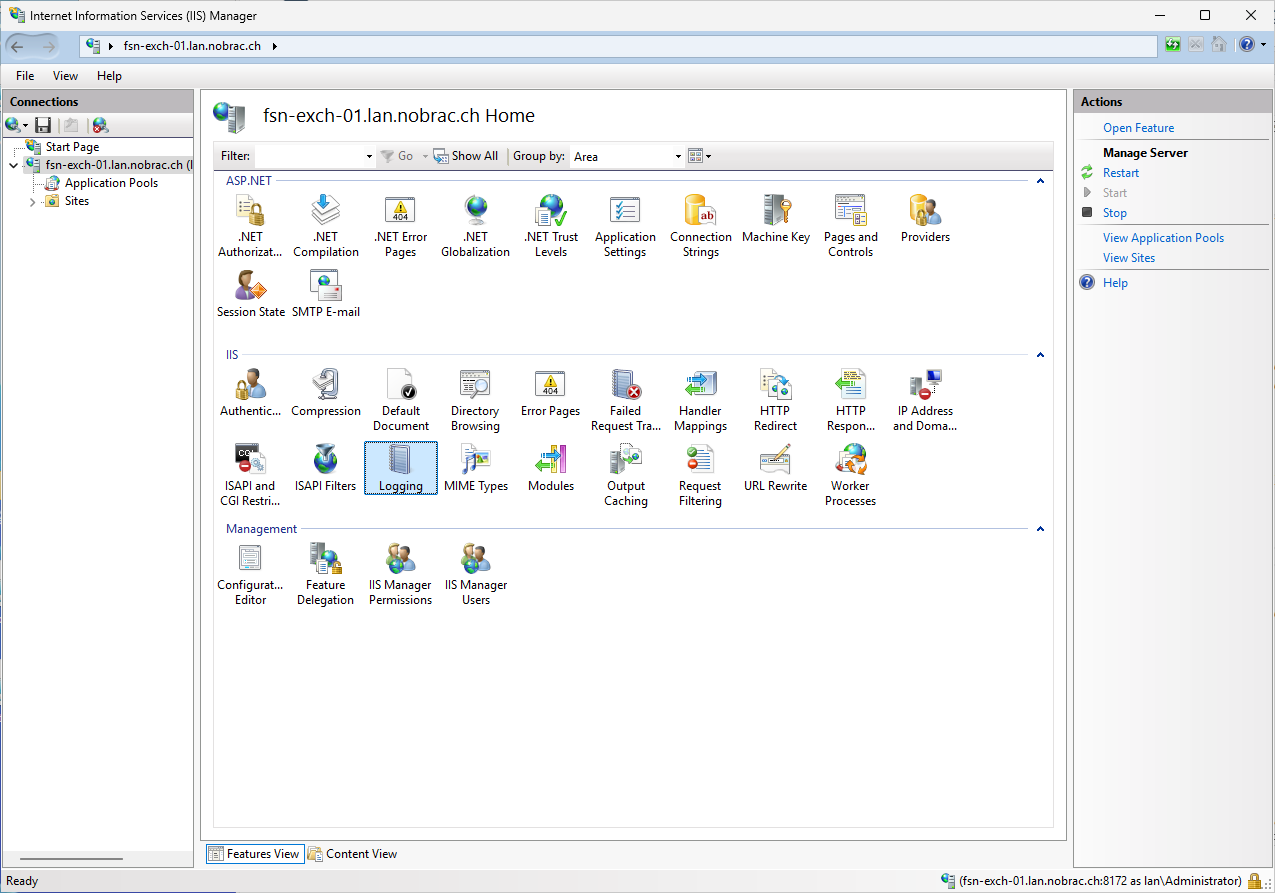
We are now connected to the IIS server of the Exchange server.
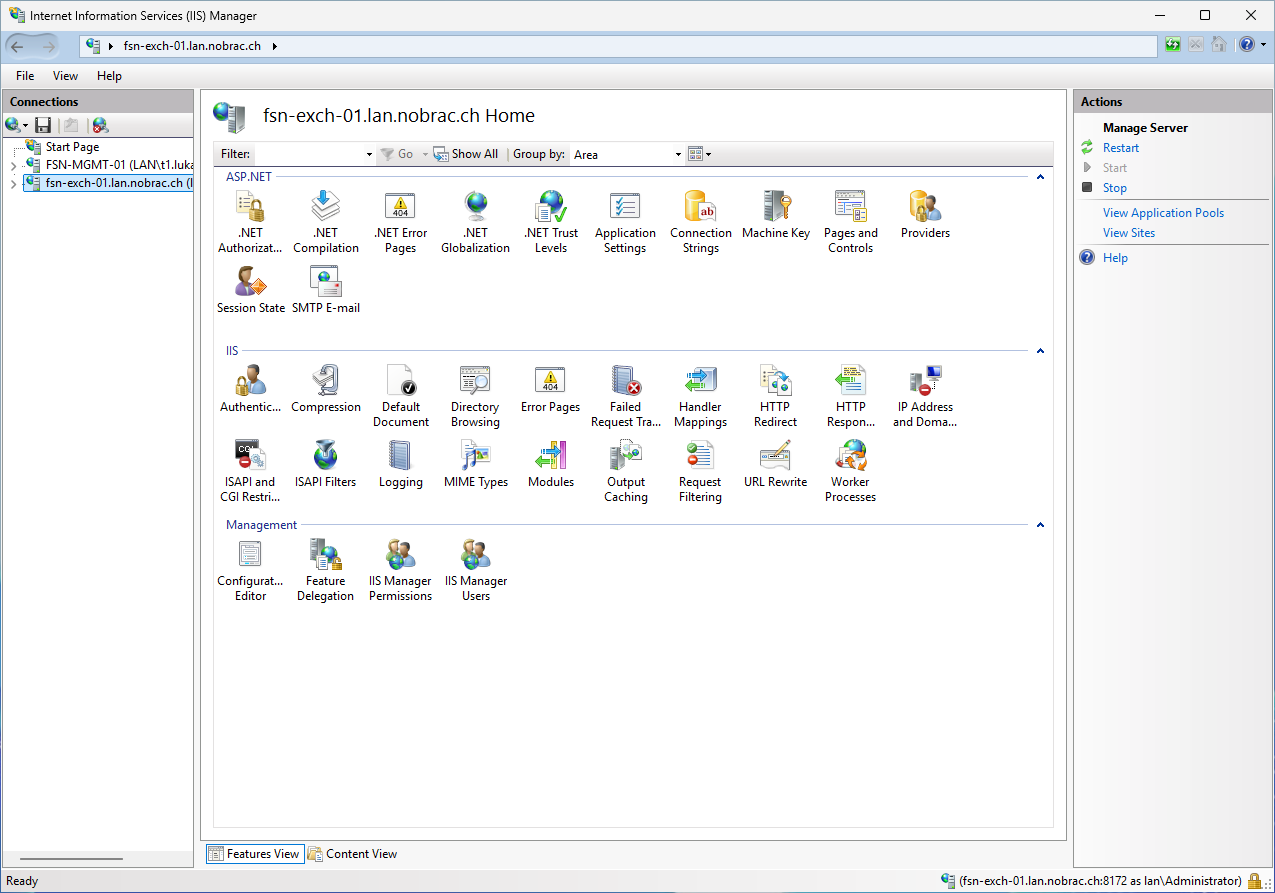
In the left navigation bar, we now expand the IIS Exchange server entry and then expand the “Default Web Site” entry. Click on “ecp” to select it.
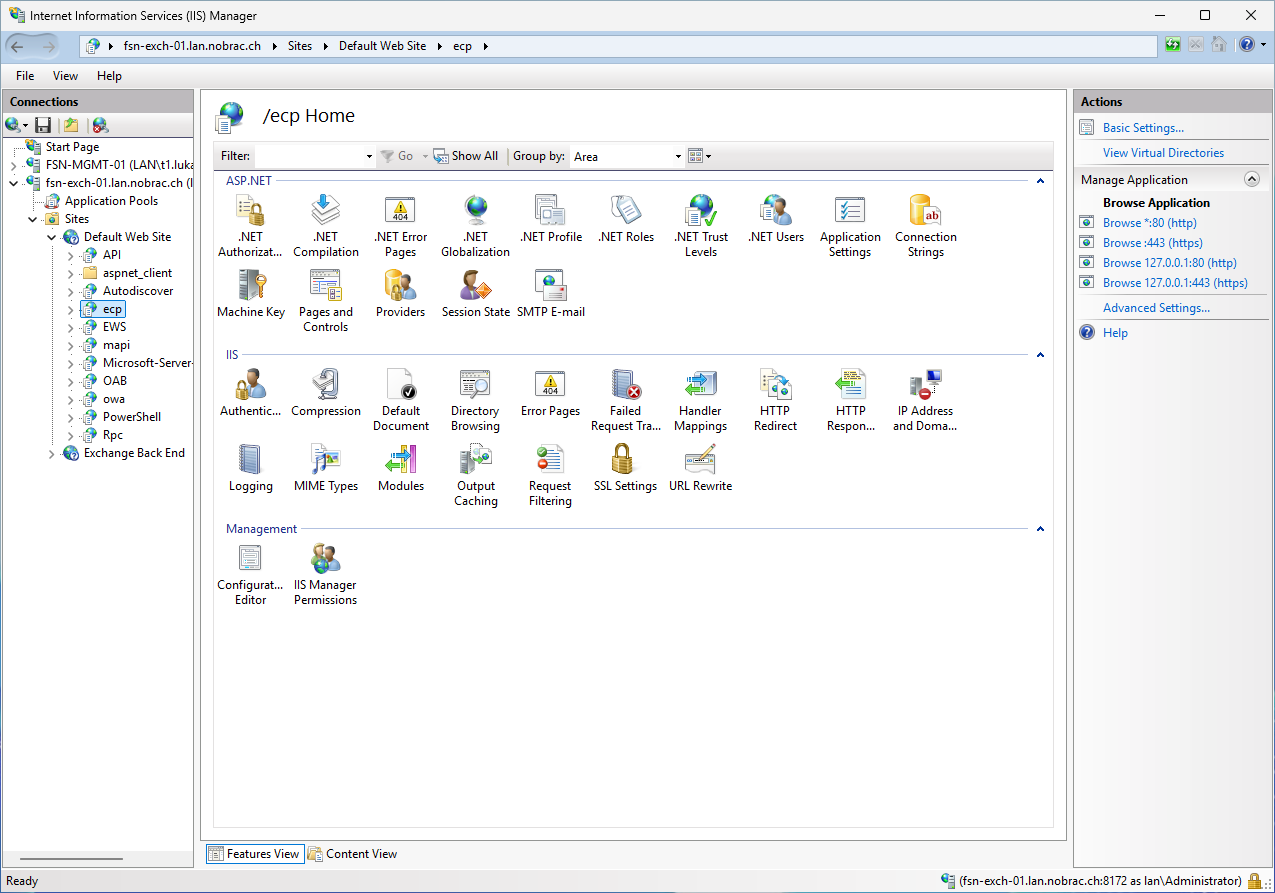
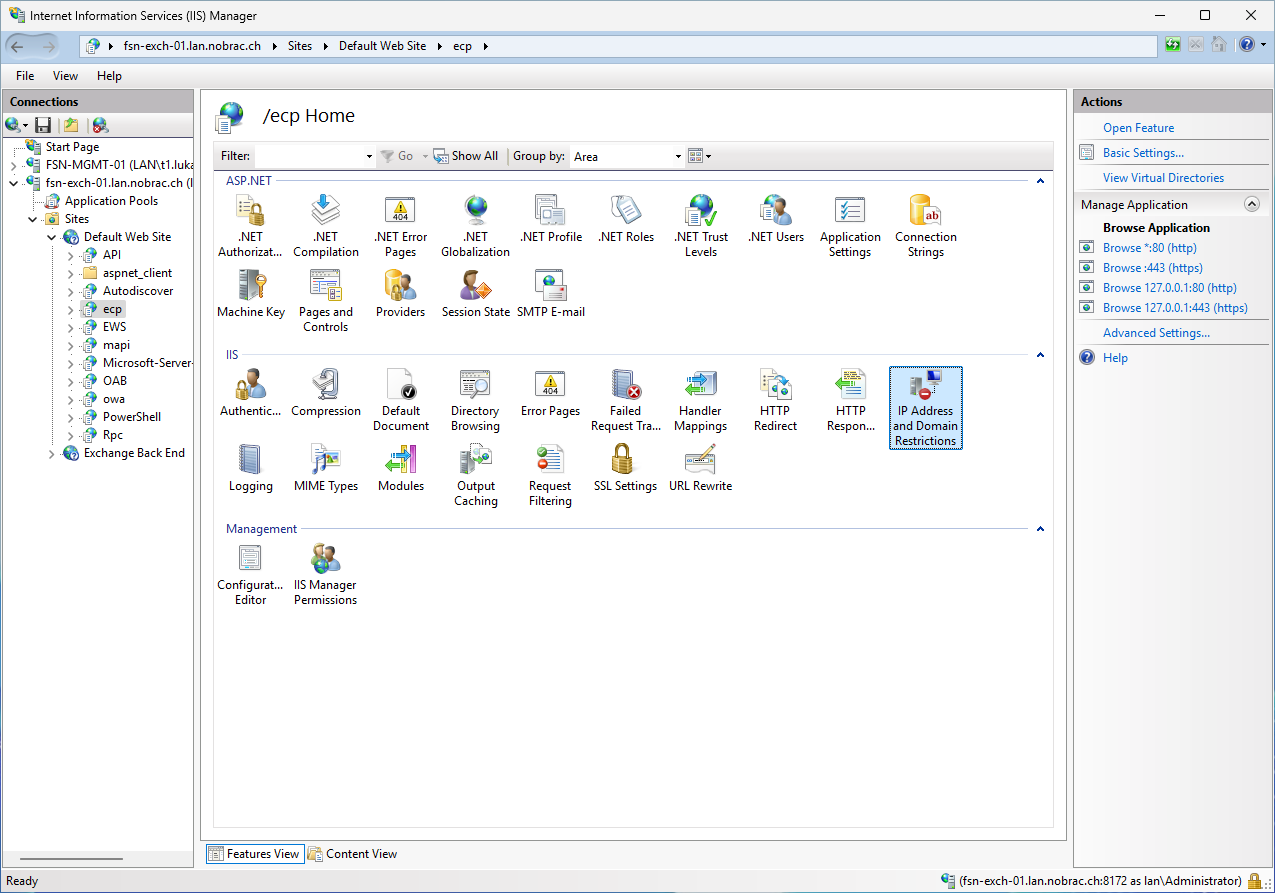
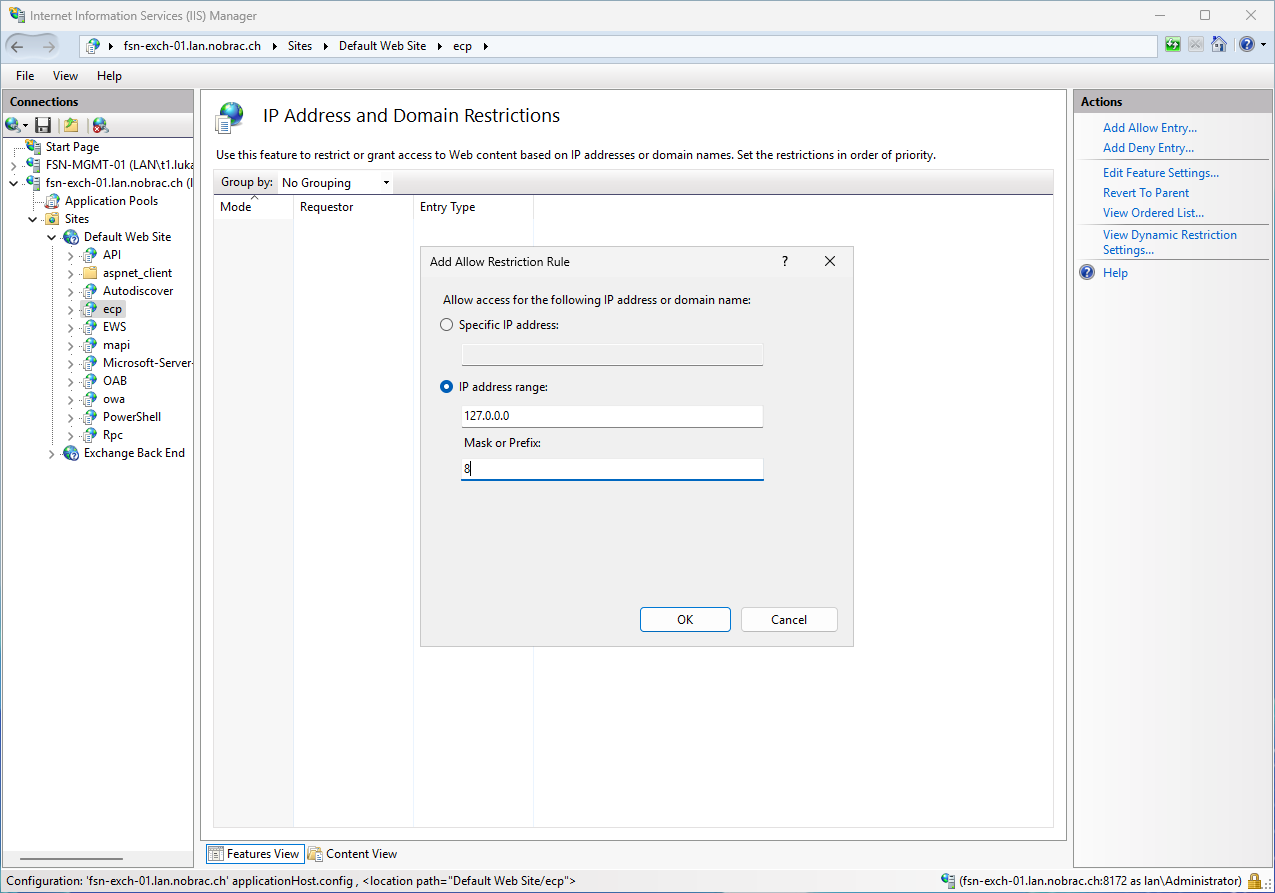
Open the “IP Address and Domain Restrictions”.
The following window opens.
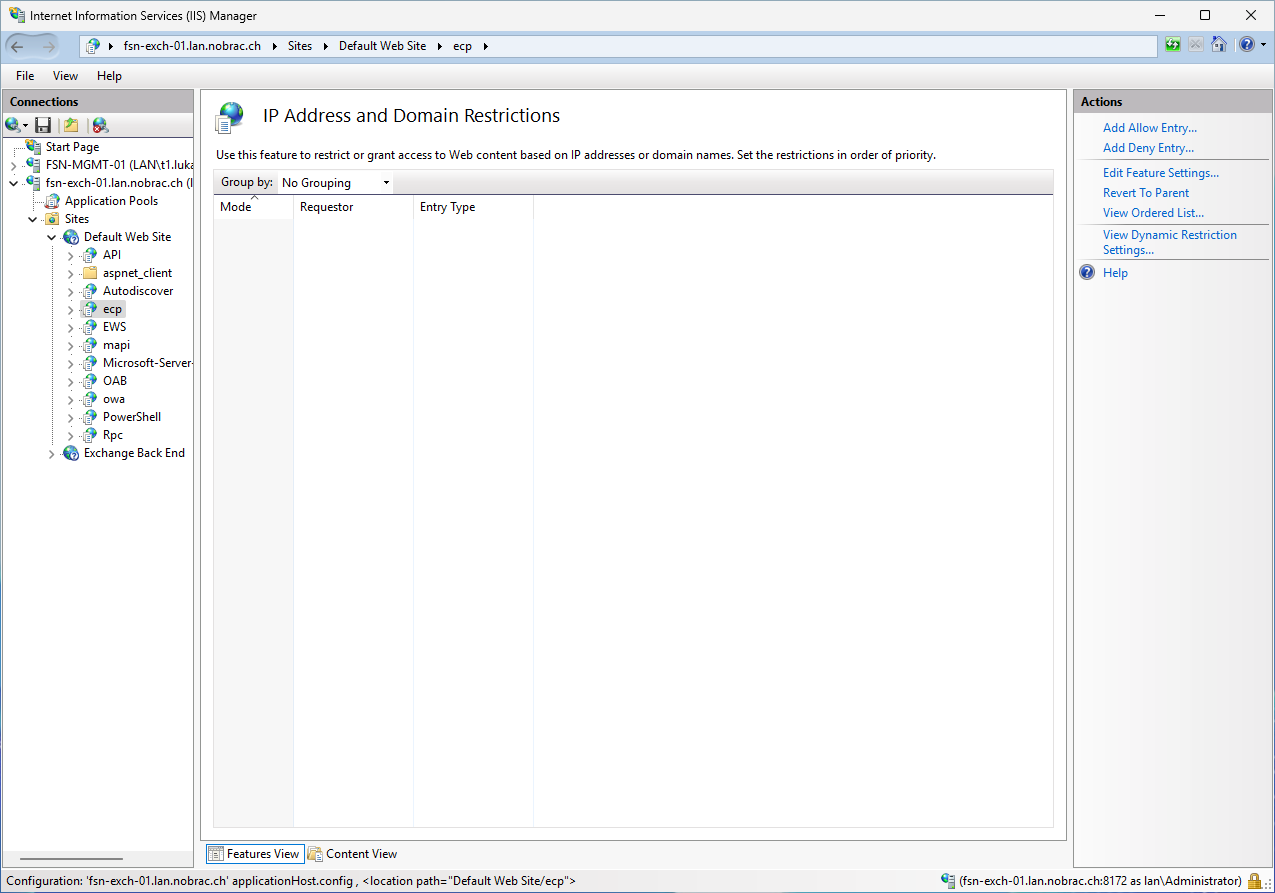
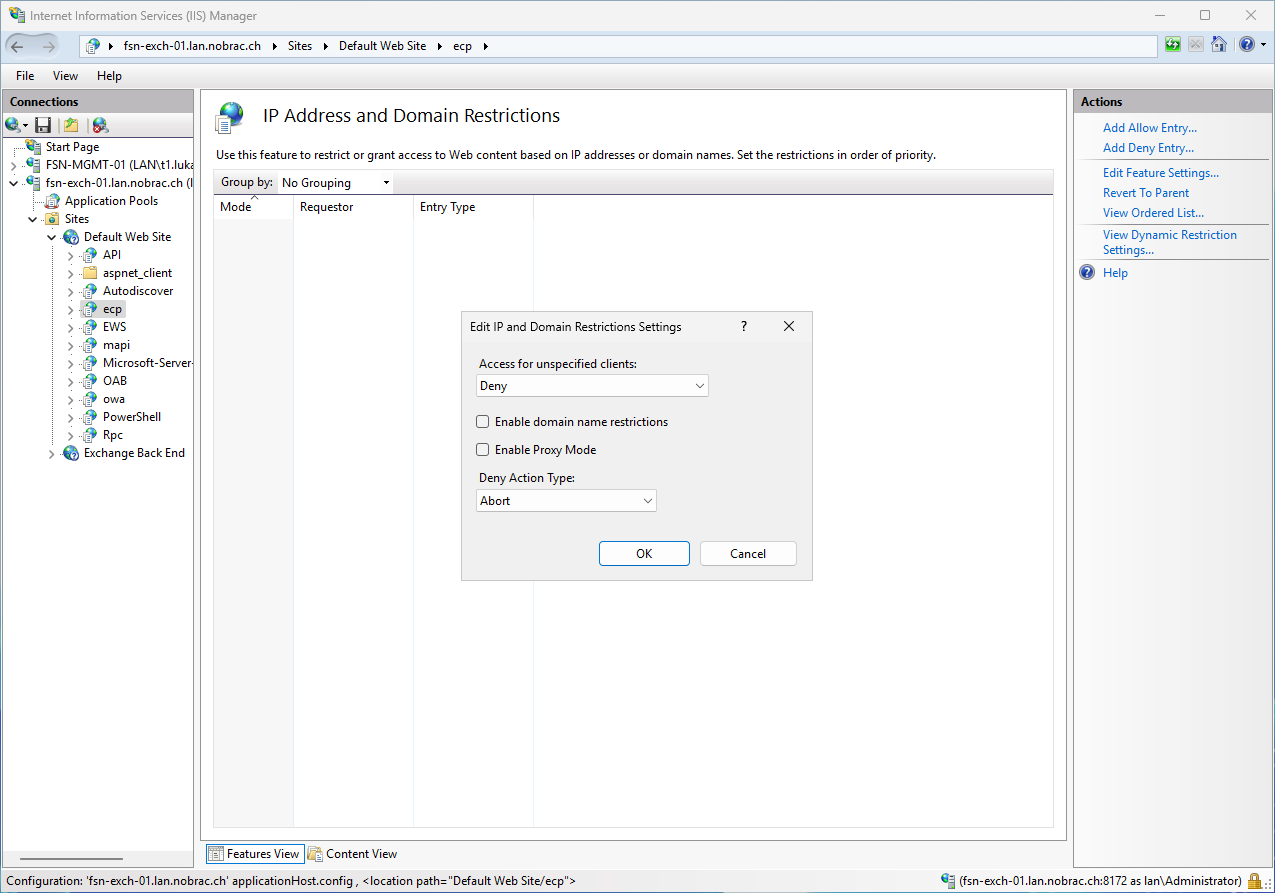
Click on “Edit Feature Settings…” in the right menu bar. Apply the settings of the screenshot.
Click on “Add Allow Entry…” in the right menu bar. Select “IP address range” and enter the localhost network range.
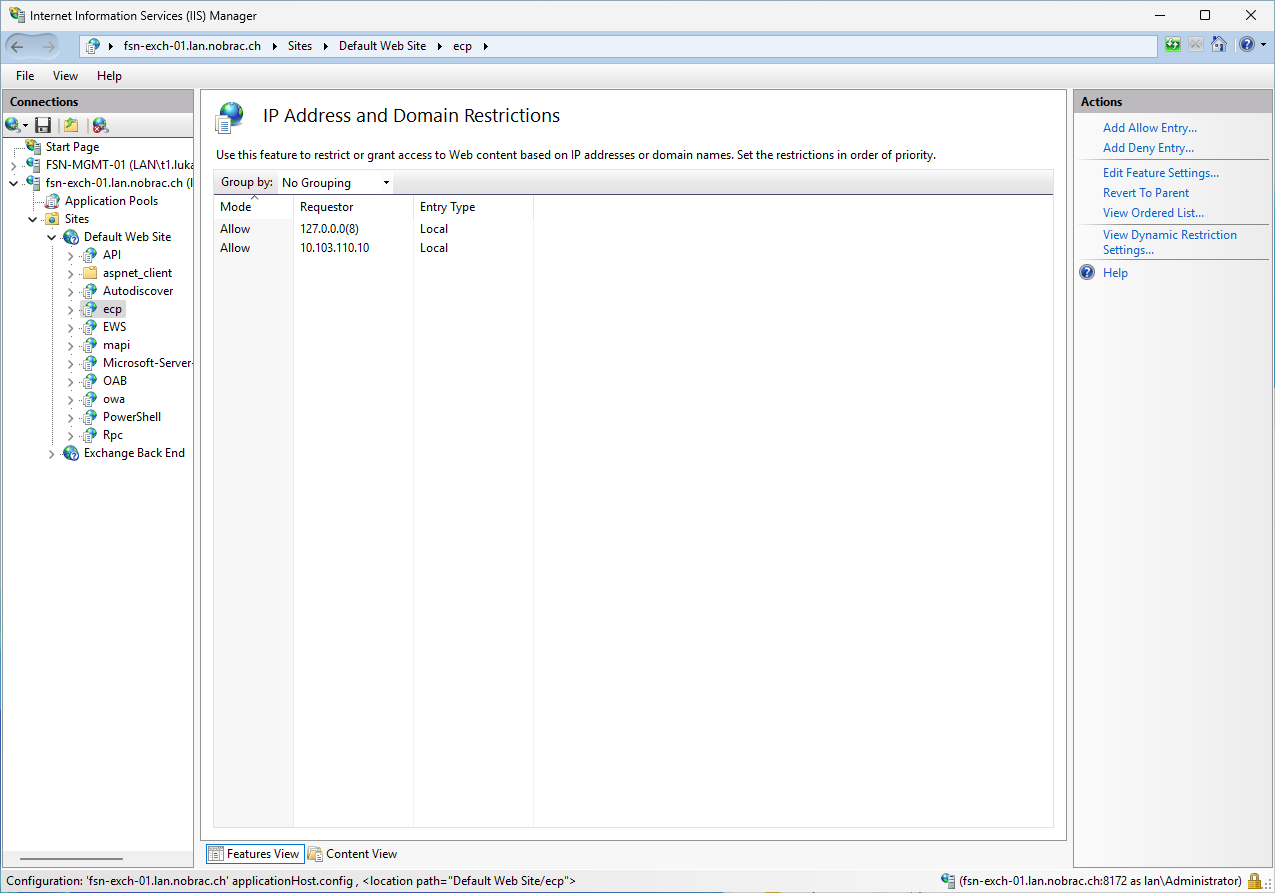
It should look like this.

Click again on “Add Allow Entry…”. Select “Specific IP address” and enter the IP address of your management host via which you want to manage the Exchange.
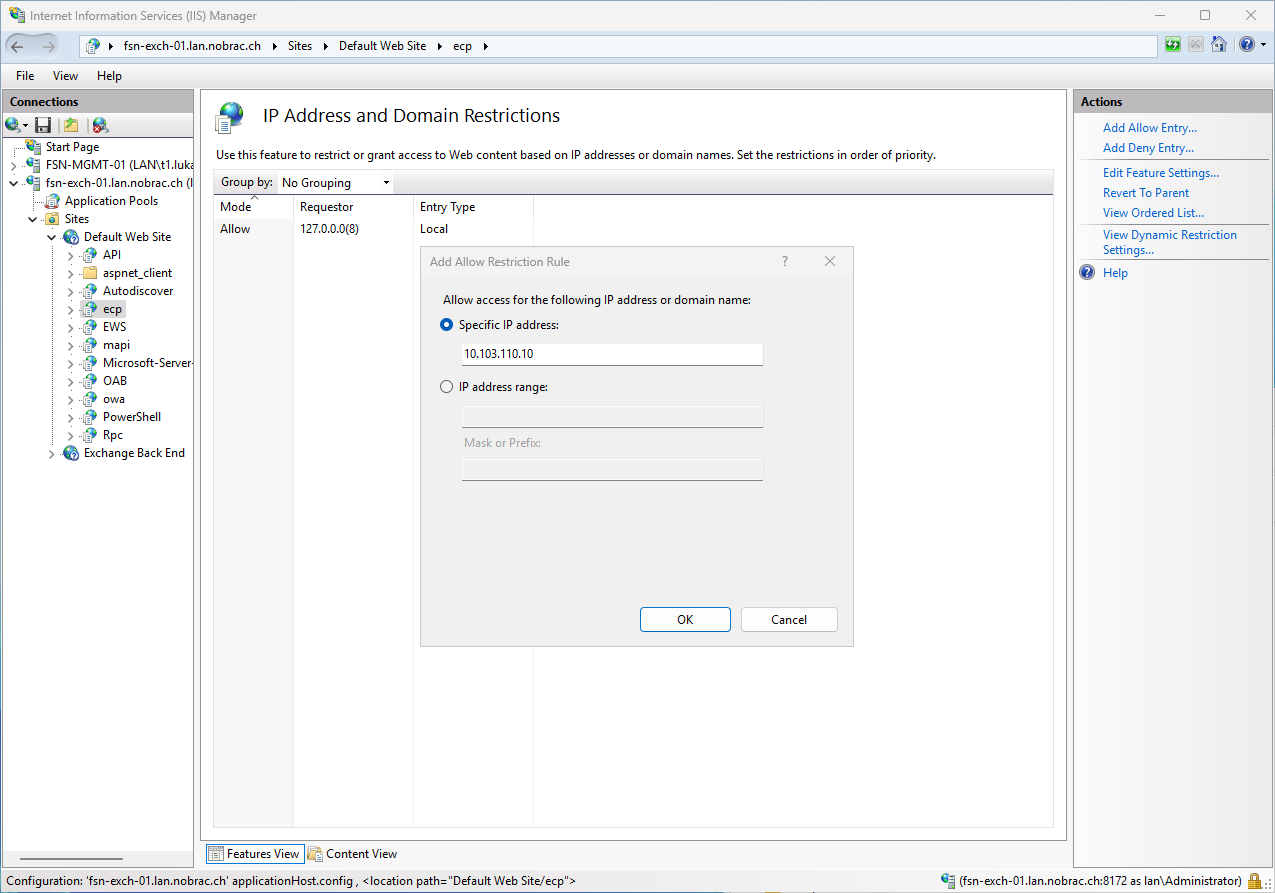
It should look like this.
Click again on “Add Allow Entry…”. Select “Specific IP address” and enter the IP address of your Exchange server.
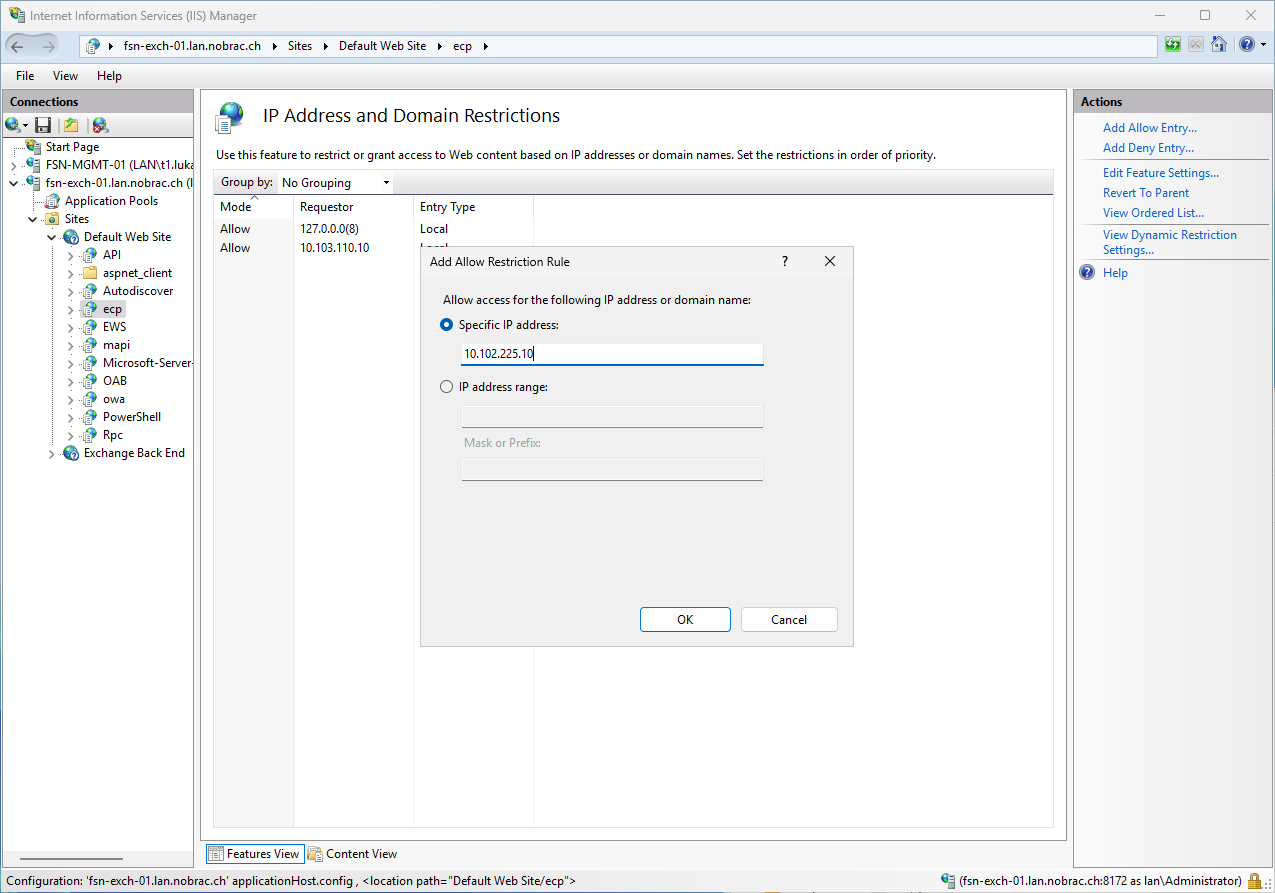
It should look like this.
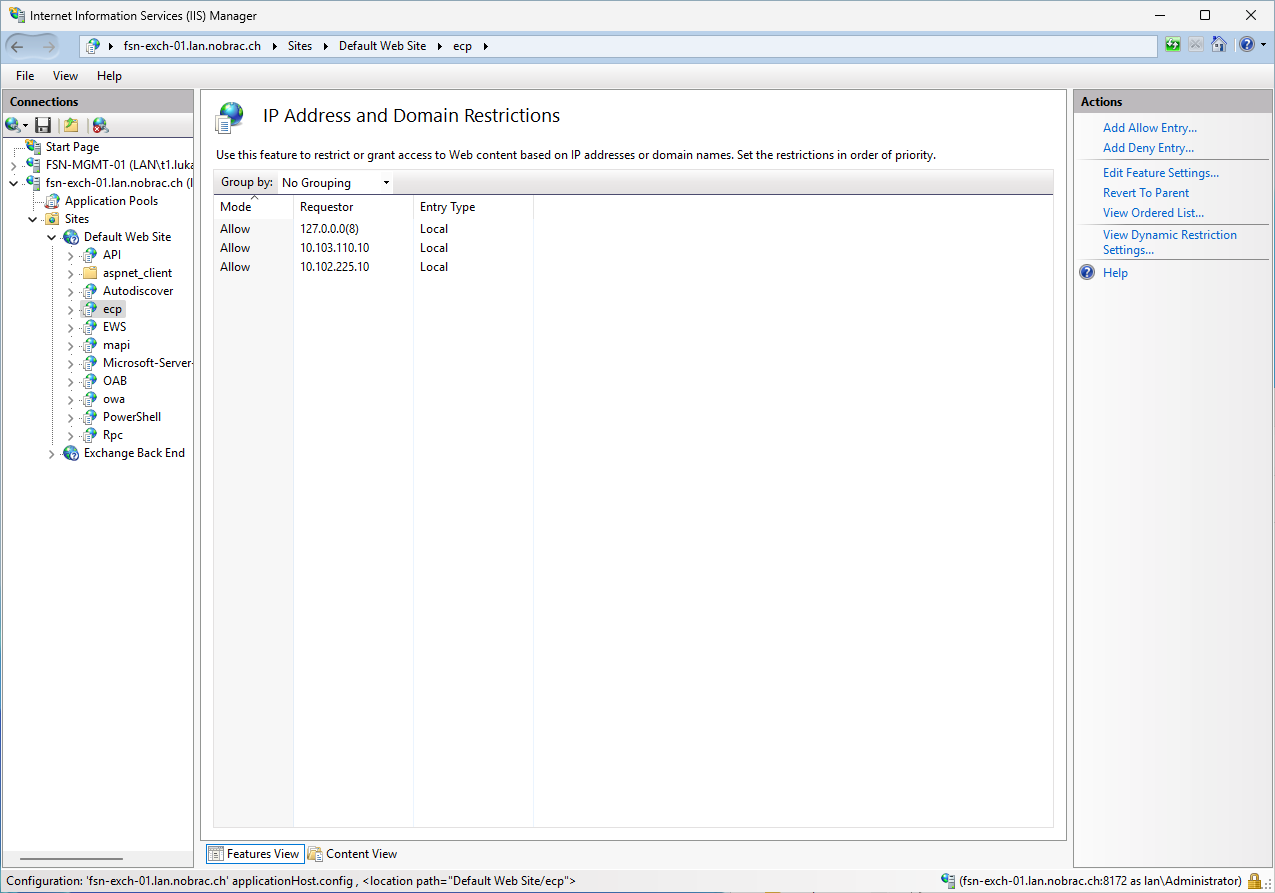
That’s it. The ECP is now only accessible via the registered IP addresses. You can of course add further IP addresses or networks.
Disable Version Header (X-AspNet)
In the default setting, the IIS transmits the ASP version used. Switching off the version transmission does not directly increase security, but if someone is already looking for vulnerabilities, then you don’t necessarily have to lay tracks.
In the left navigation bar, select the IIS Exchange server entry. Click on “Configuration Editor”.
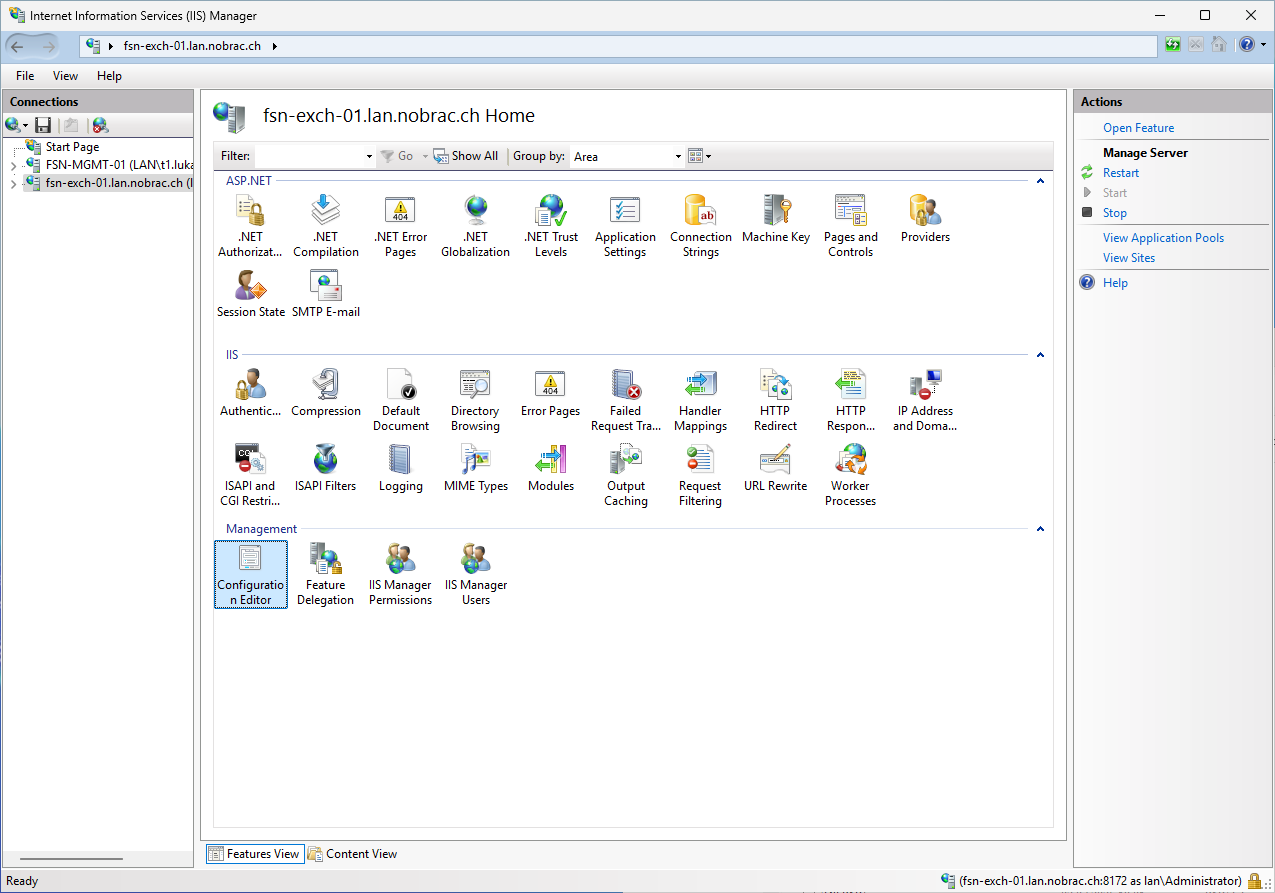
You should see the following screen.

Now enter “system.web/httpRuntime” instead of “appSettings” in the “Section” bar at the top and search for the option “enableVersionHeader”. It is activated by default.

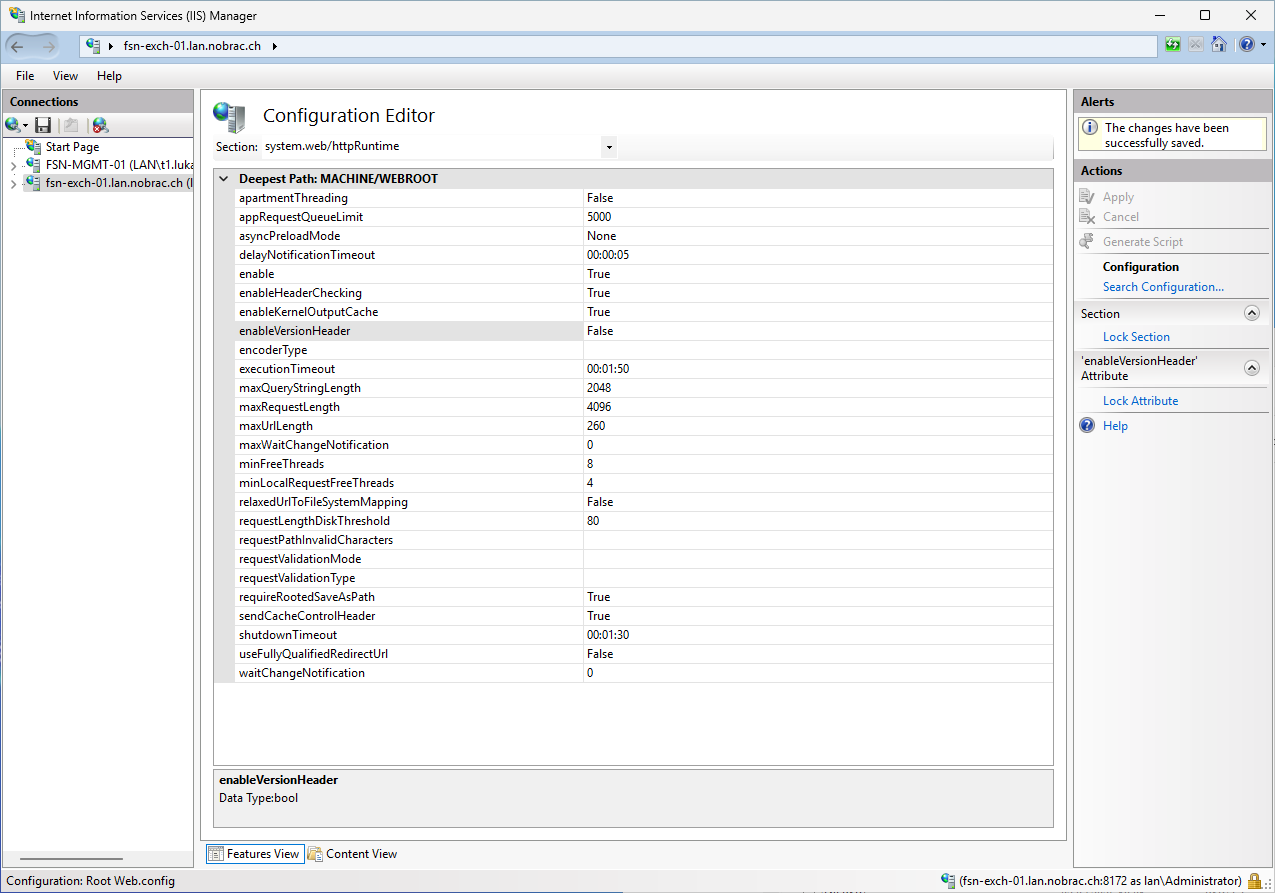
Set it to “False” and click on “Apply” in the top right corner.
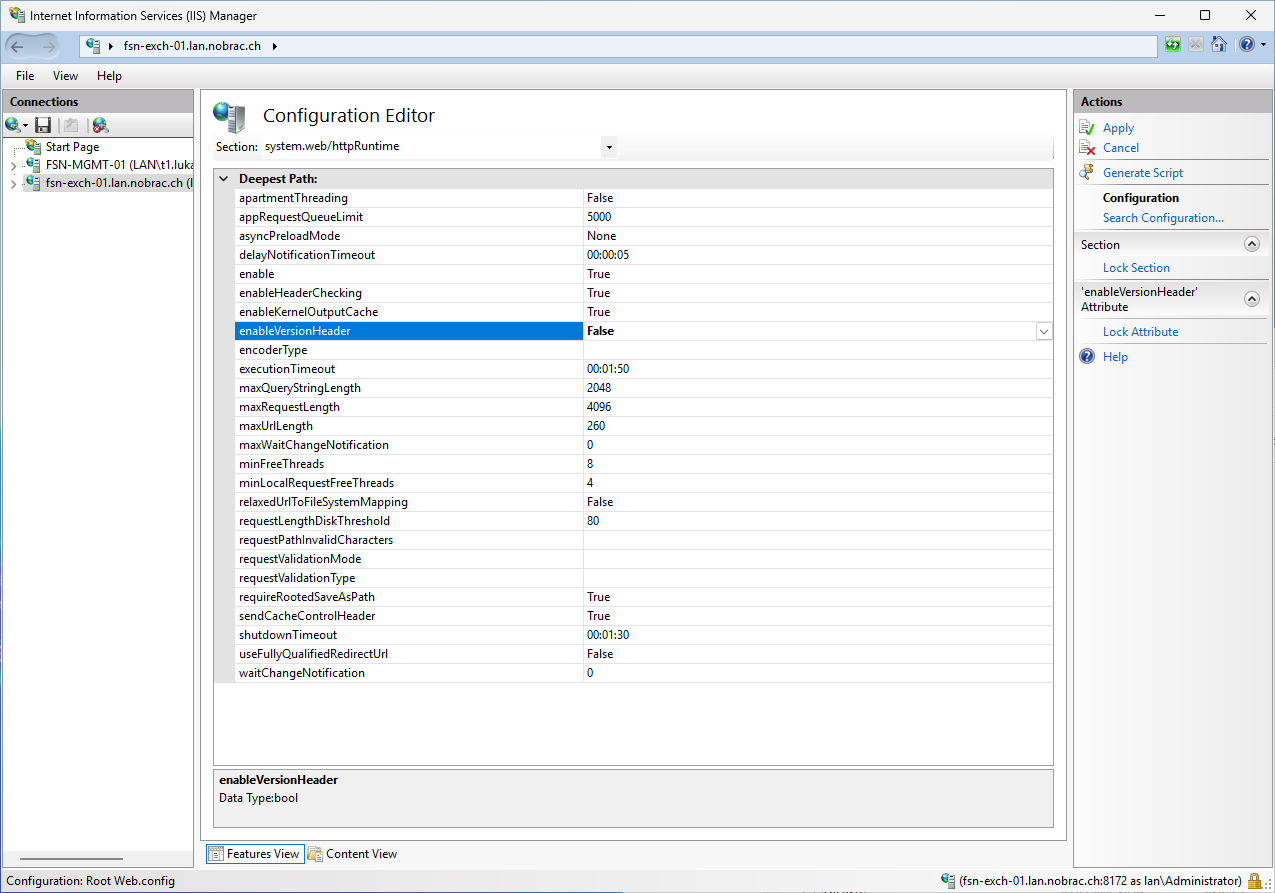
It should look like this.
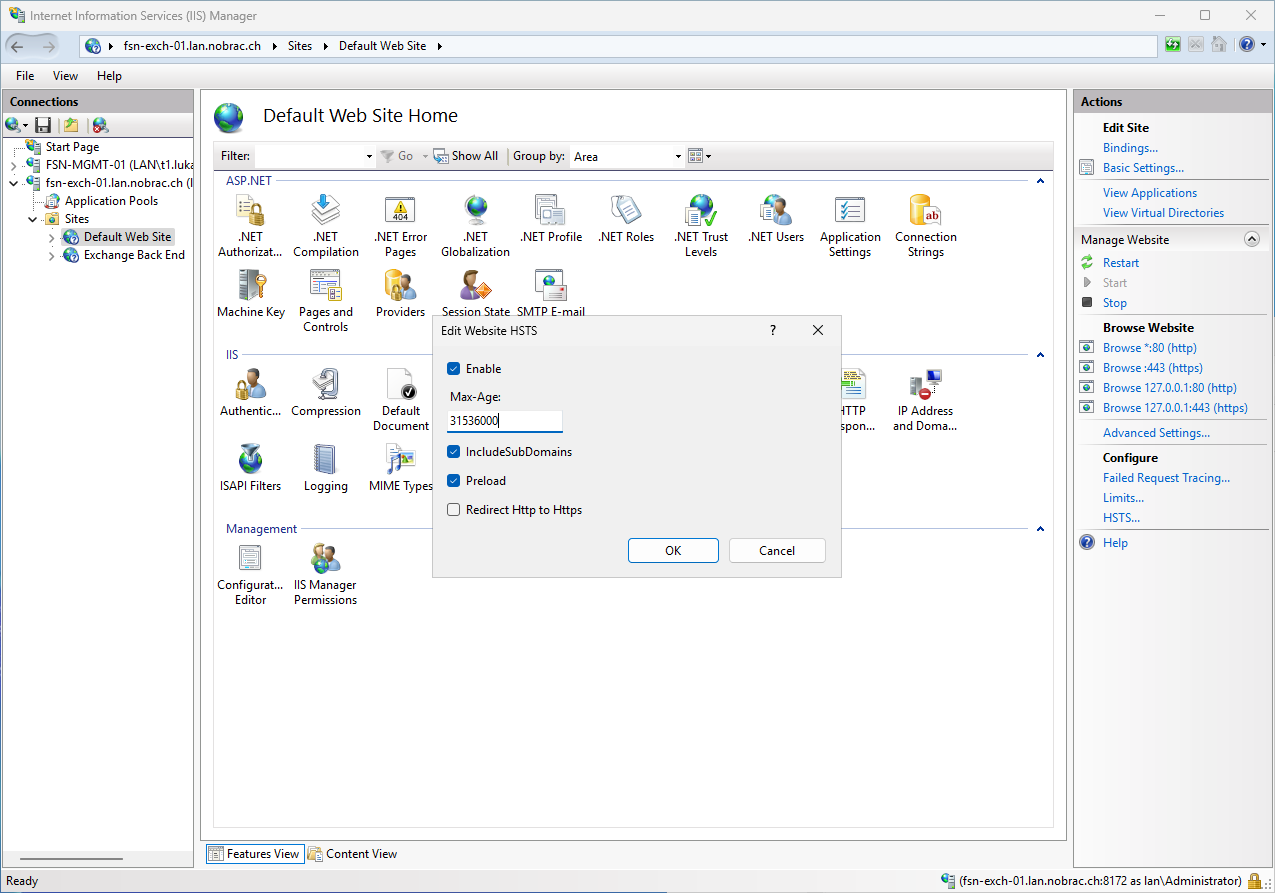
Enable HSTS
In the left navigation bar, we now expand the IIS Exchange server entry and select “Default Web Site”.

Click on the “HSTS…” option at the bottom of the right menu bar. Apply the settings of the screenshot.
Disable TRACK & TRACE
On Exchange Server
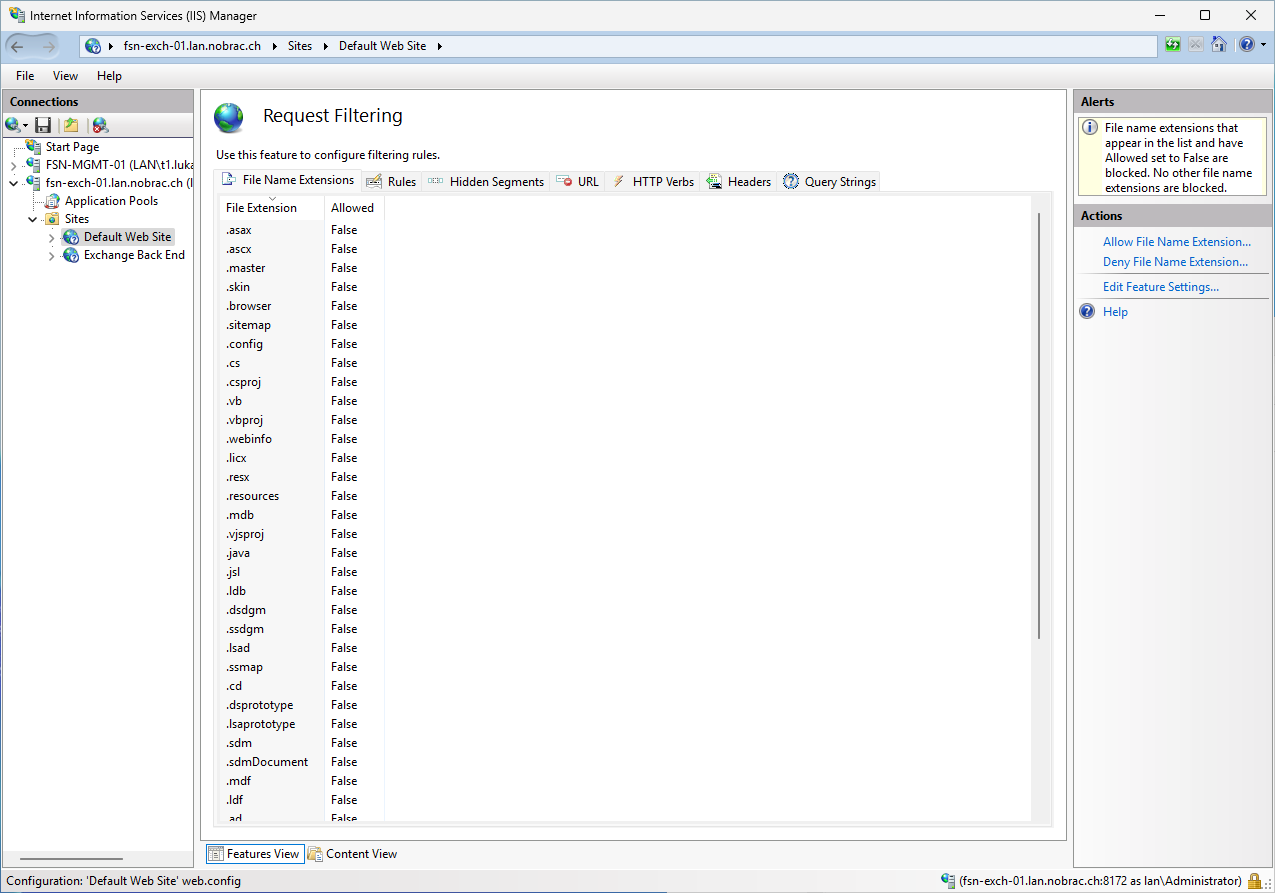
Searches for the “Request Filtering” option while “Default Web Site” is still selected.
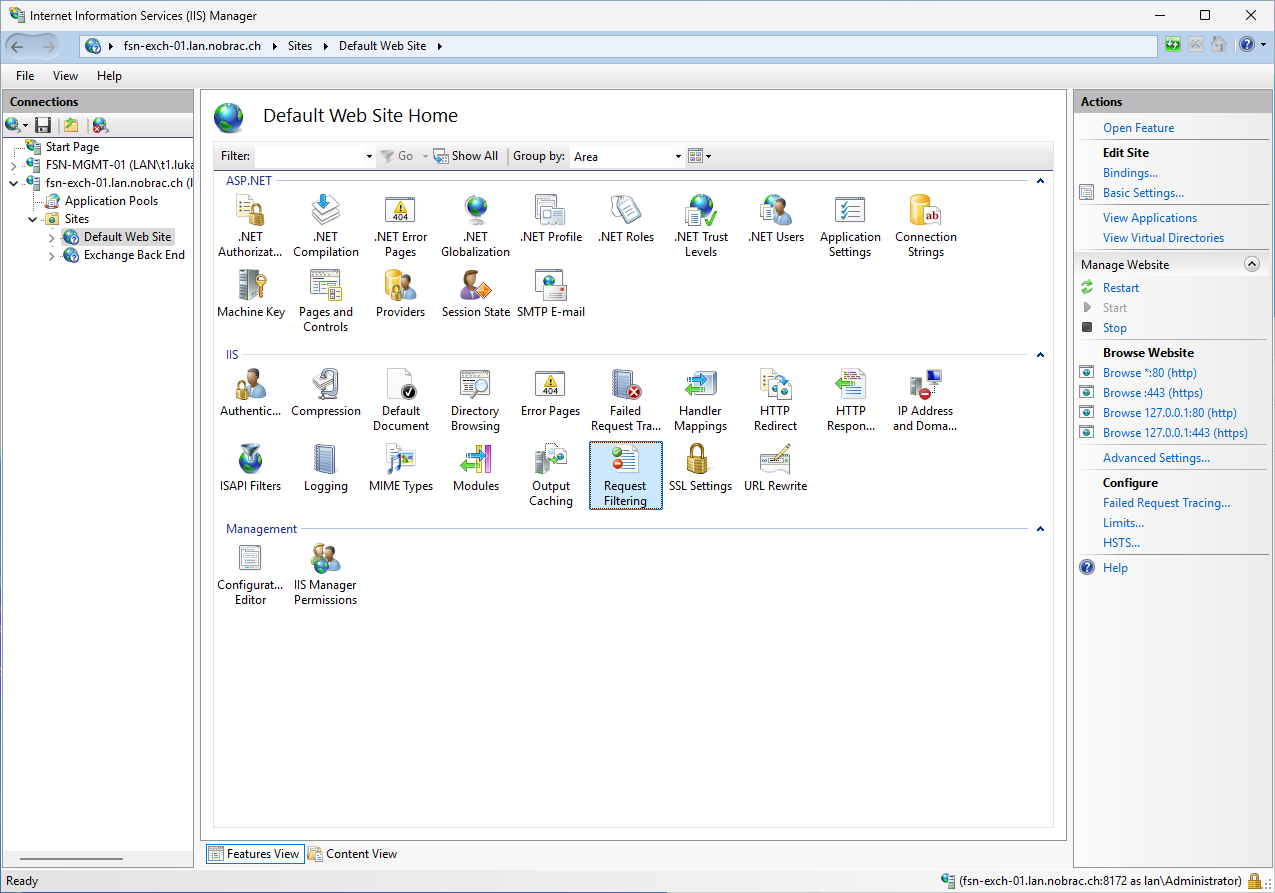
You should see the following window.
Click on “HTTP Verbs” in the top menu bar.
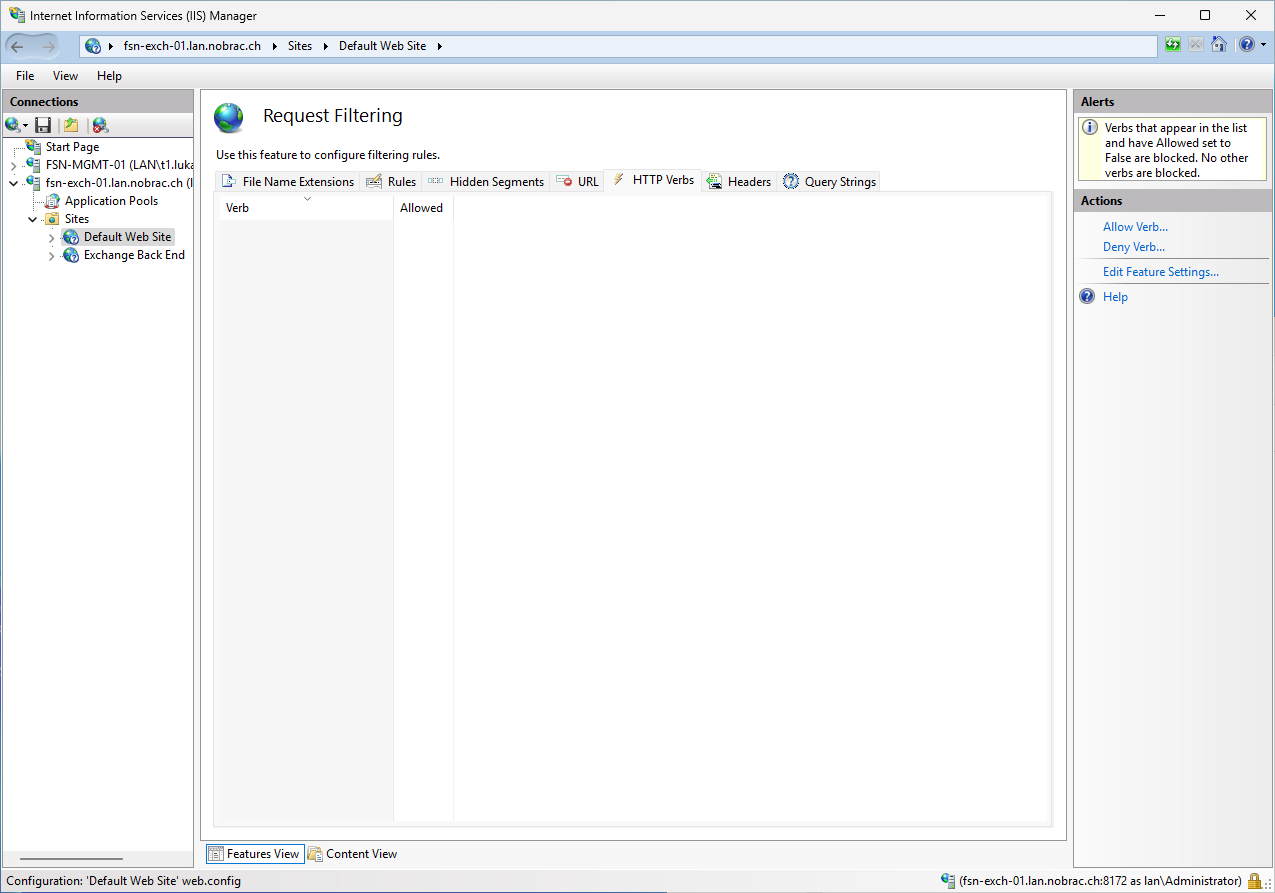
Click on “Deny Verb…” and enter “TRACE” as value.
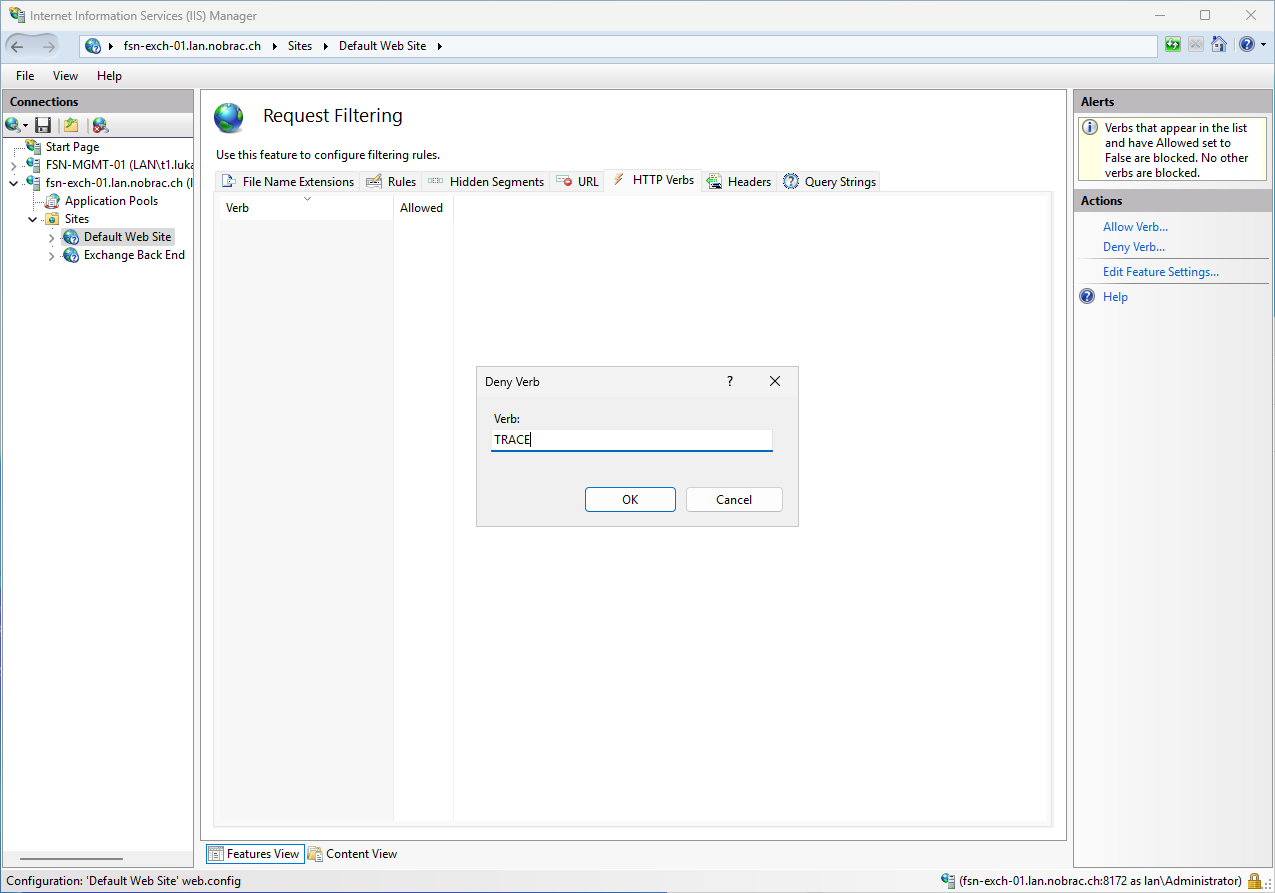
Should look like this.
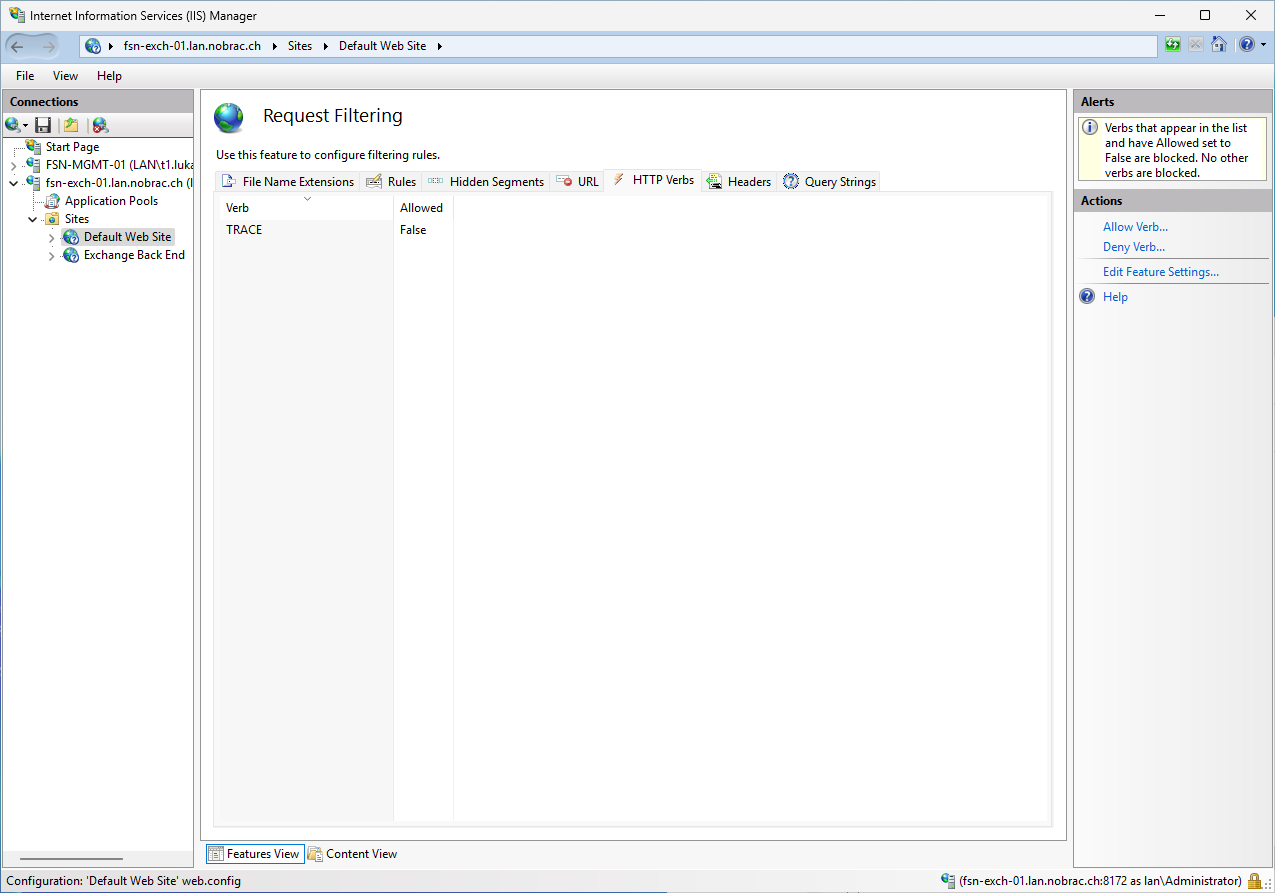
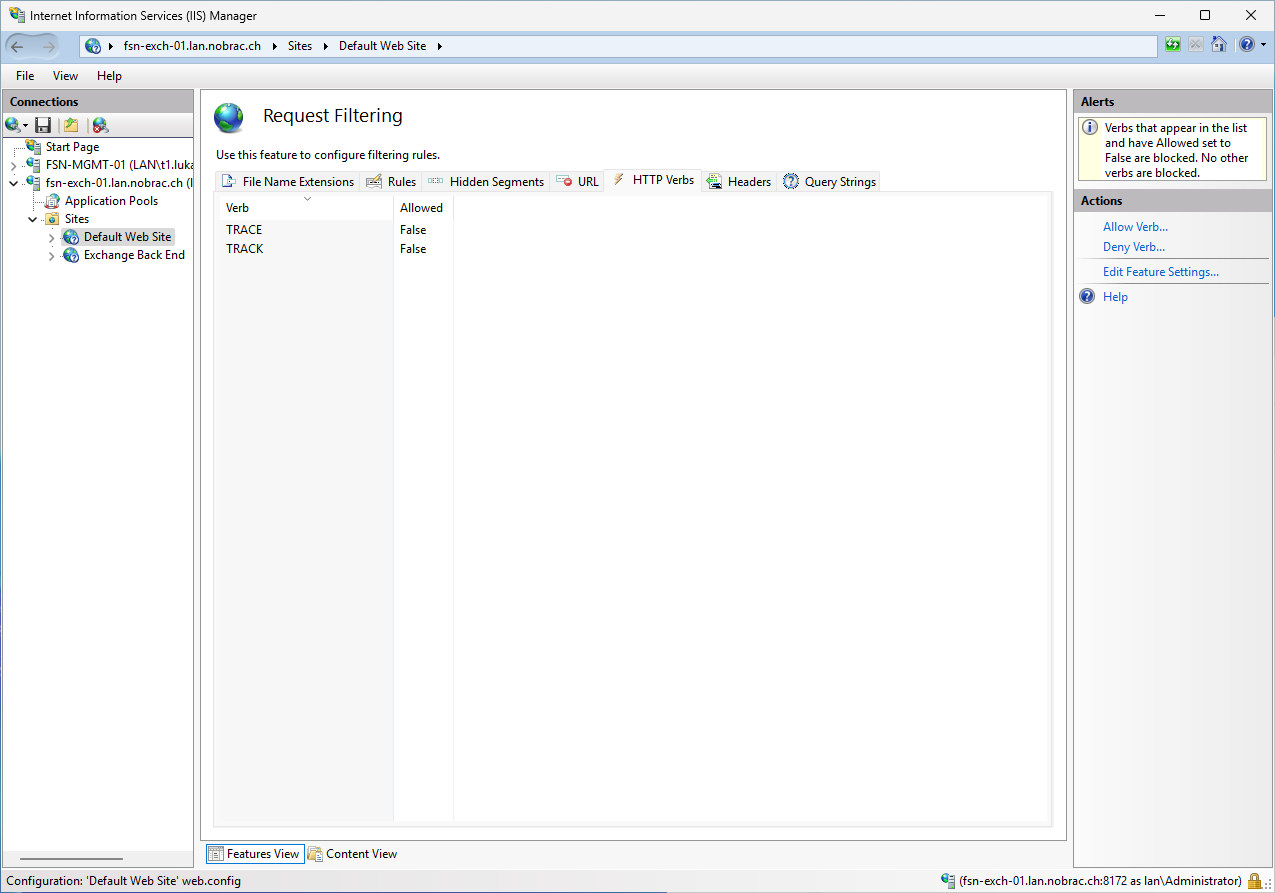
Click again on “Deny Verb…” and enter “TRACK” as value.
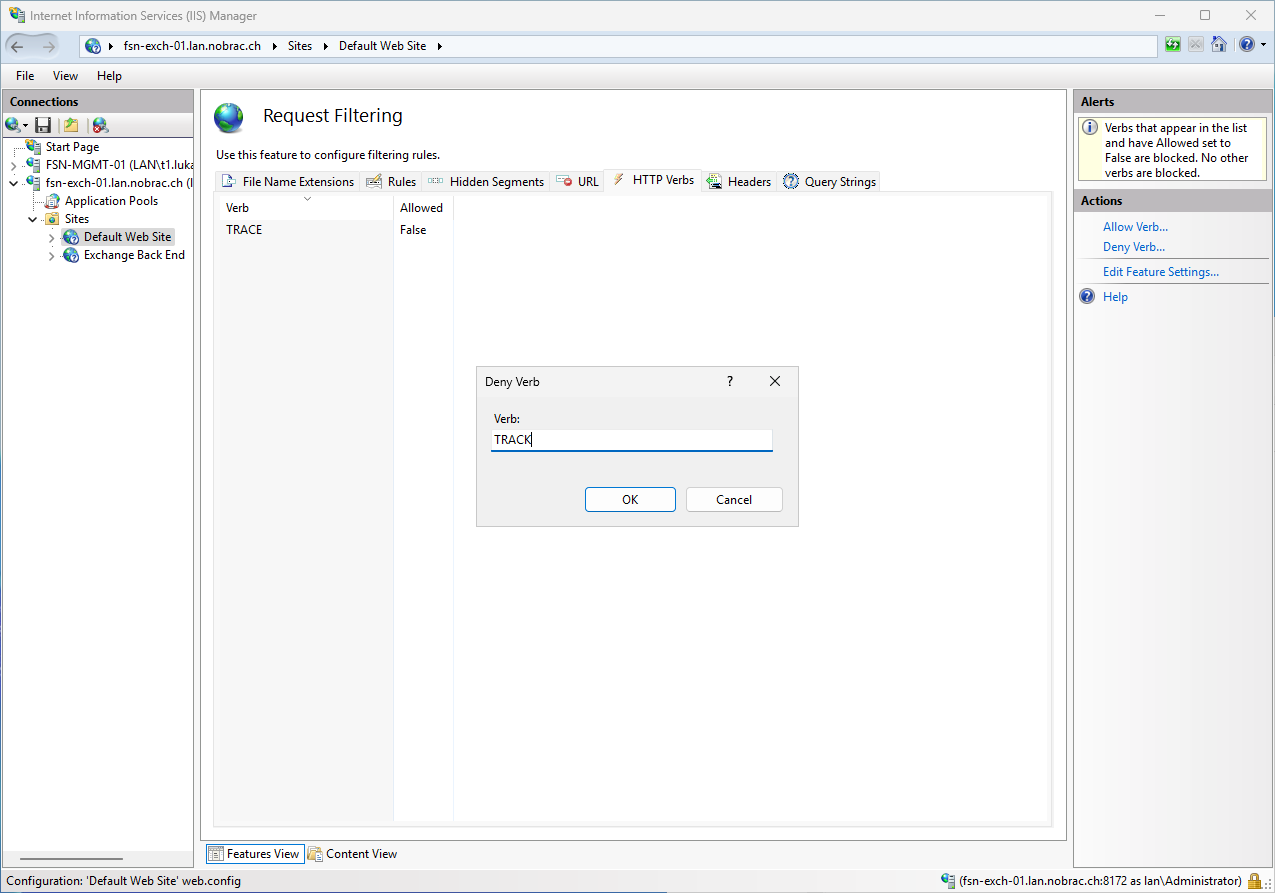
It should look like this in the end.
On Sophos XG
TRACK & TRACE is also activated on the Sophos XG. It can also be deactivated here.
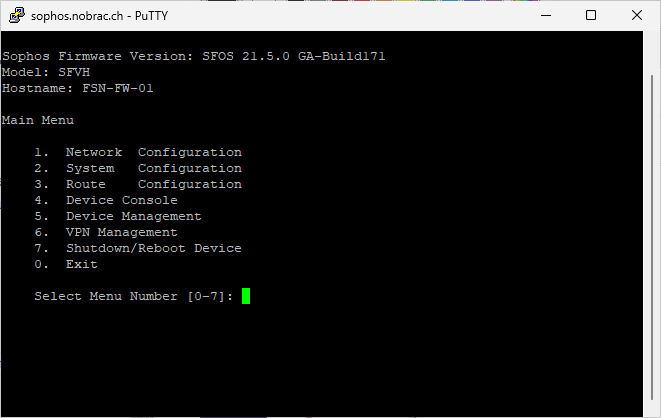
Connect to your Sophos via SSH. Select option 5.
Then select option 3.
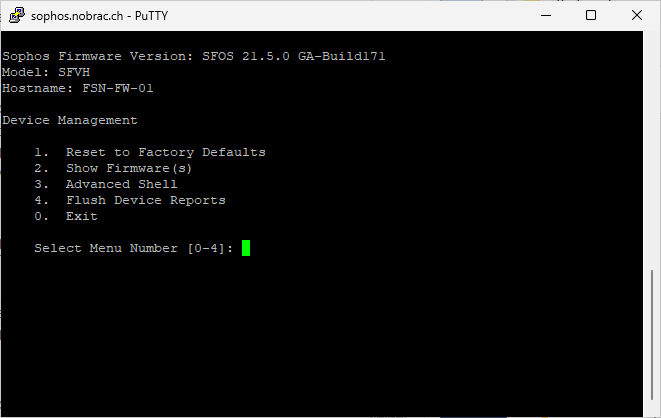
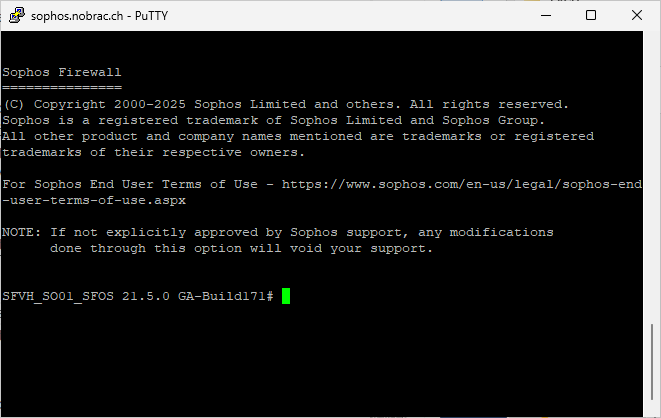
You are now in the advanced shell.
Enter the following command to deactivate TRACK & TRACE:
|
|
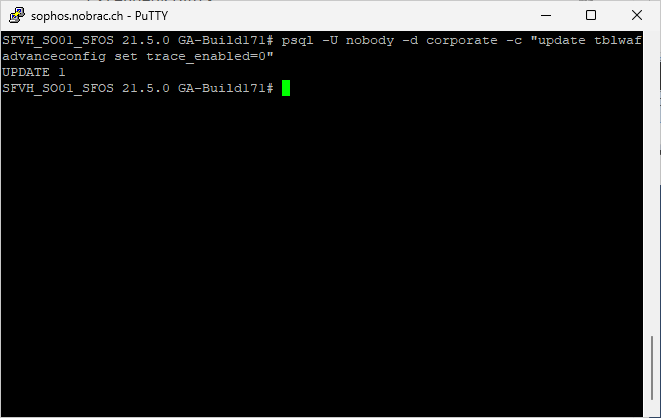
Update the config:
|
|
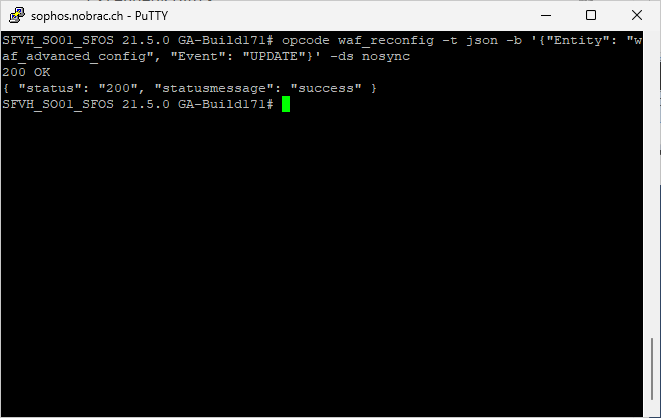
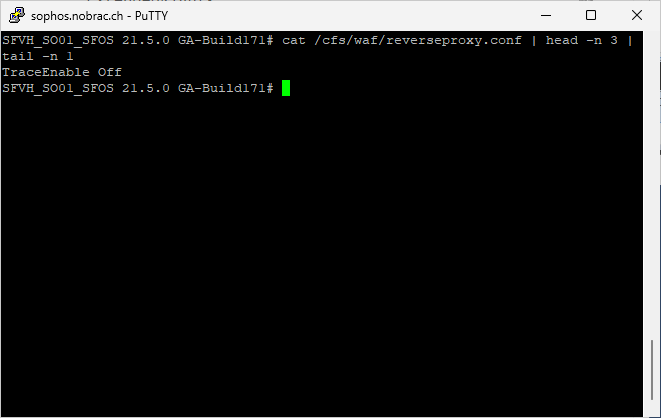
We display the line of the Config to check whether the setting has been accepted. We see that “TraceEnable” is now set to “Off”.
Reduce Mail Header
The mail header sometimes contains a lot of information that other people do not need to know. We can limit this a little.
This is what it looks like before.
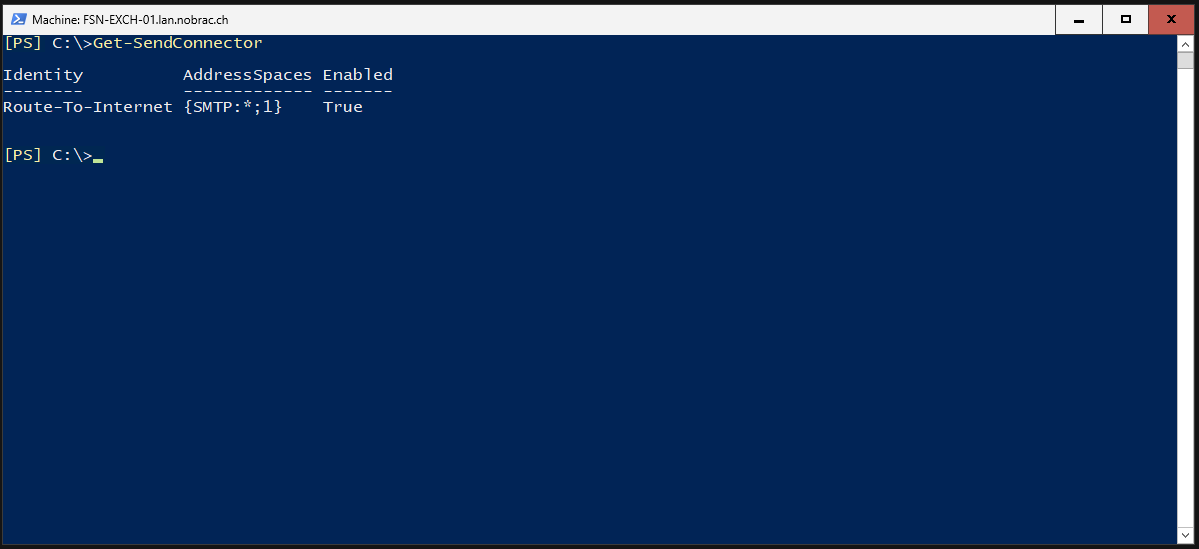
First, we display our send connector.
|
|
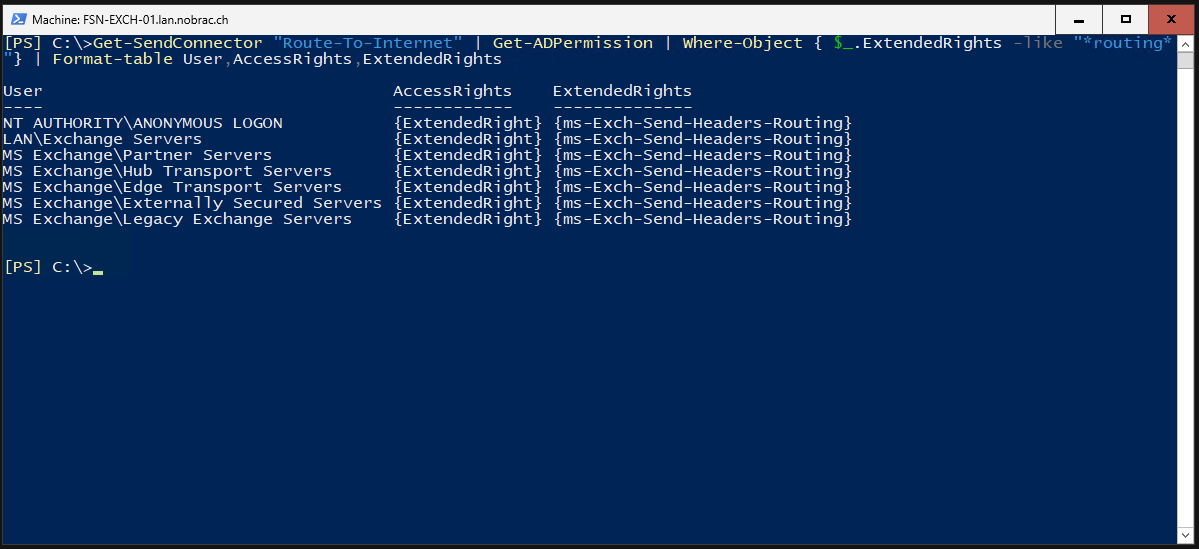
Then we look at the current authorizations of the send connector.
|
|
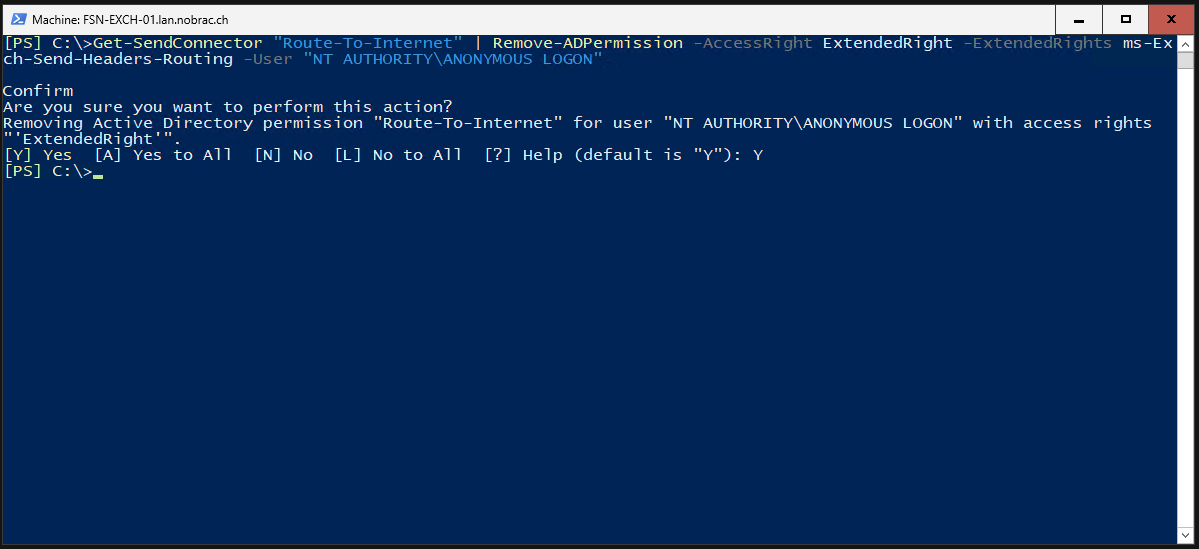
We must now remove the “ANONYMOUS LOGON”. Confirm the task with “Y”.
|
|
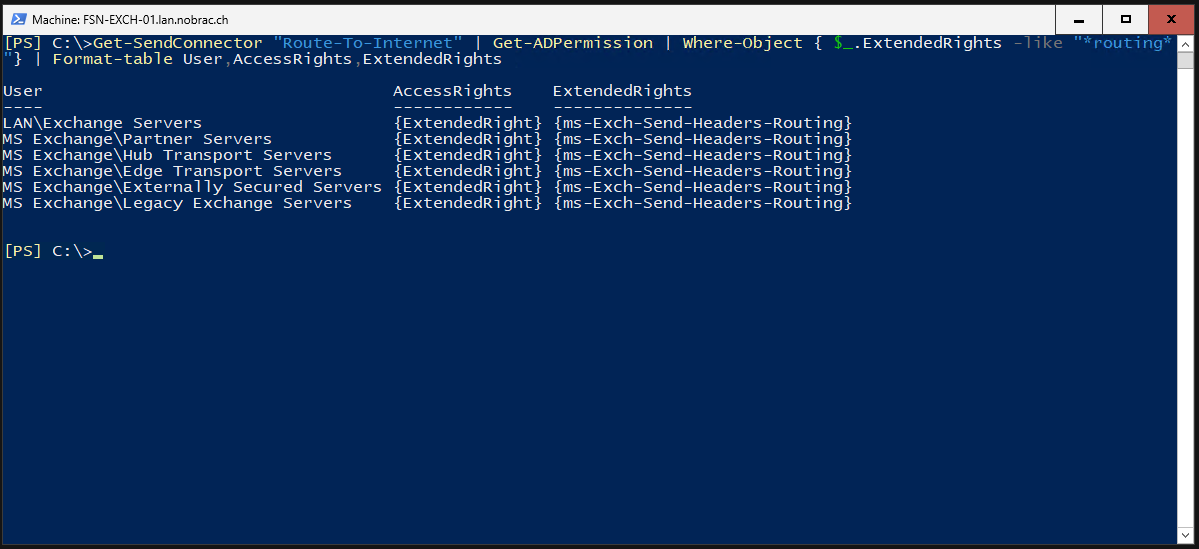
Then we display the authorizations again to check whether everything has worked.
|
|
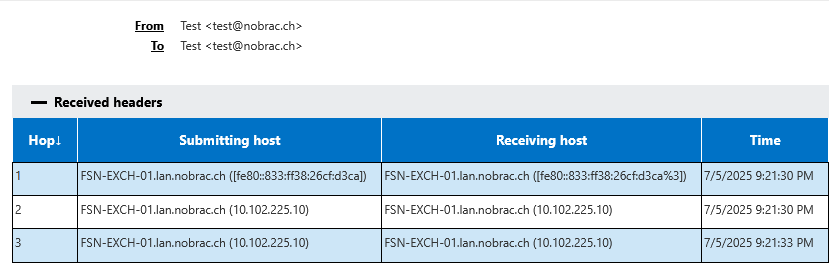
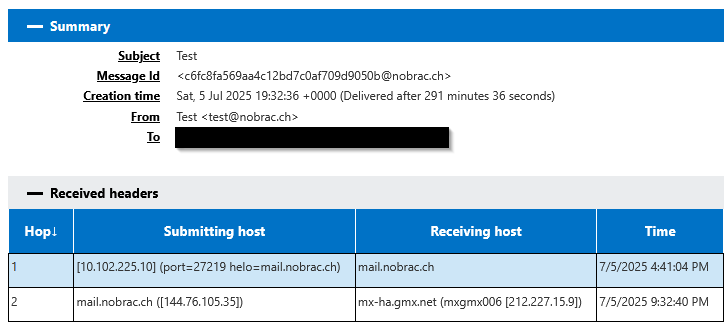
If we now look at the header of one of our mails to someone external, it looks like this.
TLSA-Record (DANE)
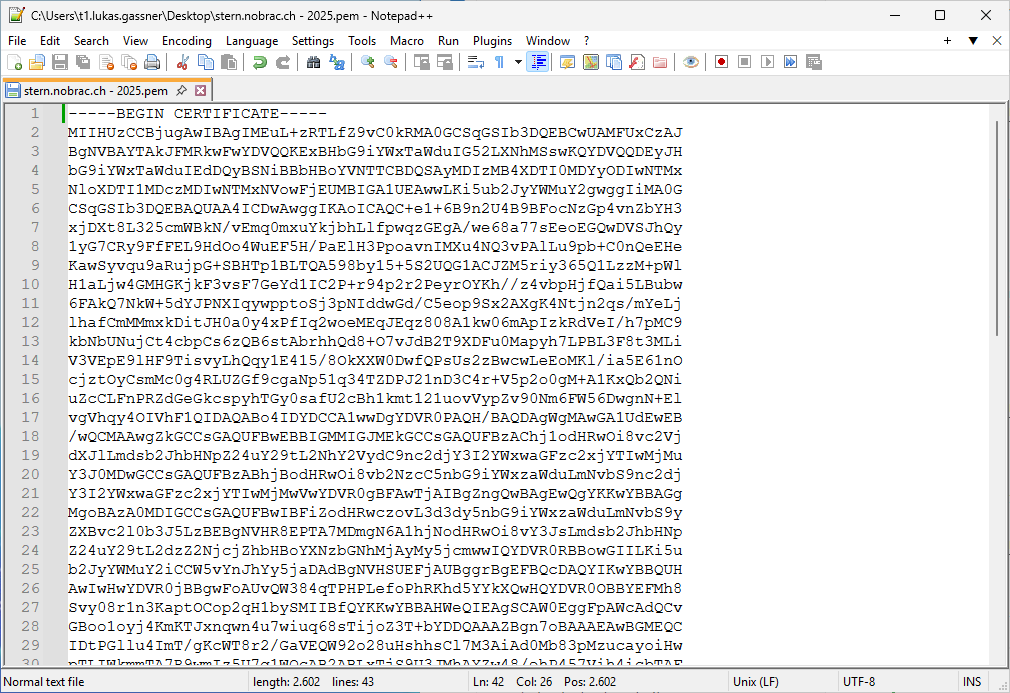
We are now configuring DANE. For this we need the wildcard certificate in Base64 format.
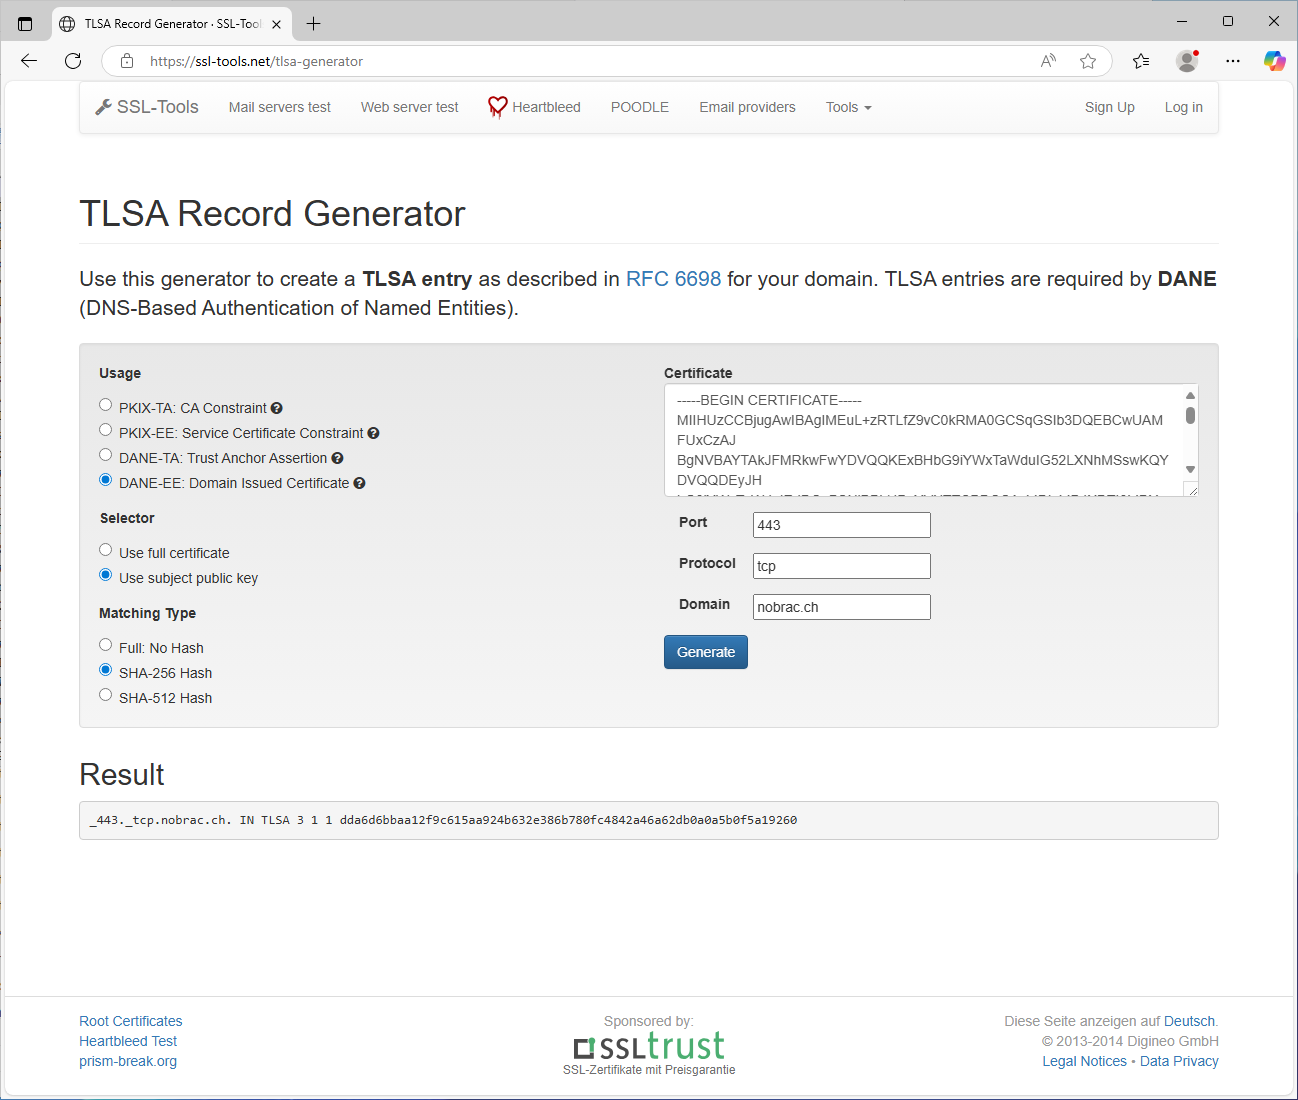
Open the website: https://ssl-tools.net/tlsa-generator
Insert your certificate in Base64 format. The remaining settings are taken from the screenshot. Of course, you adapt the domain to your own.

Click on generate. You see the result at the bottom.
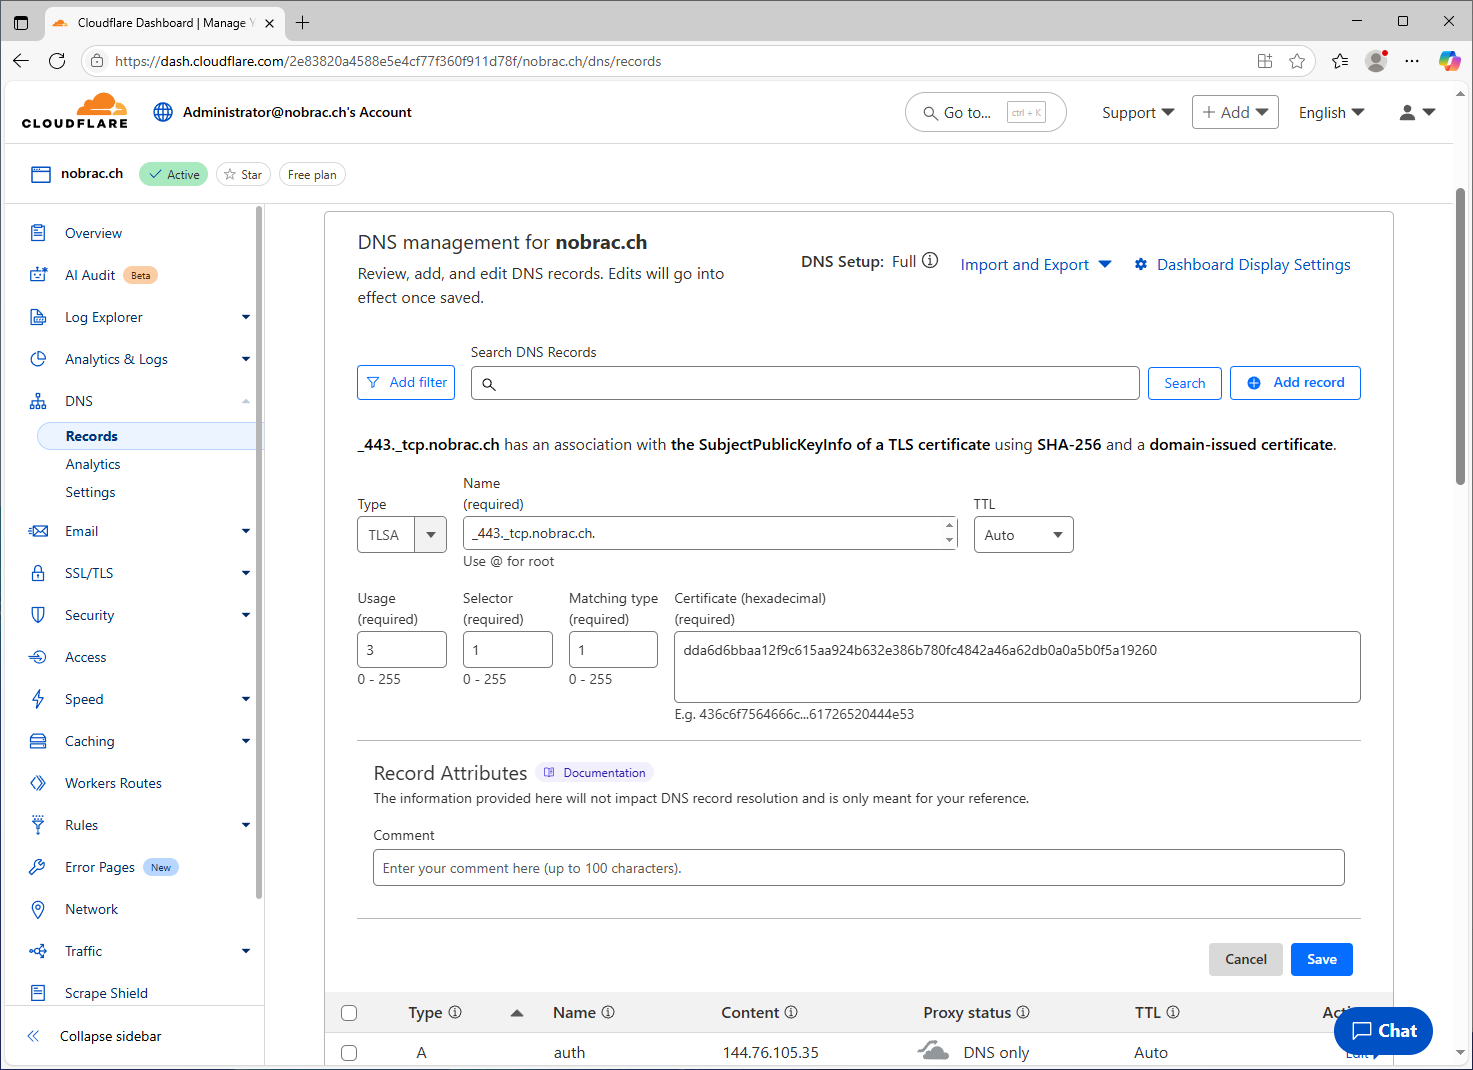
Click on “Add record” and select “TLSA” as the record type. Then apply the settings as shown in the screenshot. You must of course enter your domain in the “Name” field and your hash in the “Certificate” field. This record is for 443/TCP.
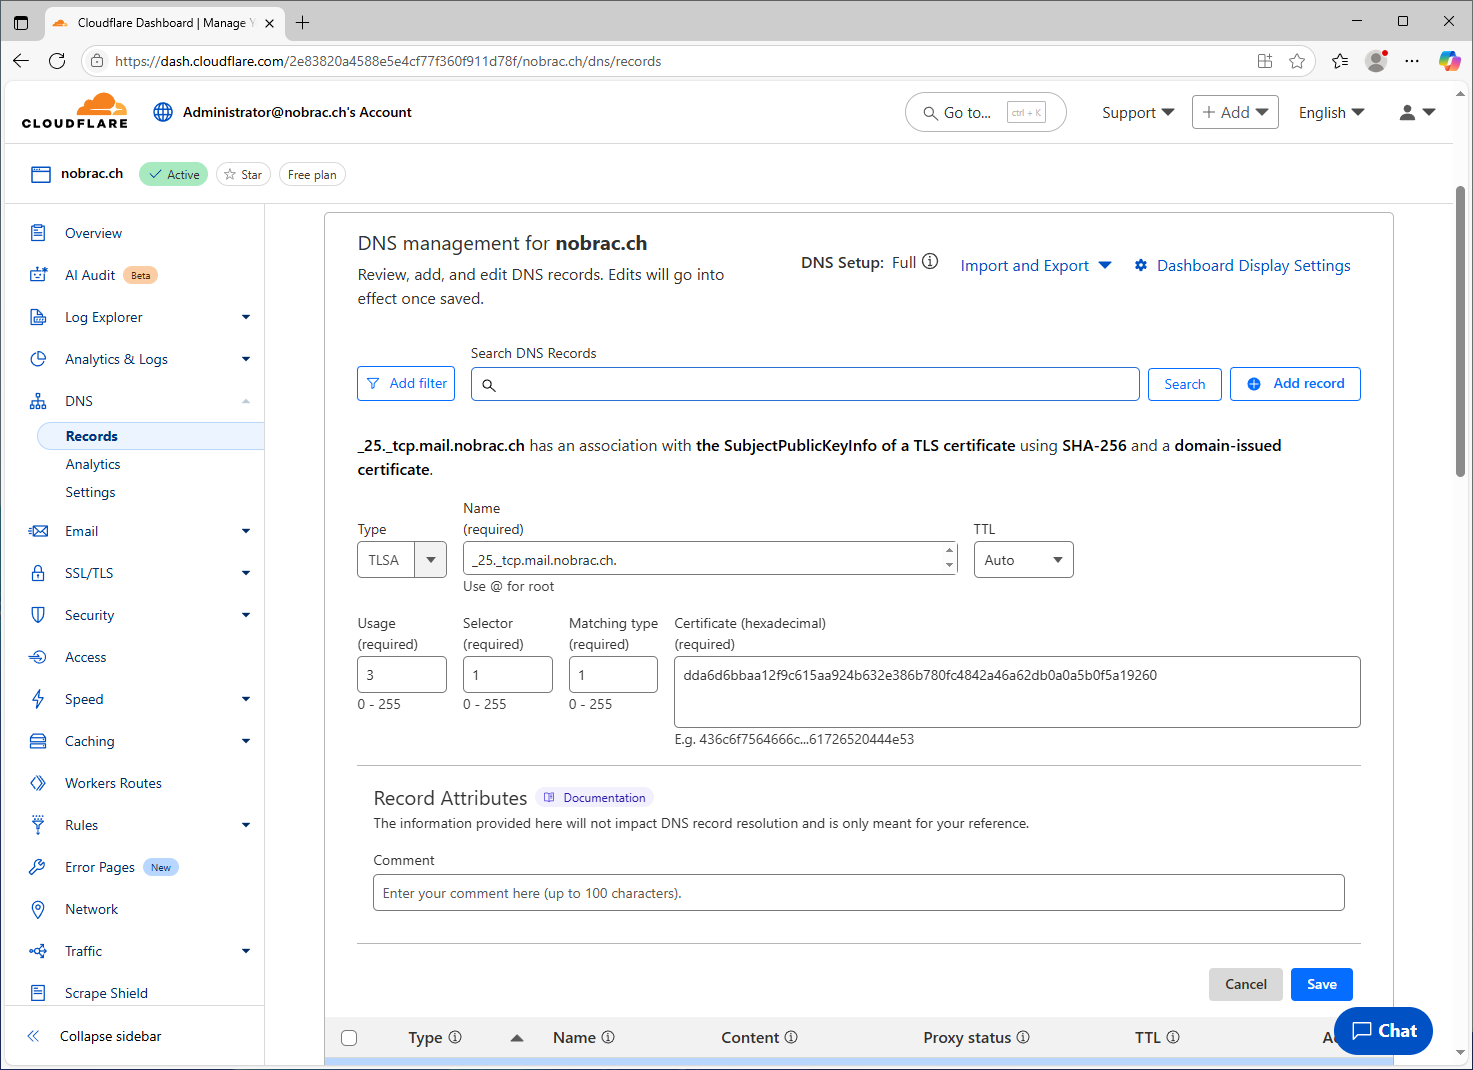
Click again on “Add record” and select “TLSA” as the record type. Then apply the settings as shown in the screenshot. You must of course enter your domain in the “Name” field and your hash in the “Certificate” field. This record is for 25/TCP.
Test the configuration
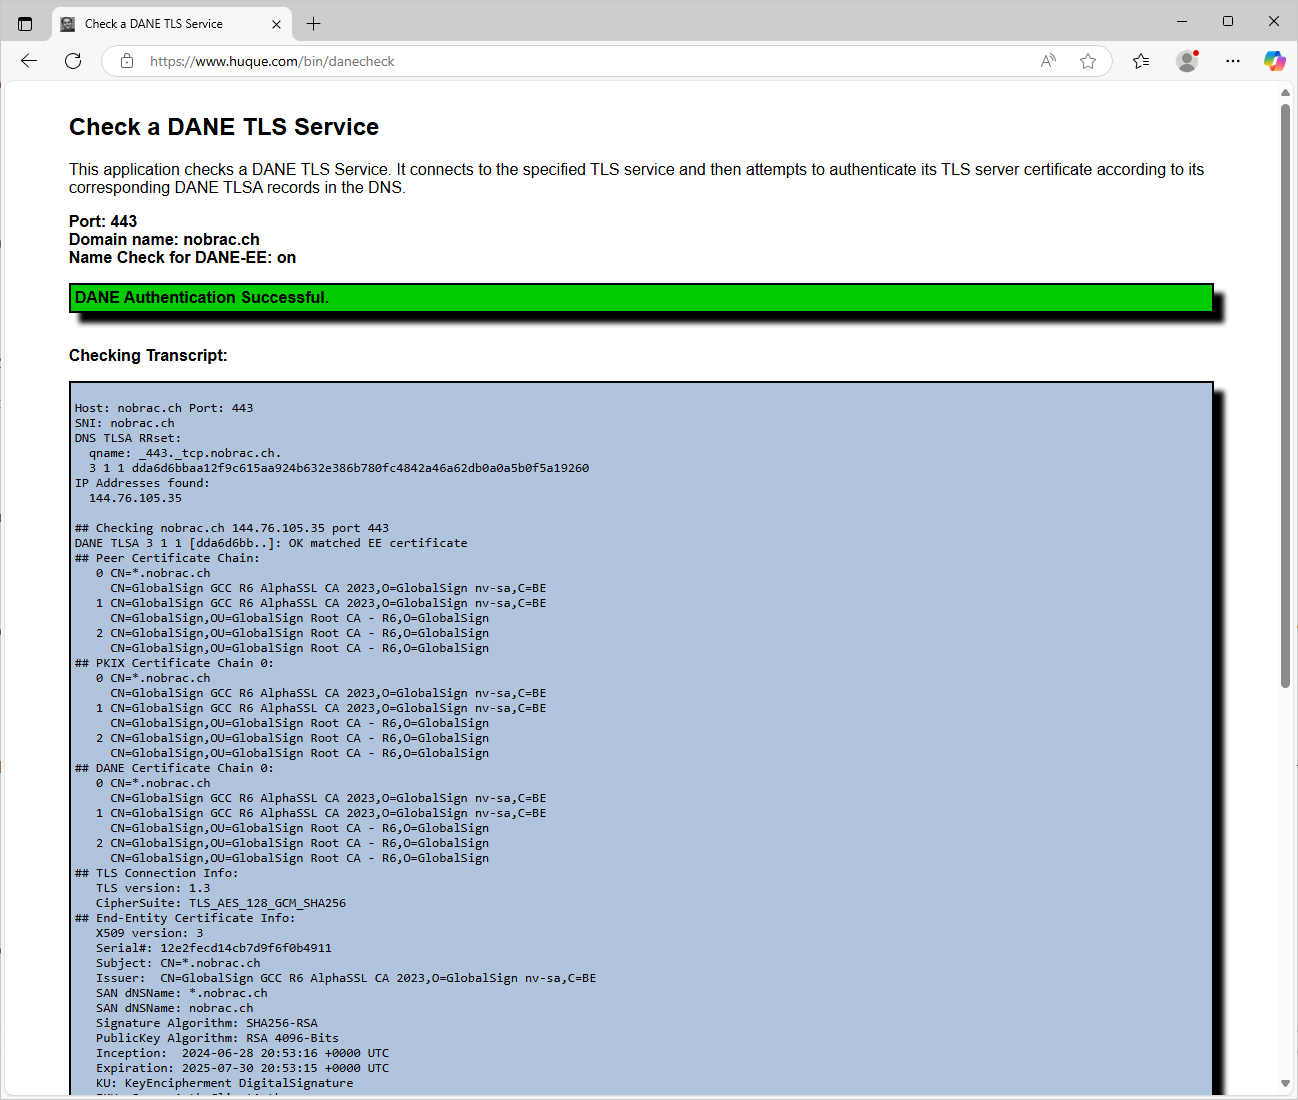
Go to https://www.huque.com/bin/danecheck. First we test our domain with port 443. Make sure that the checkbox “Perform name checks for DANE-EE” is checked.
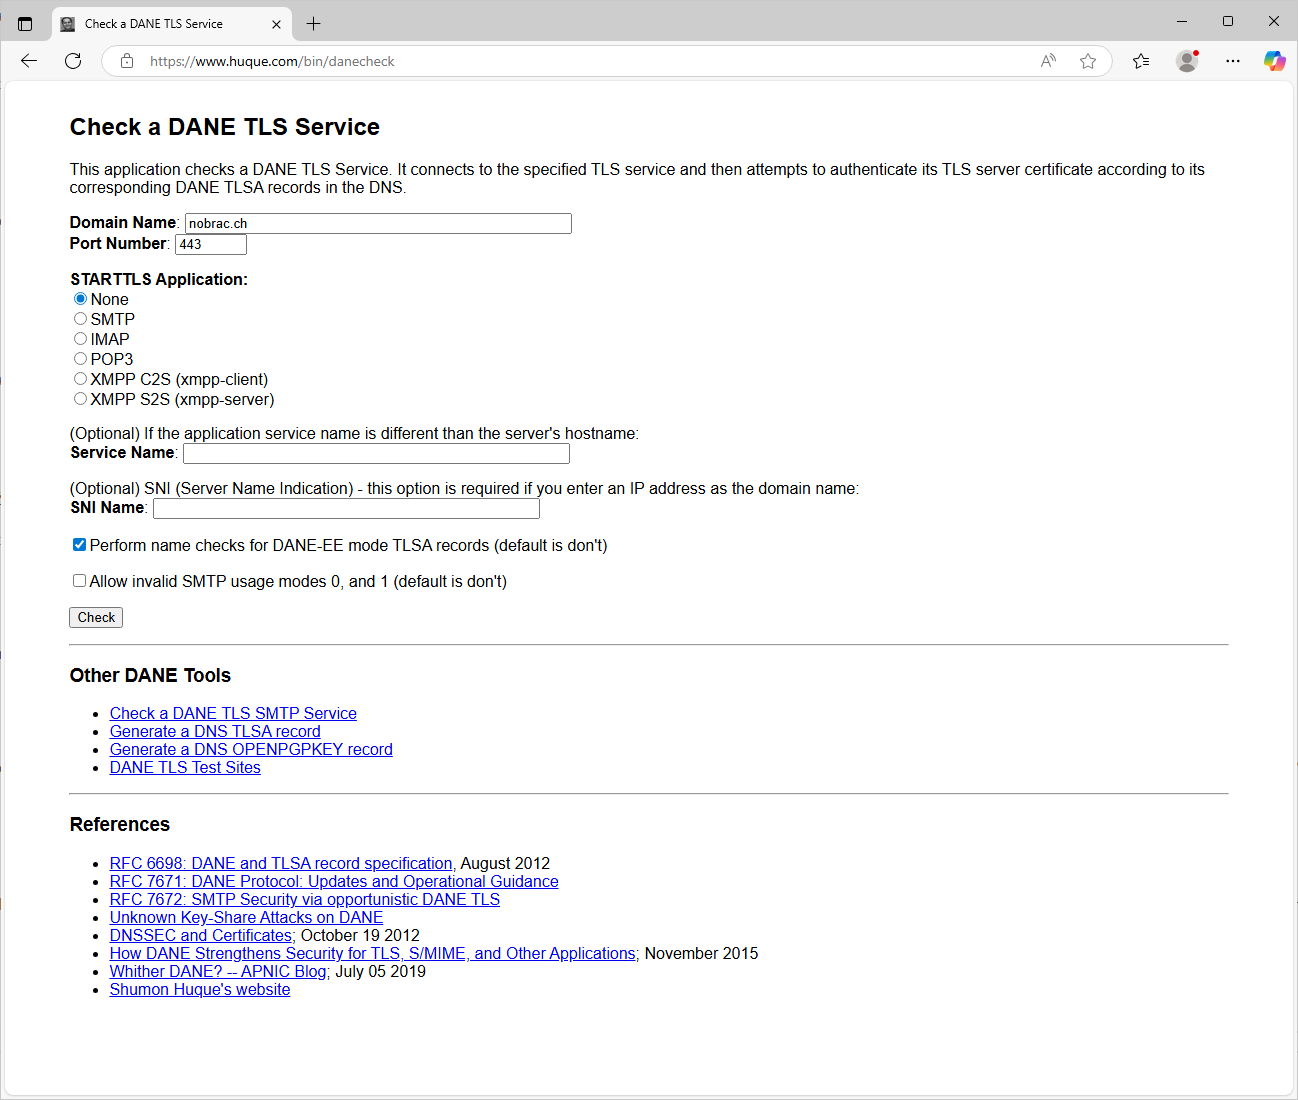
It is successful.
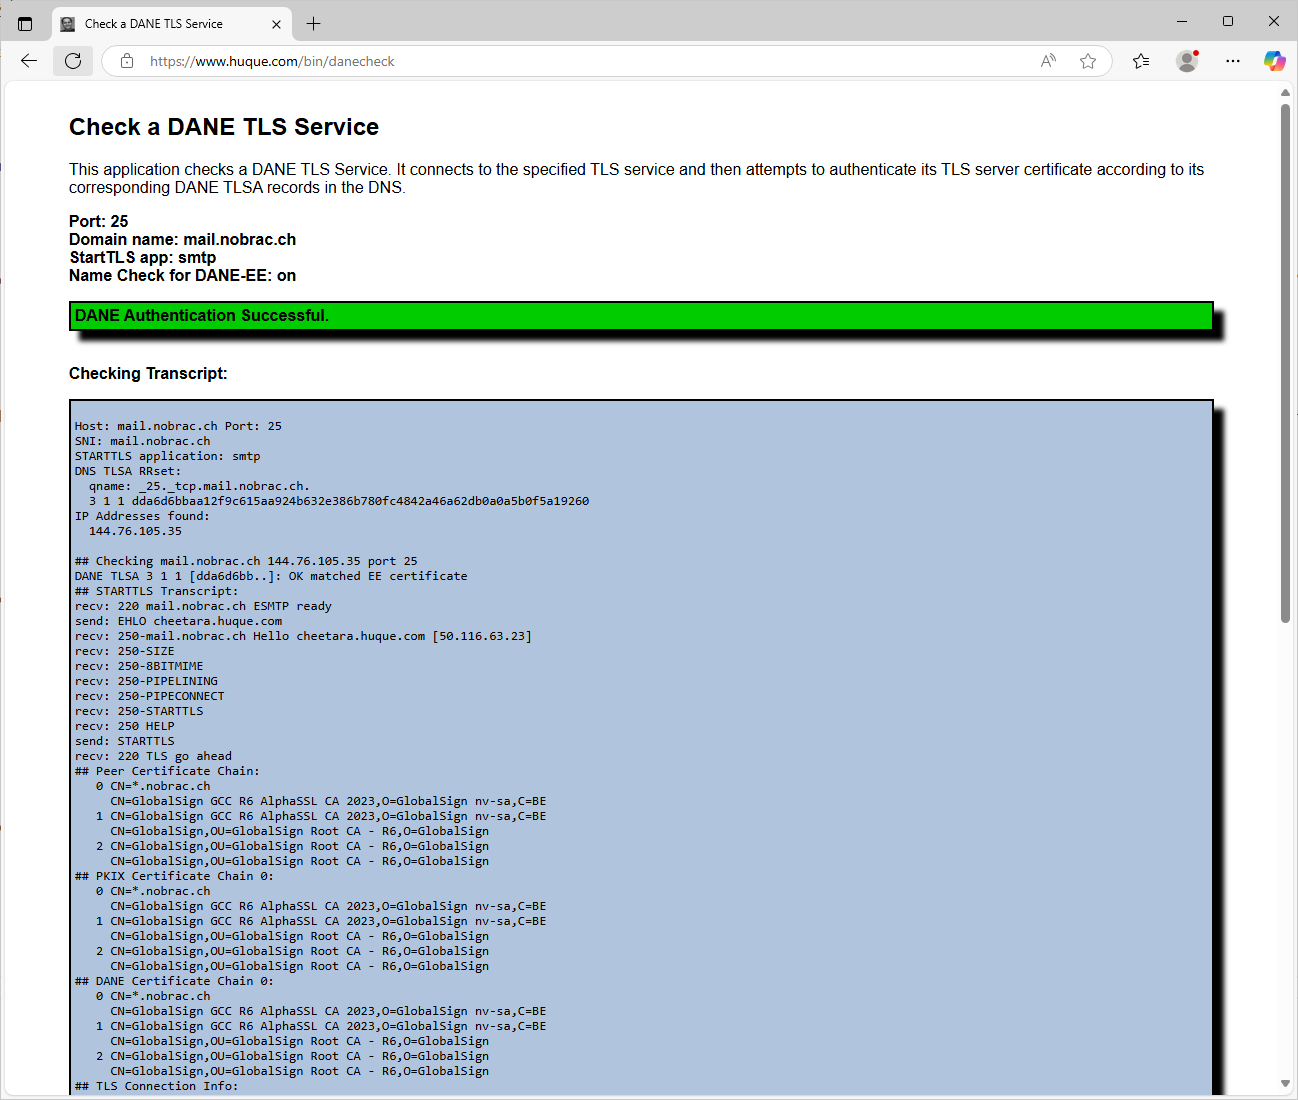
Now we test our mail domain with port 25. Make sure that the checkbox “Perform name checks for DANE-EE” is checked.

It is successful too.
Automatic IP-Ban with Sophos
I wanted to have a way to prevent brute force attacks on my OWA portal and to block the IP addresses that try to log in multiple times directly on my Sophos. First of all, these are not professional scripts - ChatGPT has definitely helped a little.
Exchange or the IIS unfortunately do not log failed logon attempts with the code 403, but with the code “reason=2”. The script searches all logs of the last 7 days, checks whether “reason=2” and the directory “GET /owa/auth/logon.aspx” was called. If the IP address is matched 5 times with the two parameters, the IP address is exported to a TXT-File.
Add X-Forwarded-For to IIS-Logs
Because Sophos is in front of our Exchange as WAF, we still have to add the X-Forwarded-For header in the IIS logs. This is not in the logs by default.
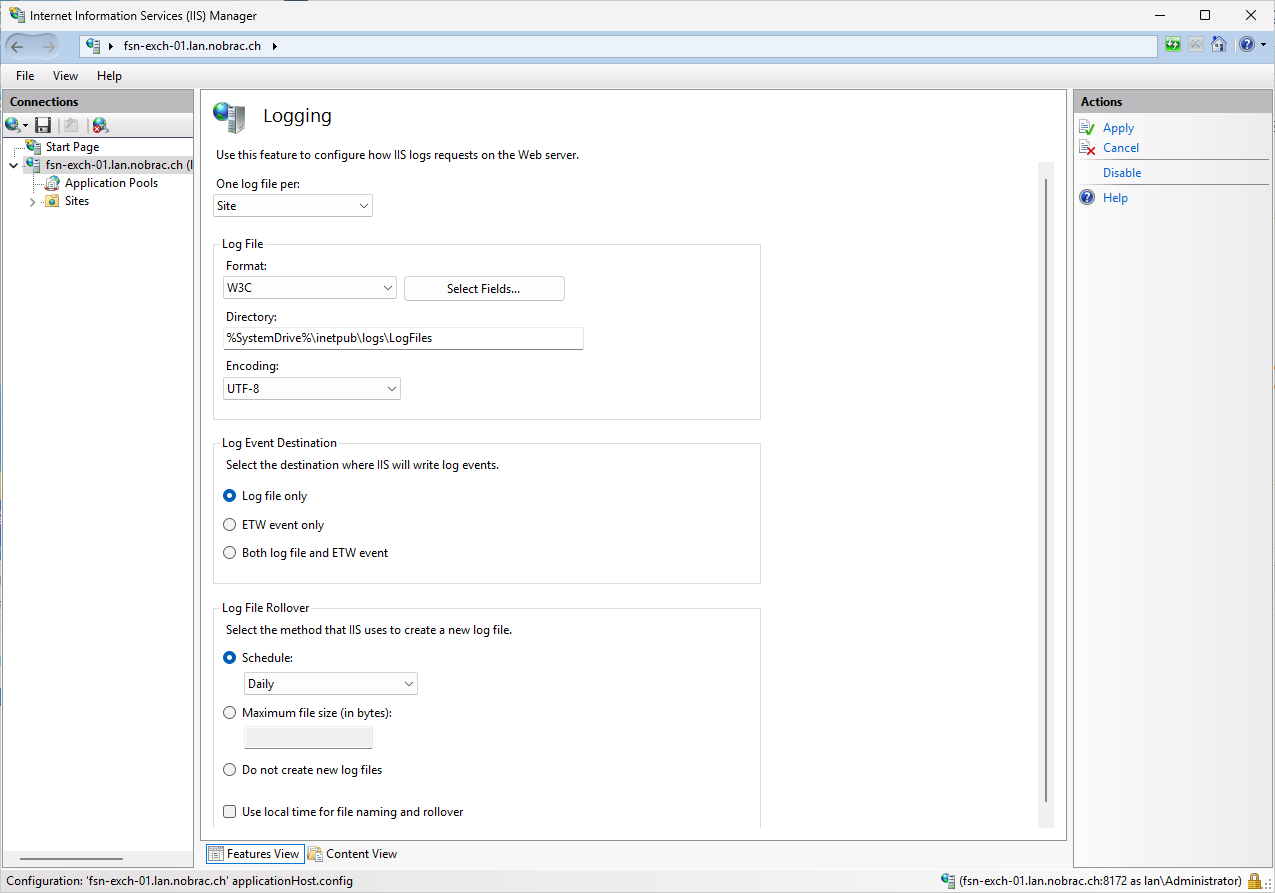
Connect to your Exchange server with the IIS Manager.

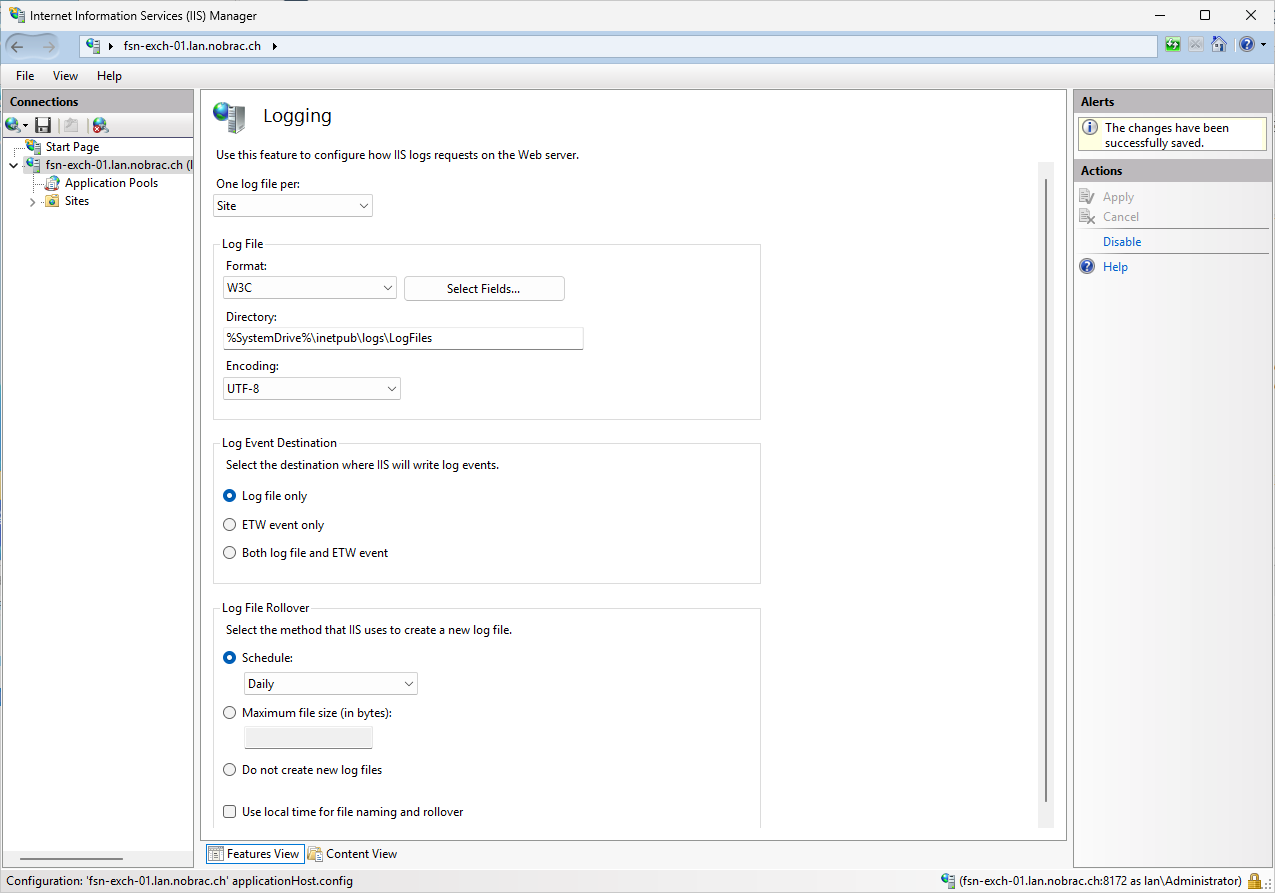
Click on the “Logging” button.
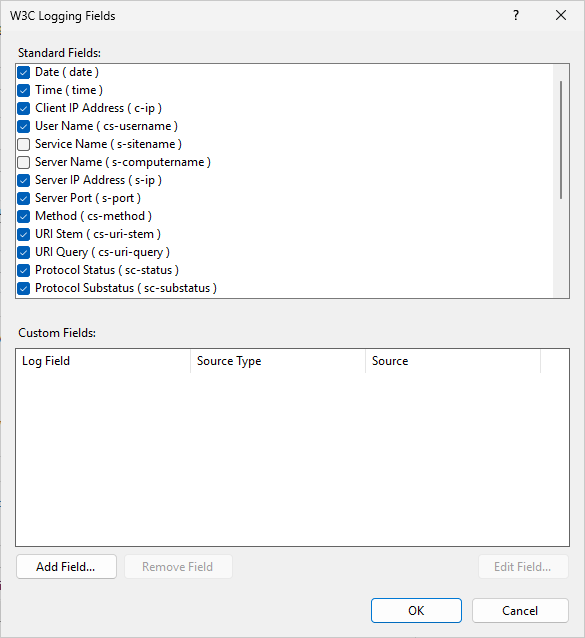
The following window appears. Click on the “Select Fields…” button.

The following window opens. Click on “Add Field…” at the bottom left.
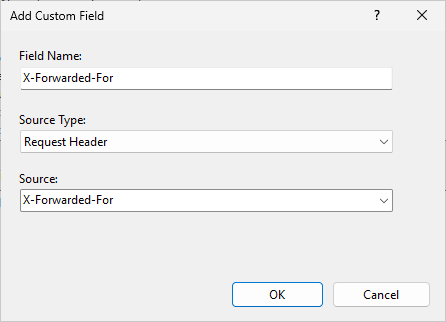
Apply the settings as shown in the screenshot and click on ok.
It should look like this.
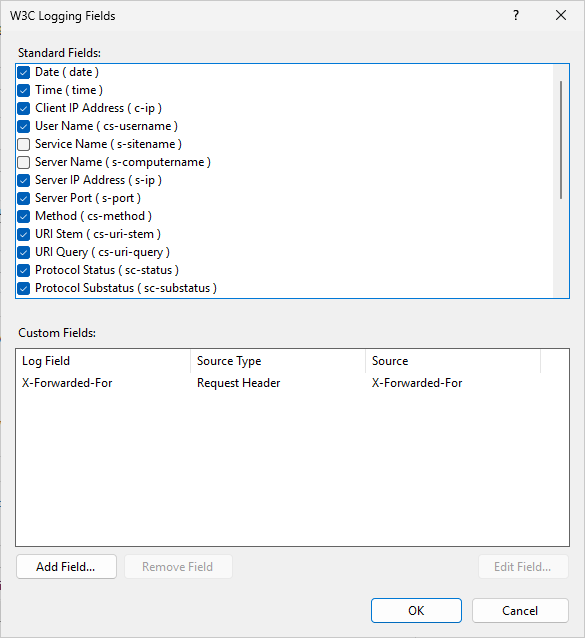
Click on “Apply” in the top right corner.
That’s it for the log part.
Preparation of the Scripts
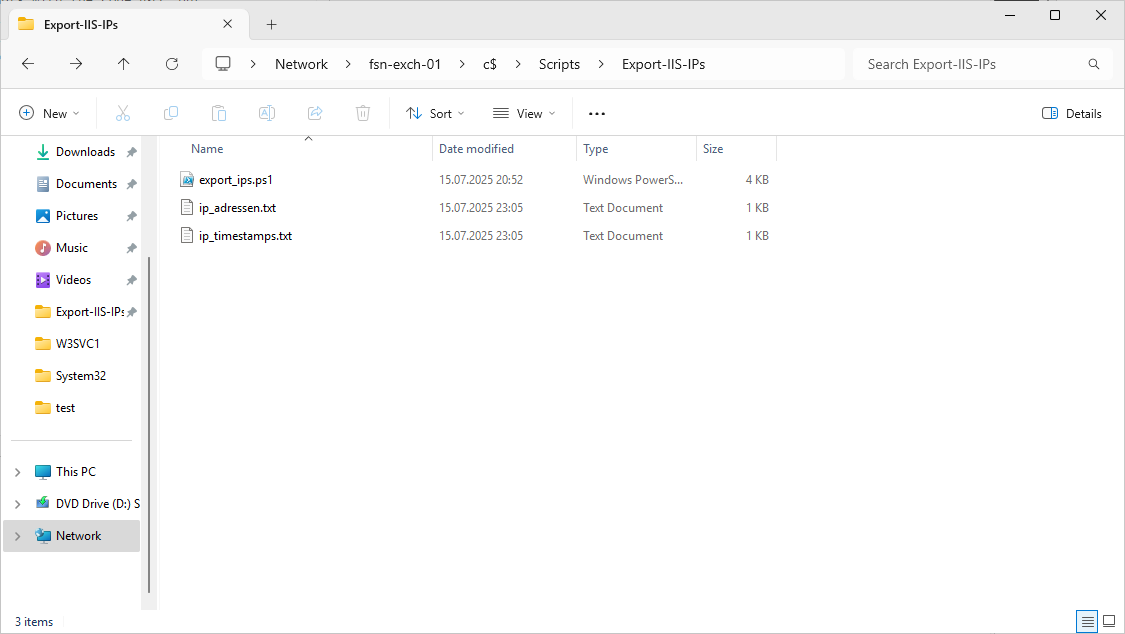
Create a folder on your Exchange server under drive C: with the name “Scripts”, for example. I have then created a folder under this with the name “Export-IIS-IPs”. You can do as you like. Please create two more TXT files manually. One with the name “ip_adressen.txt” and the other with the name “ip_timestamps.txt”. The individual IP addresses are then saved in the “ip_adressen.txt” TXT file. The IP addresses and a respective date are stored in the “ip_timestamps.txt”. This serves as a counter. The IP address is then deleted from the “ip_adressen.txt” after 7 days.
Then copy the script below and also save it in the folder with the TXT files and name it “export_ips.ps1”, for example.
Should look like this.
|
|
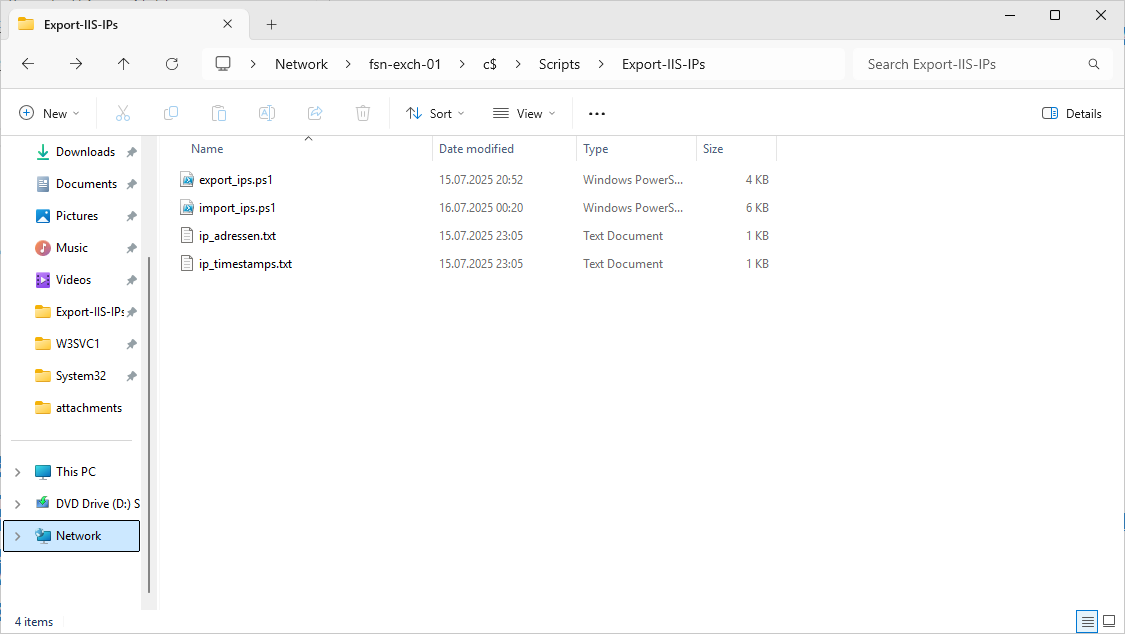
The following script is now for importing the IP addresses from the “ip_adressen.txt” to the Sophos Firewall using the Sophos API. Save it in the same folder, e.g. with the name “import_ips.ps1”.
Credits go to Antonio Cienfuegos, as part of the script is his. I just tweaked it a bit for my needs. He made this available on the Sophos forum. Source: https://community.sophos.com/sophos-xg-firewall/f/recommended-reads/128124/sophos-firewall-laziness-at-your-service-automated-load-of-object-through-api-from-csv
It should look like this.
|
|
Sophos Config
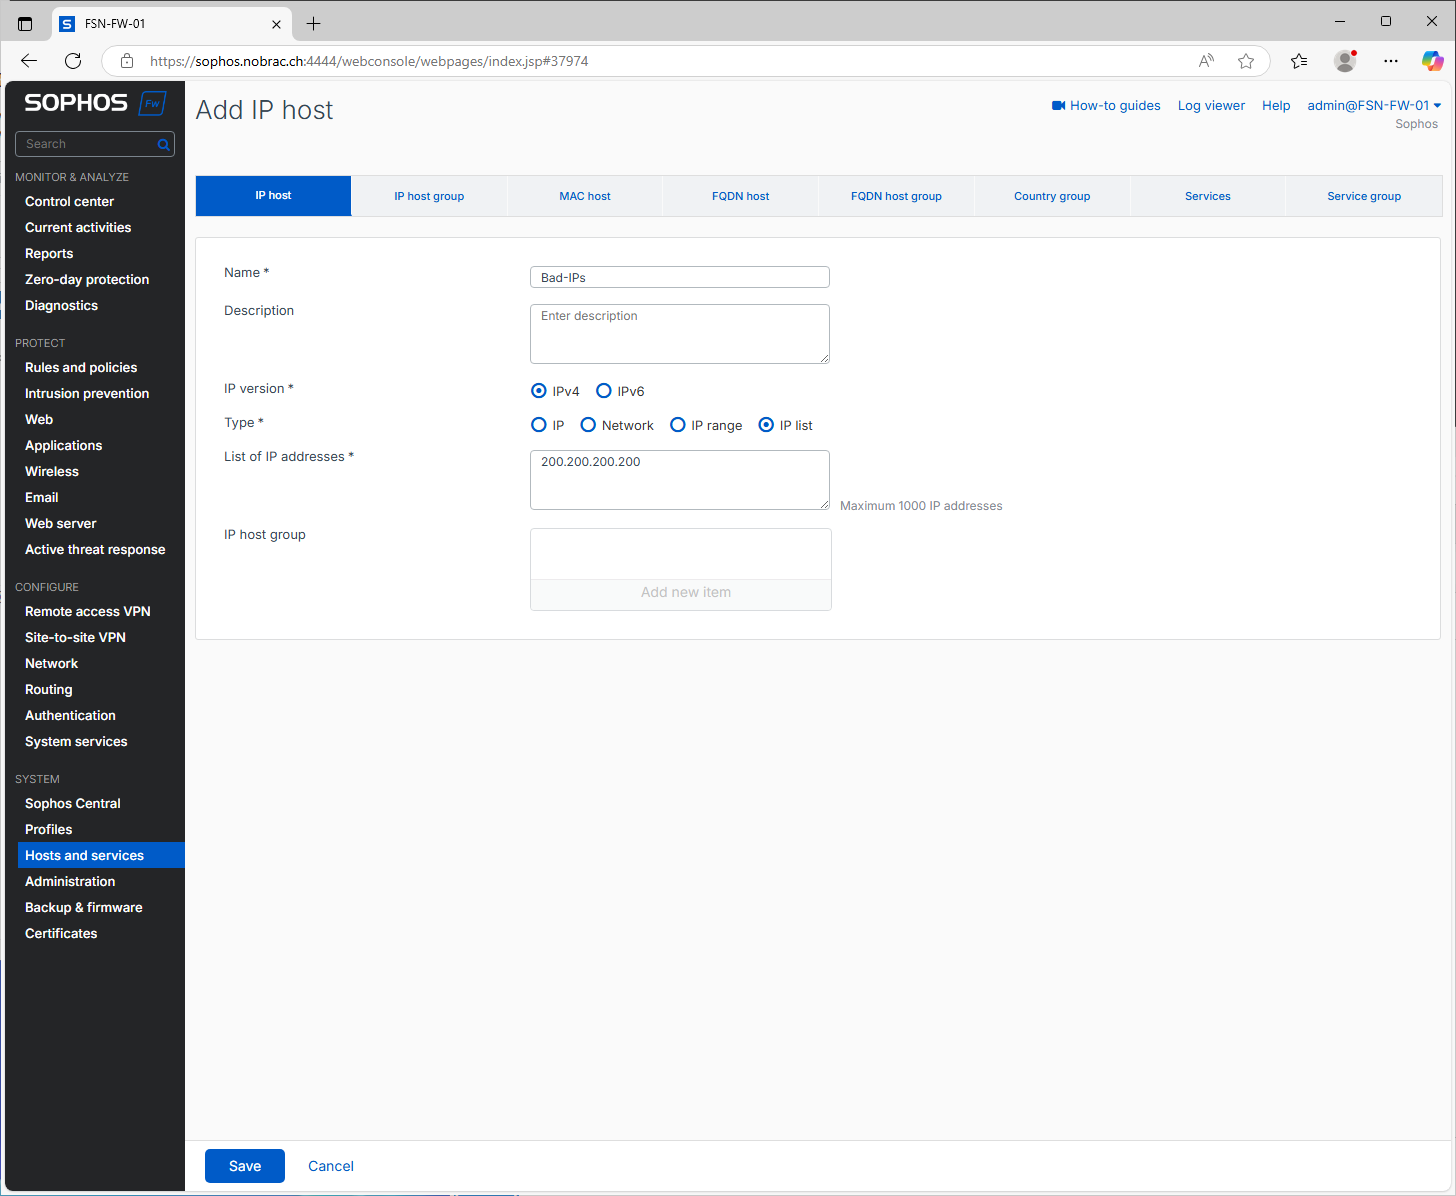
Create IP-List object
On your Sophos, navigate to “Hosts and services” and then to “IP host”. Create a new IP host there with the type “IP list”. Name it “Bad-IPs”, as this is how it’s defined in the script. If you want to name them differently, you have to change this in the script. As you cannot create the IP list without an entry, simply enter any IP. This will be overwritten later anyway.
Create NAT-Rule
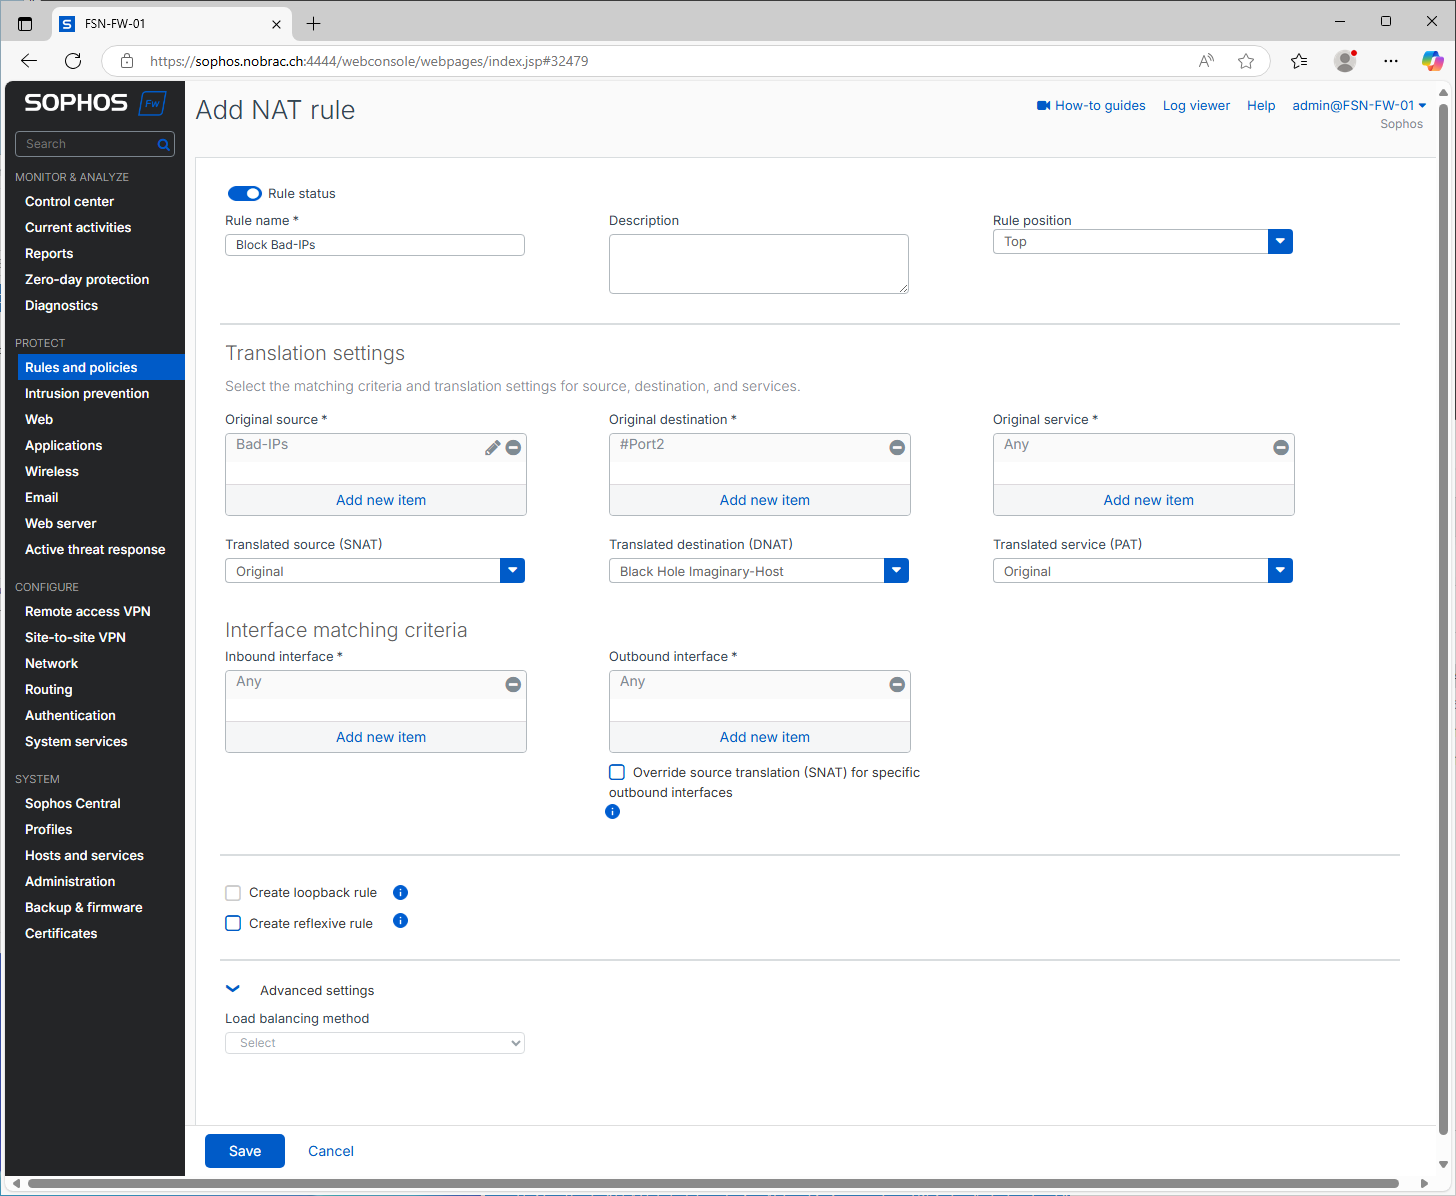
Then creates a new NAT rule. To do this, go to “Rules and policies” on your Sophos and then to “NAT rules”.
You can assign the name as you wish. We now select the “Bad IPs” IP list as the “Original source”. Select your WAN port as the “Original destination”.
With the “Translated destination (DNAT)” option, you now create a host object that does not actually exist. Assign the host object an IP address that you will never use in your network. The requests from the “bad IPs” are then forwarded to this imaginary host. And since this host does not exist, nothing happens.
You can copy the remaining settings from the screenshot.
Create Firewall Rule
In addition, create a firewall rule for logging, where everything from the source “Bad-IPs” is dropped.
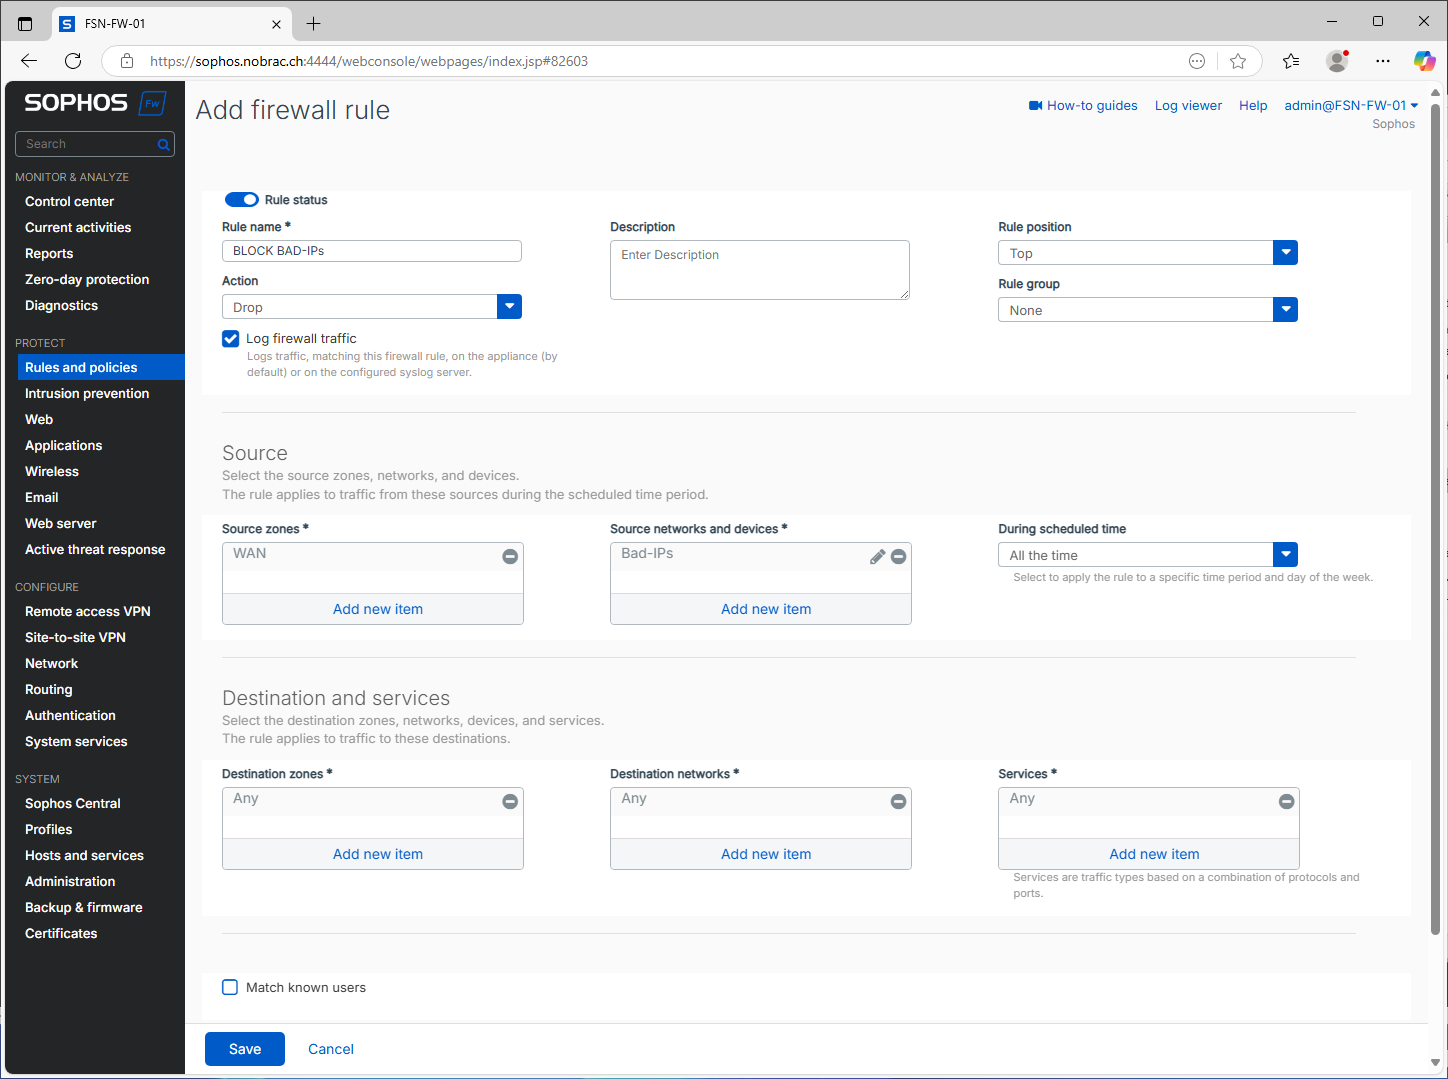
The rule should then be at the top at best.

Enable HTTPS Access
In addition, you must activate HTTPS access to Sophos for the Exchange zone on your Sophos under “Administration” -> “Device access”. Otherwise, API access will not work.

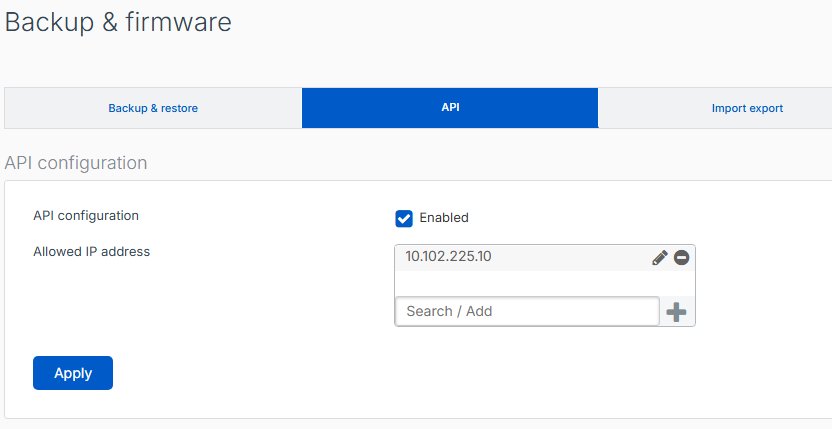
Enable API Access
In addition, you must navigate to “Backup & firmware” -> “API” on your Sophos and activate API access there and enter the IP address of your Exchange server. This means that only the Exchange server is authorized for the API.
Exchange Server Config
Create Script User
Please create a separate user in your domain. This user will then execute the script. For example, I have named my user “Exchange Service”.
Then add the user to the local administrator group of the Exchange server.

I have not taken any more screenshots here, it should be self-explanatory.
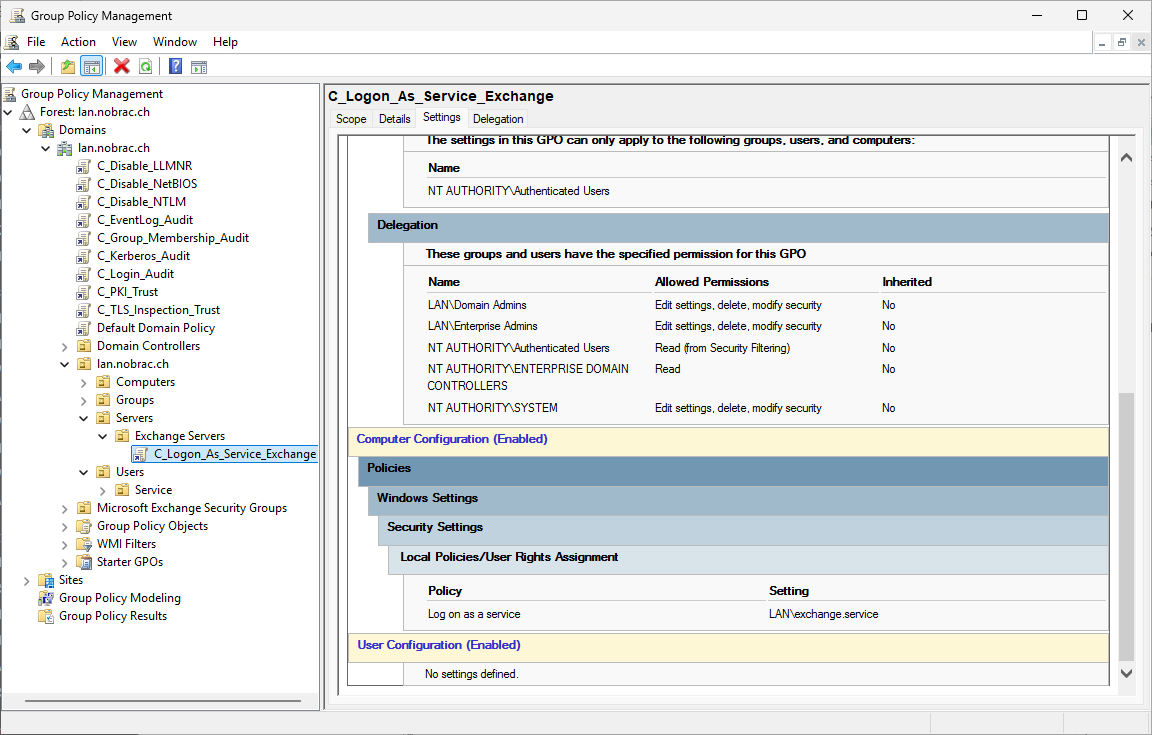
Create GPO
In the next step, create a GPO that gives your Exchange service user the “Log on as a service” rights.
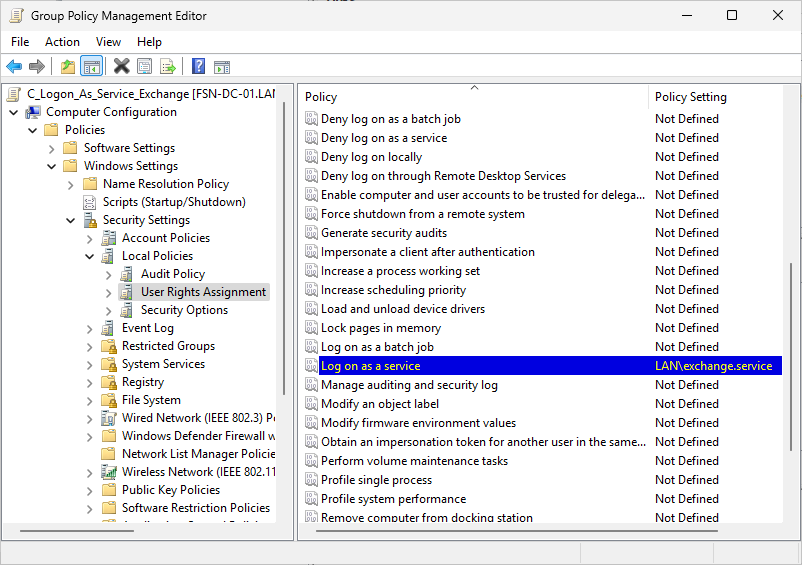
Then link the GPO to your Exchange server OU accordingly.
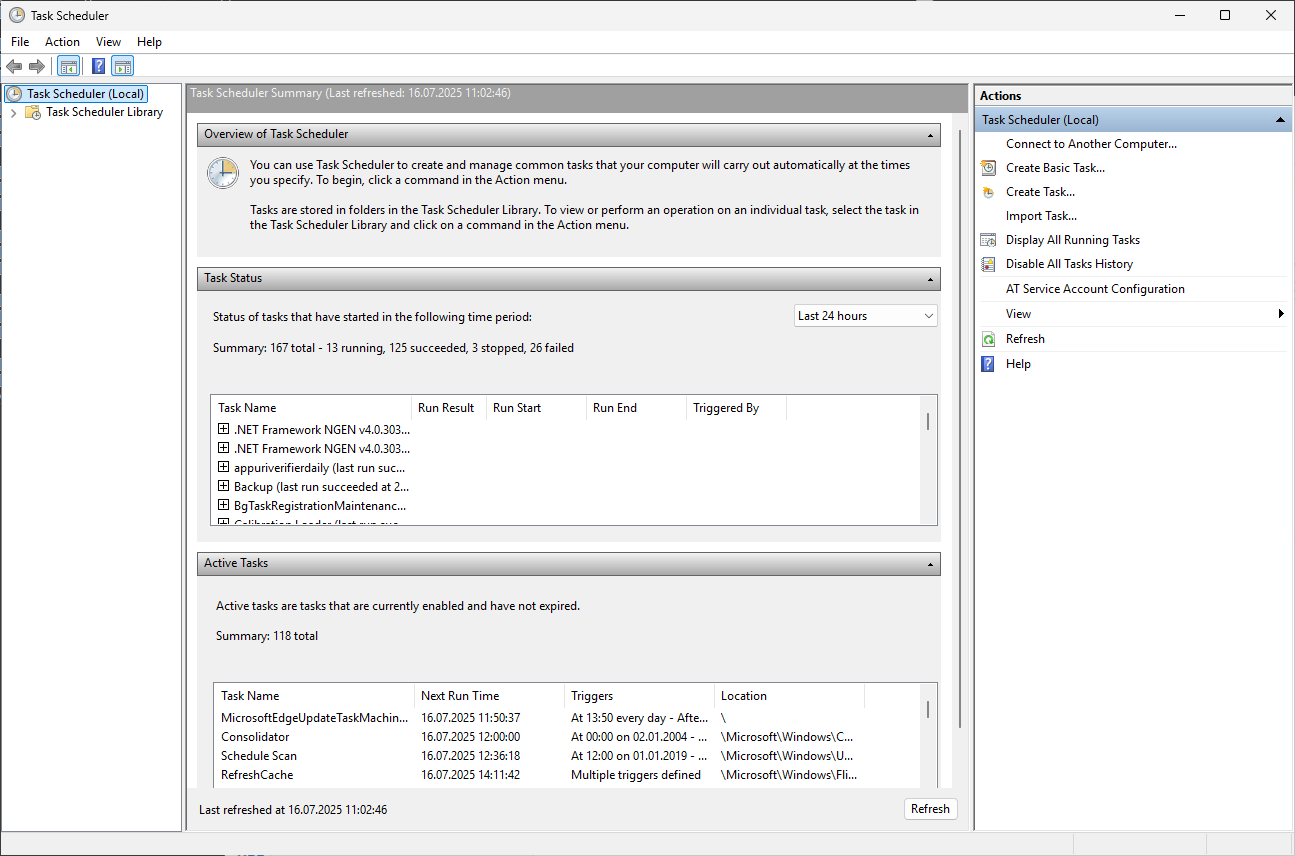
Create Task
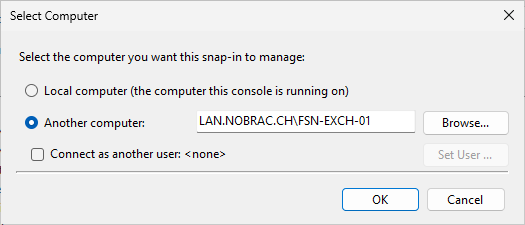
Now open the Task Scheduler on your management VM. At the top left you can right-click on “Task Scheduler (Local)” and then select that you want to connect to another computer.
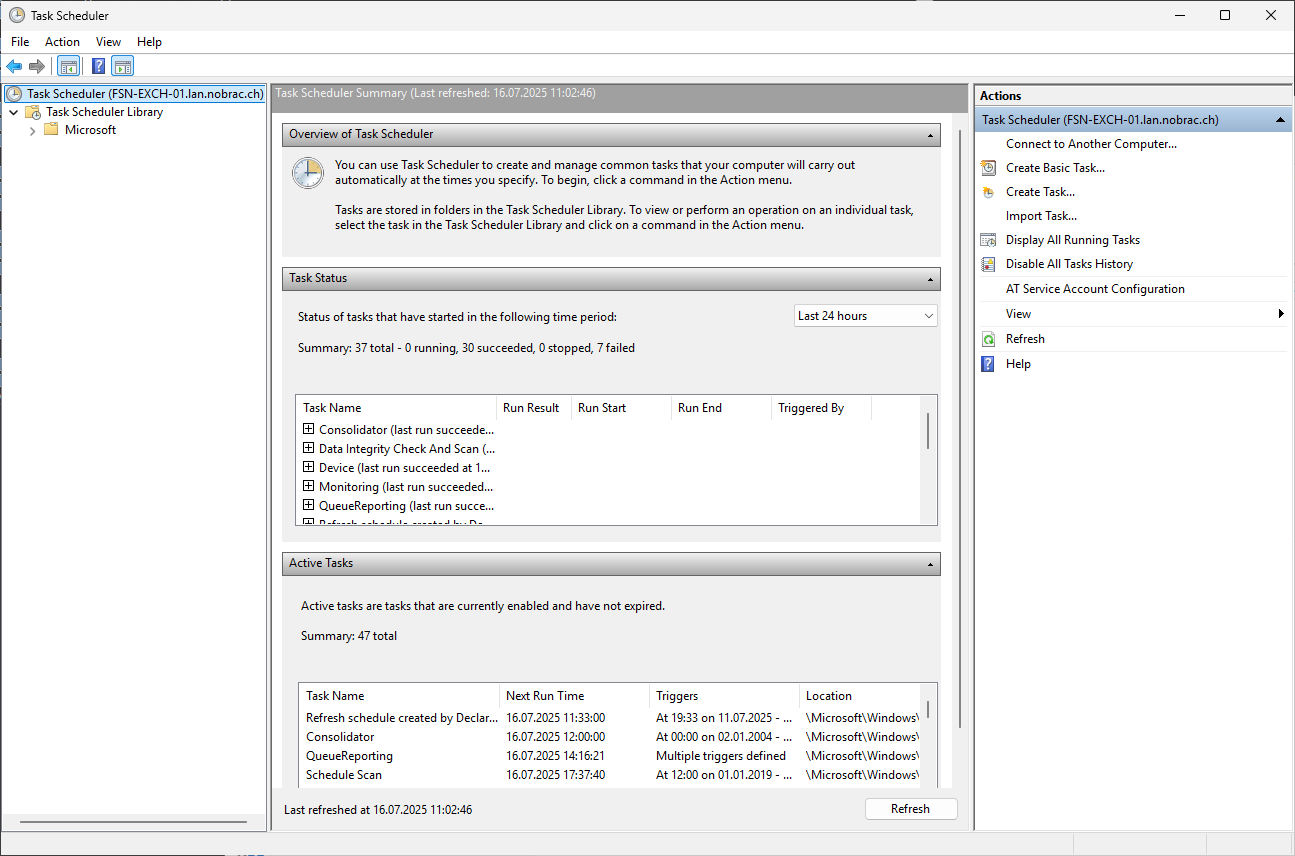
Then simply select your Exchange server.
You should then be connected to the Exchange server. The name can then be seen at the top left.
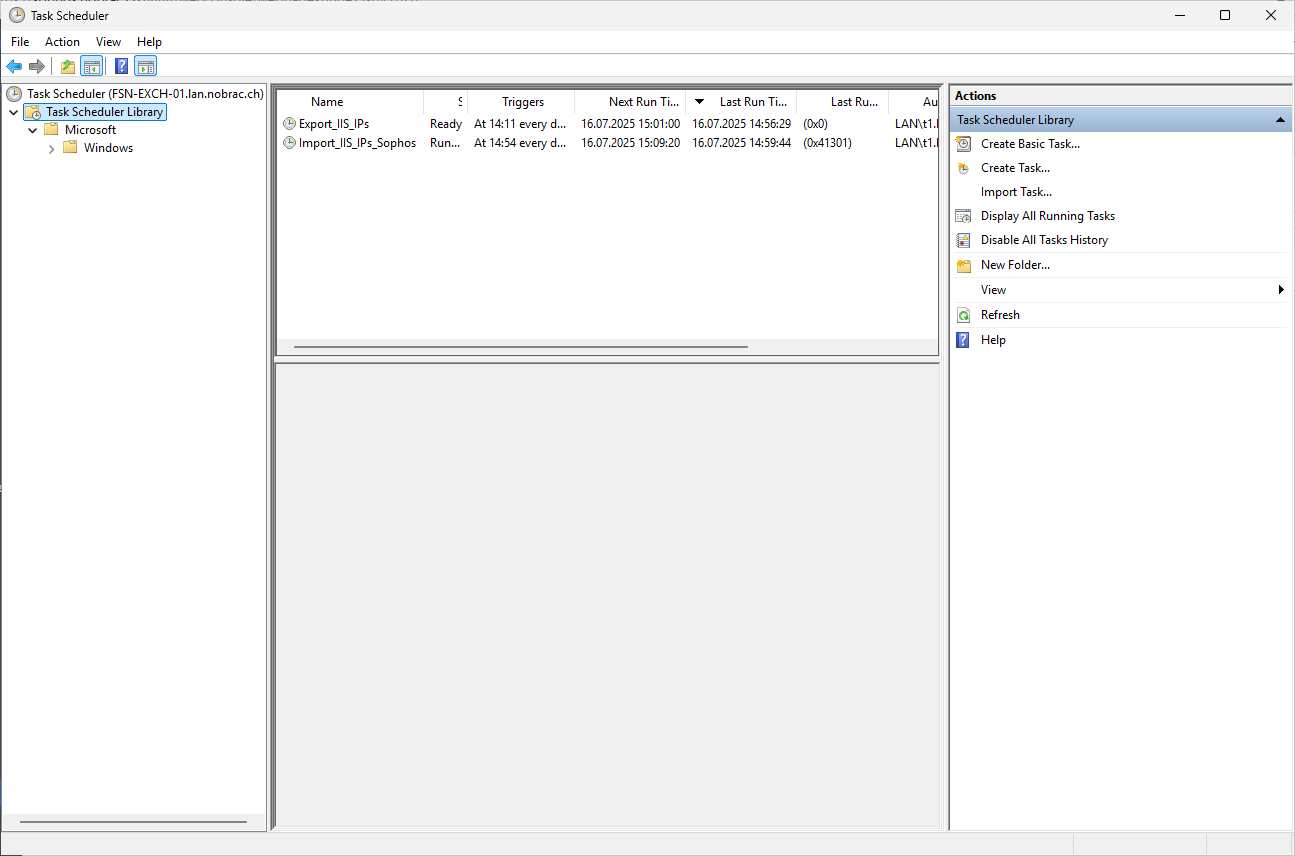
Then creates two tasks. One task to export the IPs and one task to import the IPs.
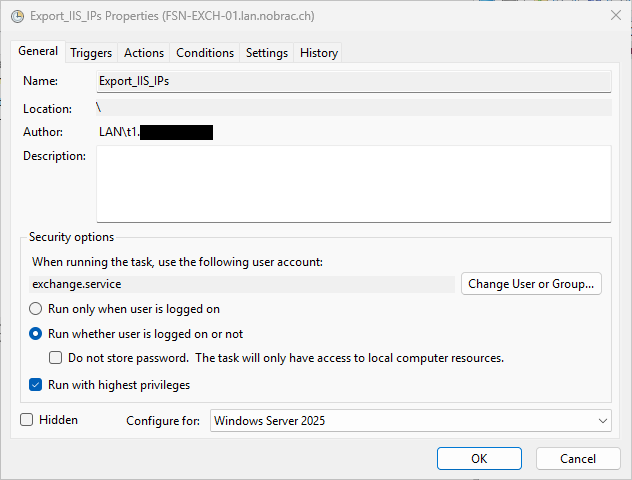
Make sure that the radio button “Run whether user is logged on or not” is selected and that “Run with highest privileges” is checked.
Also adjust the compatibility (Configure for).
Also make sure that you select your service user so that the task is executed by this user - in my case “exchange.service”.
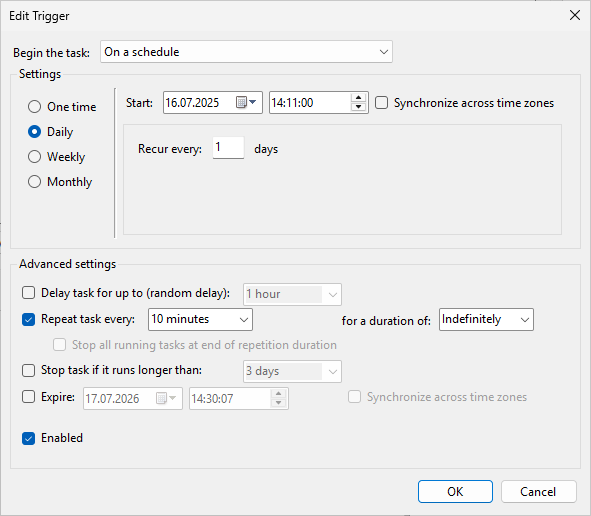
In the “Trigger” tab, I have set the task to run every 10 minutes and for an unlimited duration.
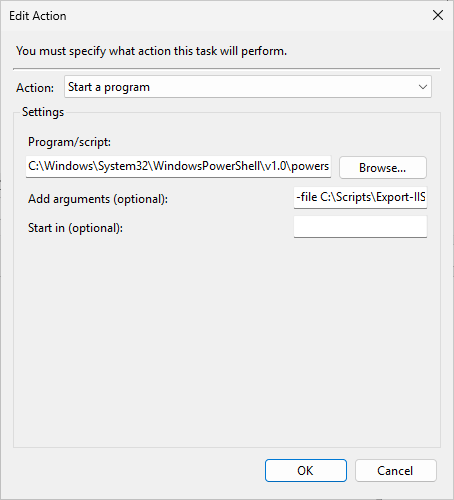
Under the “Action” tab, select your script to execute.
Specifies the entire path to powershell.exe in the “Program/script” field, i.e.:
|
|
You then enter your script in the “Add arguments” field, in my case:
|
|
Then simply do the same again for the other task for IP import on the Sophos. Simply select your other script here and run it every 15 minutes, for example. The export IP task should logically always run before the import IP task.
In the end, it should look something like this.
Then execute the scripts directly via Powershell on the Exchange server itself with the same parameter as for the task. This way you can see whether the execution of the script is blocked by the execution policy or something else.
For example like this:
|
|
Check if it works
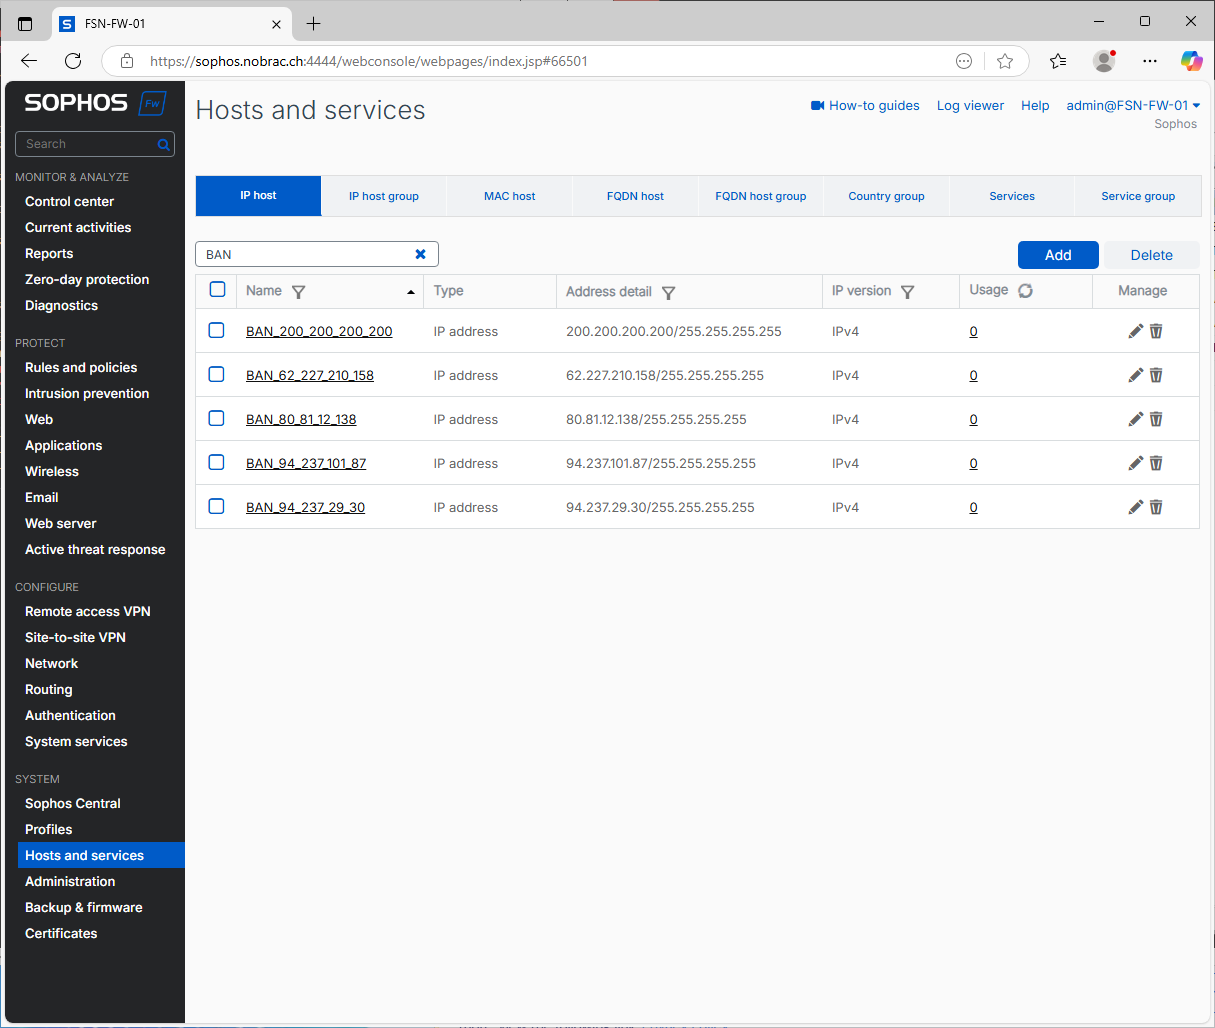
If everything works, IP host objects should be successfully created on your Sophos. They always have the prefix “BAN_”.
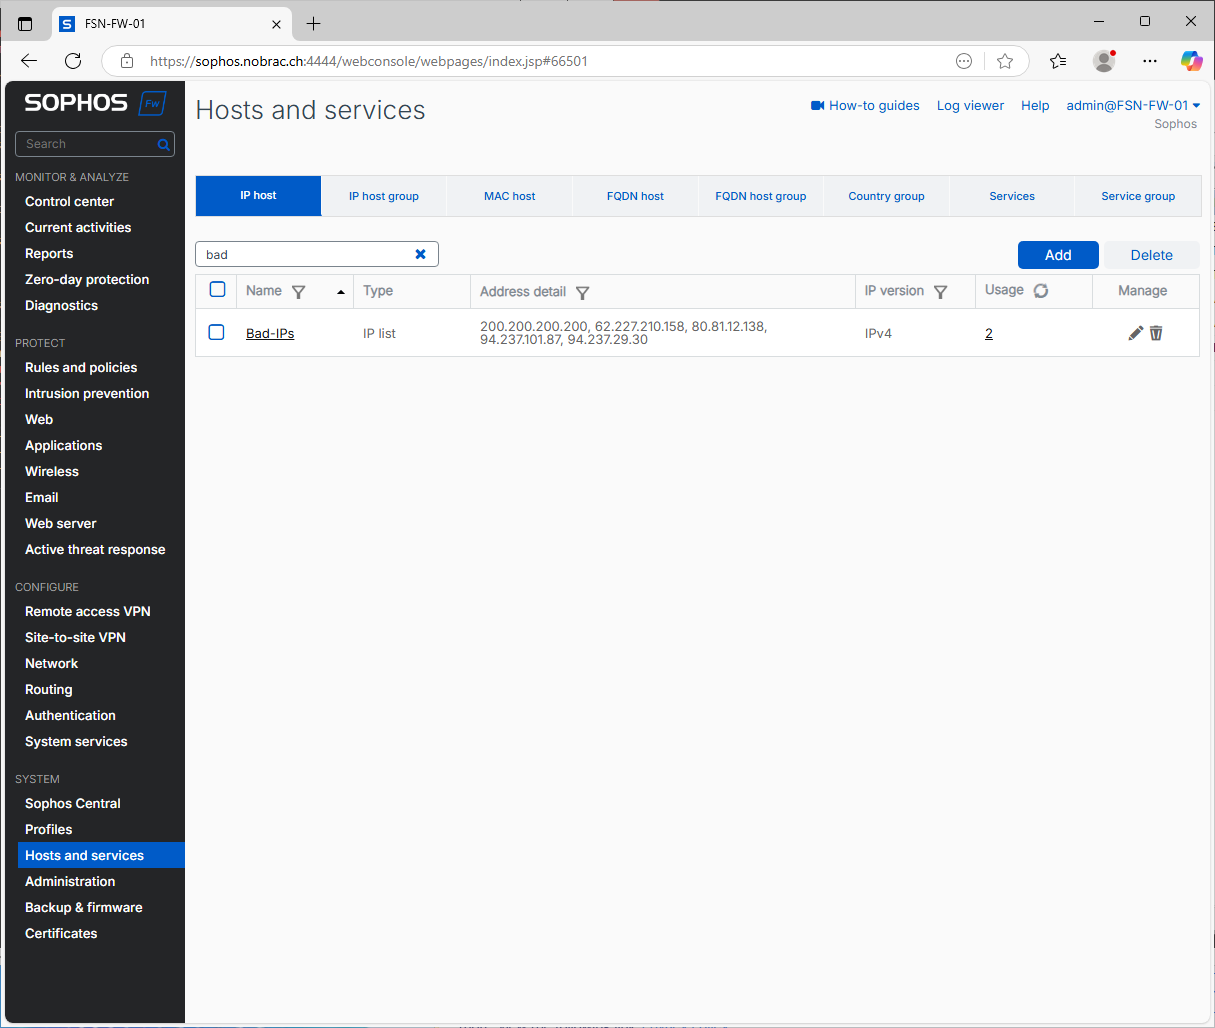
The IP list “Bad IPs” should then also be filled.
That’s it. You now have automatic brute force protection.
Microsoft Security Baseline
You should also take a look at the Microsoft Security Baseline. I’ll show it briefly in the example using the Windows Admin Center. This greatly simplifies many processes. You can also roll out the baseline via Powershell or GPO. This is important for all servers in the domain. I just wanted to mention it here in case anyone is not yet aware of it.
In general, you always have to be careful what you set in the baseline, as some changes can have a serious impact.
The Windows Defender baseline should normally not cause any problems if all recommended settings are applied. Various customers and my home lab have had no problems here.
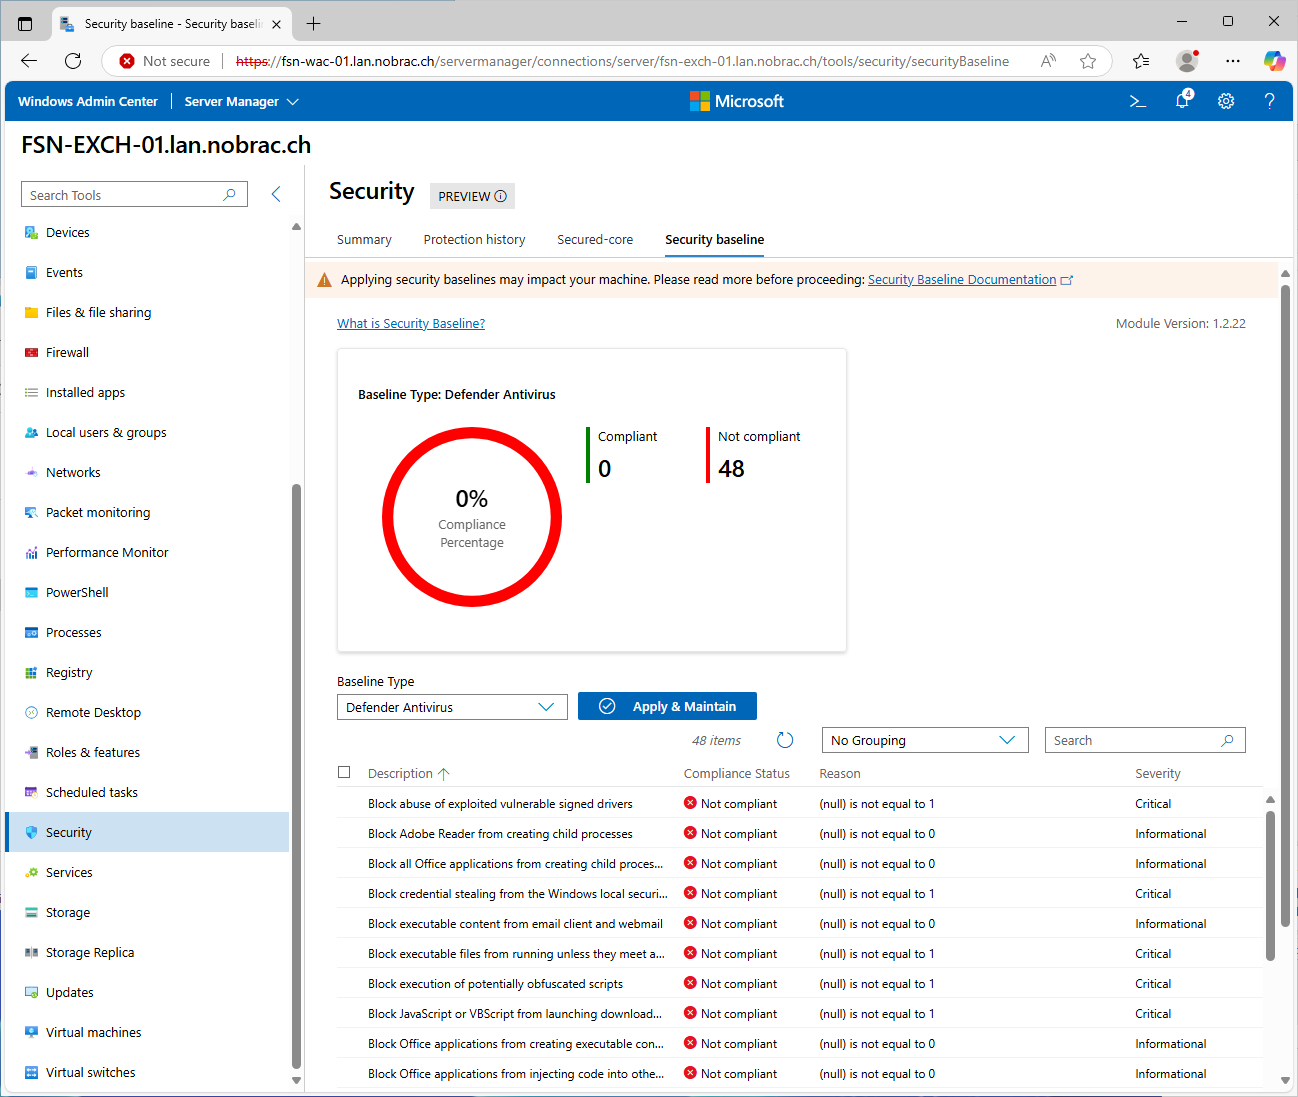
As we can see, Microsoft is complaining about 48 points.
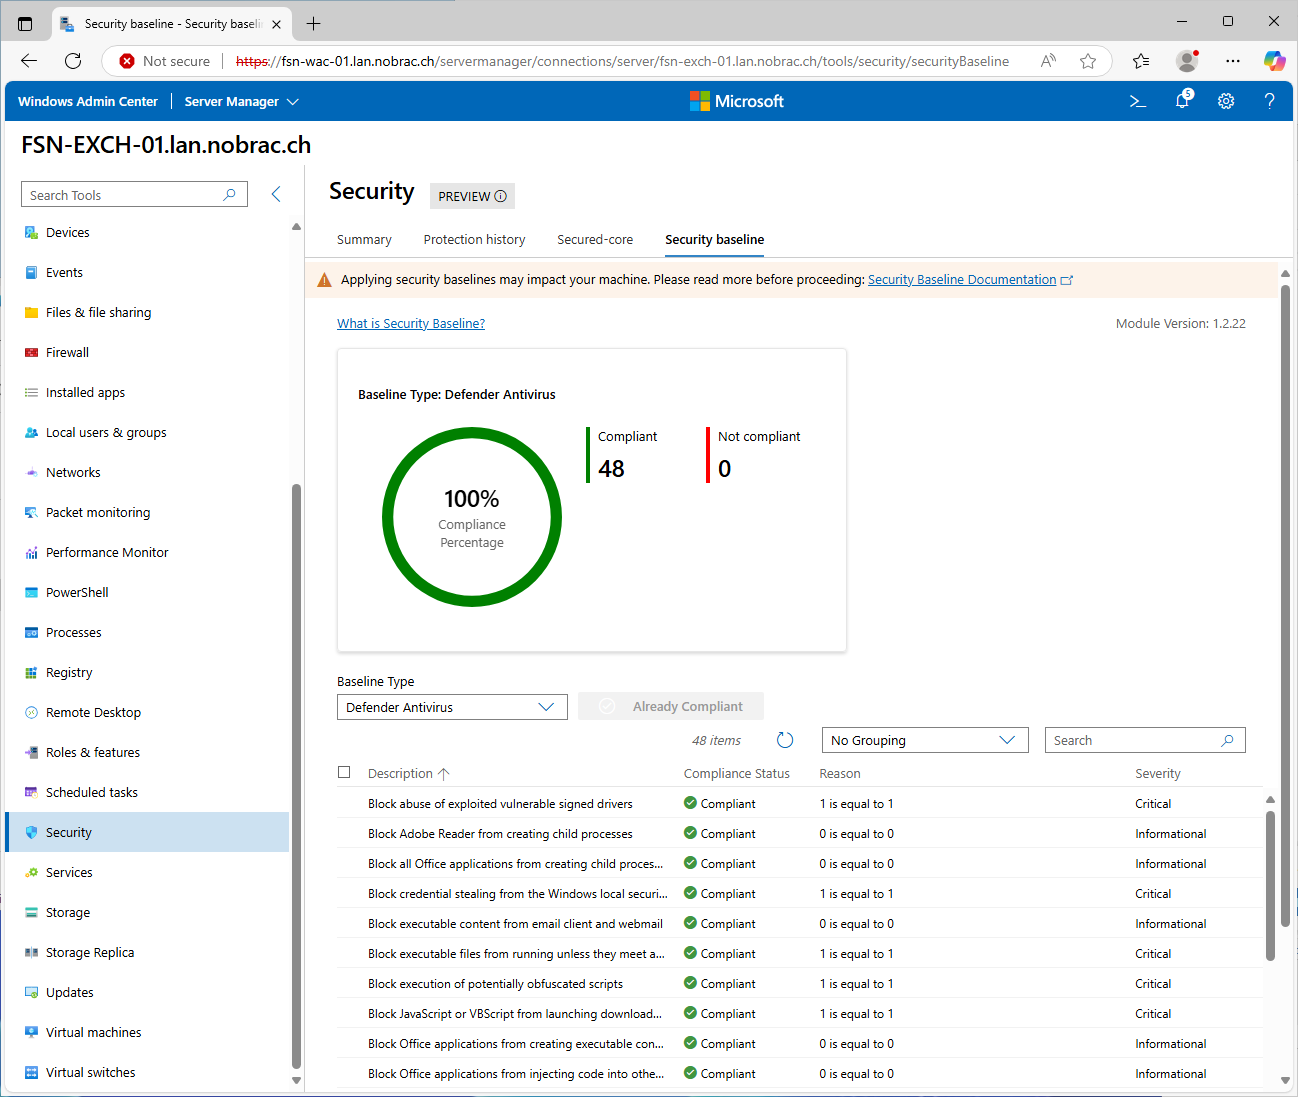
If we adopt the baseline, it looks like this.
Then, as I said, be sure to take a look at other baselines such as the “Member Server” baseline, where there are also many points that can and should be improved.

Add 2FA with DUO
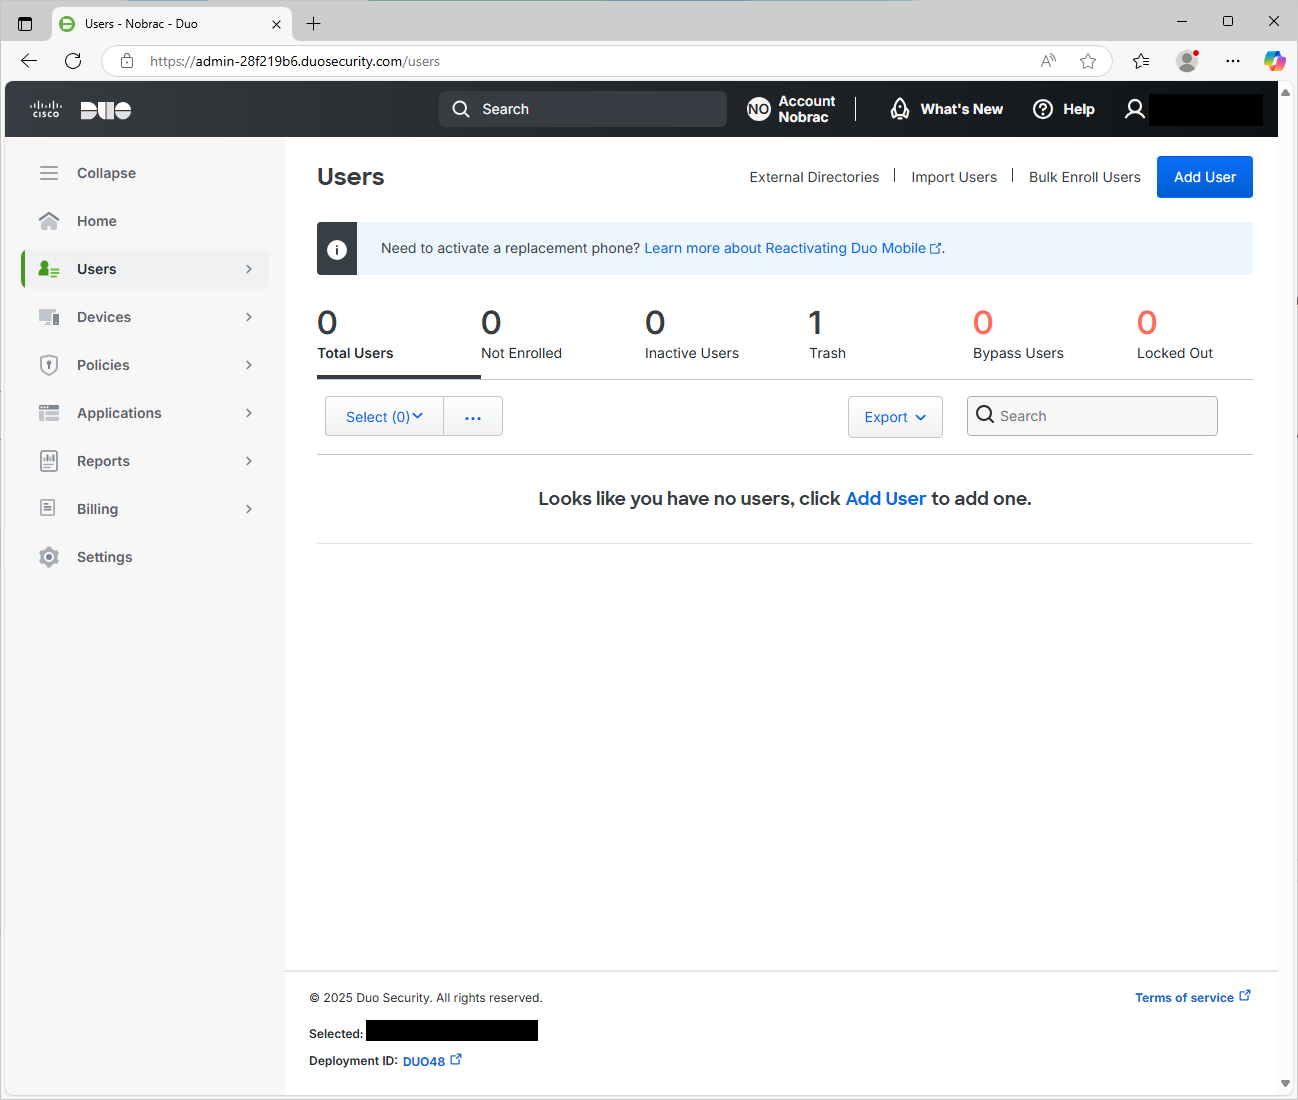
In addition, it is possible to add 2FA for OWA/ECP through DUO from Cisco. This is free for up to 10 users.
So just register with DUO and you should be here. Click on “Add User” at the top right.
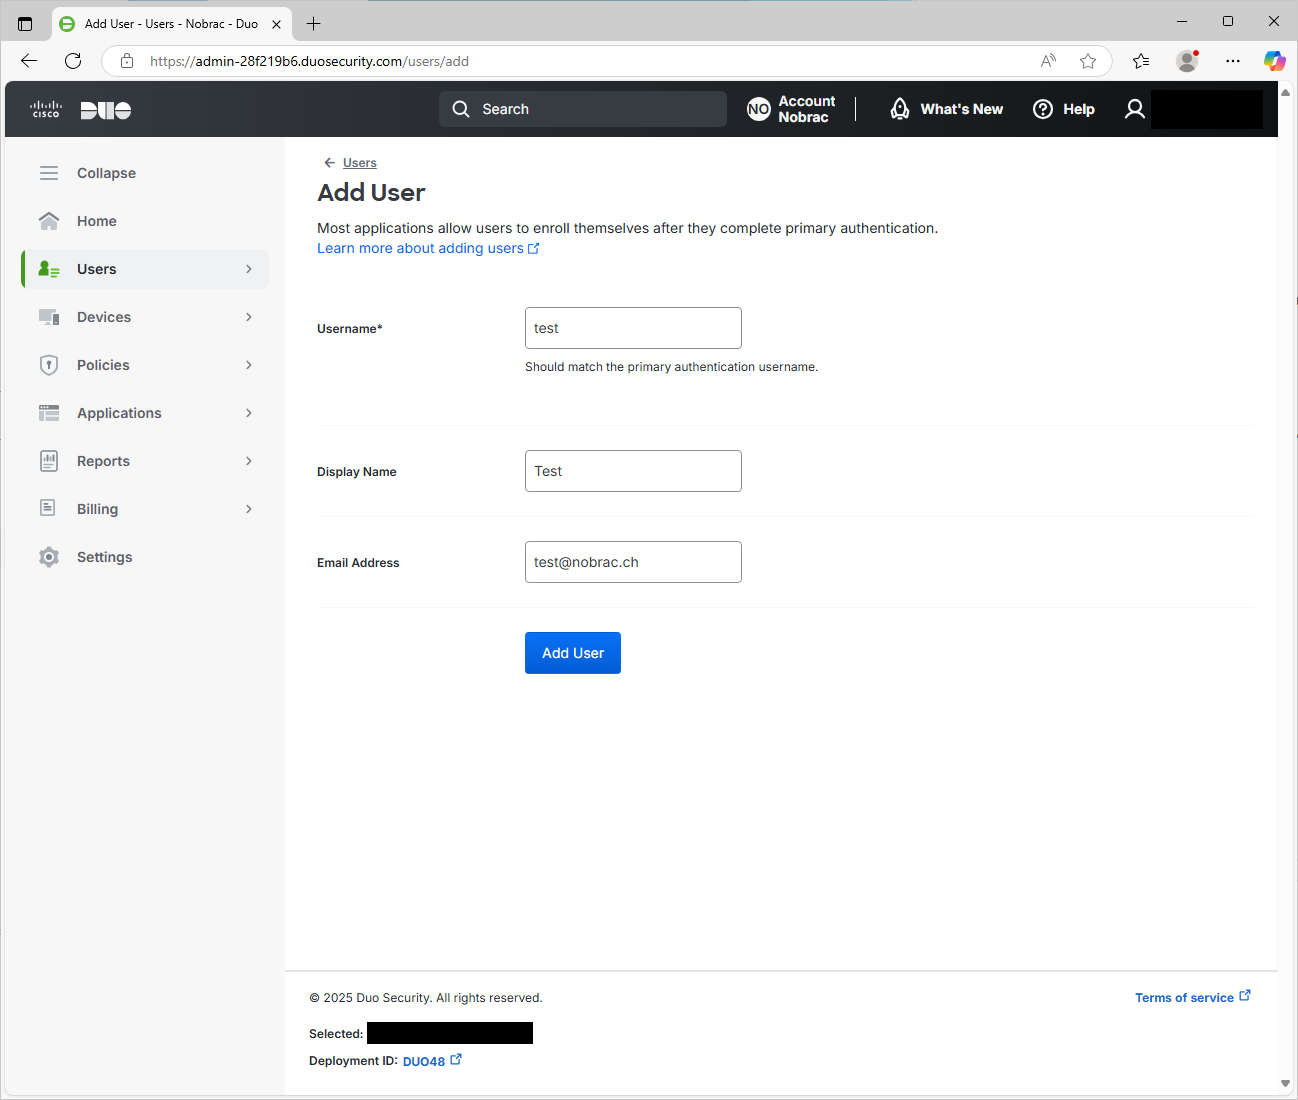
Fill in the details accordingly. The user name must be the same as in the Active Directory.
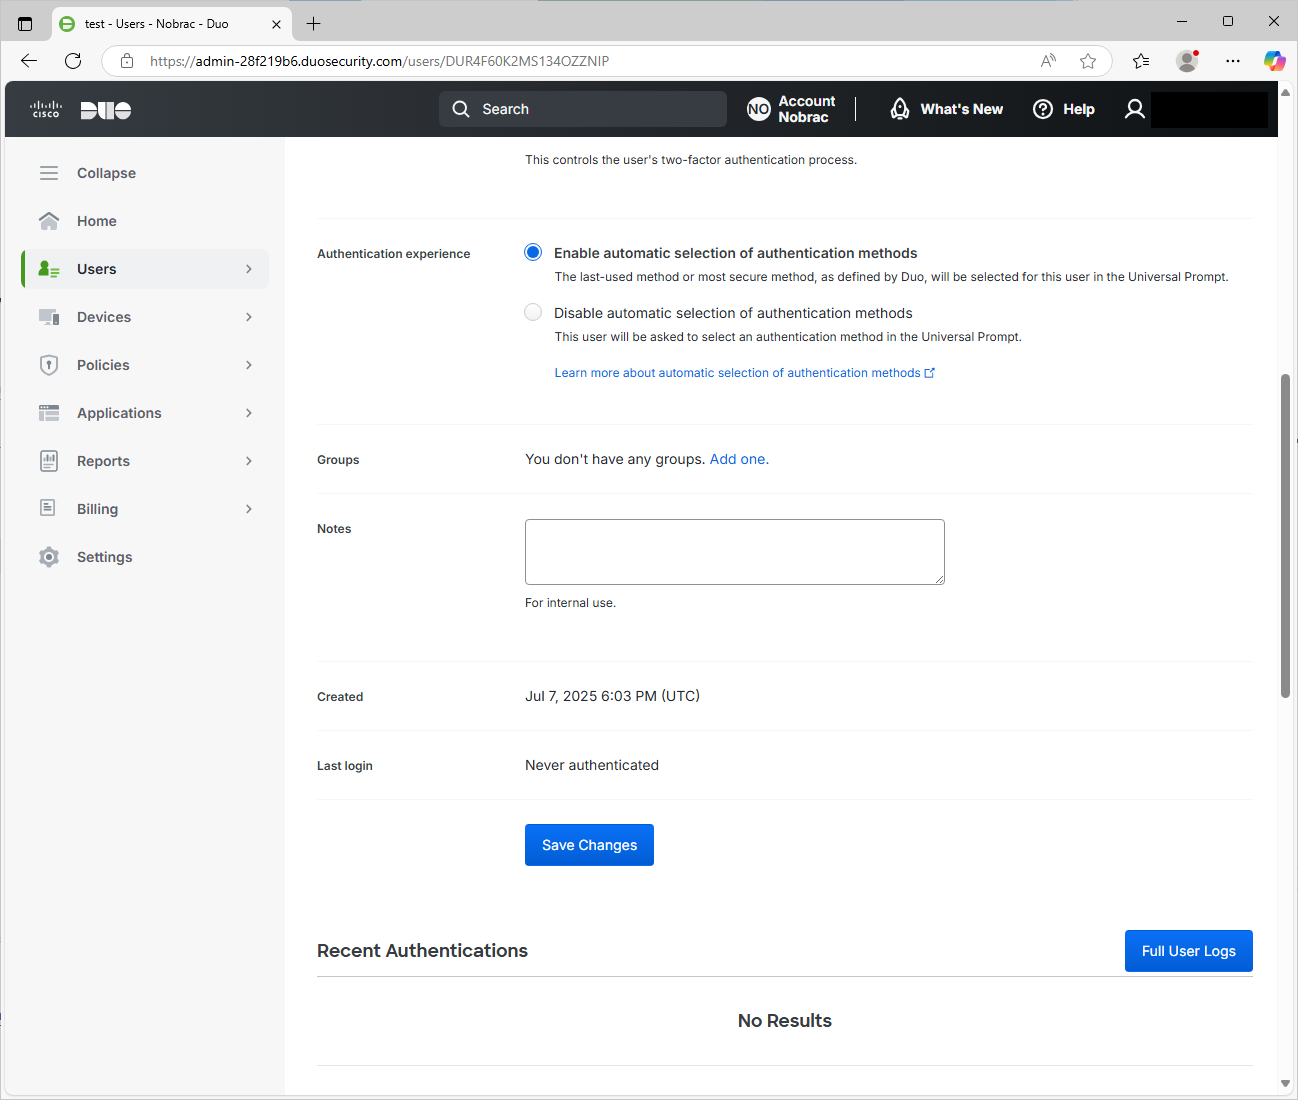
The user was successfully created. Ensures that the status for the 2FA is set to “Active”.

I leave the default setting for the automatic selection of the 2FA method. Sounds like your changes below on “Save Changes”.
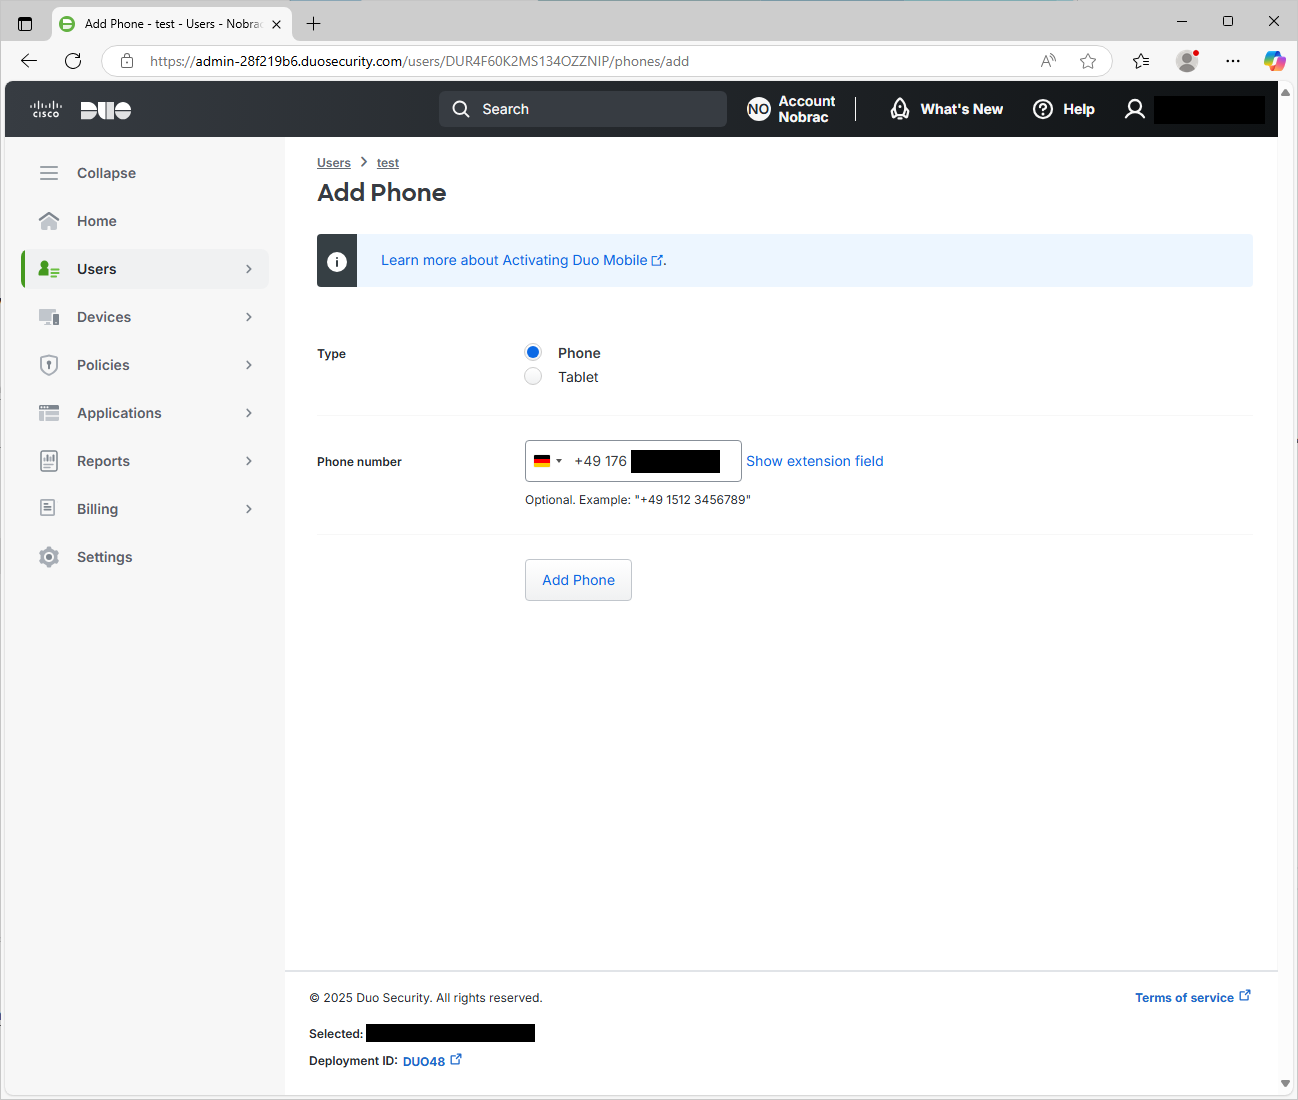
Below you will find the options for 2FA. In this example, I am using my cell phone with the DUO app, you can of course use something else.
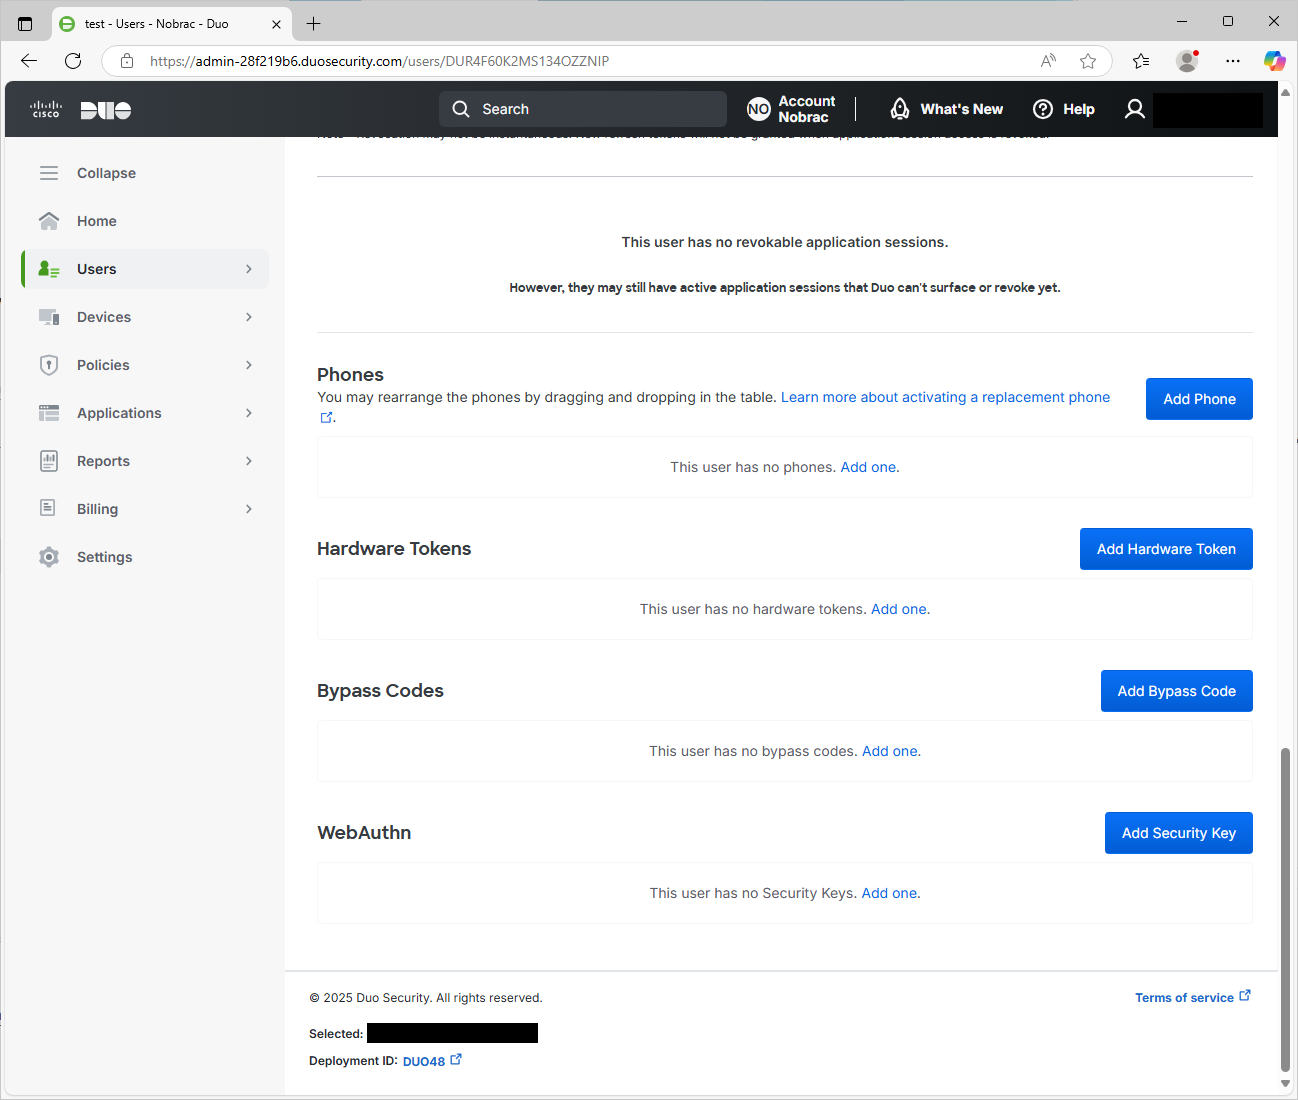
Enter your cell phone number.
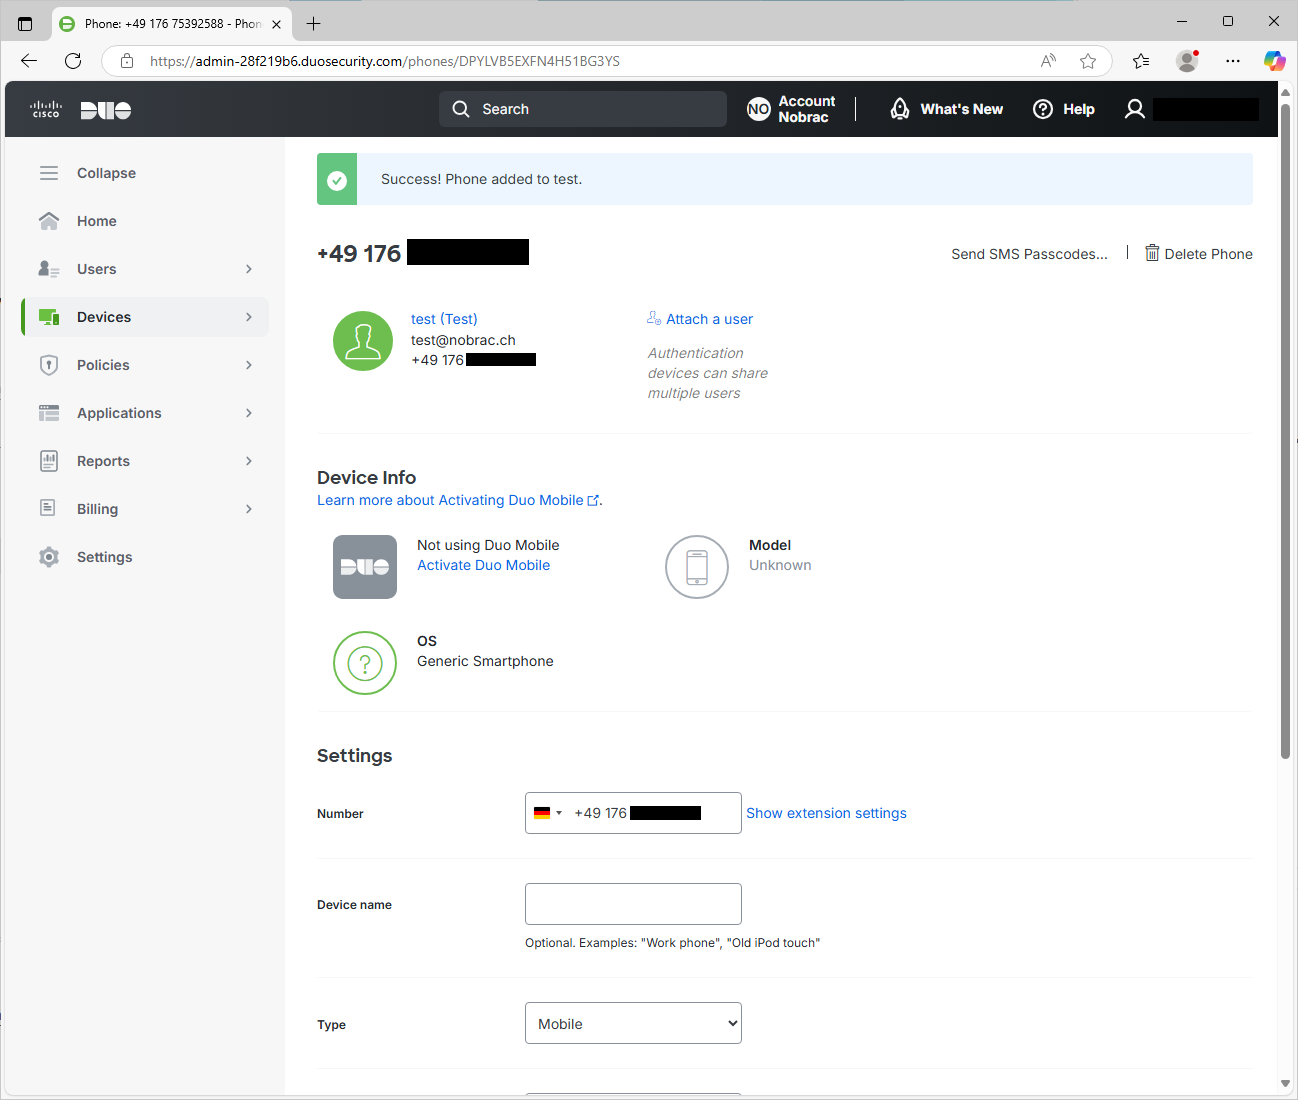
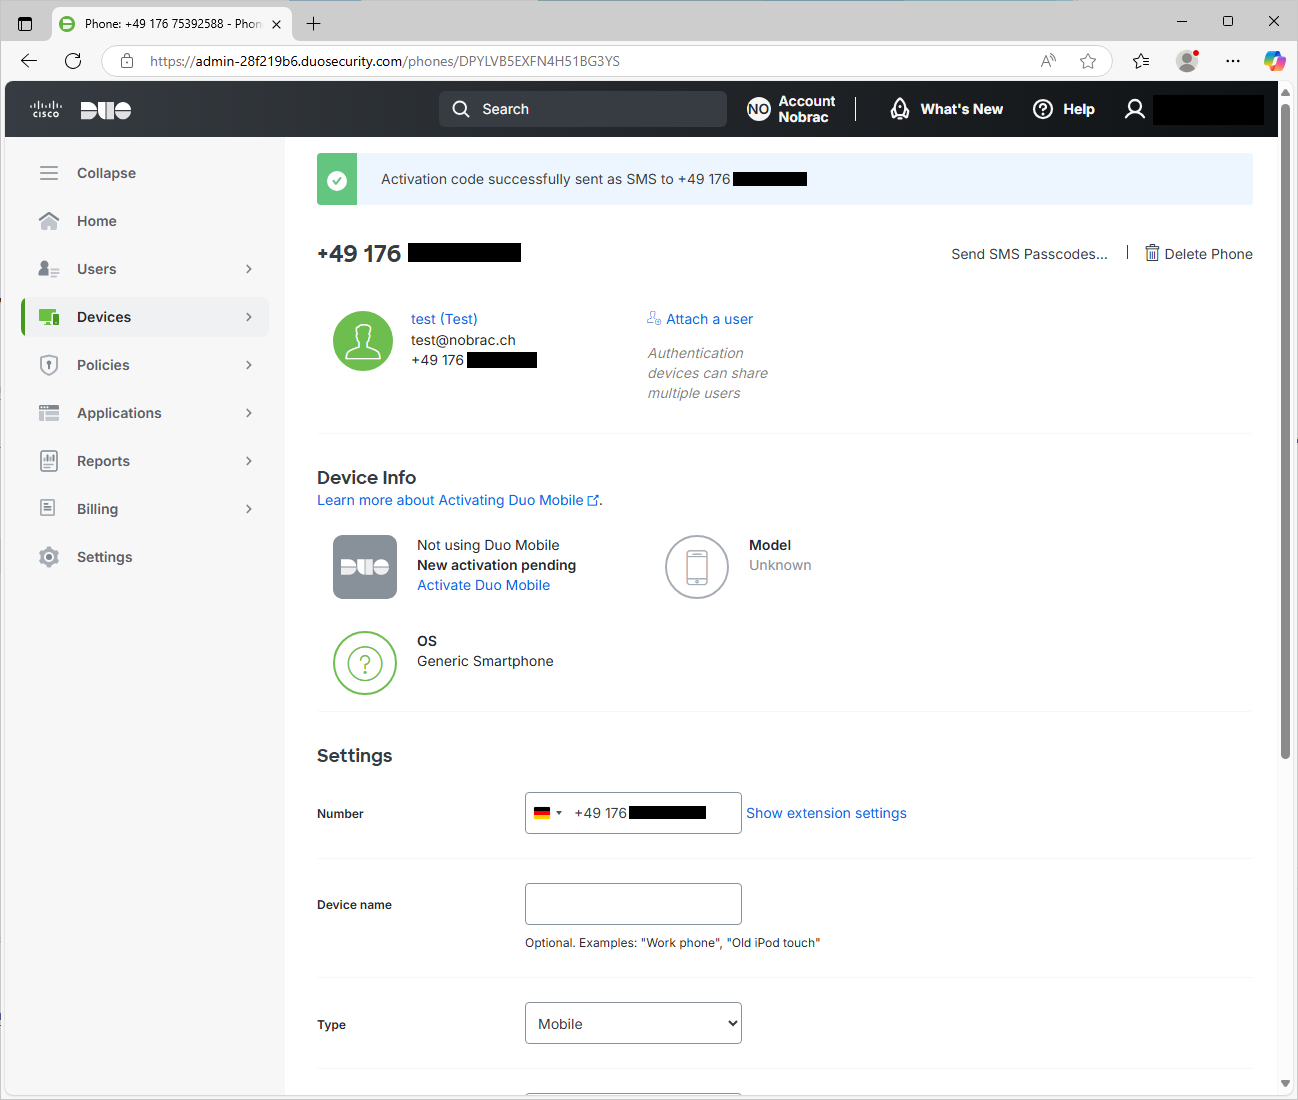
The cell phone has been successfully added. Click on “Activate Duo Mobile” in the “Device Info” category.
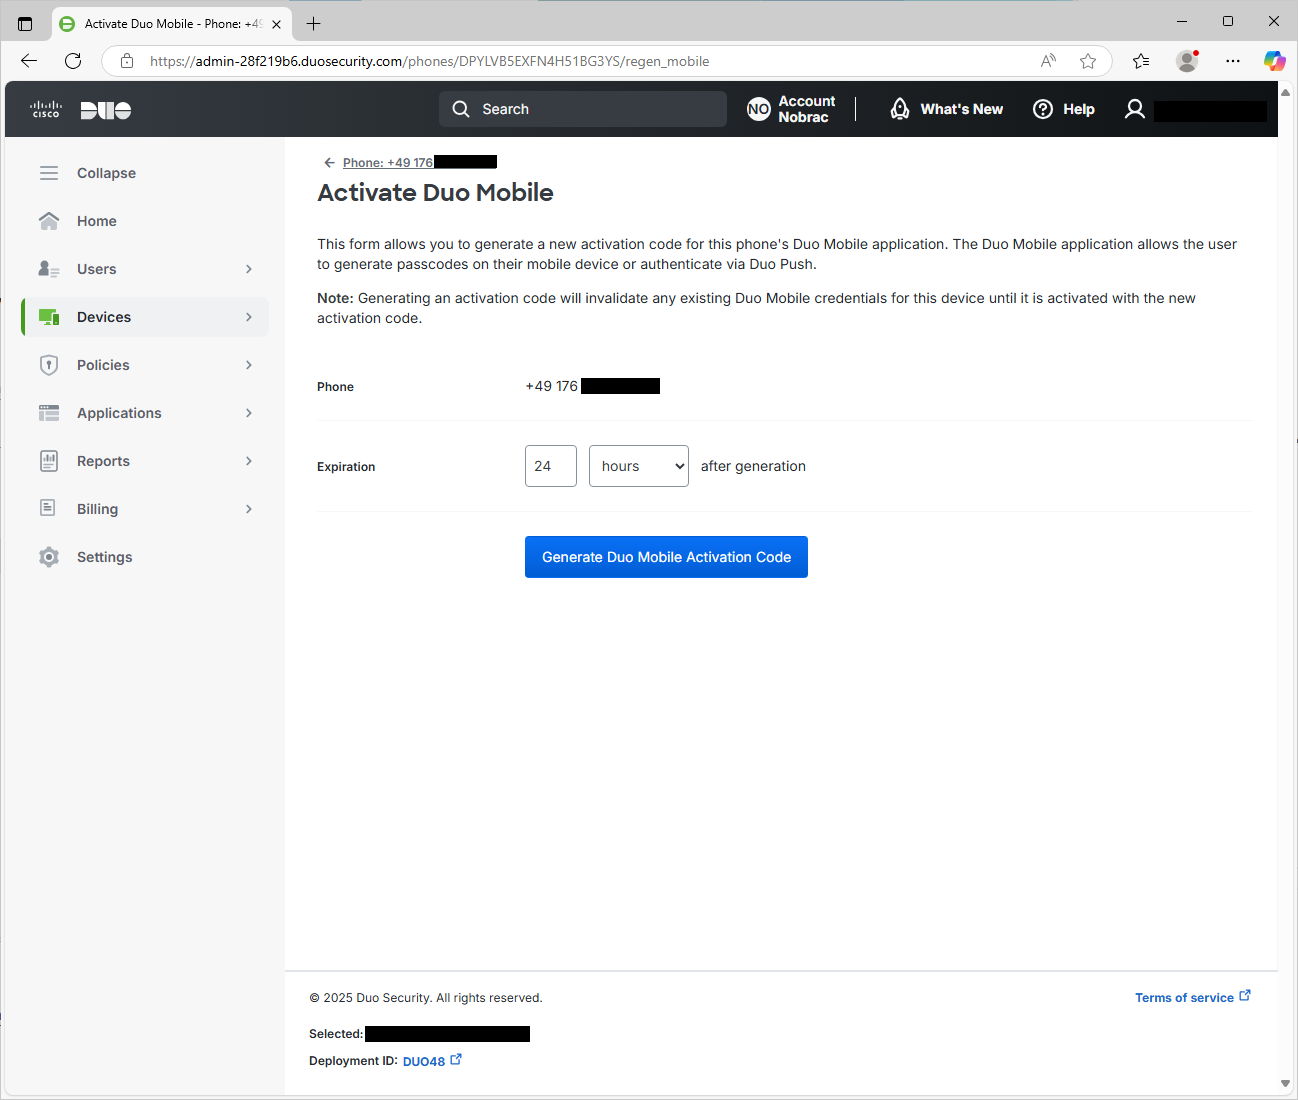
Then click on “Generate Duo Mobile Activation Code”.
I have the link sent to me by SMS. Of course you can also take it by e-mail.
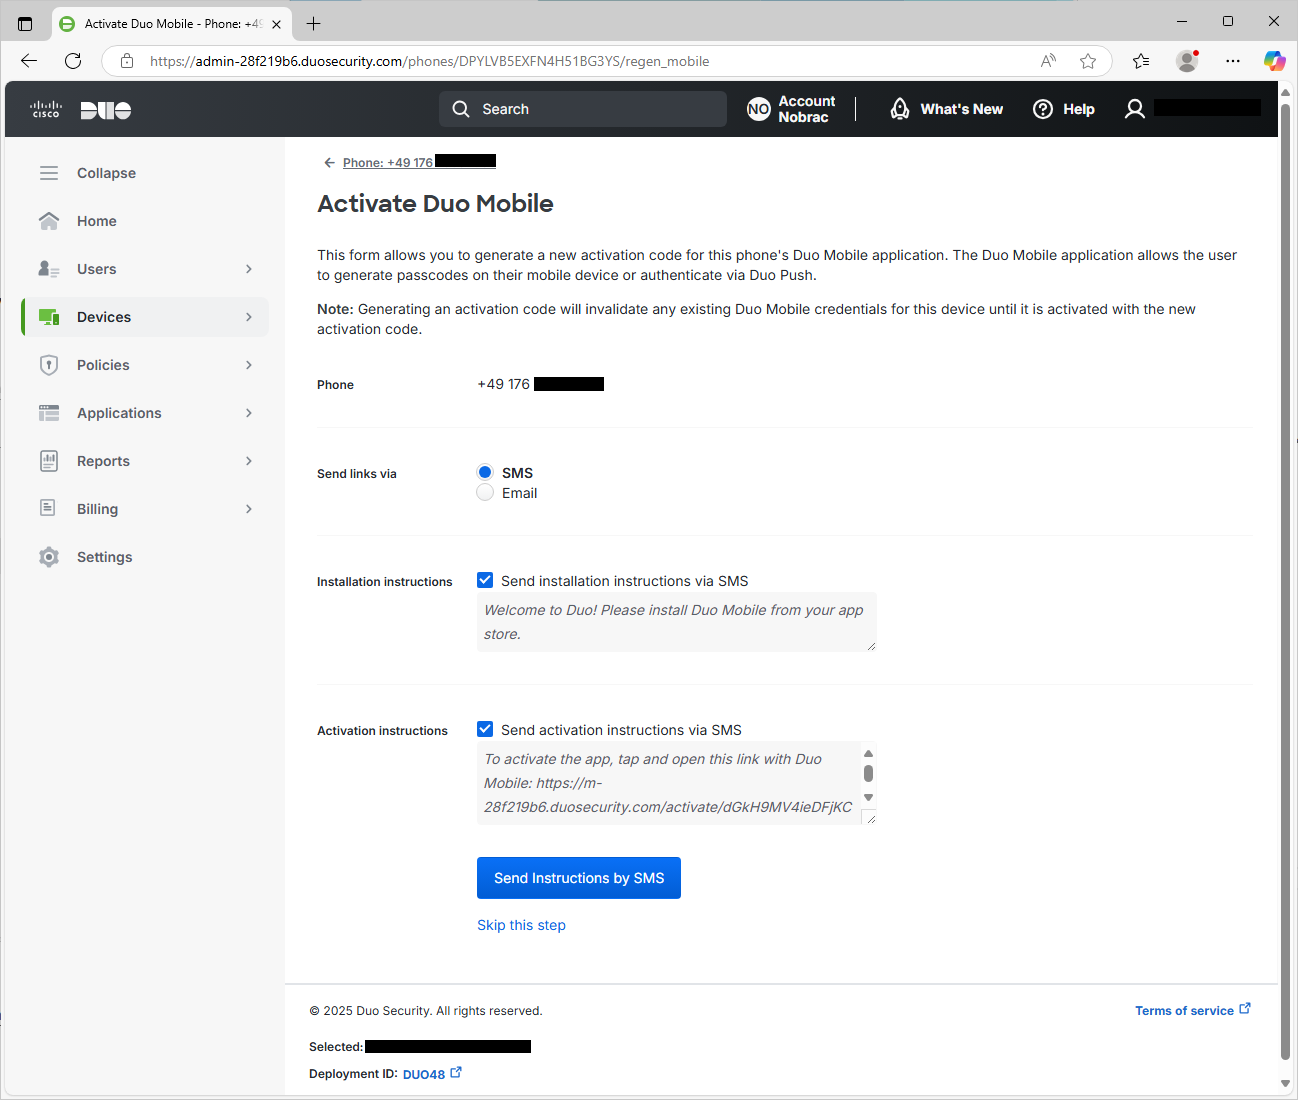
Activation code got successfully sent.
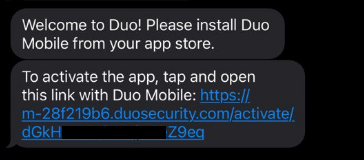
You should then receive an SMS. Download the Duo Mobile App before you click on the link.
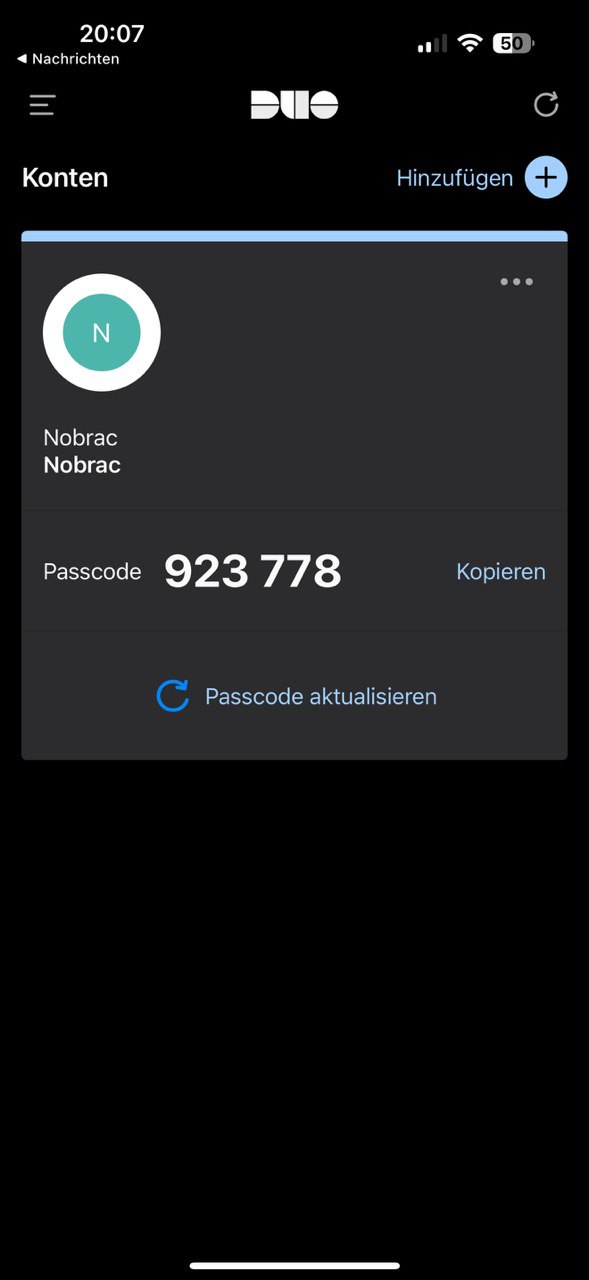
After you have clicked on the link, the account should have been added to your DUO app.
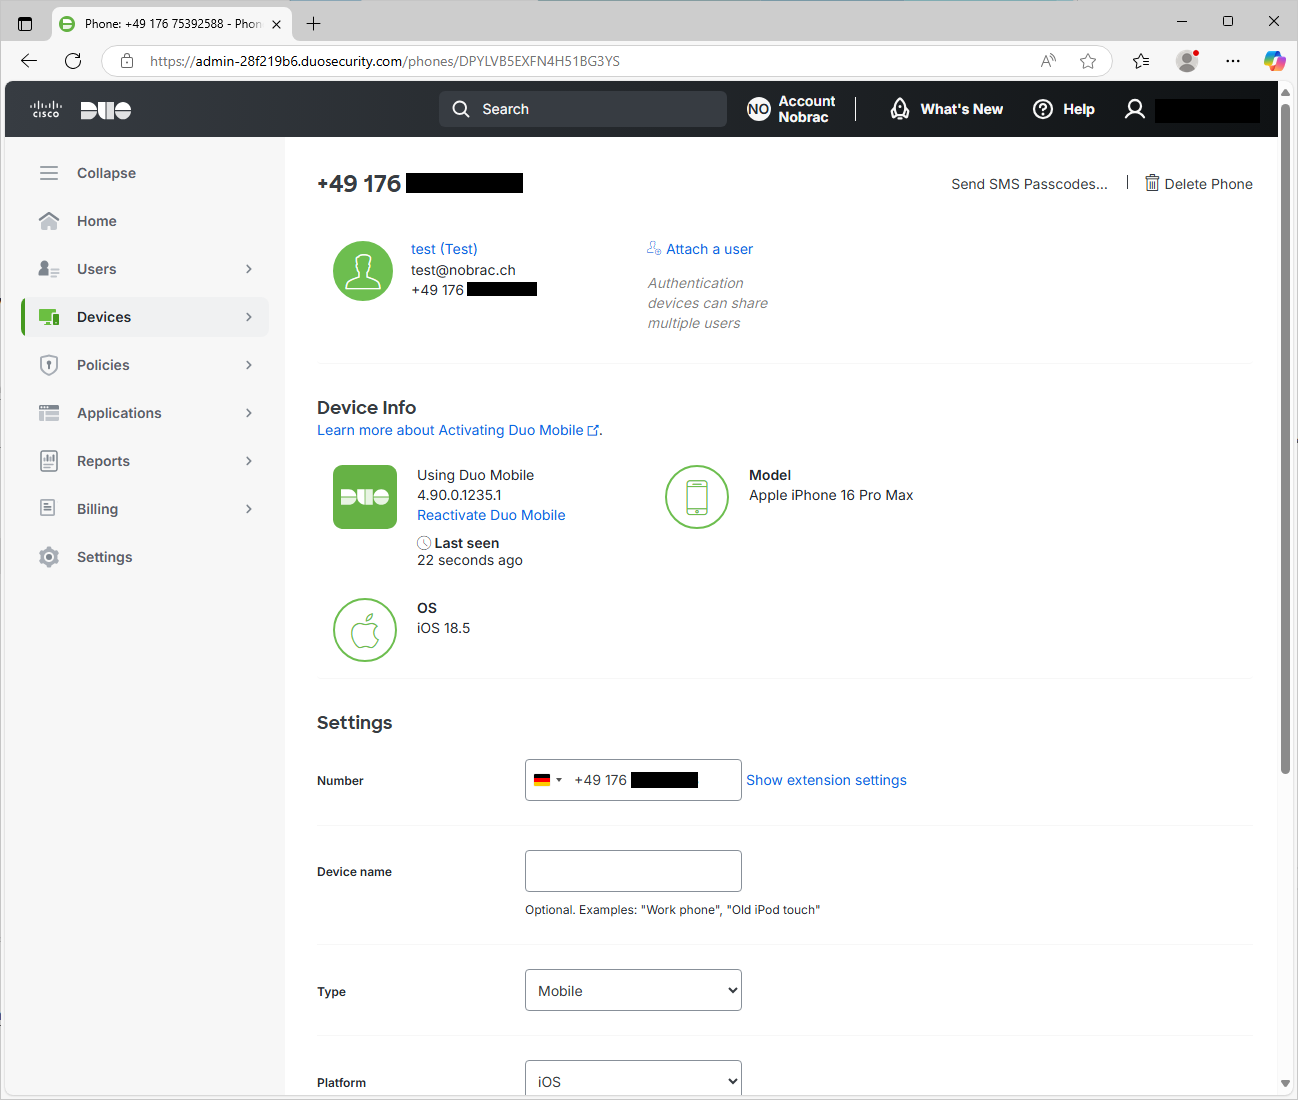
After adding the account, your cell phone should also be registered in the DUO portal and the corresponding information should be displayed.
Download the DUO installer for OWA and copy it to your Exchange server (I simply used the C$ share here again): https://dl.duosecurity.com/duo-owa-latest.msi
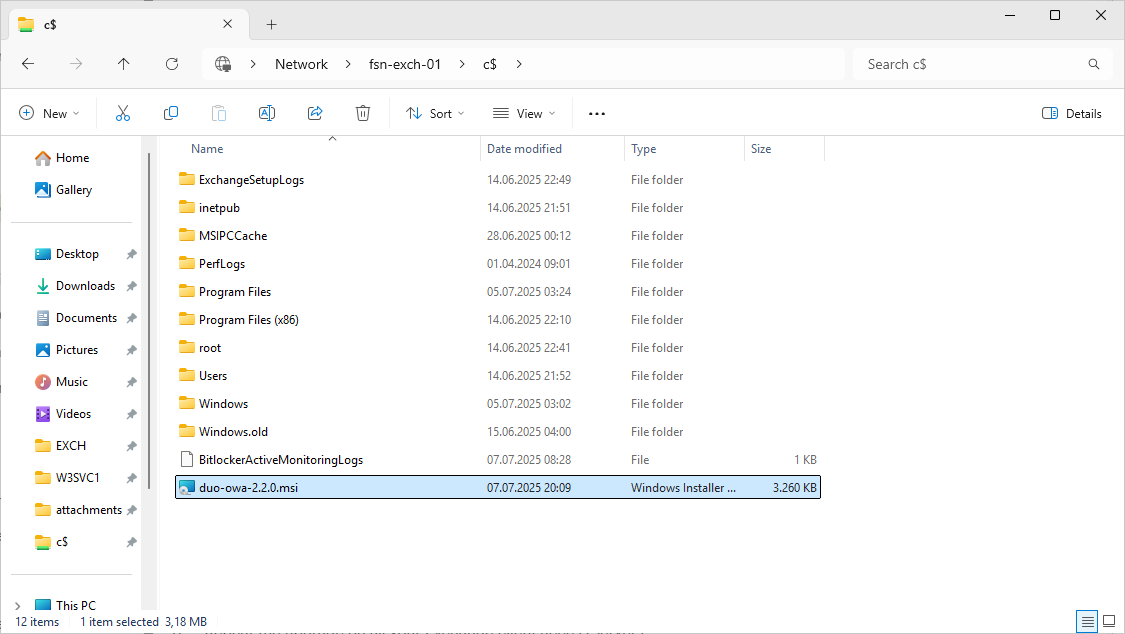
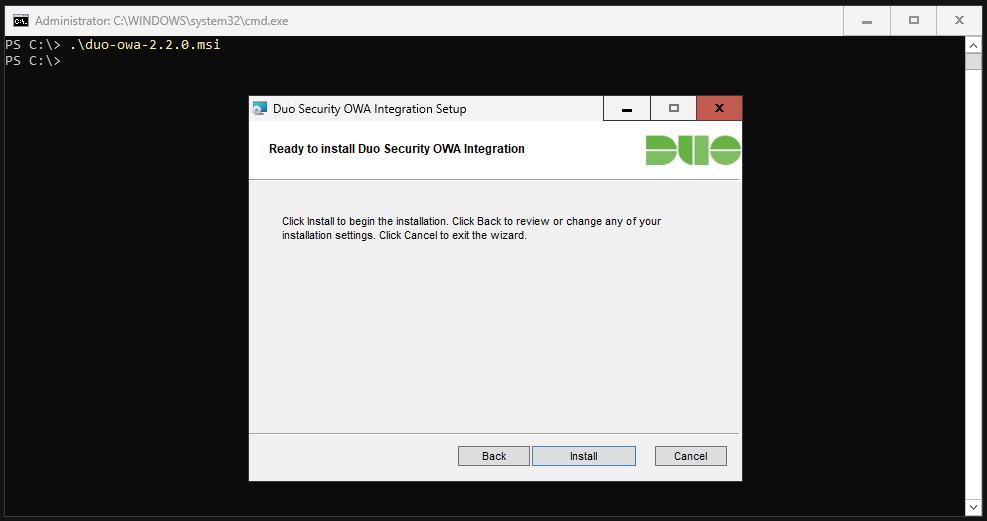
Navigate to the directory with the installer on your Exchange server.
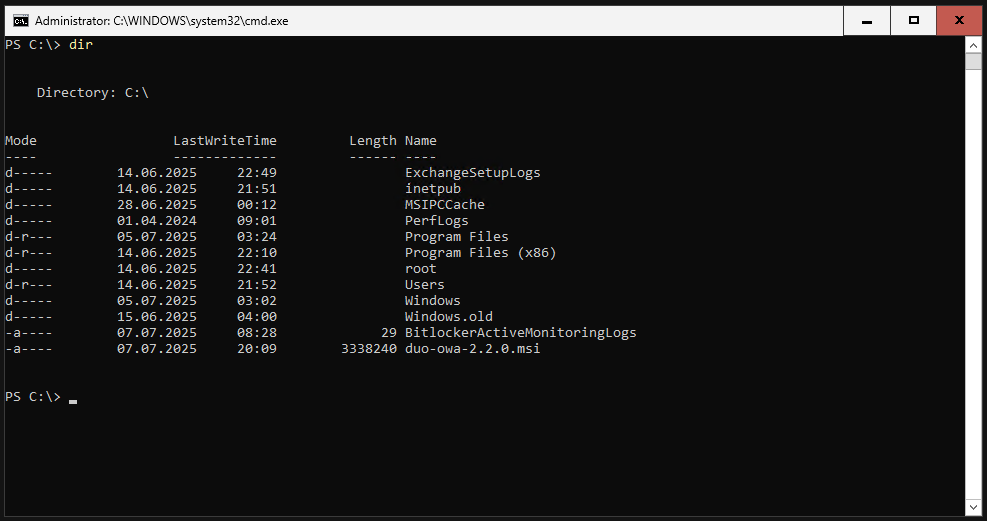
And then execute the MSI file.
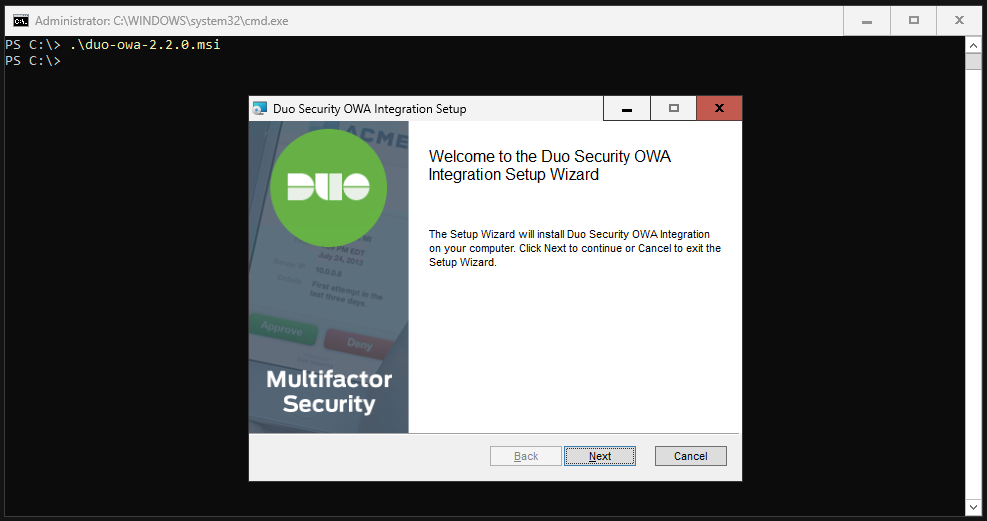
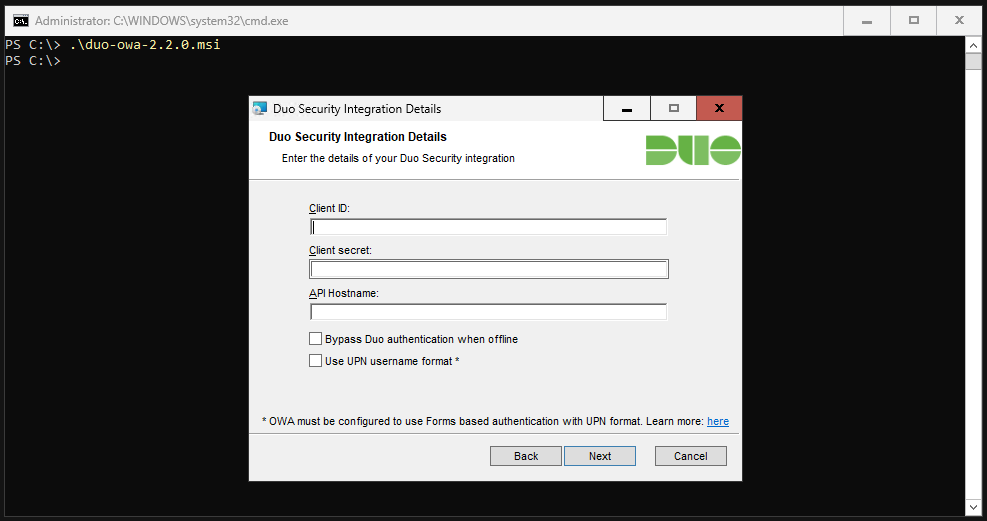
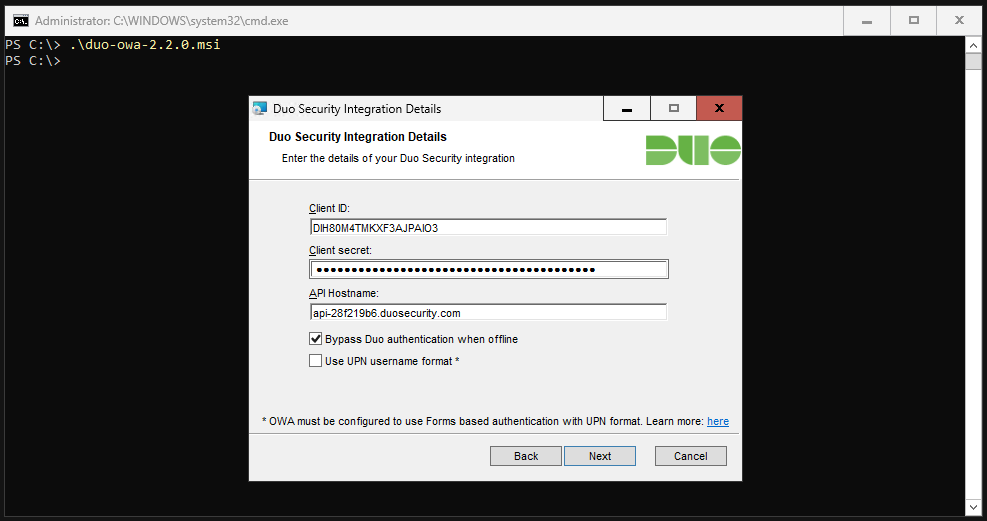
In the next step you will be asked for Client ID, Client secret and API hostname. We will now get these from the DUO portal.
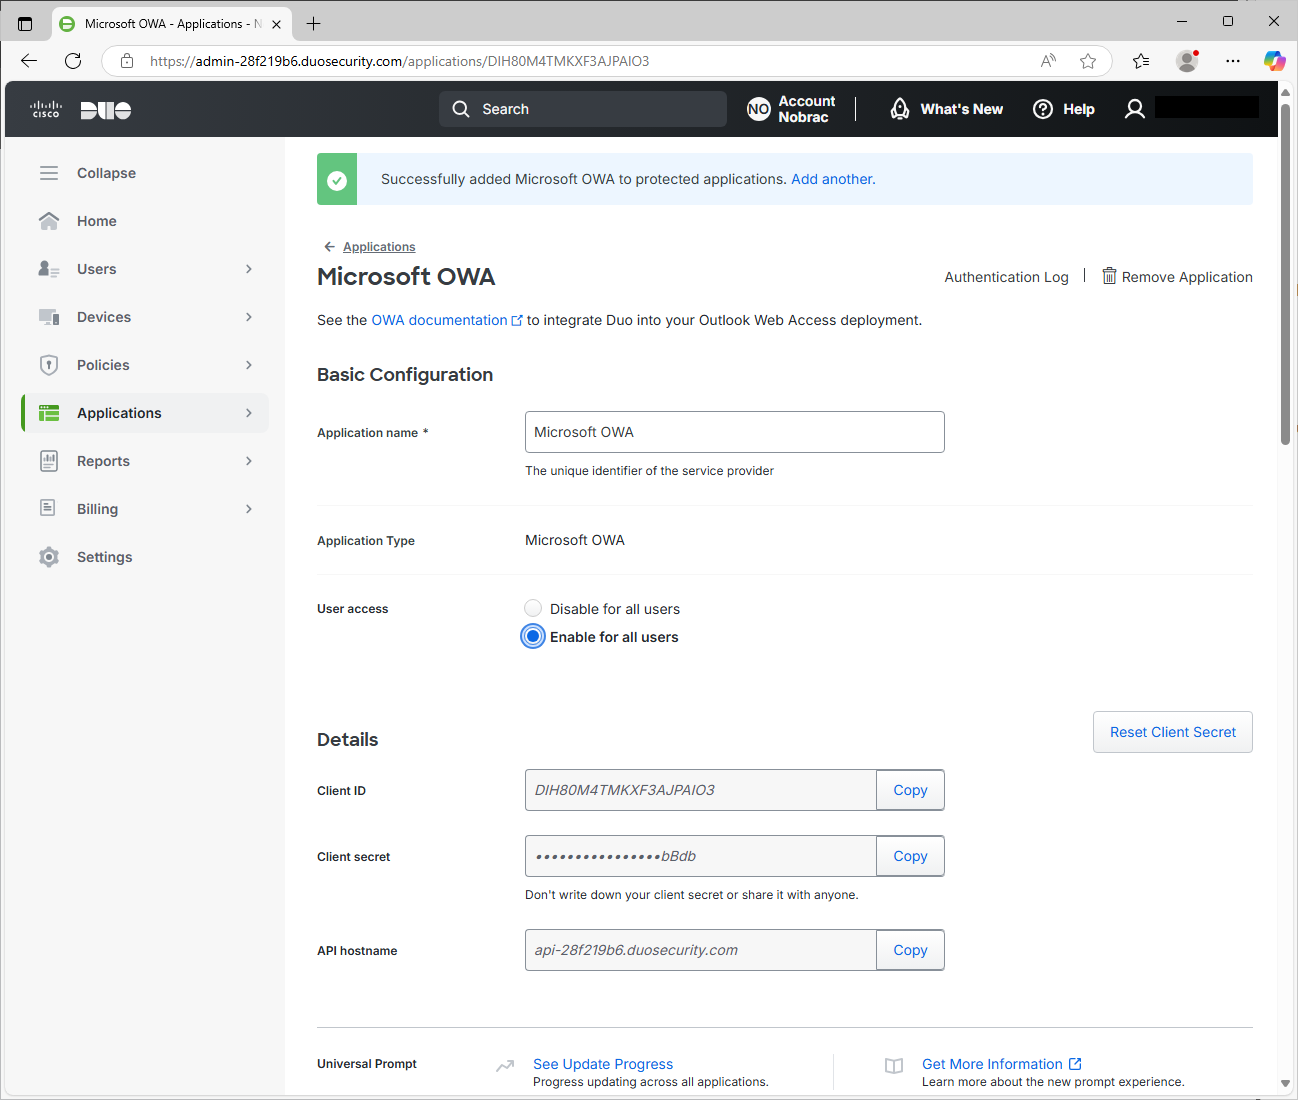
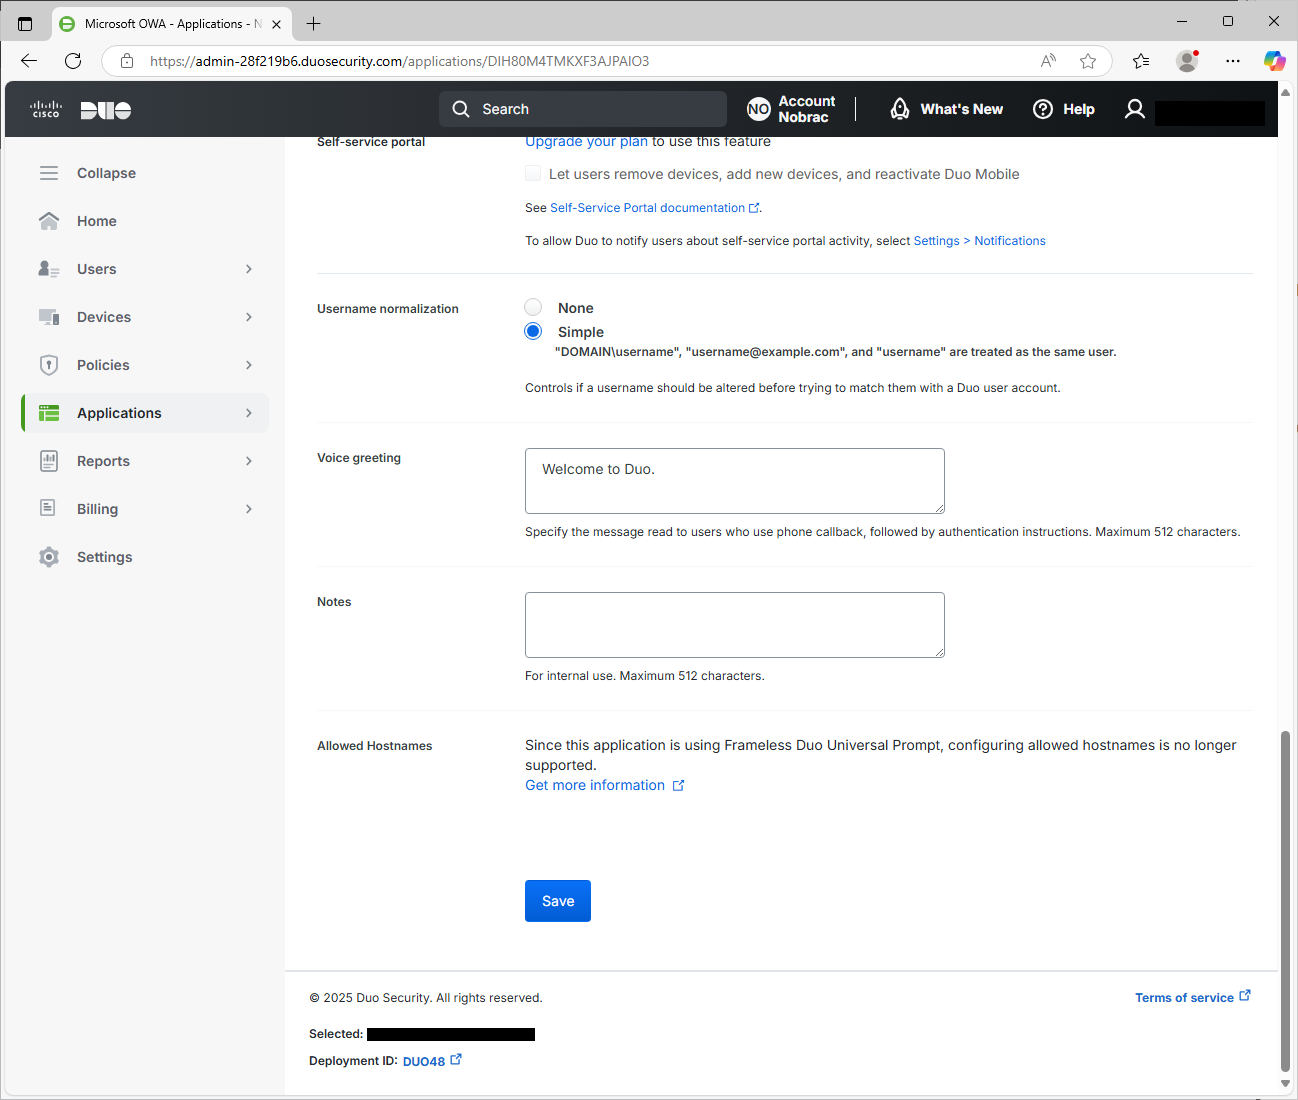
Click on “Applications” in the left-hand menu bar in the DUO portal. Click on “Add application” at the top right.

Then search for “OWA” and click on “Add” for the entry.
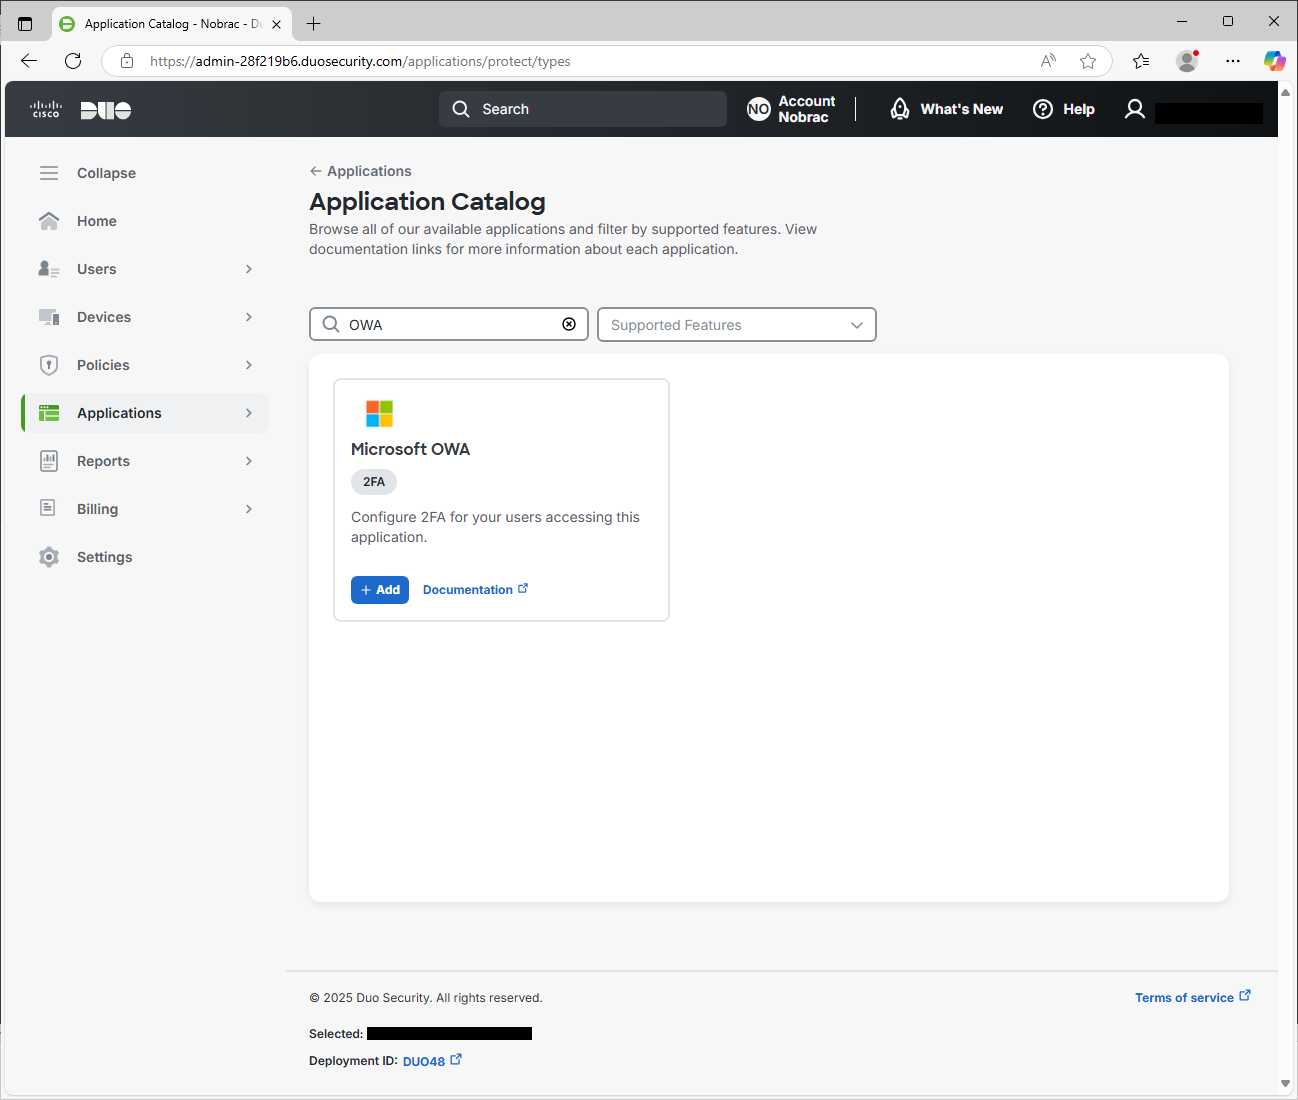
Here you can see the information required for the installer.
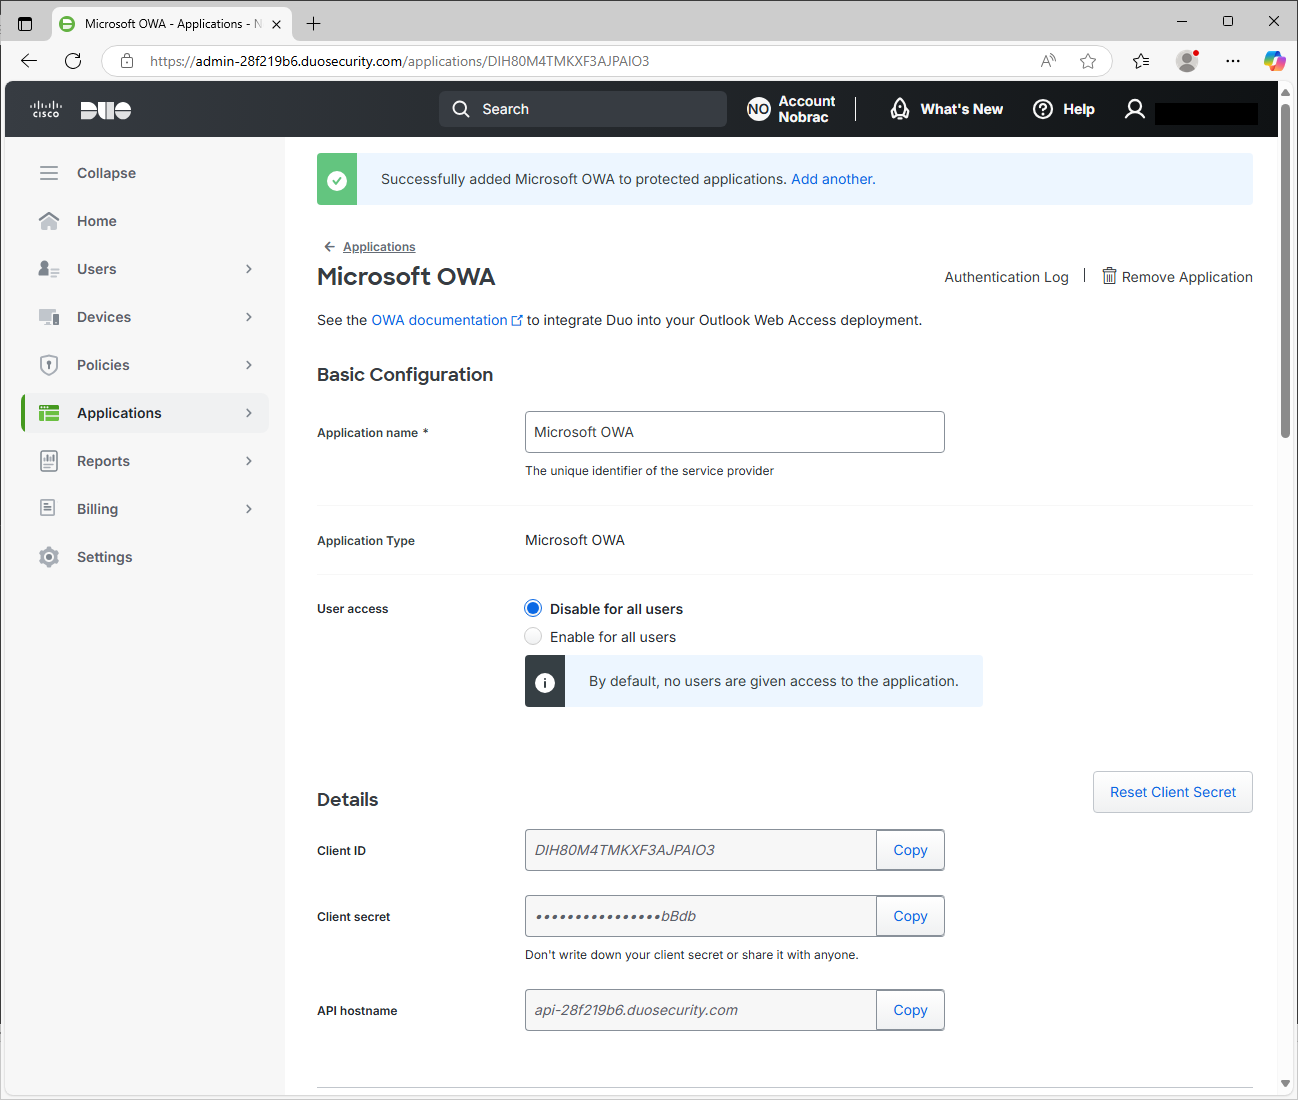
Enter it in the installer. If you want, you can check the “Bypass Duo authentication when offline” box. This will prevent you from being locked out if the Exchange server has problems with the Internet and you need to troubleshoot something.
Select “Generate a new session key”.
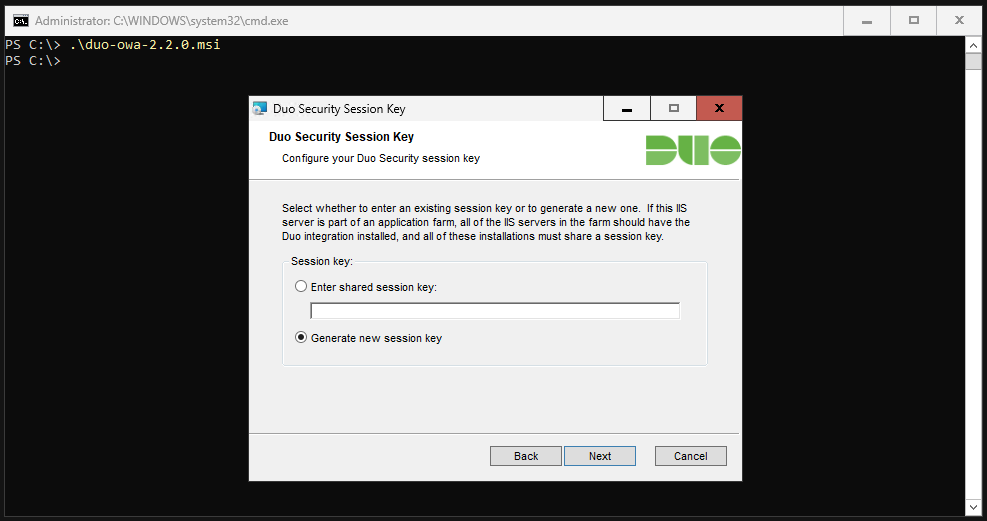
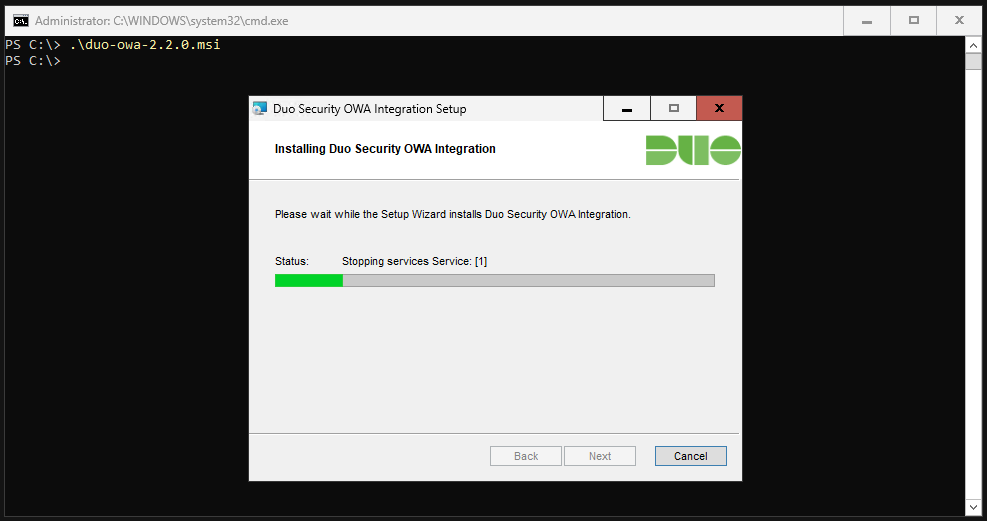
Click on “Install”.
This will take some time.
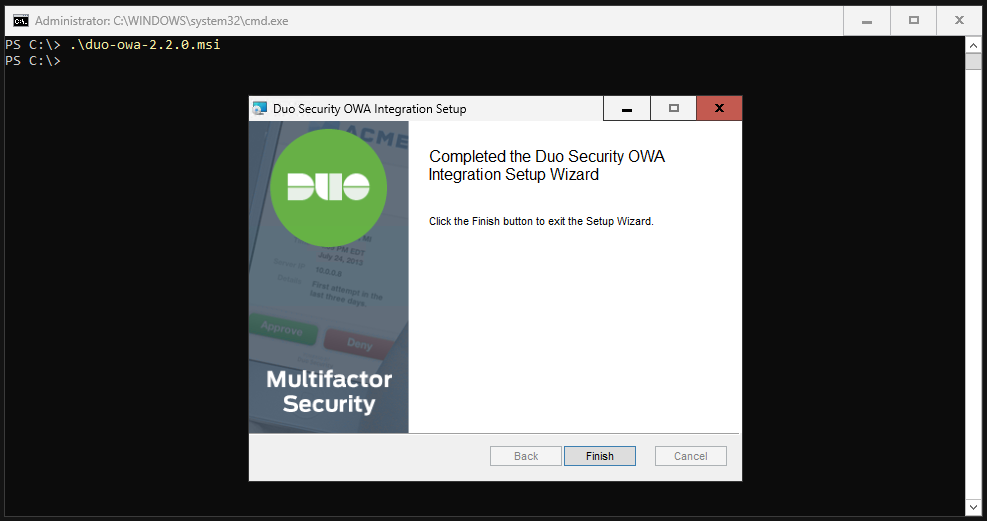
Finished.
In the DUO Portal, make sure that “User access” is set to “Enable for all users” in the OWA application.
Scroll all the way down and click on “Save”.
Now open your OWA and enter your access data as usual.
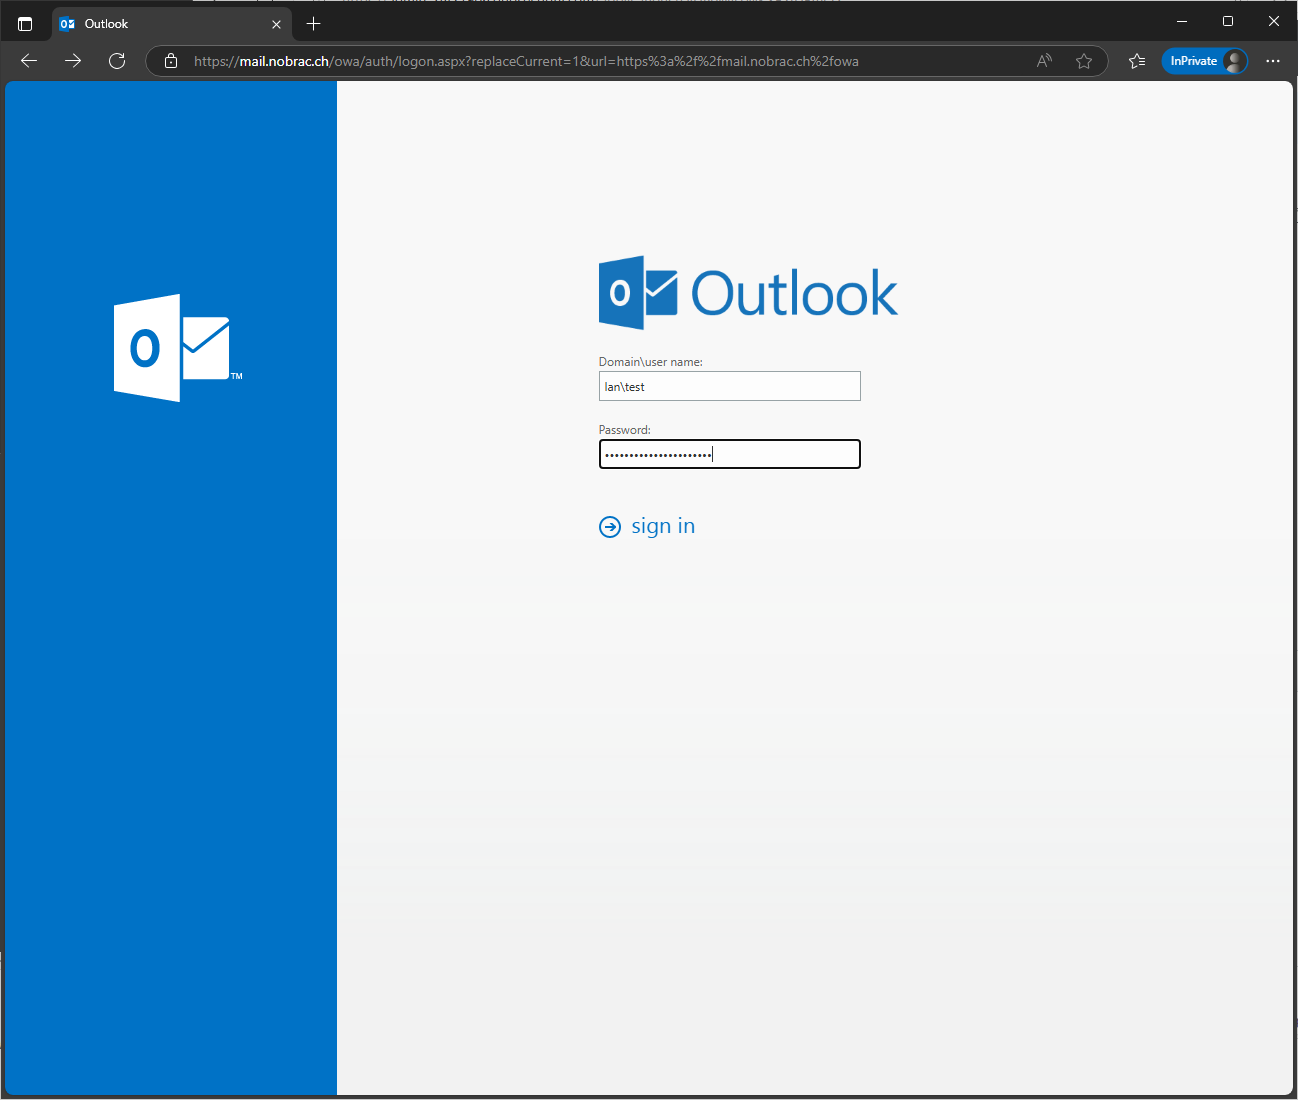
A redirect and the request for the Duo Push should happen.
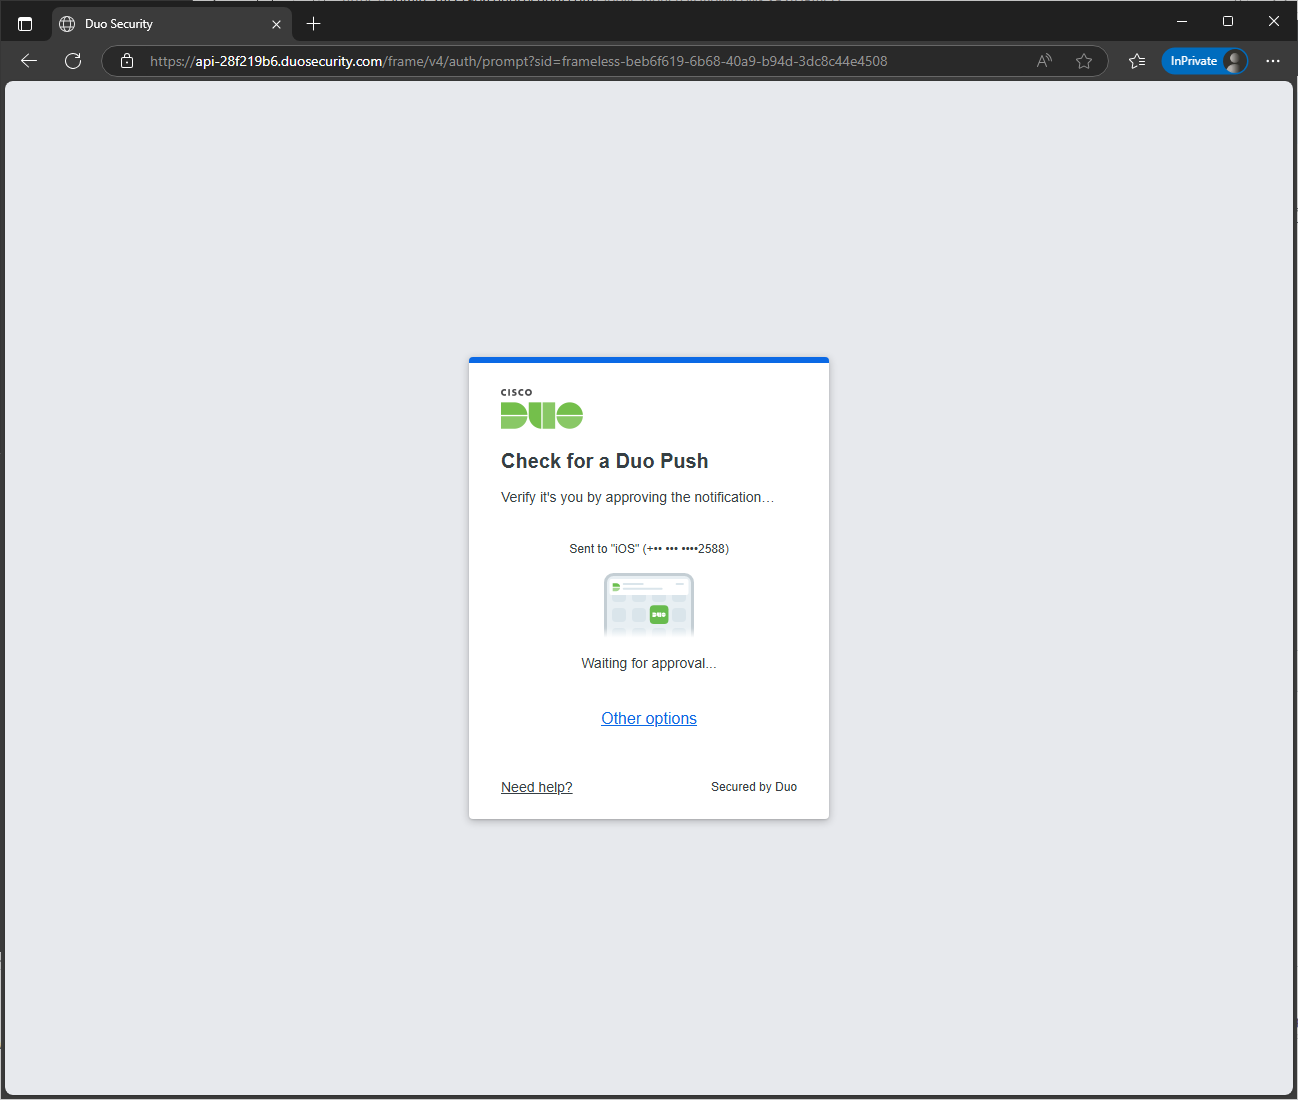
You can now confirm or reject the request on your cell phone.
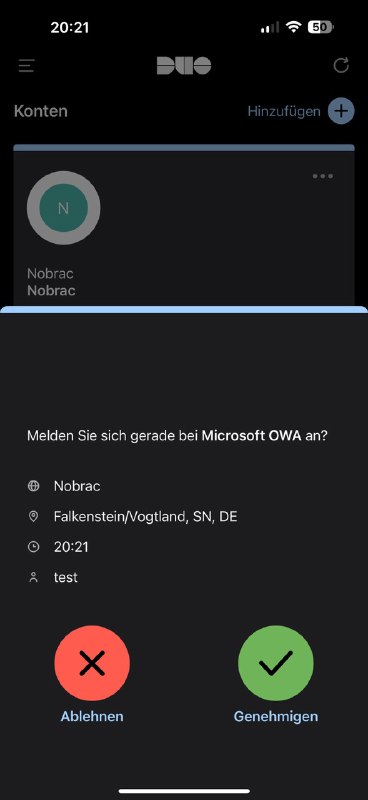
After confirmation you should be logged in successfully.
Important: Make sure that you also create a user with the name “Administrator” in the Duo Portal. Possibly also create an extra user for your T0 account. You can also create aliases for a user so that you can use the same 2FA for several users.
In any case, you need one for your admin account, otherwise you will not be able to log in to the Exchange Admin Center during maintenance work, as the DUO 2FA is also required here!
Qualys SSL Test
After all our settings and changes, we received an A+ rating from the Qualys SSL test.

Nessus Vulnerability/Security Scan
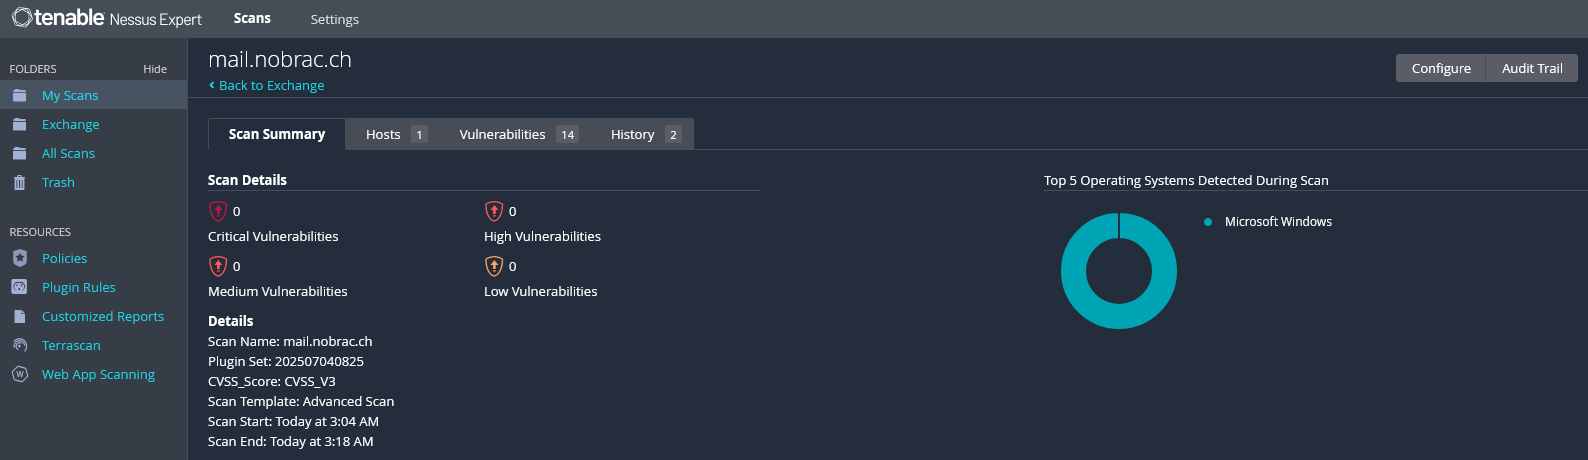
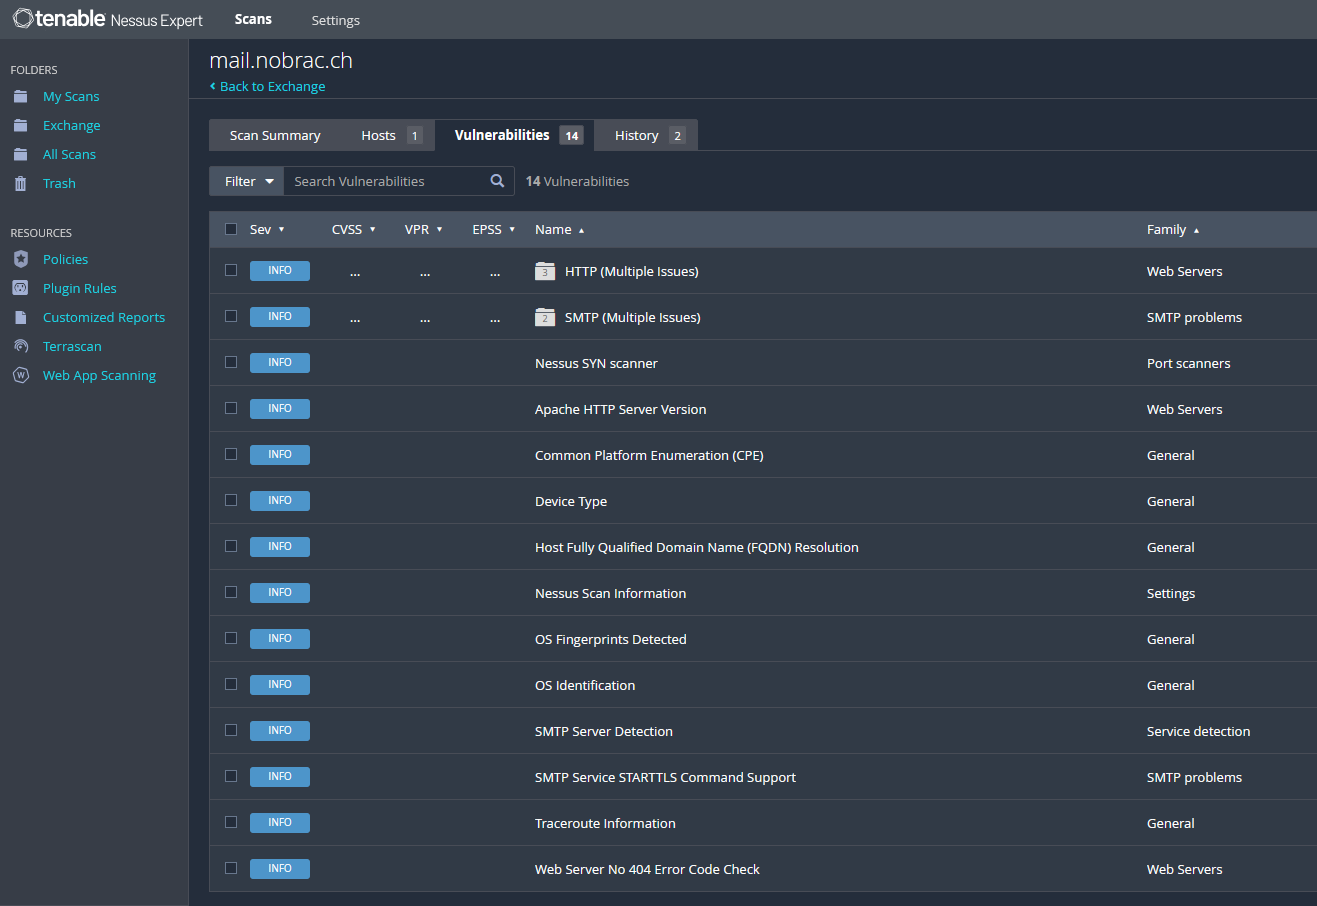
In the end, I ran a vulnerability scan on my domain “mail.nobrac.ch” with Nessus.
As you can see, no security problems were found, only information about the running services, which is normal. That’s why everything is only categorized as “INFO”.
Upgrade to Exchange SE
Since Exchange Server 2019 will no longer be supported after October 2025, Exchange SE was recently released. Here, I will show you how to update to this version.
Please create a snapshot before.
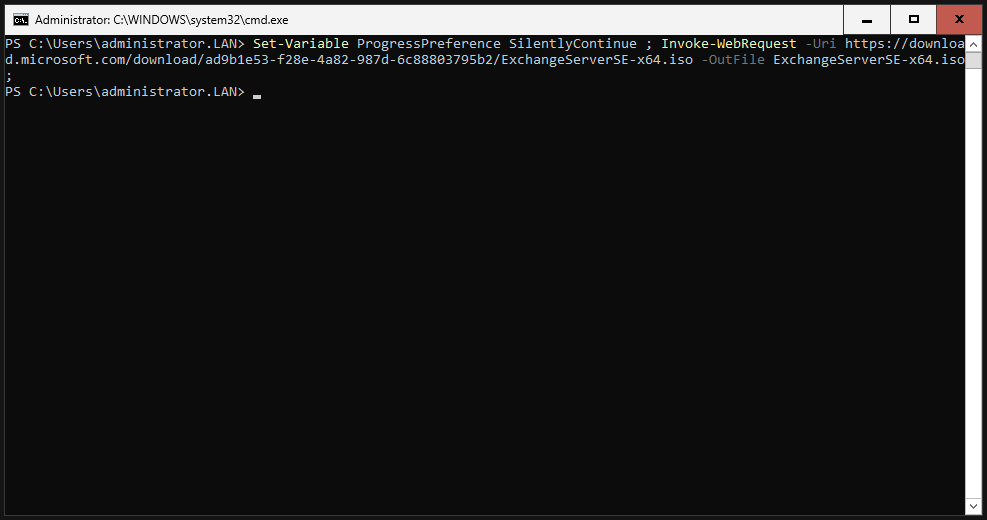
Download the Exchange SE ISO:
|
|
Mount the downloaded ISO:
|
|

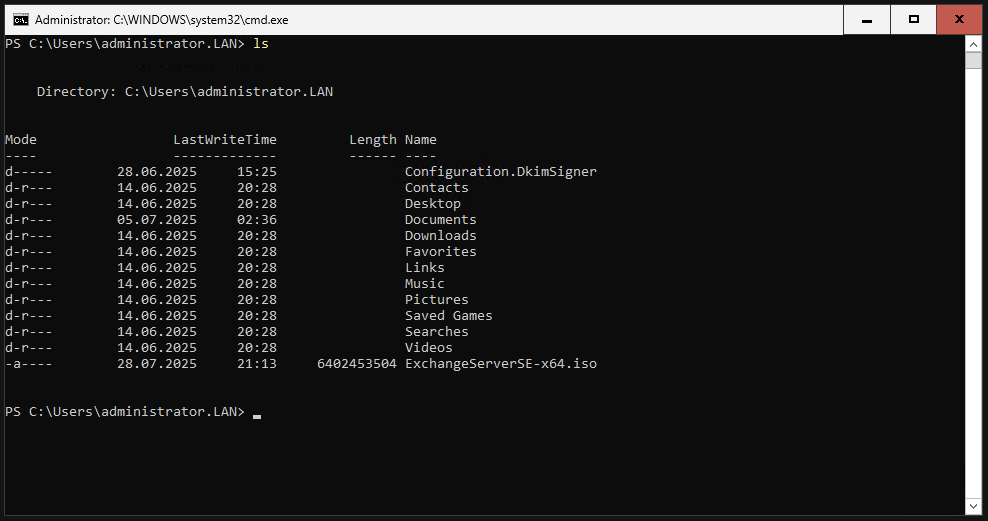
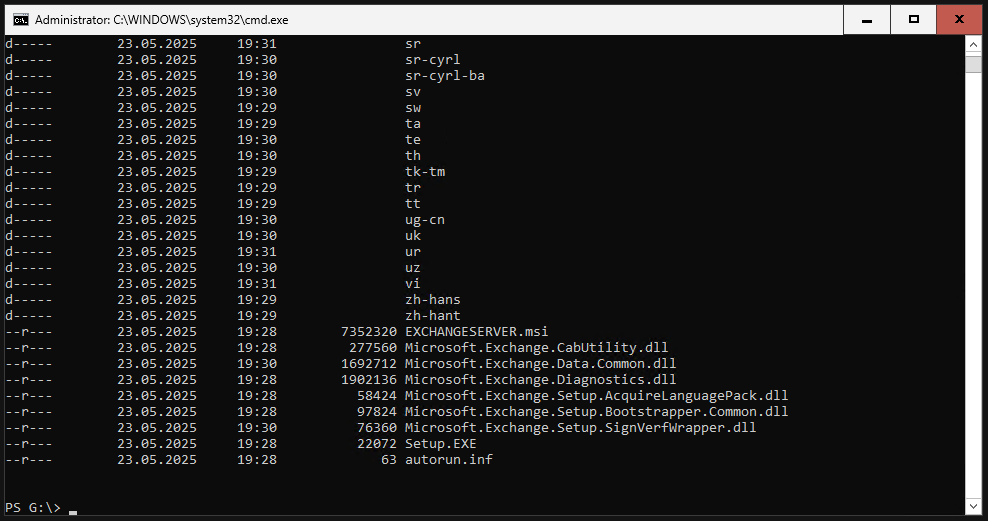
Navigate to the drive where the ISO is mounted. There should be a Setup.EXE file there. In my example, it was drive G:.
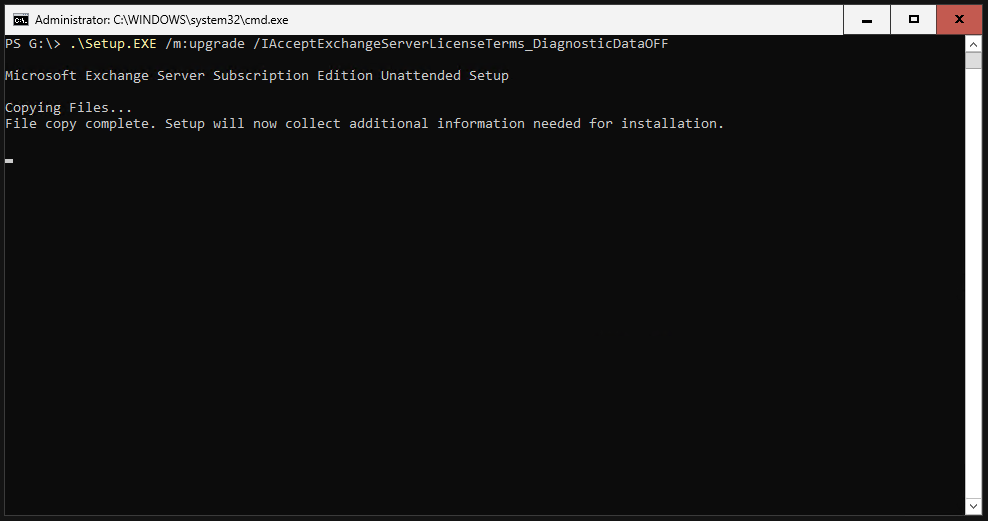
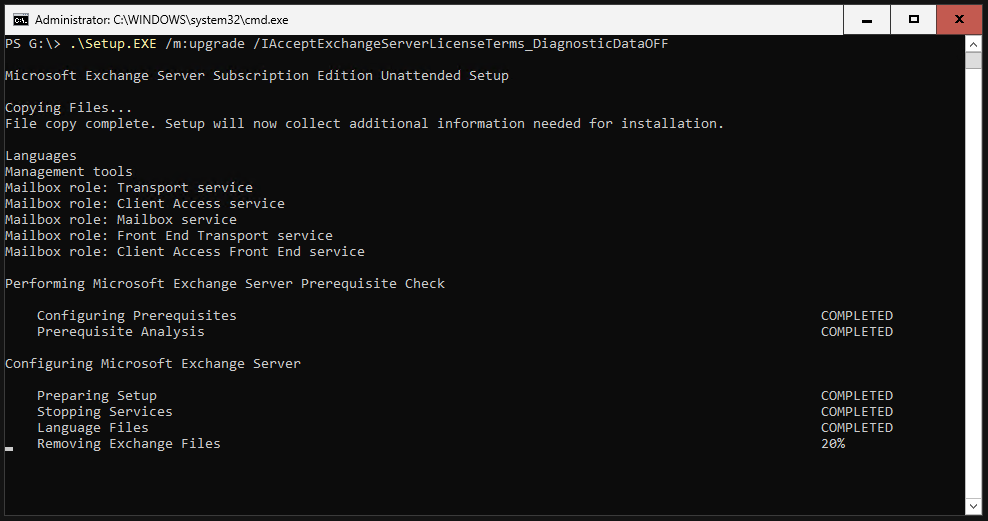
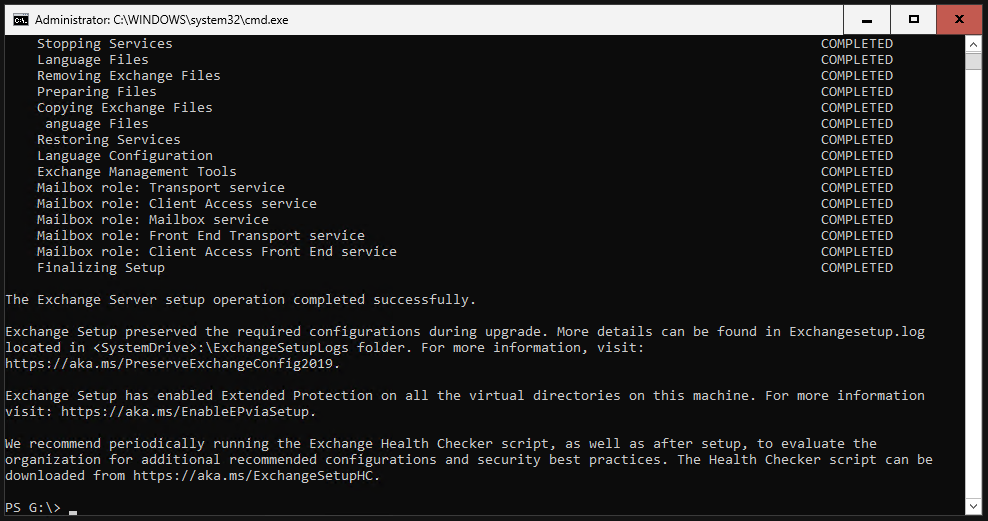
Run the setup. This will take some time to complete.
|
|
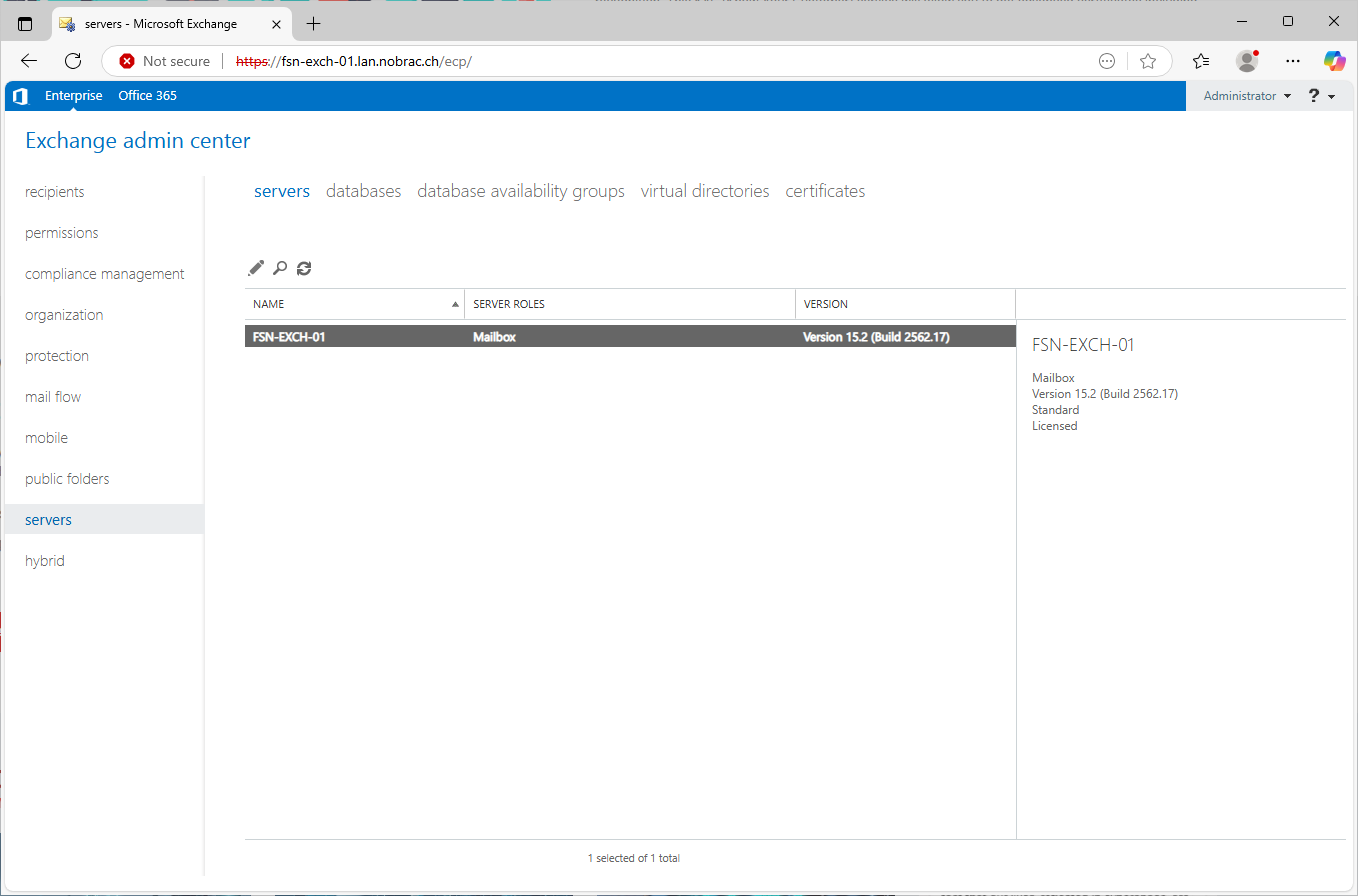
Restart your server when the setup is completed.
We then quickly check the server version number. Nothing has changed in terms of appearance; only the version number has been updated so far. It should now display “Version 15.2 (Build 2562.17)”.