
Foreword
This is going to be a long one. Make sure you have enough coffee.
In this guide we install a complete two-tier PKI with its separate server for the revocation lists. This means that a total of three Windows servers are required. I will show step-by-step how this works.
I have created this guide because I have never found a perfect step-by-step guide on the Internet.
This guide was created based on various Microsoft best practices, as well as various books and blog articles. I have invested a lot of work and research into the topic. I am by no means claiming that this installation method is the safest. However, I would say that everything here is best practice and as secure as possible.
Prerequisites
-
Active Directory
-
3 Windows Server VMs
-
3 VLANs (one VLAN for each server and yes, please separate them)
I use the following VLAN/network configuration in my Homelab:
| Description | Hostname | IPv4 | VLAN-ID | OS |
|---|---|---|---|---|
| Root CA Server | NBG-RCA-01 | 10.101.113.10 | 1113 | Windows Server 2025 |
| Sub CA Server | NBG-SCA-01 | 10.101.114.10 | 1114 | Windows Server 2025 |
| IIS Server for the CRL | NBG-CRL-01 | 10.101.115.10 | 1115 | Windows Server 2025 |
I gave every Windows Server 2025 VM 36GB SSD storage, 2 CPU cores and 4GB RAM.
Root CA
Initial configuration
Let’s start with the Root CA.
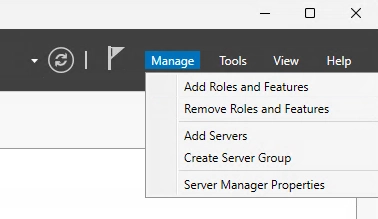
Open the Server Manager and select “Add Roles and Features”.
Just click on next.

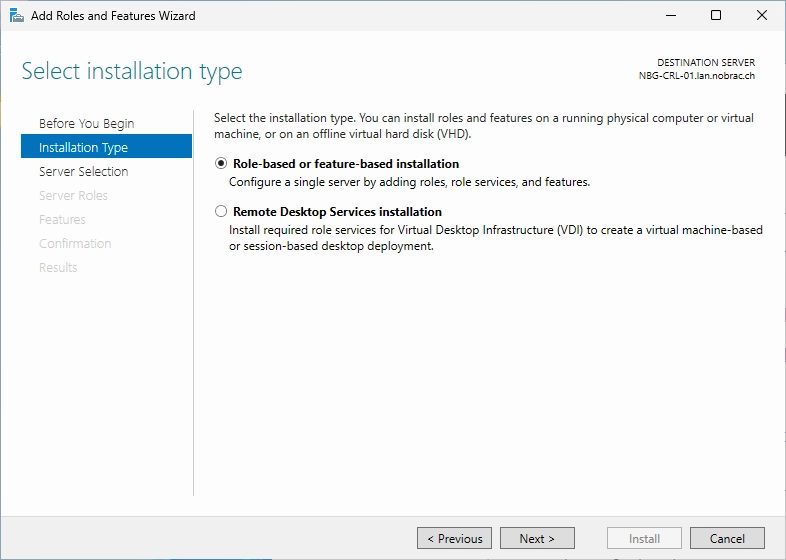
Select “Role-based or feature-based installation”.

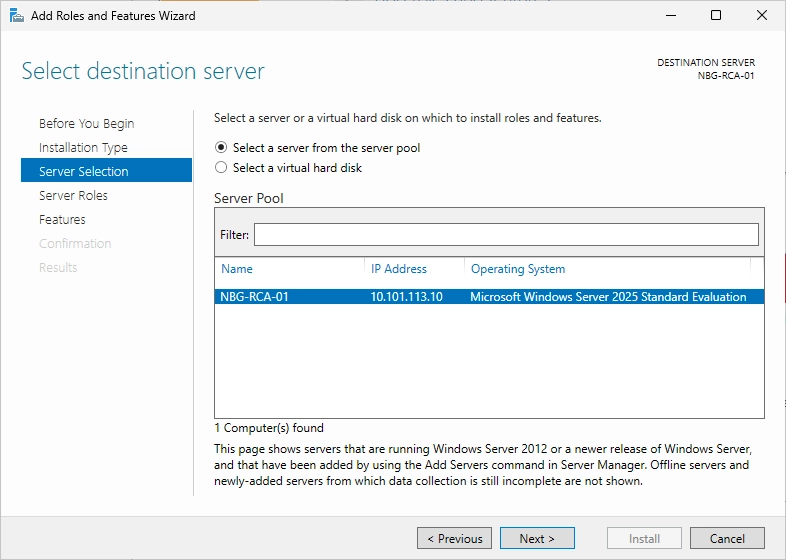
Make sure that the correct server for the Root CA is selected.
Tick the “Active Directory Certificate Services” box.

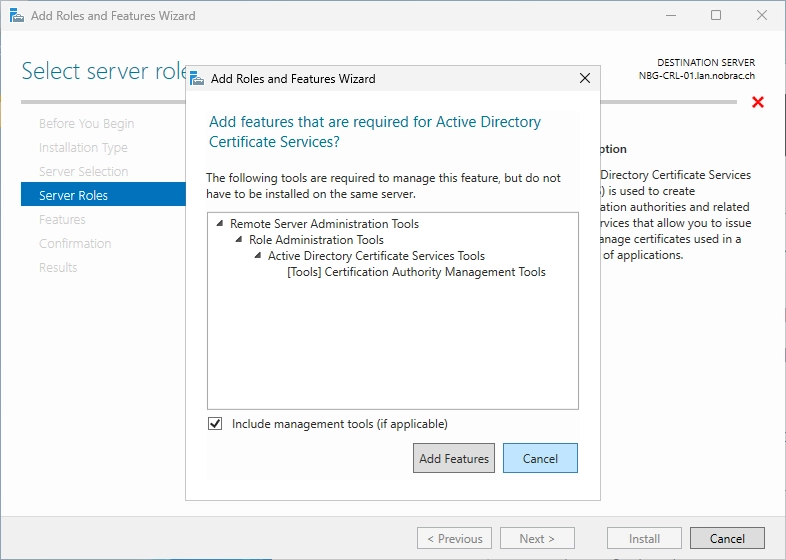
Confirm the required features.

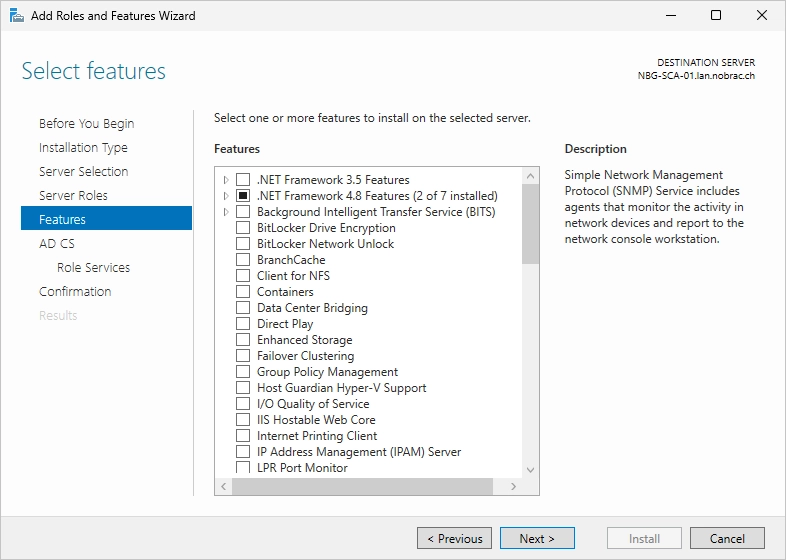
It should look like this now.

We don’t need additional features so just click next here.

Confirm the information.

Make sure that only the “Certification Authority” box is checked.

Confirm the installation.

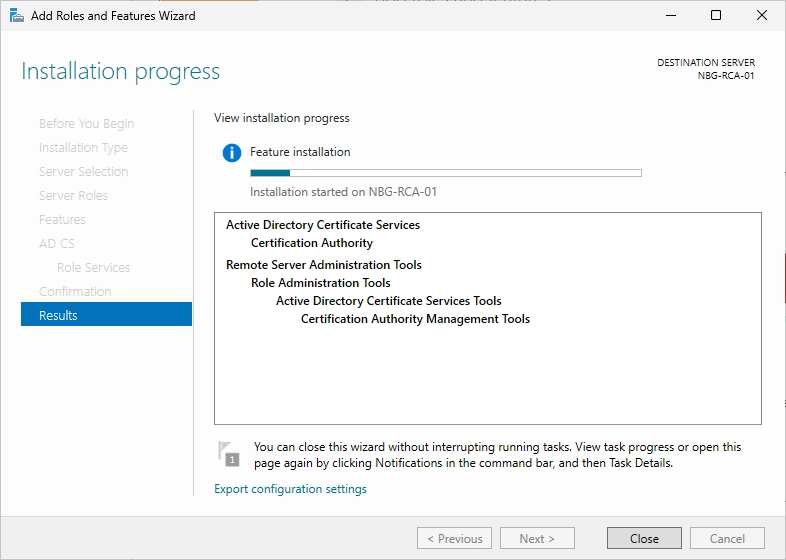
Wait till the installation is finished.
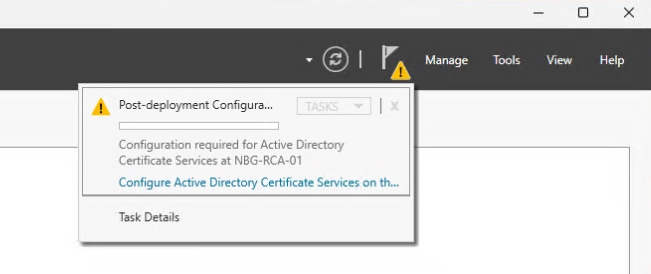
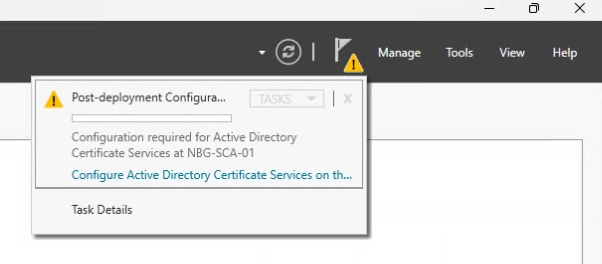
You should now see a yellow flag in the top right of your Server Manager.

Click on the flag and then click on “Configure Active Directory Certificate Services…”.
Use the local account of the Administrator and click on next.

Make sure that “Certification Authority” is selected.

Select the “Standalone CA” option.
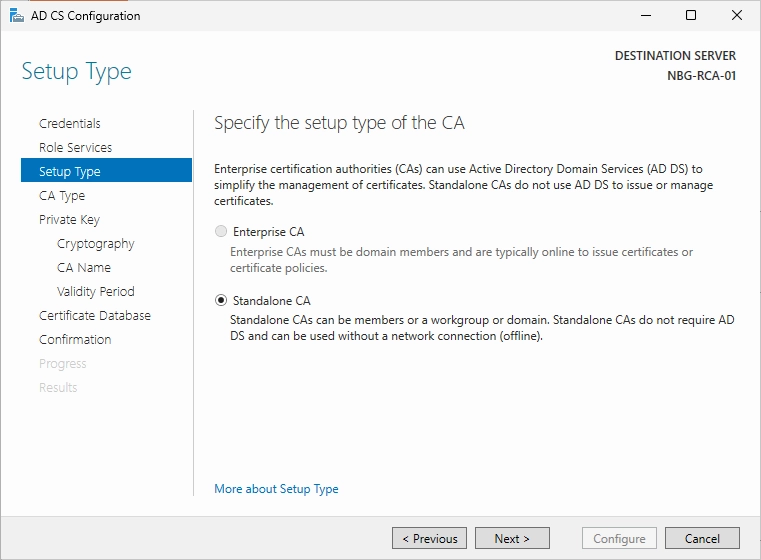
Select the “Root CA” option.

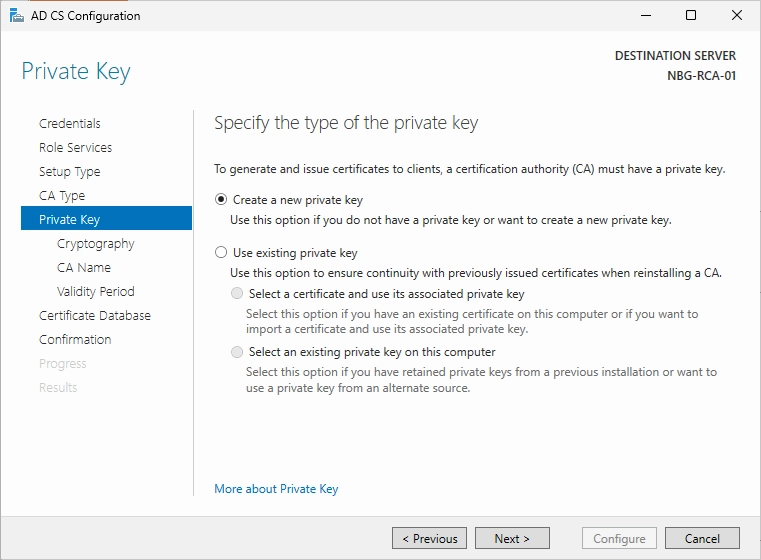
Select the “Create a new private key” option.
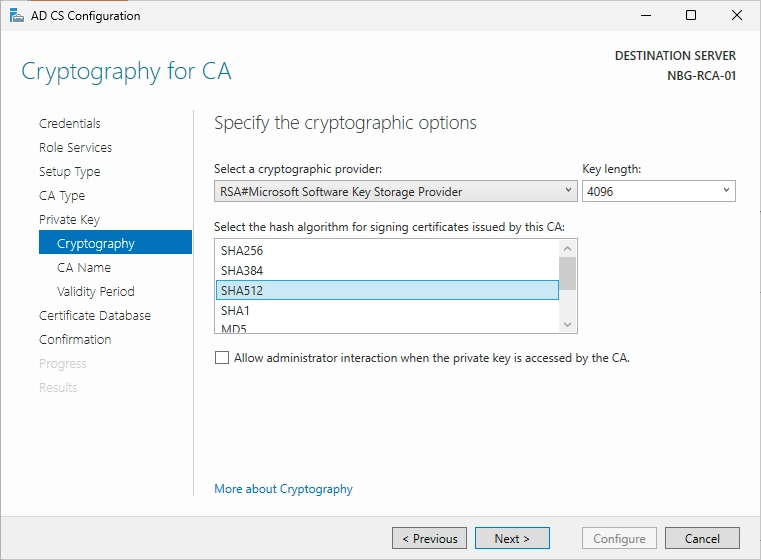
In my home lab, I always use the latest version of Windows servers, Linux and other software, which is why I can select RSA with a key length of 4096 and SHA512 as the hash algorithm in the following step.
If this is used in a company, it is essential to check beforehand whether legacy servers are in the environment and which settings are supported.
Specify a good name for the Root CA. I used “Nobrac CH - Root CA” in my homelab.
[!WARNING]
You can’t change the name afterwards!

I specified 10 years for the validity period.

Just click next for the database location.

Confirm all the settings.

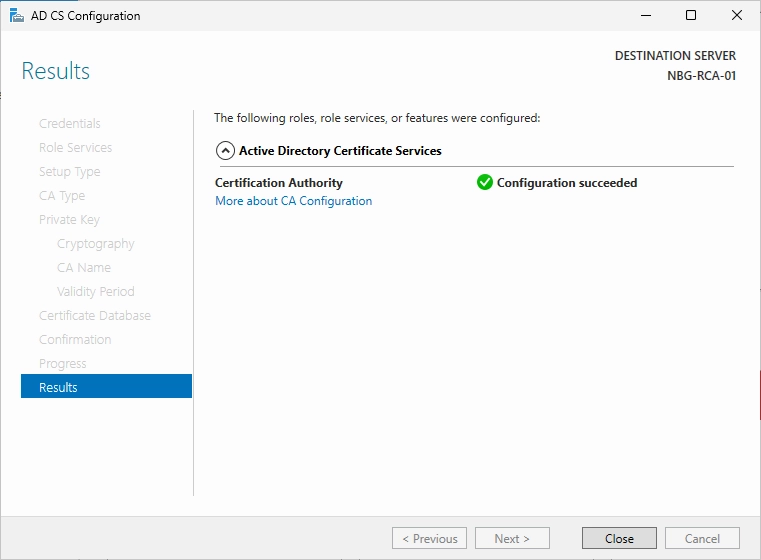
Wait till the configuration process is finished.
DNS configuration (Domaincontroller)
The CRL can/should possibly be accessible via the Internet so that external clients can always retrieve the current revocation list. For this reason, we now define an external domain. In my case, I chose the domain “crl.nobrac.ch”. For internal clients, I create a new forward lookup zone in the DNS Manager for this purpose.
Open the DNS Manager on your management VM (or directly on your DC).
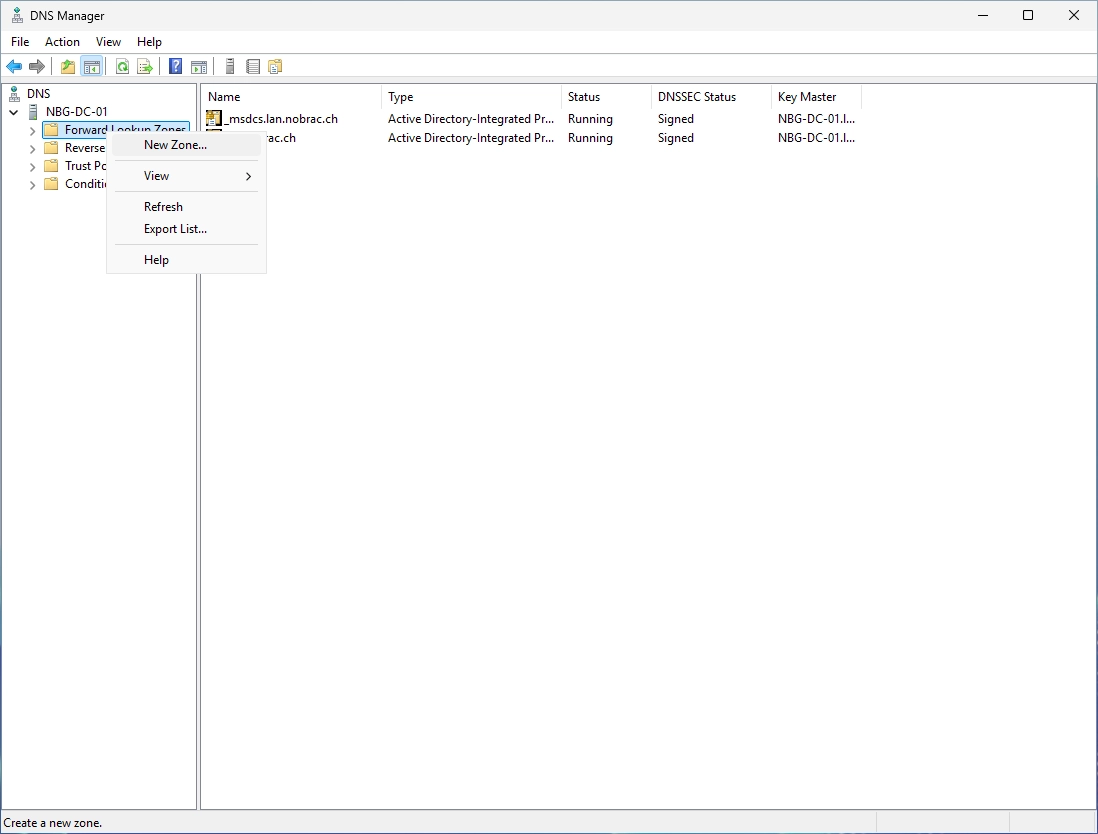
Then right-click on “Forward Lookup Zones” and select “New Zone…”.
Just click on next.
Just click on next again.

Just click on next again.

Enter your chosen domain for the CRL.

Just click on next again.

Check the settings and click on finish.

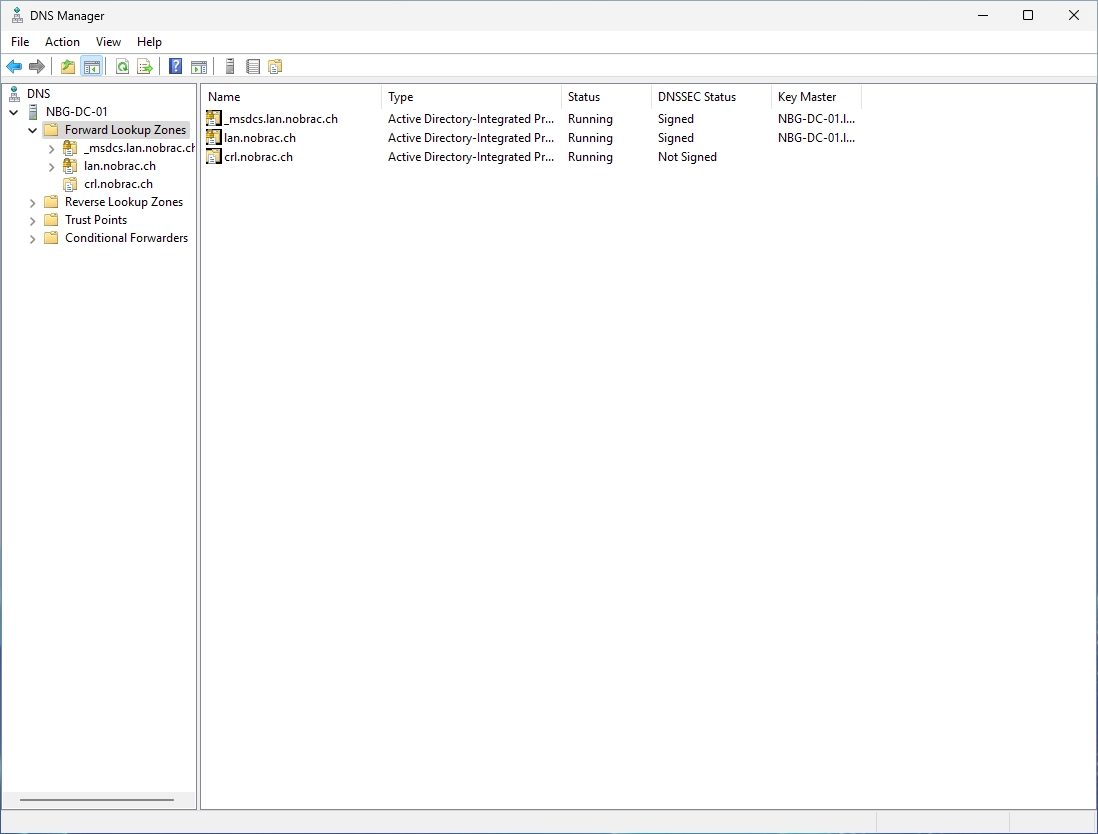
You should see your new zone in the DNS Manager.
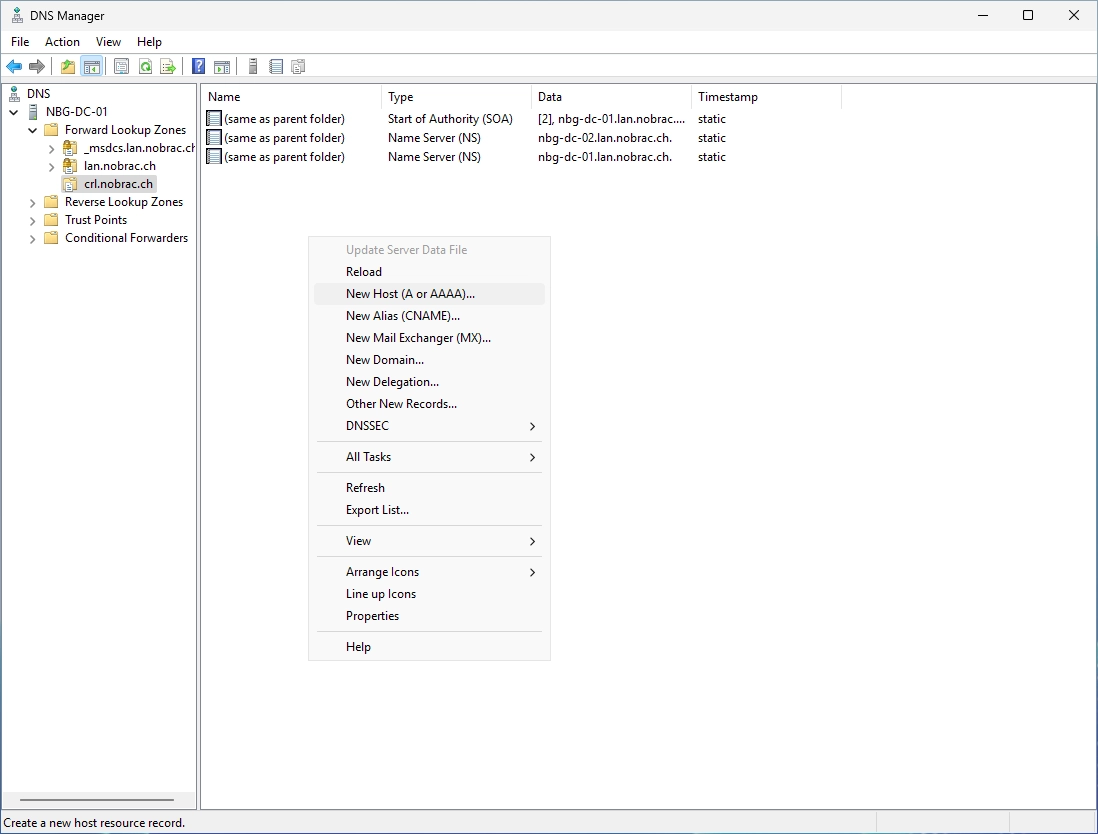
Select your newly created zone and make a right-click in the right, empty field. Click then on “New Host (A or AAAA)…”.
Leave the field for the name blank. For the IP address, enter the IP of your CRL IIS server and click on “Add Host”.
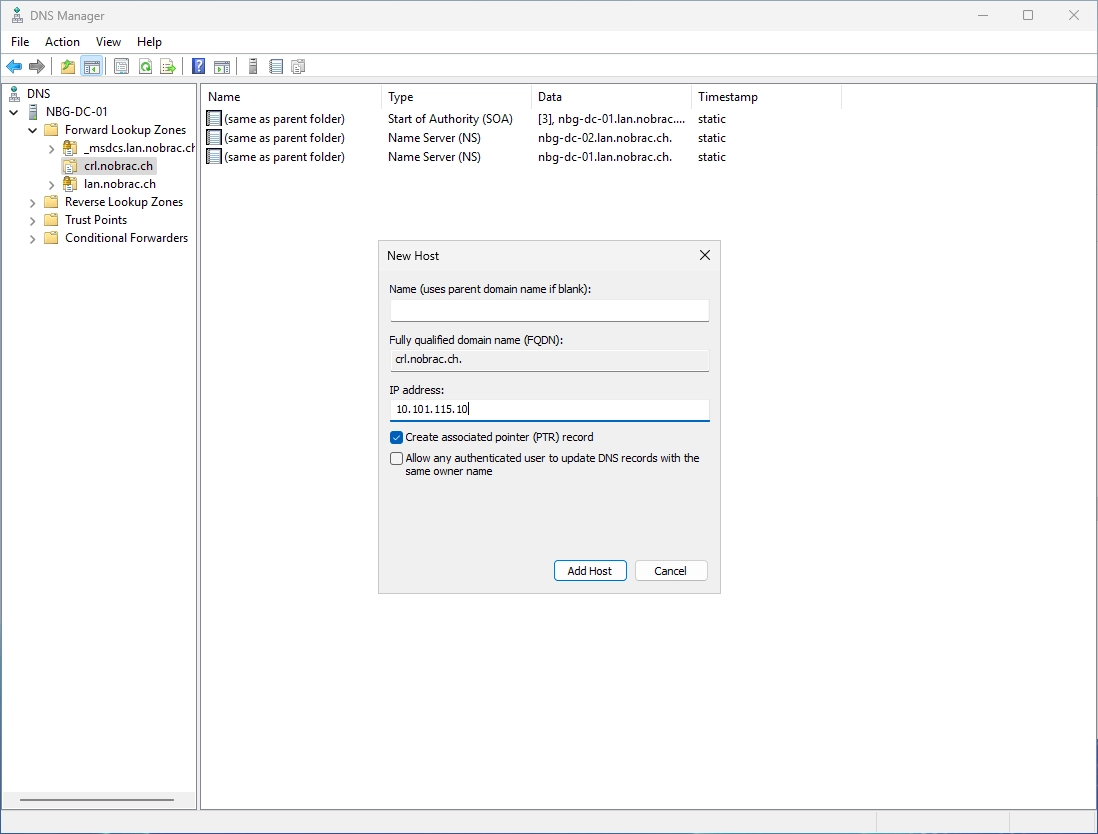
You should see the new A-Record in the DNS Manager.

Configure CRL and AIA
[!IMPORTANT]
Do this on the Root CA!
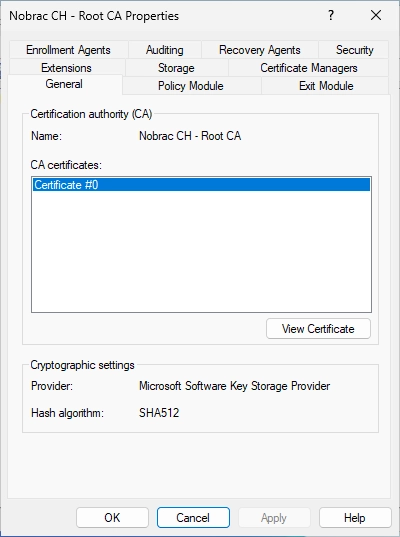
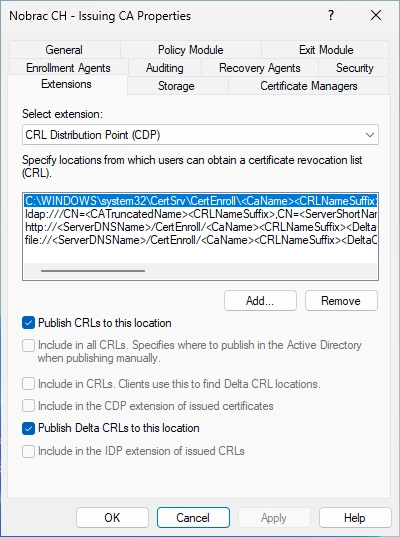
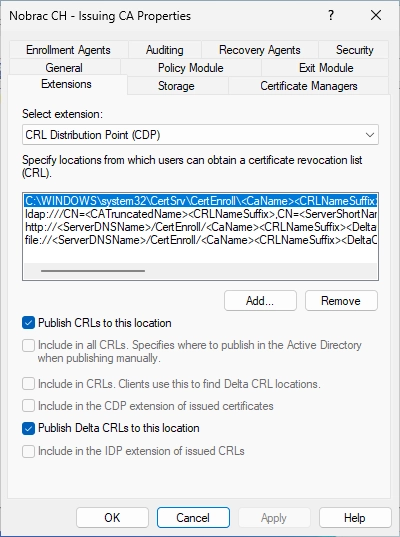
Back on the Root CA server, open the Certificate Authority. Select your CA and do a right click on it and then select “Properties”.

You should see the following window.
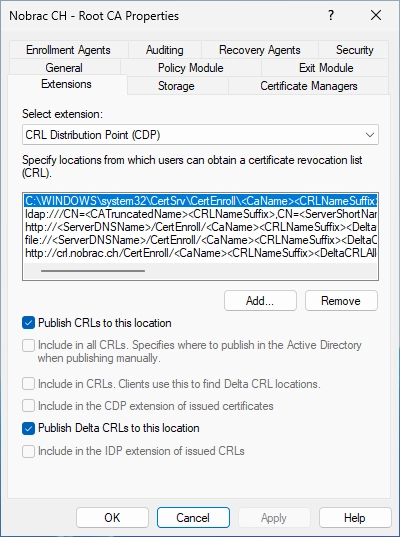
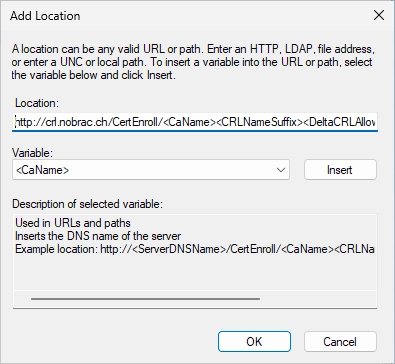
Navigate to the “Extensions” tab and click on “Add…”.

For the location, enter the following URL:
|
|
So in my example it’s:
|
|
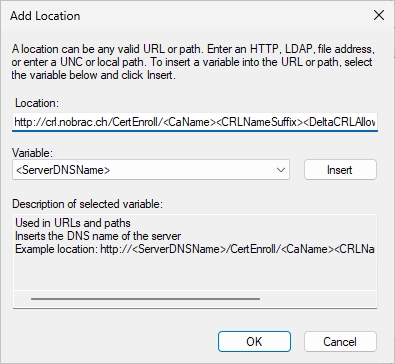
Then, select these two checkboxes:
- Include in CRLs. Clients use this to find Delta CRL locations.
- Include in the CDP extension of issued certificates
It should look like in the screenshot.
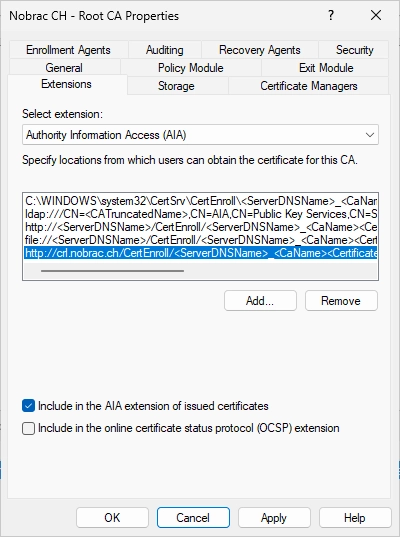
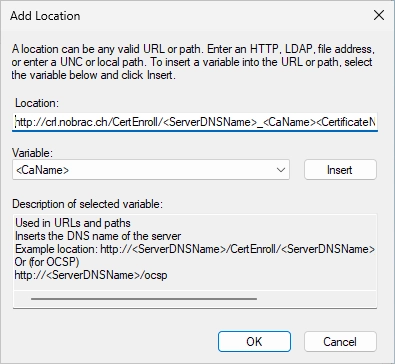
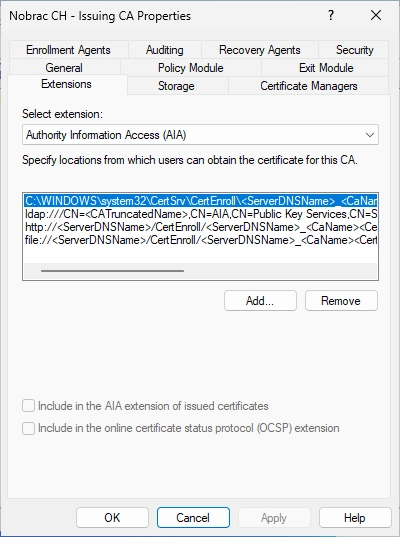
In the same “Extensions” tab, now select “Authority Information Access (AIA)” in the “Select extension” dropdown menu and click on “Add…”.

For the location, enter the following URL:
|
|
So in my example it’s:
|
|

Then, select the following checkbox:
- Include in the AIA extension of issued certificates
It should look like in the screenshot.
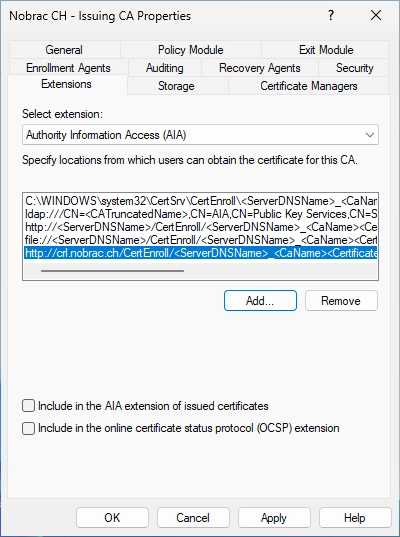
Remove default CDP & AIA settings
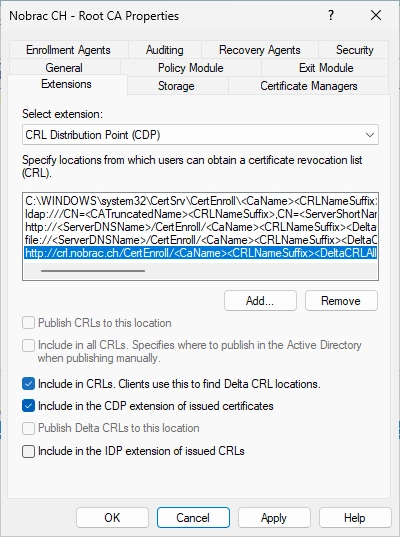
In the “Extensions” tab, switch back to the CRL (CDP) in the drop down menu.
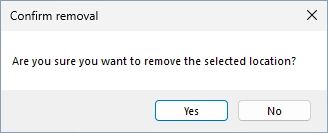
Select the “ldap” entry and click on “Remove”.

Confirm the removal.

Now select the “http” entry and click on “Remove”.

Cofirm the removal again.

Now do the same for the “file” entry. Click again on “Remove”.

Confirm the removal again.
It should look like this in the end.

Now select AIA from the drop down menu at the “Extensions” tab and do all the same steps again.
In the end it should look like that.

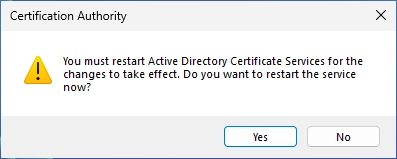
Then click OK for everything and accept the warning so that the CA service will restart.

Sub CA
Initial configuration
Continue with the Sub CA.
Make sure that you are logged in with the Domainadministrator.
Open the Server Manager and select “Add Roles and Features”.
Just click on next.
Select “Role-based or feature-based installation”.

Make sure your server correct server for the Sub CA is selected.

Tick the “Active Directory Certificate Services” box.

Confirm the required features.

It should look like this now.

We don’t need additional features so just click next here.
Confirm the information.

Make sure that only the “Certification Authority” box is checked.

Confirm the installation.

Wait till the installation is finished.

You should now see a yellow flag in the top right of your Server Manager.
Click on the flag and then click on “Configure Active Directory Certificate Services…”.
Use the Domainadministrator account and click on next.
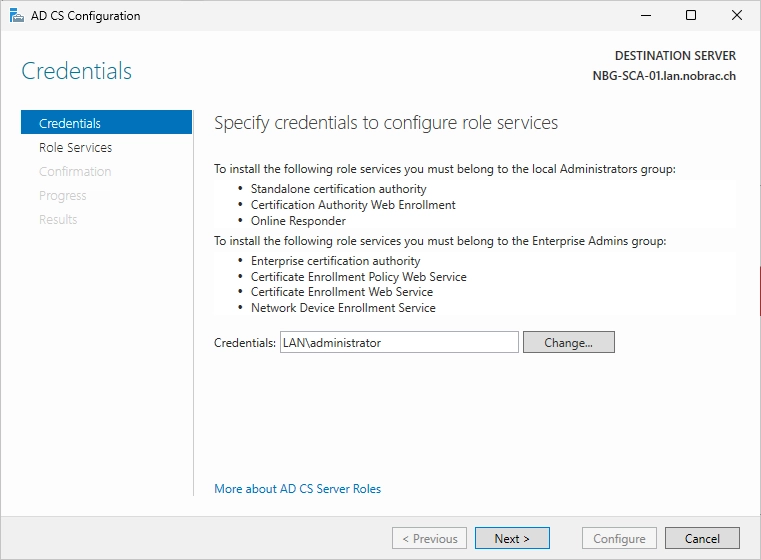
Make sure that “Certification Authority” is selected.

Select the “Enterprise CA” option.
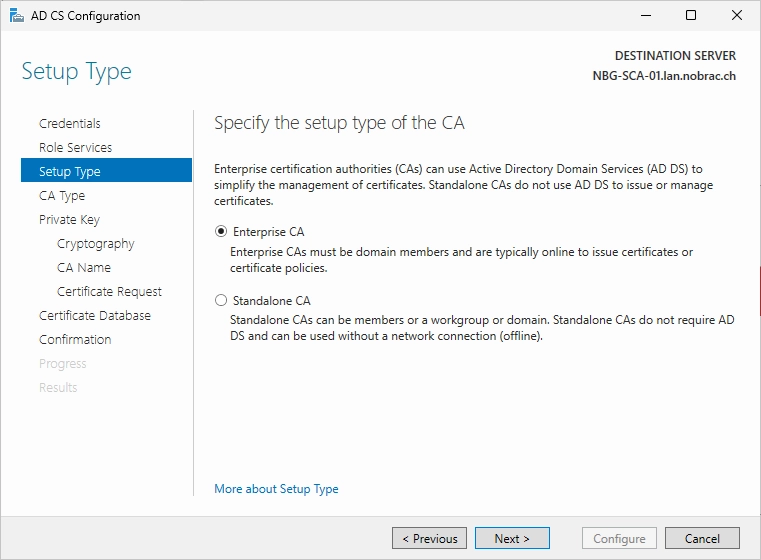
Select the “Subordinate CA” option.

Select the “Create a new private key” option.

Again like in the Root CA setup:
In my home lab, I always use the latest version of Windows servers, Linux and other software, which is why I can select RSA with a key length of 4096 and SHA512 as the hash algorithm in the following step.
If this is used in a company, it is essential to check beforehand whether legacy servers are in the environment and which settings are supported.

Specify a good name for the Root CA. I used “Nobrac CH - Issuing CA” in my homelab.
[!WARNING]
You can’t change the name afterwards!

Since the root CA is not in the domain, we have to save the certificate request locally.

Just click next for the database location.

Confirm all the settings.

Wait till the configuration process is finished. The warning is normal since we need to do the last step manually. Don’t worry.

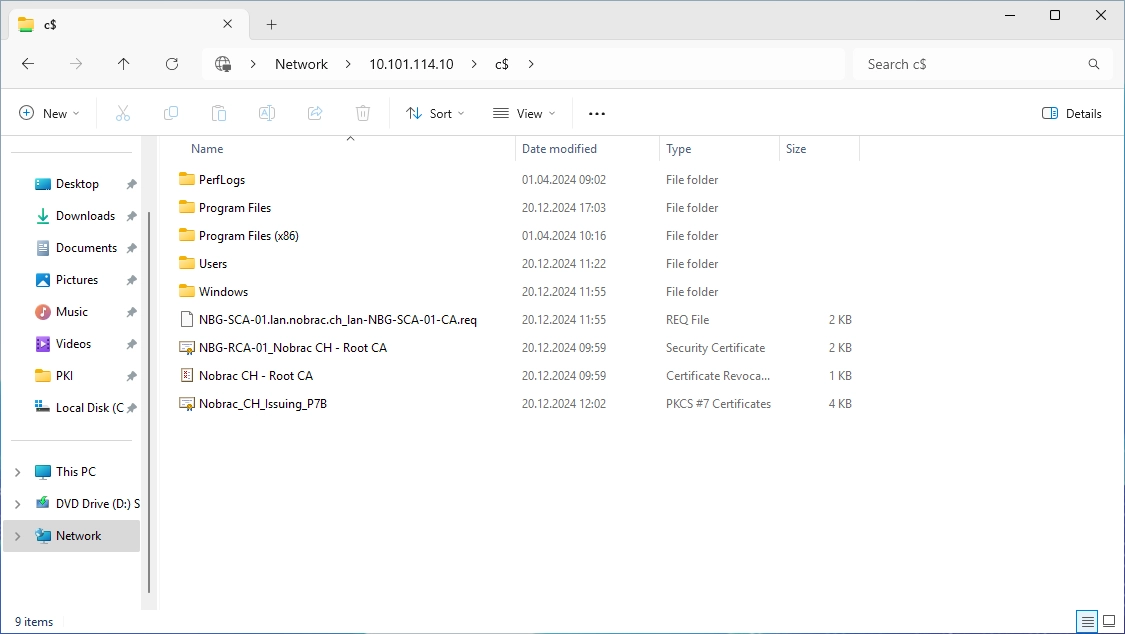
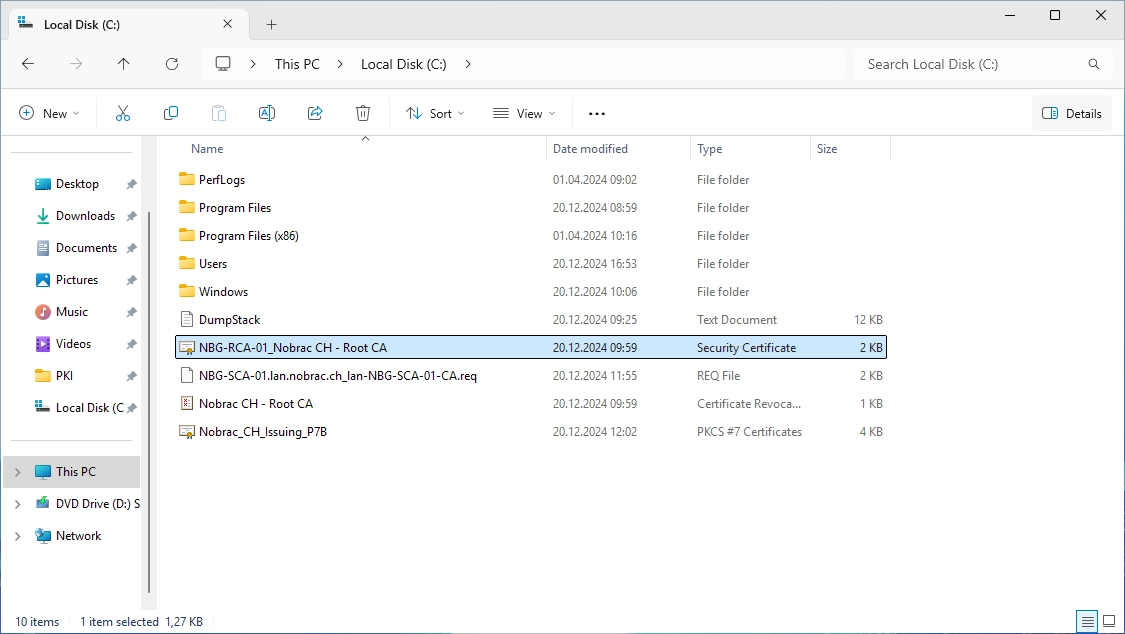
The certificate request should now be on the C: drive.

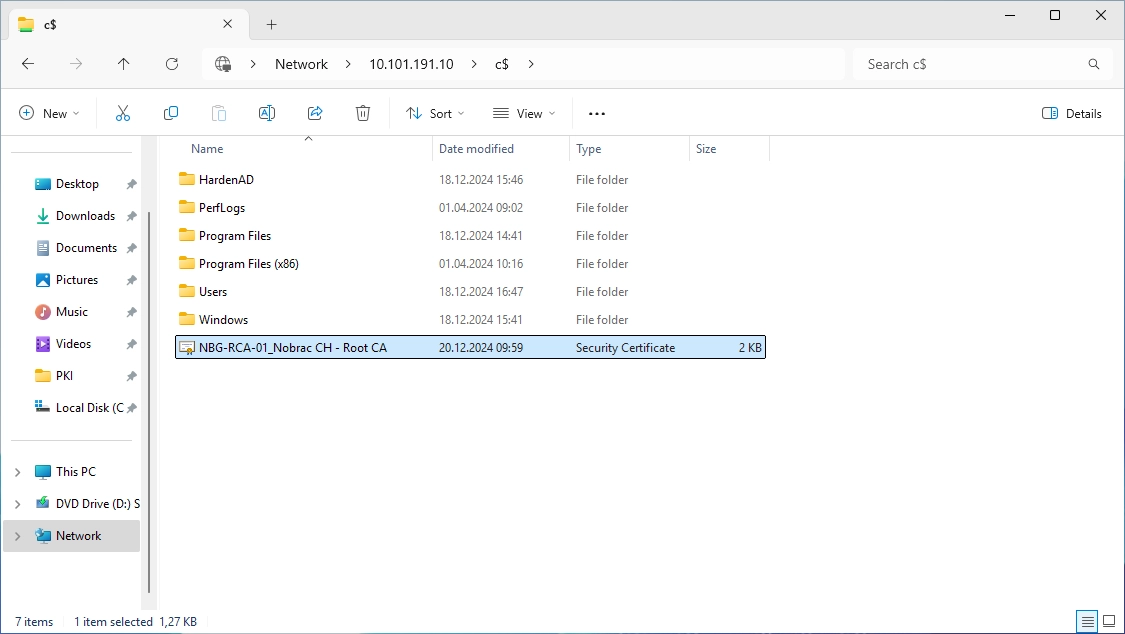
Copy the certificate request to the Root CA server (I used the c$ network share).

Complete CSR
[!IMPORTANT]
Do this on the Root CA!
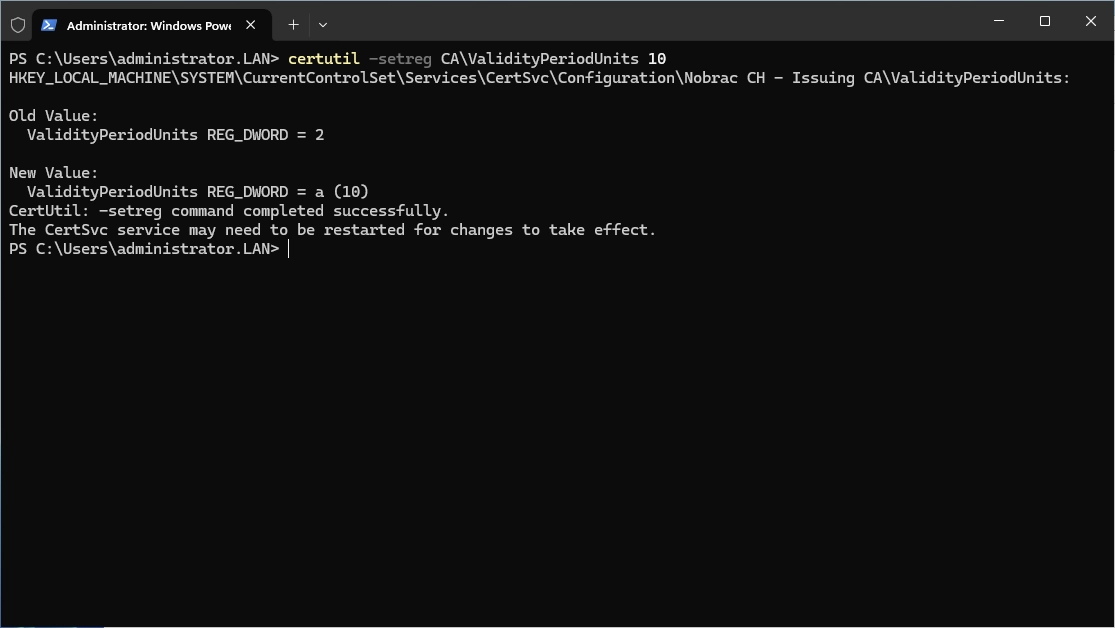
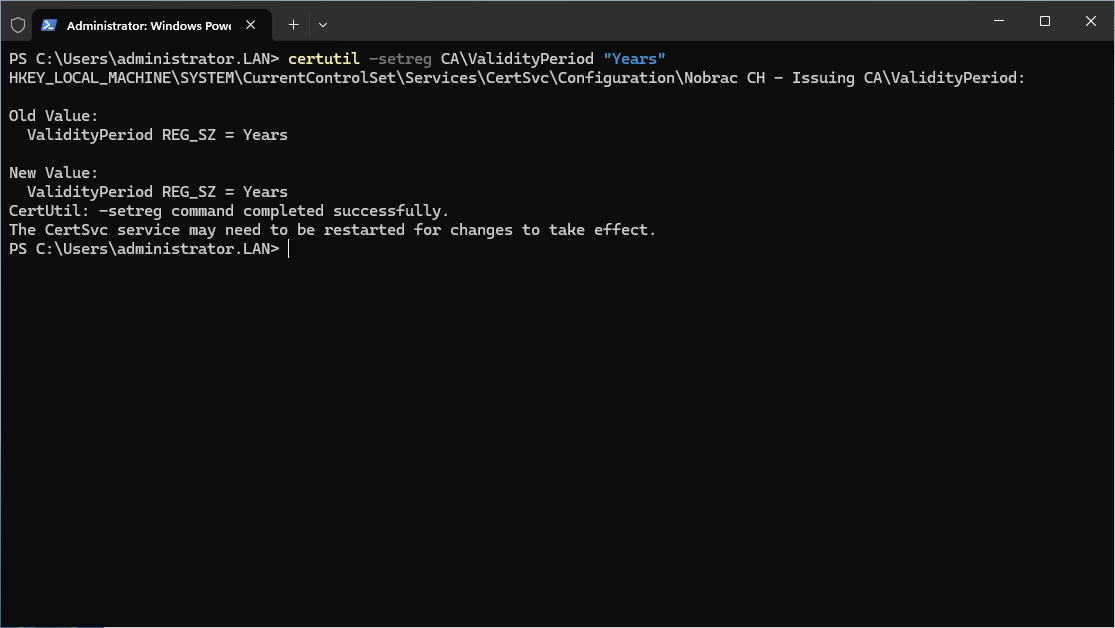
Before requesting our certificate, we need to adjust the validity period for our CRLs from the Root CA. By default, this is set to one week. However, since our Root CA cannot automatically publish the CRL and it requires manual effort from the administrator (as we’ll discuss later in this series), a week seems too short. Online opinions vary widely on the ideal duration, with suggestions ranging from 3 to 12 months, and some even recommending setting it to match the certificate’s lifespan (10 years in this lab). Ultimately, how you configure your production environment is your choice, but for this lab, we’ll set it to 6 months.
Execute the following commands inside a administrative Powershell:
|
|

|
|

|
|
|
|
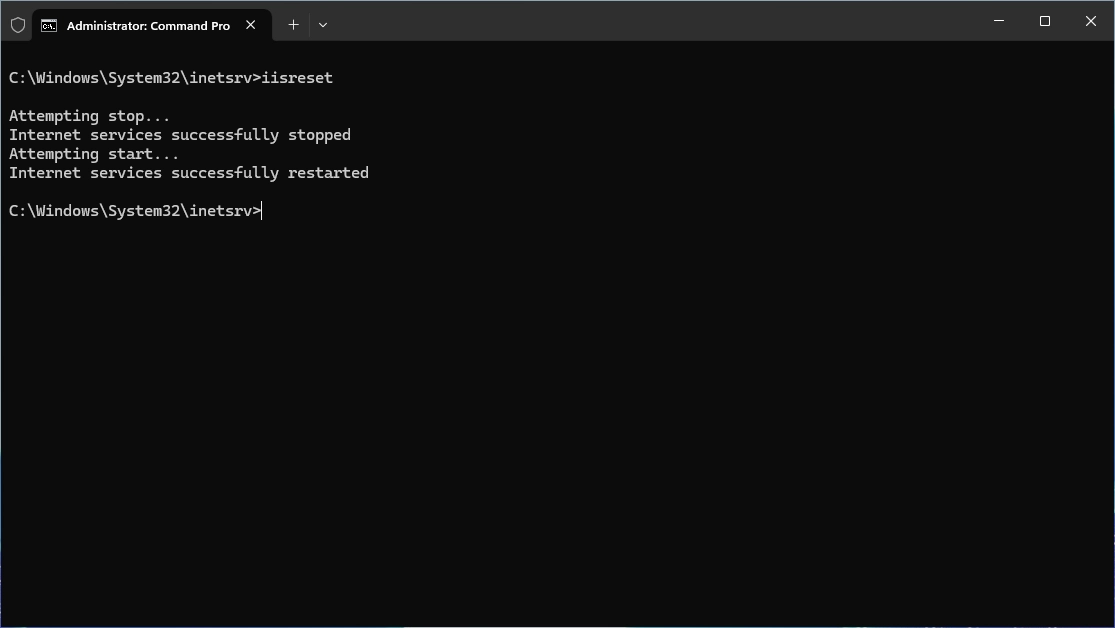
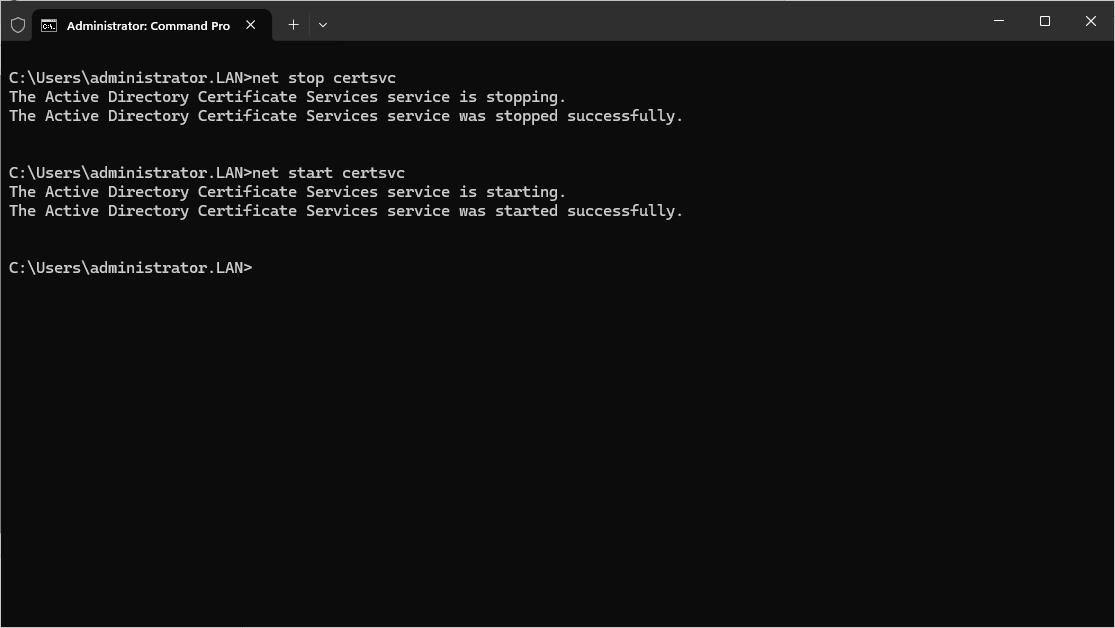
After that, restart the “Active Directory Certificate Serivces” service.
Stop it first.
|
|
Then start it again.
|
|

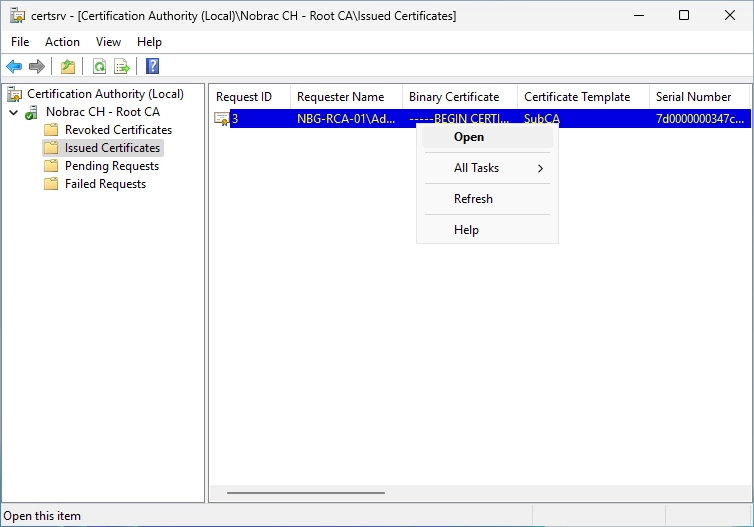
Now open the Certificate Authority on the Root CA server and do a right-click on the Root CA and select “All Tasks” -> “Submit new request…”.

Select the transferred certificate request file from the step before.

Navigate to the “Pending Requests” folder. You should now see the request here.

Right-click on the request and select “All Tasks” -> “Issue”.

Now navigate to the “Issued Certificates” folder. You should now see the issued certificate.

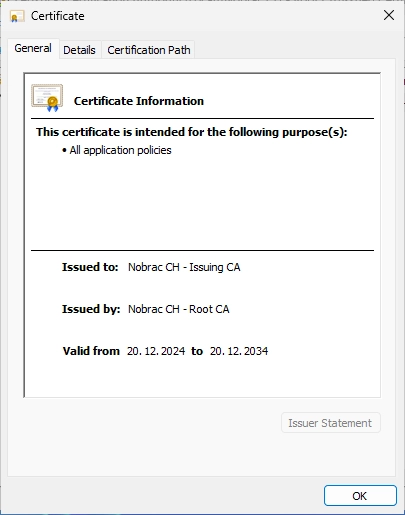
Right-click the certificate and select “Open”.
You can now see the certificate of the Issuing CA.
Navigate to the “Details” tab and click on “Copy to File…”.

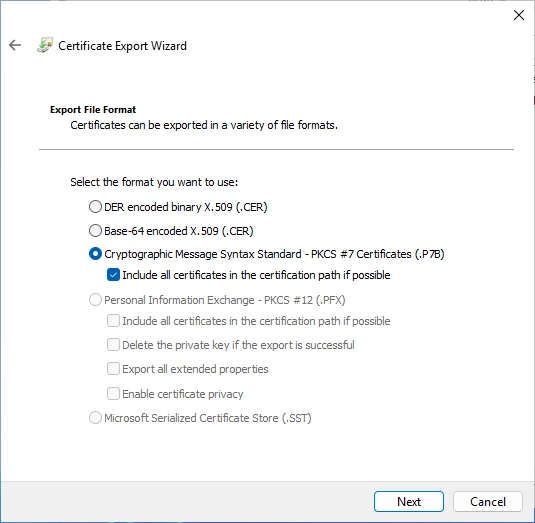
Click on next.
Select the PKCS #7 format and check the additional box below.
Click on “Browse…” to select the storage path.
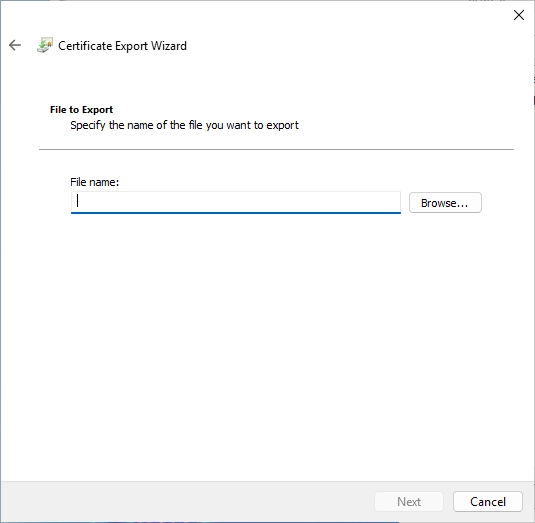
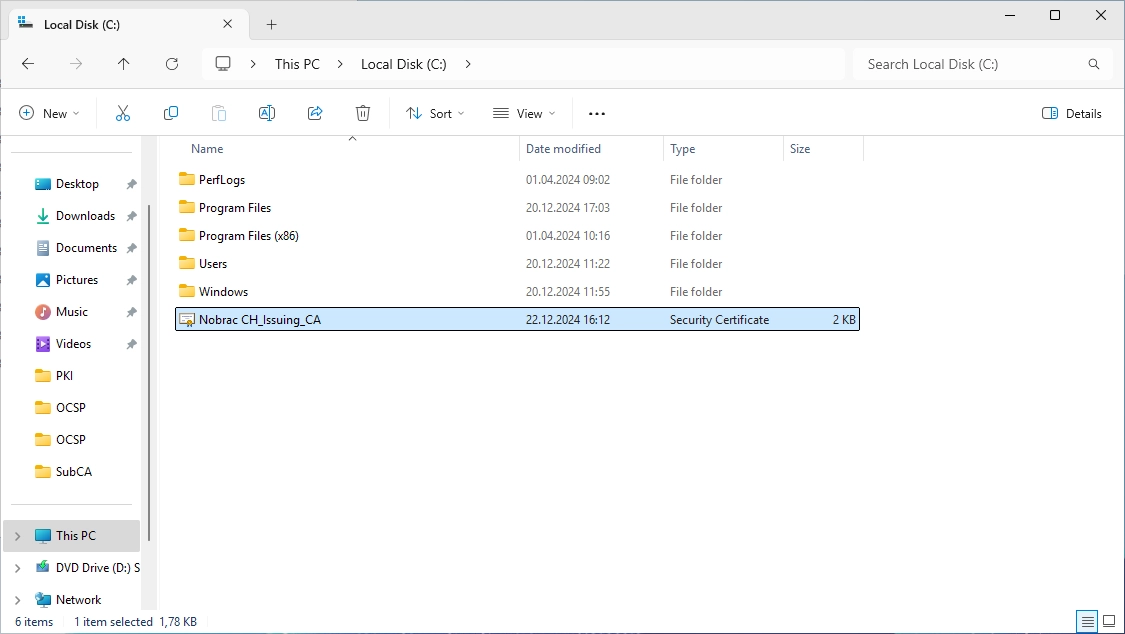
I saved it directly on C: in this example and chose the name “Nobrac_CH_Issuing_P7B”. The file extension must be “*.p7b”.

It should look like this.

Confirm everything.
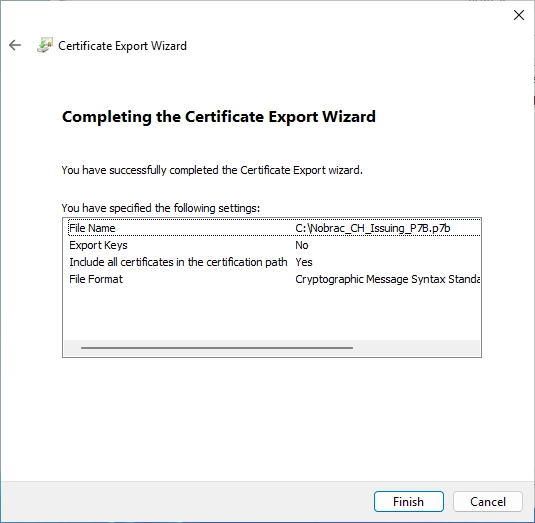
Confirm the export.

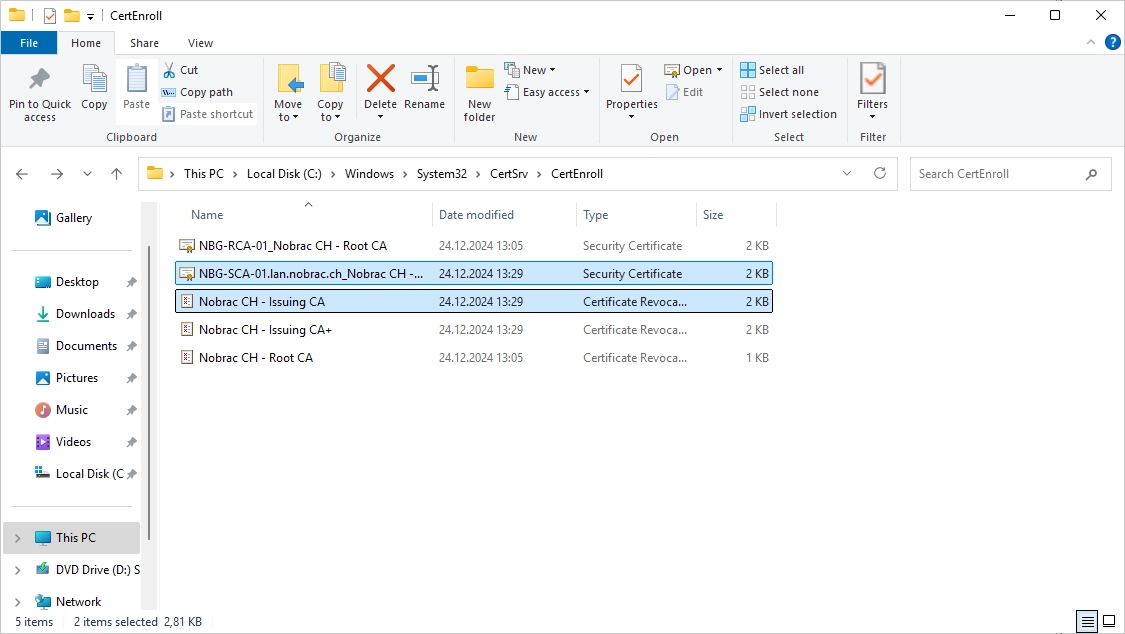
On the Root CA server, navigate to “C:\Windows\System32\CertSrv\CertEnroll”.
There should be two files.
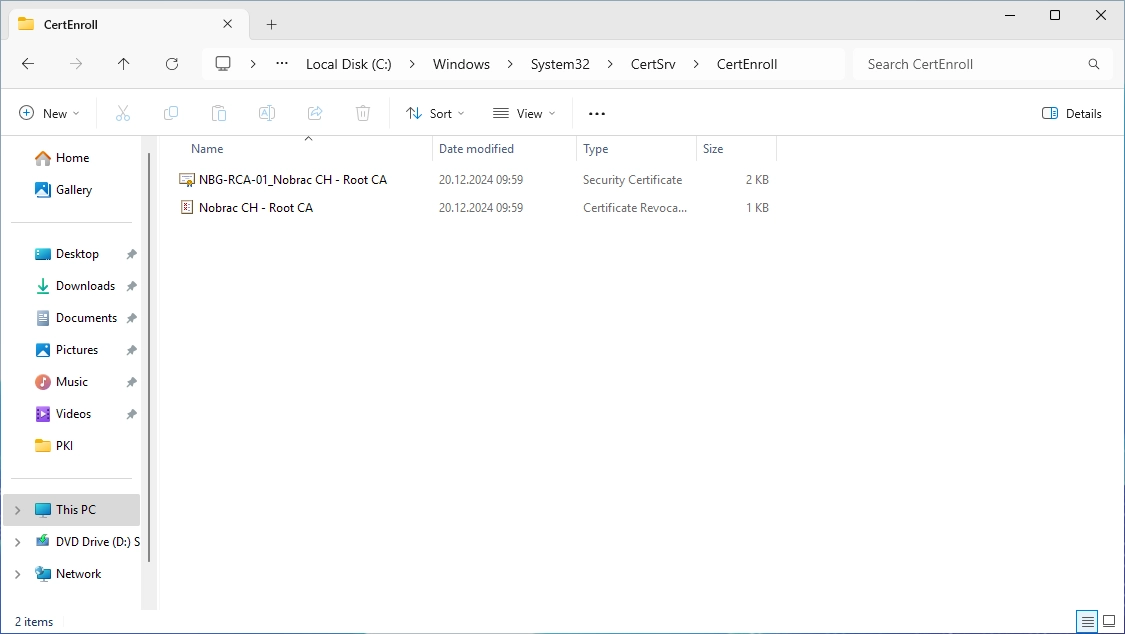
Copy both files temporarily to the Sub CA server (I use the c$ share again for that).
CRL IIS Server
Initial configuration
Let’s continue with the CRL server.
Open the Server Manager and select “Add Roles and Features”.
Just click on next.

Select “Role-based or feature-based installation”.
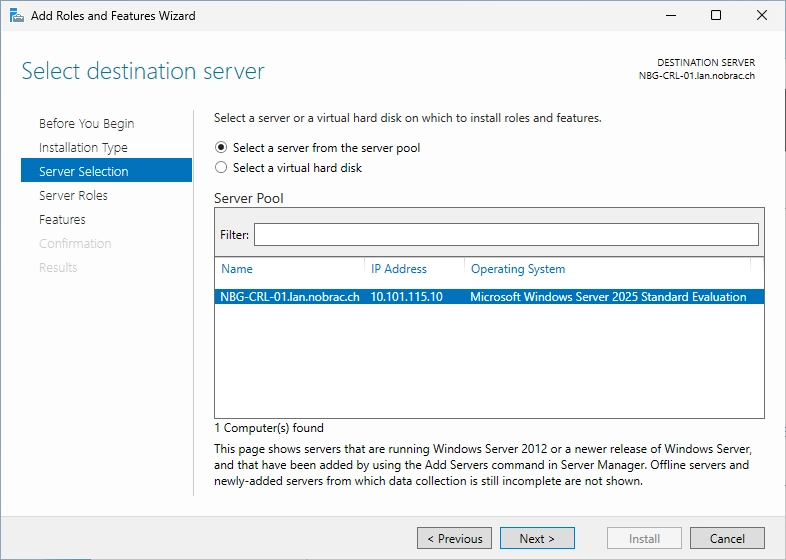
Make sure your server correct server for the CRL IIS is selected.

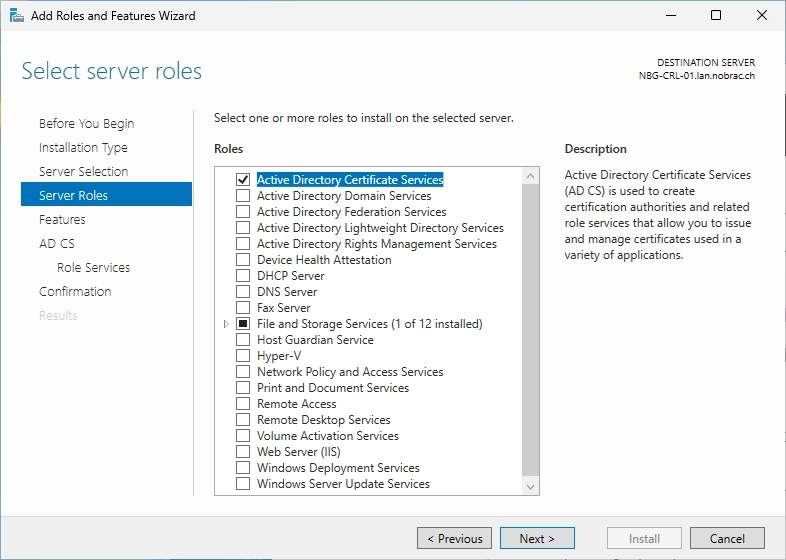
Tick the “Active Directory Certificate Services” box.

Confirm the required features.
It should look like this now.
We don’t need additional features so just click next here.
Confirm the information.
Uncheck the “Certification Authority” box.
Before:

After:

Now check the “Certification Authority Web Enrollment” box.
Confirm the required features.

It should look like this.

Confirm the information.
Leave everything as it is.

Confirm the installation.

Wait till it’s finished.

Install CA certificate
[!IMPORTANT]
Do this on the Sub CA!
Open the Certificate Authority. Then do a right-click on the Issuing CA and select “All Tasks” -> “Install CA Certificate…”.
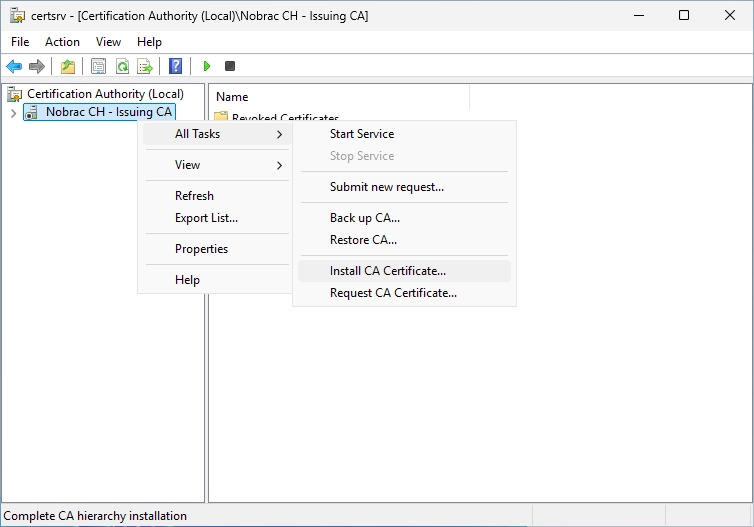
Select the P7B-File from before.

An error message now appears stating that the revocation function cannot reach the revocation server. This is normal, as we have not yet fully configured the CRL IIS server.
We can confirm the message with “OK”.

We will temporarly disable the offline check.
|
|
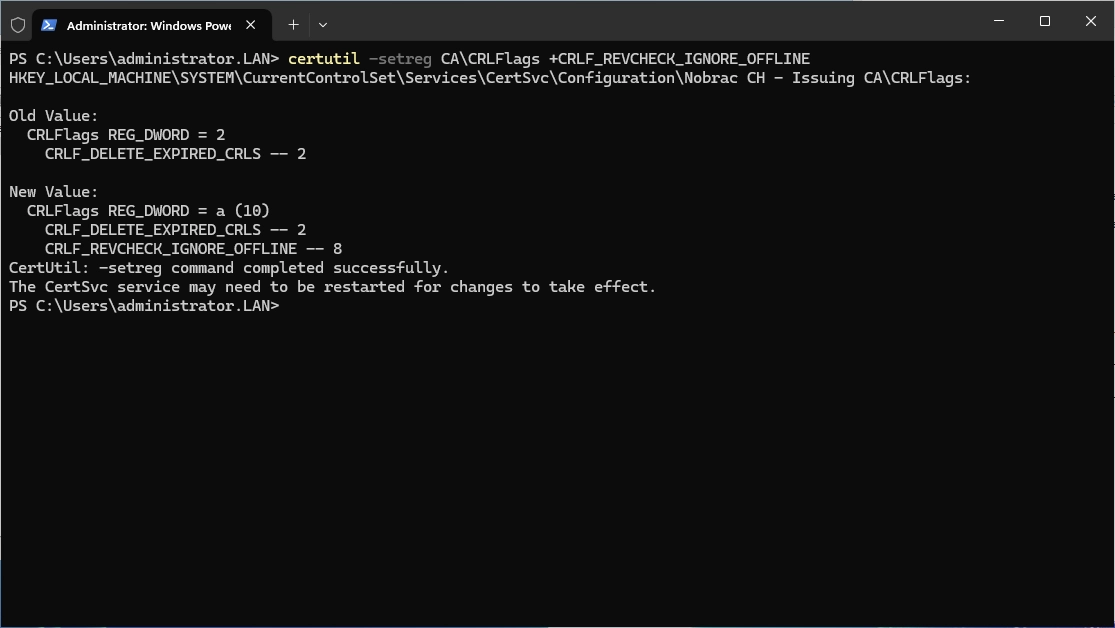
There will be a warning since the root certificate is untrusted. We can click on “OK” so the Root CA certificate will be placed in the “Trusted Root Certification Authorities” automatically for us.

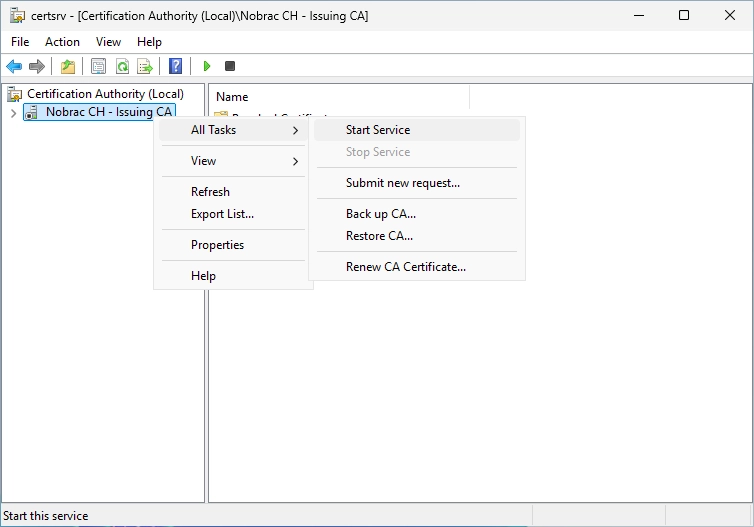
You can now right-click the Issuing CA and select “All Tasks” -> “Start Service”.
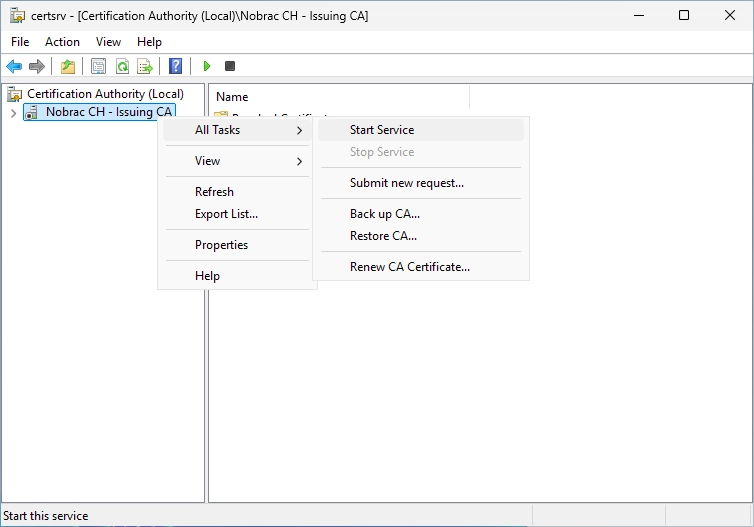
The Issuing CA should start successfully now.

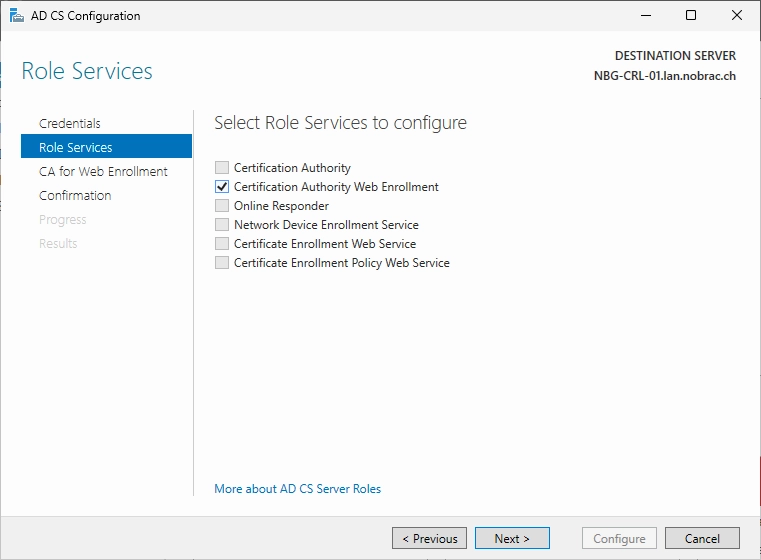
Configure CA Web Enrollment
[!IMPORTANT]
Do this on the CRL IIS server!
Make sure you are logged in as the Domainadministrator.
You should now see a yellow flag in the top right of your Server Manager.
Click on the flag and then click on “Configure Active Directory Certificate Services…”.

Use the Domainadministrator account and click on next.

You should see this windows now.

Select the “Certification Authority Web Enrollment” box.
In the next window click on “Select…”.

Select the Issuing CA.

It should look like this.

Confirm the settings and wait till it’s finished.

The configuration was successful.

Enable Double Escaping
For better compatibility we allow double escaping on the IIS. Open a administrative CMD.
Navigate to the following path:
|
|
Execute the following command:
|
|
It should look like this:

Restart the IIS service after that:
|
|
Enable Directory Browsing
On the CRL IIS server, open the IIS Manager and make sure the “CertEnroll” folder on the left side is selected.

Click on “Directory Browsing” in the middle of the window. You should then see the following window.

Click enable on the right side. It should look like this afterwards.
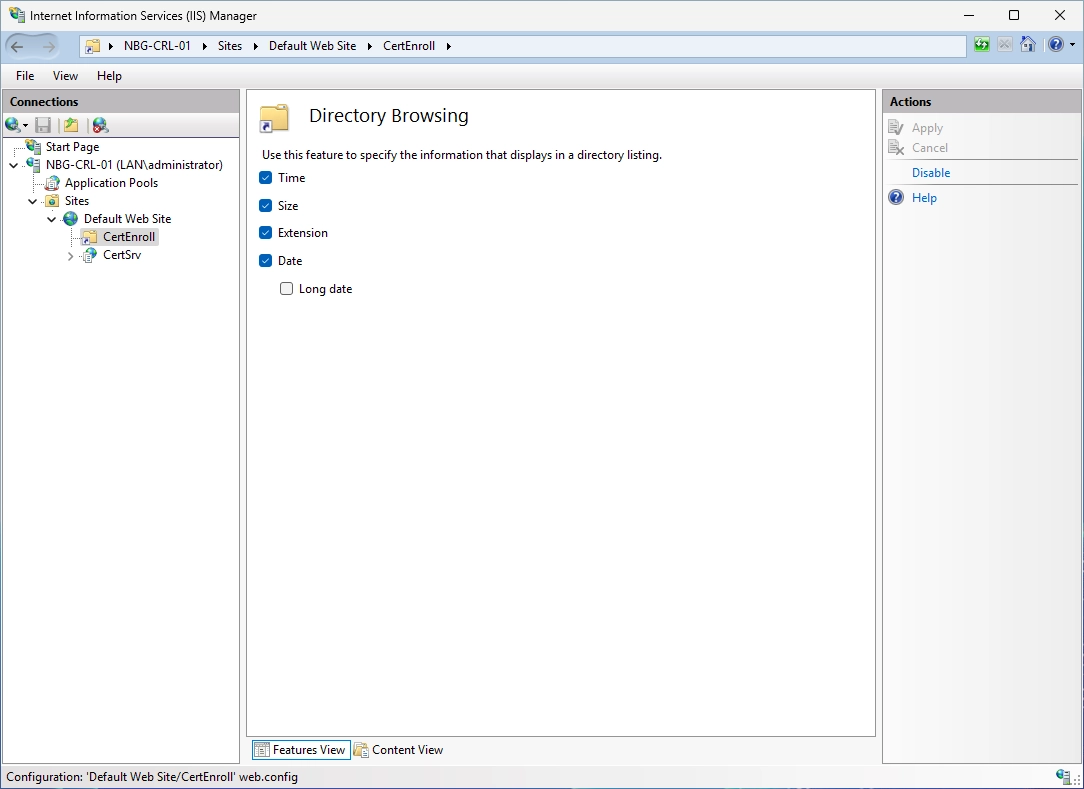
You can close the IIS Manager now.
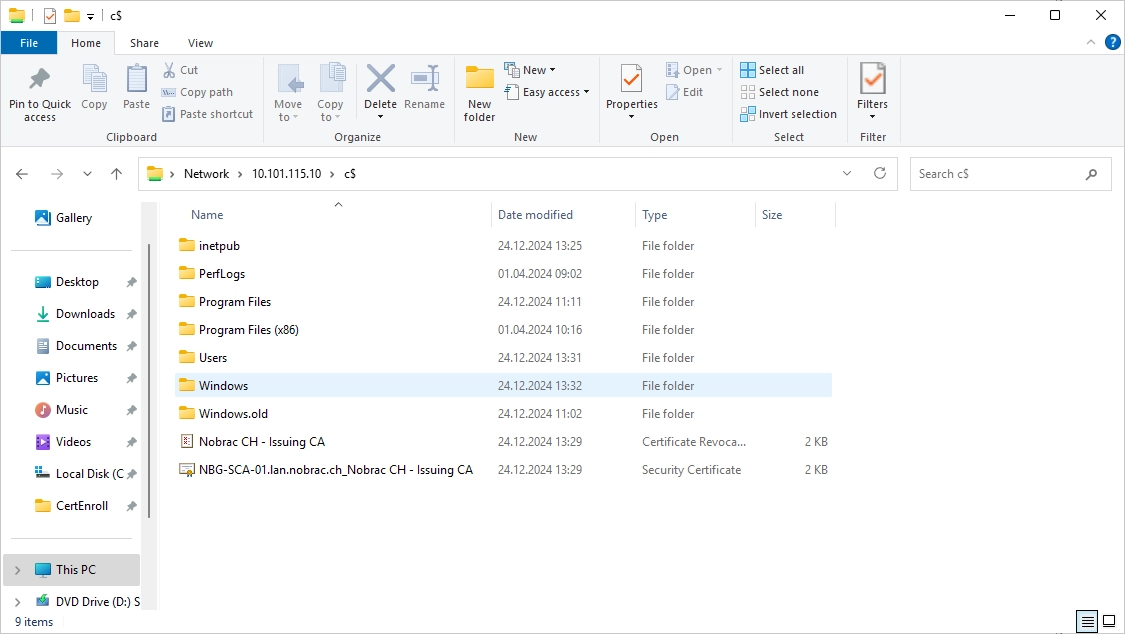
Copy certificates to CRL IIS server
Copy the two files (certificate revocation list and Root CA certificate) to the CRL IIS server (I used the c$ share again).

You should now have these two files on your CRL IIS server:
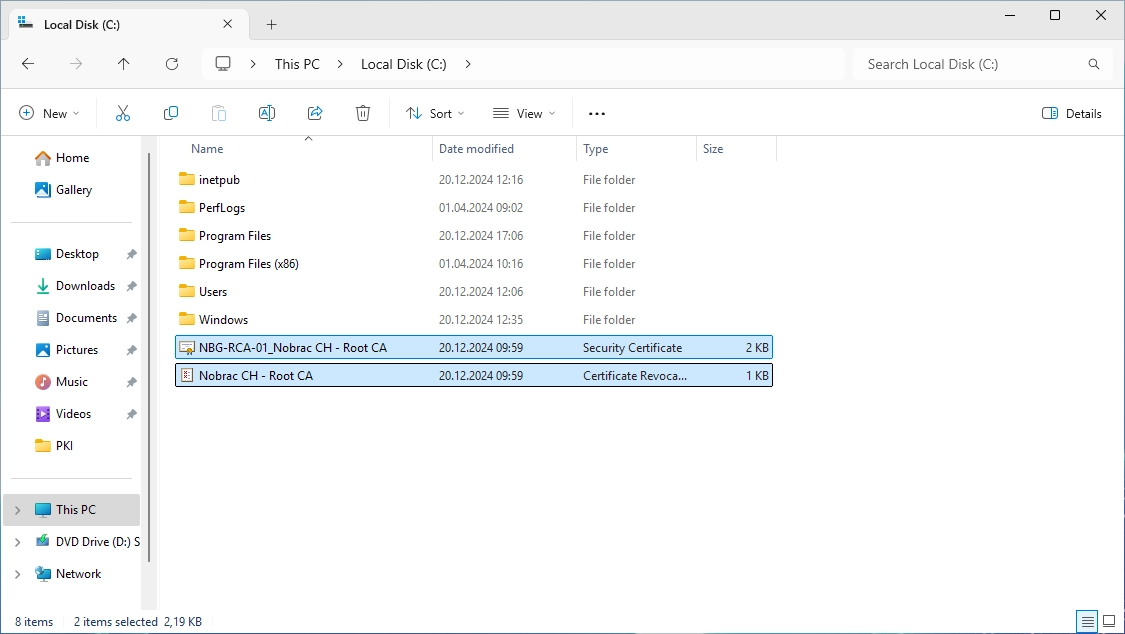
Copy the two files (certificate revocation list and Root CA certificate) to the following folder on the CRL IIS server:
|
|

Finish Sub CA configuration
We will now enable the offline check again. Enter the command in a administrative Powershell:
|
|
Open the Certificate Authority on the Sub CA server.
Right-click the Issuing CA and select “All Tasks” -> “Stop Service”.

Right-click it again and select “All Tasks” -> “Start Service”.
It should now start without any errors.

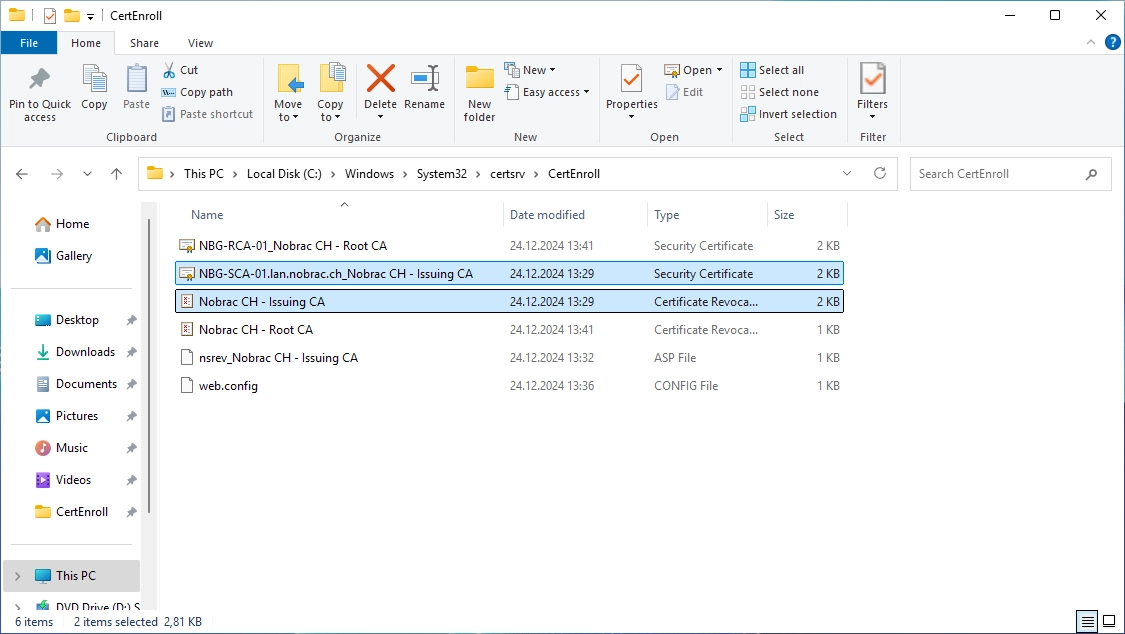
On your Sub CA server, navigate to the following folder:
|
|
There should be these two certificate files: (Issuing CA revocation list and Issuing CA certificate)
Copy these two files to the CRL IIS server (I use c$ again).
On the CRL IIS server, copy both files to the following folder:
|
|
It should look like this:
Configure CDP and AIA
Configure the CRL and AIA like on the Root CA.
On your Sub CA server, open the Certificate Authority and do a right-click on the Issuing CA and select “Properties”.

Go to the “Extensions” tab and click on “Add…”.
For the location, enter the following URL:
|
|
So in my example it’s:
|
|
Then, select these two checkboxes:
- Include in CRLs. Clients use this to find Delta CRL locations.
- Include in the CDP extension of issued certificates
It should look like in the screenshot.

In the same “Extensions” tab, now select “Authority Information Access (AIA)” in the “Select extension” dropdown menu and click on “Add…”.

For the location, enter the following URL:
|
|
So in my example it’s:
|
|
Then, select the following checkbox:
- Include in the AIA extension of issued certificates
It should look like in the screenshot.
Remove default CDP & AIA settings
We will now delete the other default CDP & AIA settings like on the Root CA before.
It should look like this in the end.
CDP:

AIA:

Click “OK” and confirm the message to restart the CA service.
Check that everything works
We can use the tool “pkiview.msc” to check that everything is okay with our PKI installation. You can and should generally use the tool from time to time to check whether everything is OK with the PKI. Just enter “pkiview.msc” on the Sub CA server in the searchbar.

Create Group Policy
Copy certificate
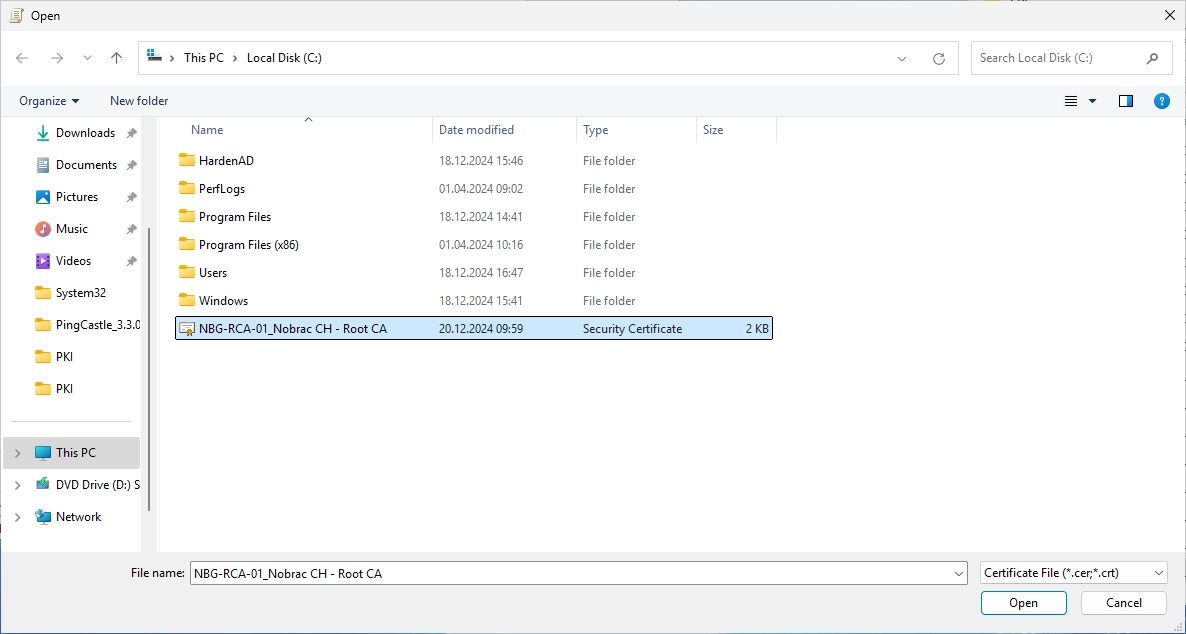
Now copy the root CA certificate to your management host or directly to your domain controller.
I used the c$ share again for this.
Create GPO
Open the Group Policy Management on your management host or DC.

Right-click on your domain (lan.nobrac.ch in my case) and select “Create a GPO in this domain, and Link it here…”.
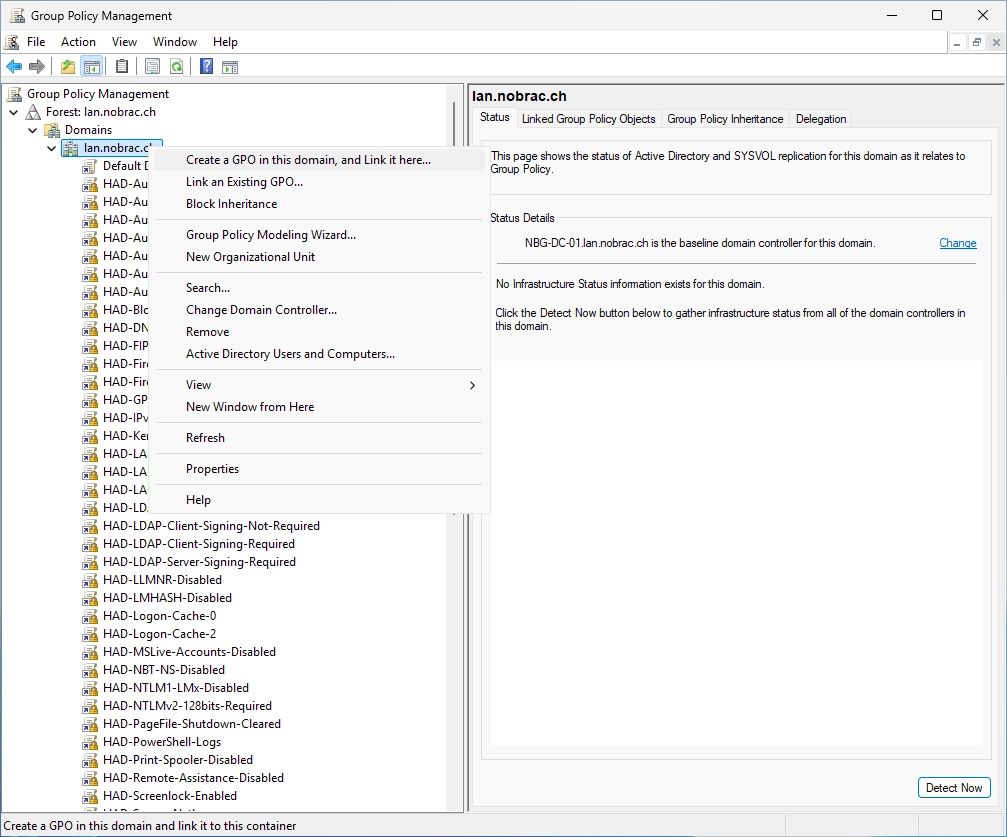
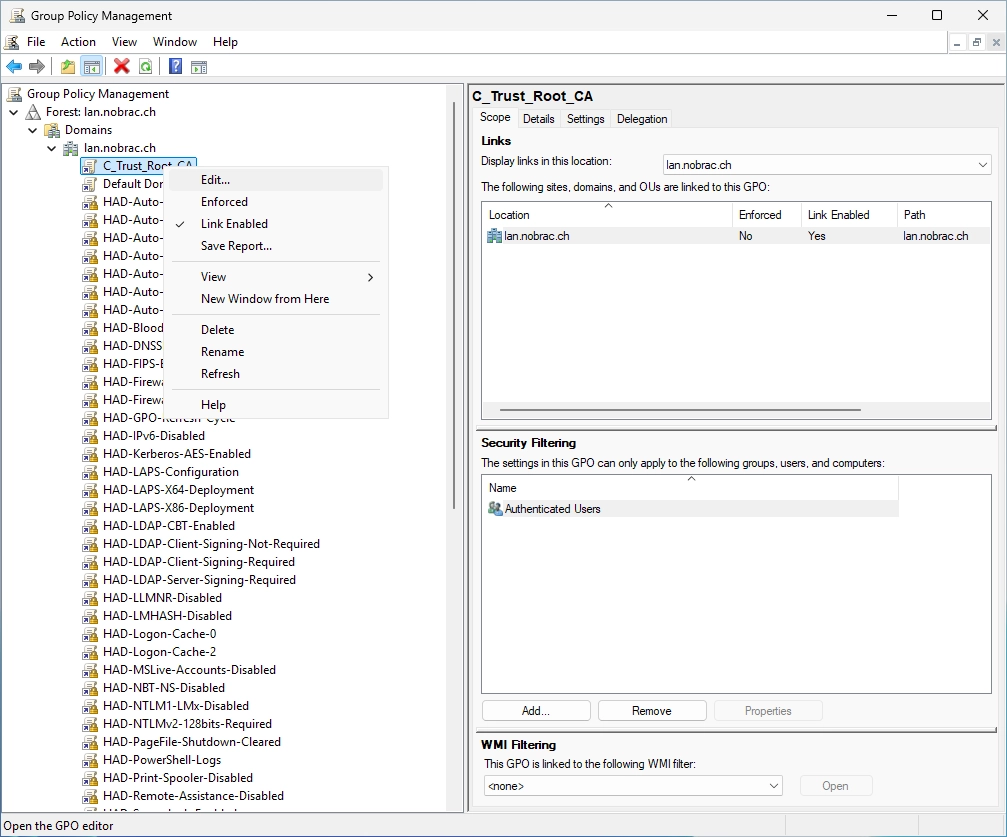
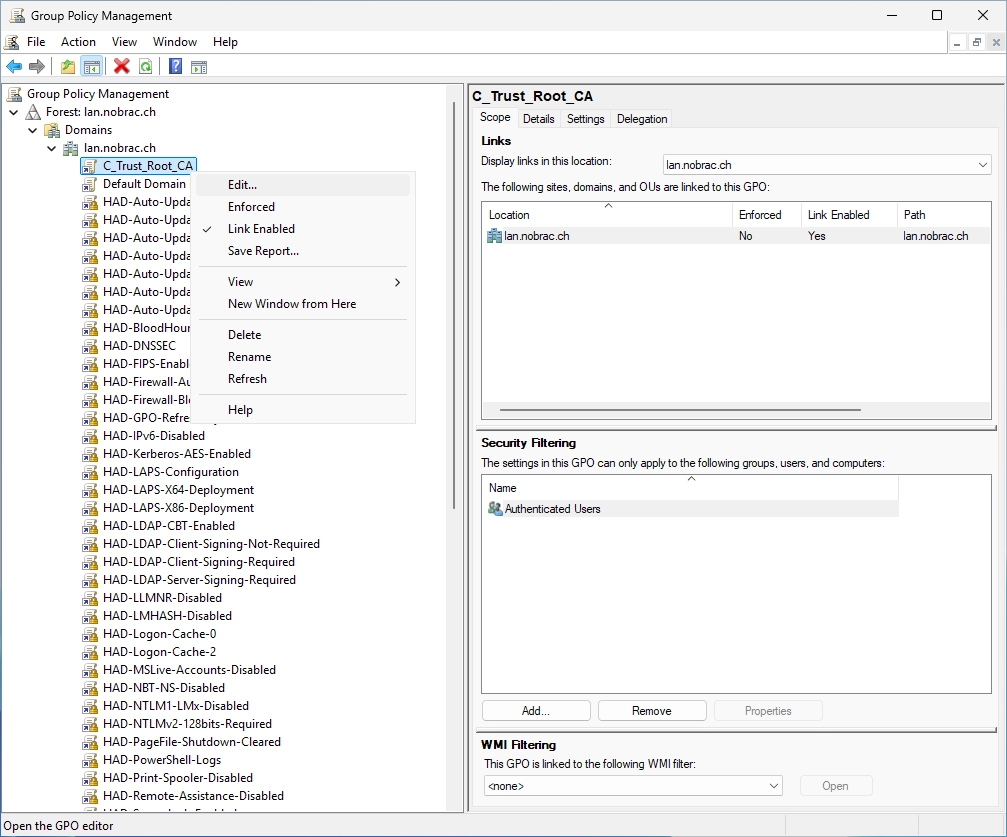
Choose a name for the new GPO. I chose “C_Trust_Root_CA” (C stands for computer cause it’s a computer GPO).

Right-click on the new GPO and select “Edit…”.
Navigate to the following GPO path:
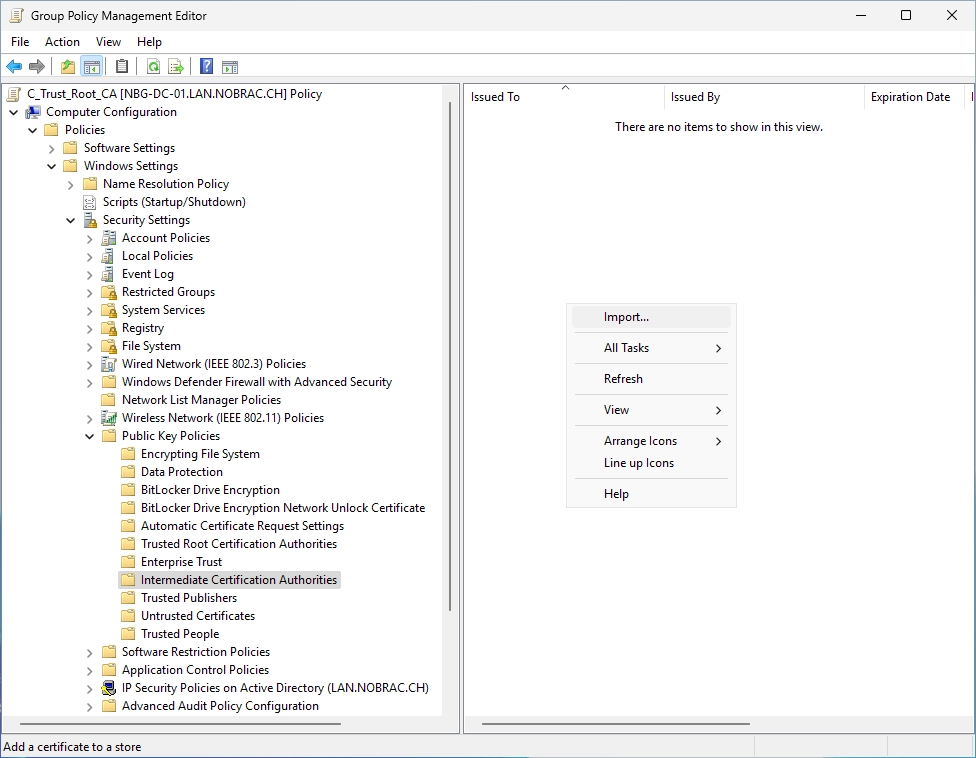
Computer Configuration -> Policies -> Windows-Settings -> Security Settings -> Public Key Policies -> Trusted Root Certification Authorities

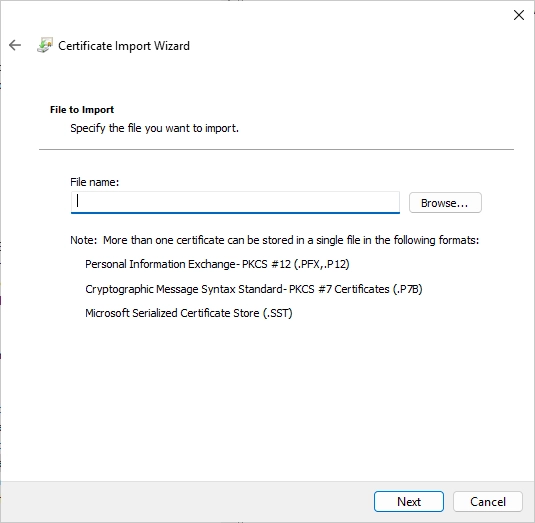
Do a right-click on the right side in the empty field and select “Import…”.

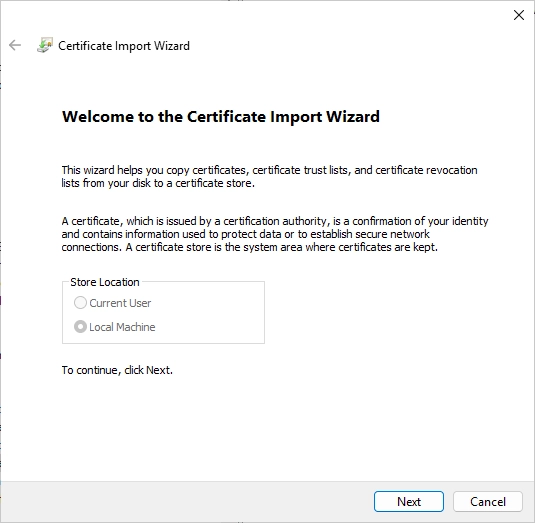
Just click on next.

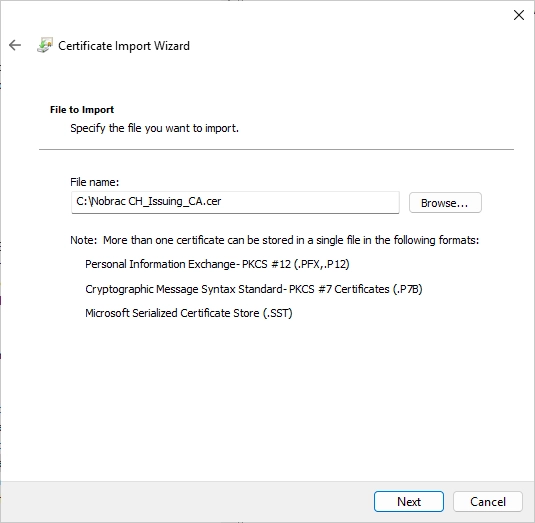
Click on “Browse…”.

Select the Root CA certificate.
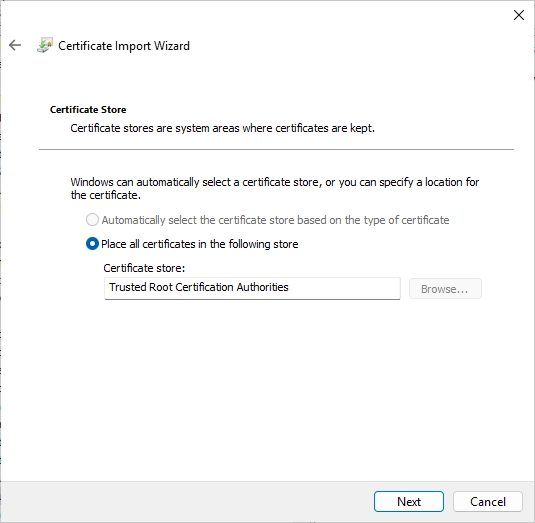
It should look like this.

Make sure that the certificate get’s placed in the “Trusted Root Certification Authorities” certificate store.
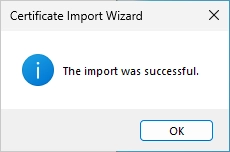
Check the settings.

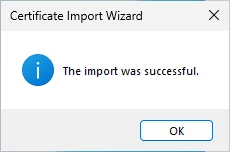
The import was successful.
You should now see the imported certificate on the right side.
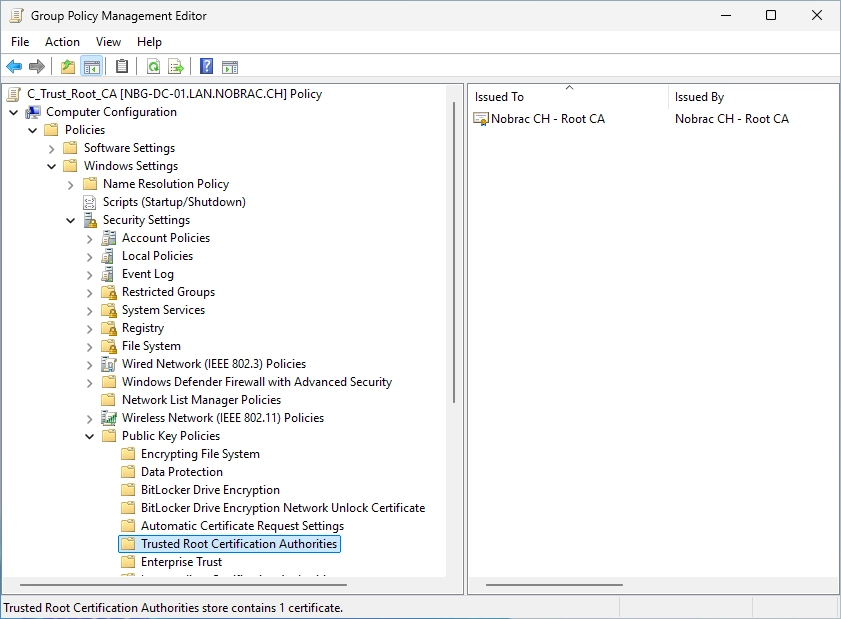
The GPO is now done. You can close the Group Policy Management.
Certificate Templates
Create new template (Code Signing)
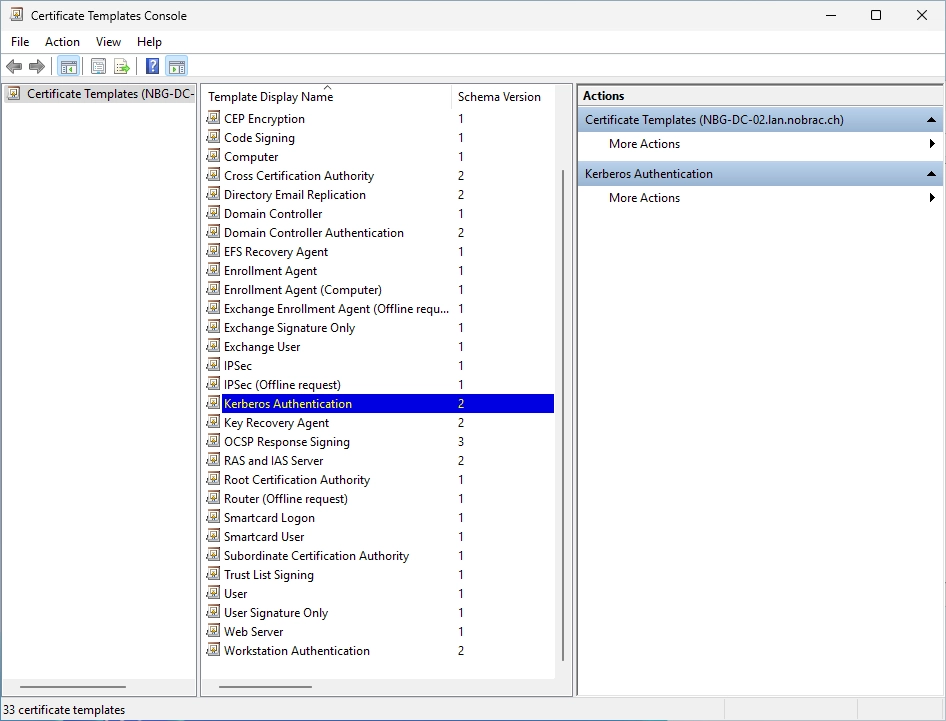
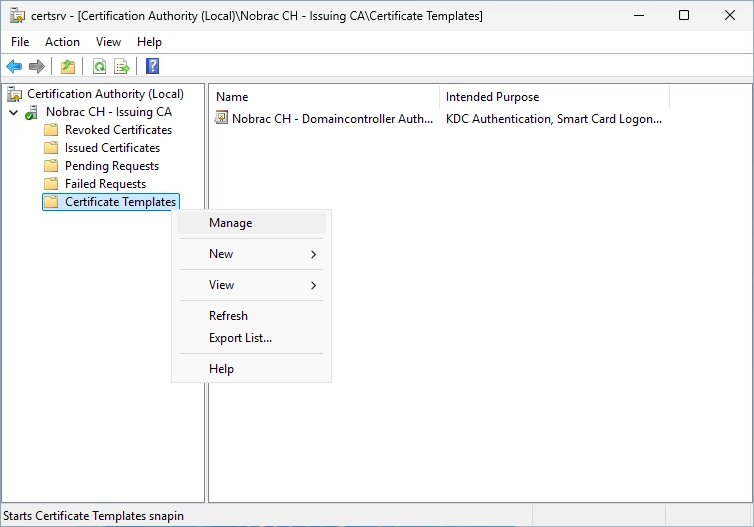
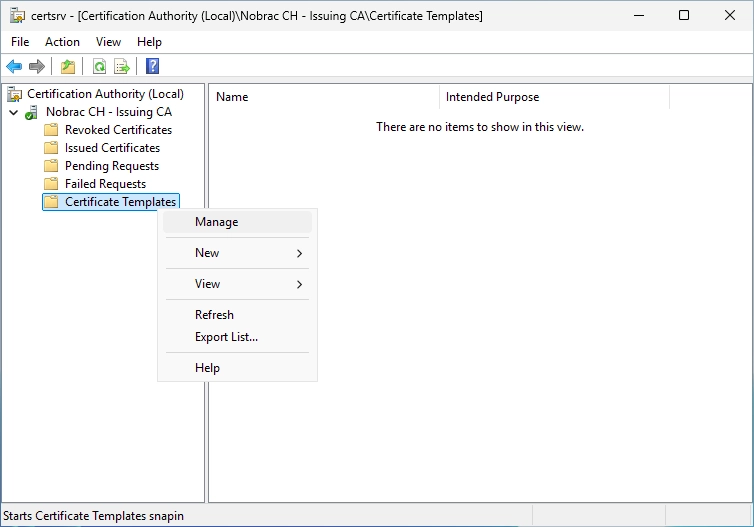
We will now configure our first certificate template. Open the Certificate Authority on the Sub CA and navigate to the Certificate Templates.

Now we delete all predefined templates. I do this because I don’t want any certificates that I don’t even know/use to be issued in my network. This also reduces the attack surface.
Simply mark them all and do a right-click and select “Delete”.
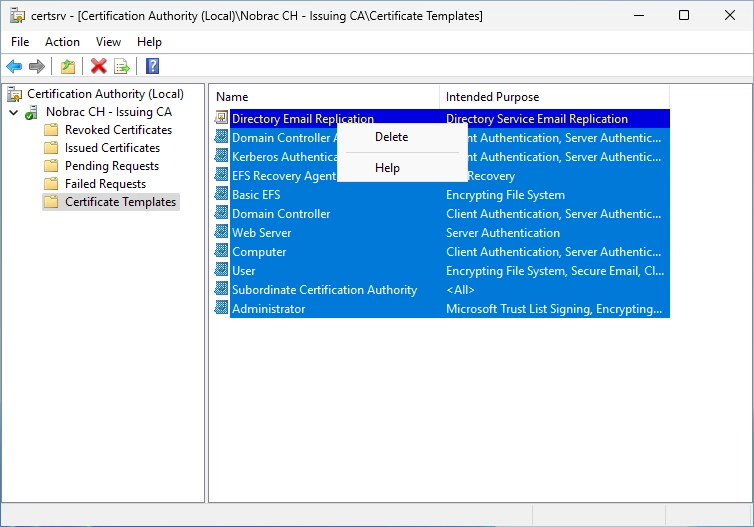
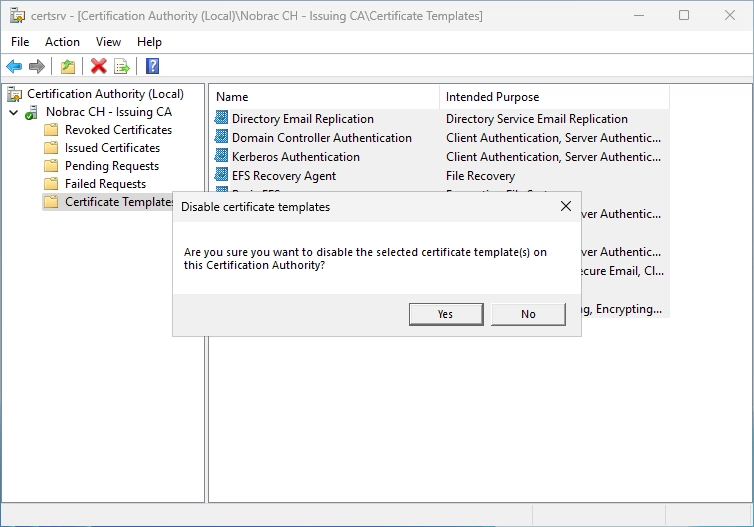
Confirm the dialog.
Now the Certificate Templates should be empty.

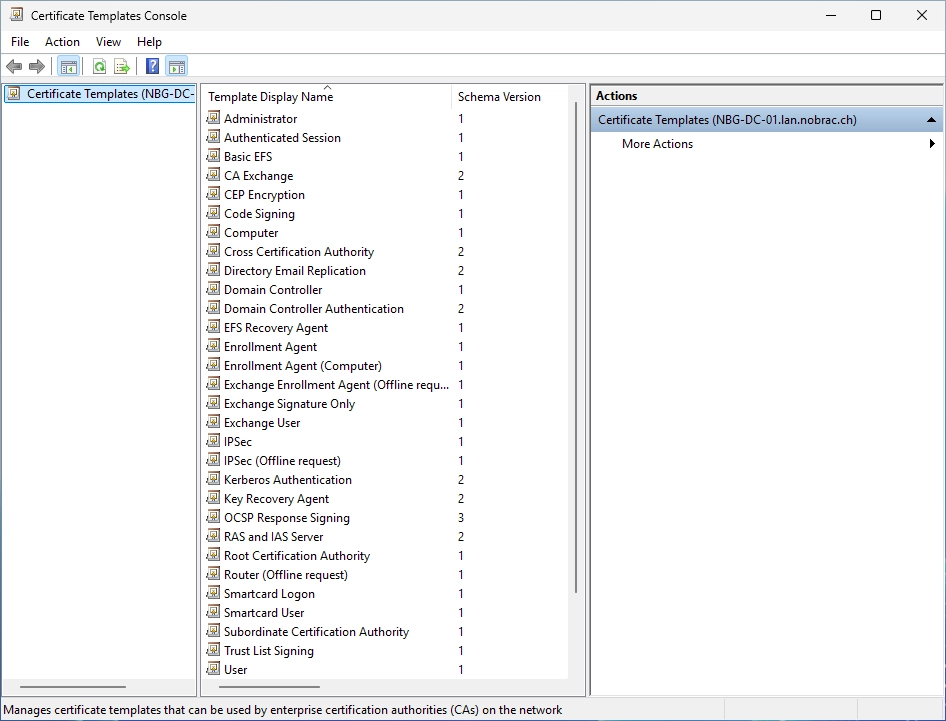
Right-click on the Certificate Templates folder and select “Manage”.

We now see all the available templates.
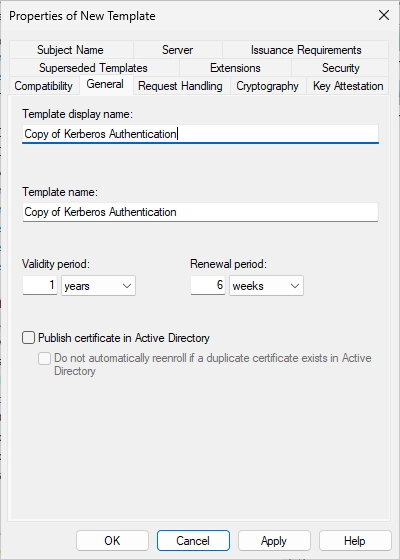
Search the “Code Signing” certificate. We will use this one in this guide. Then, do a right-click on it and select “Duplicate Template”.

You should now see the following window.

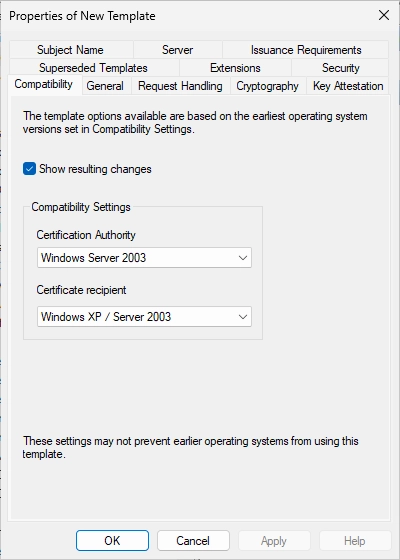
Change the compatibility settings from 2003 to 2016 for the Certificate Authority.
Accept the dialog.

It should look like this now.

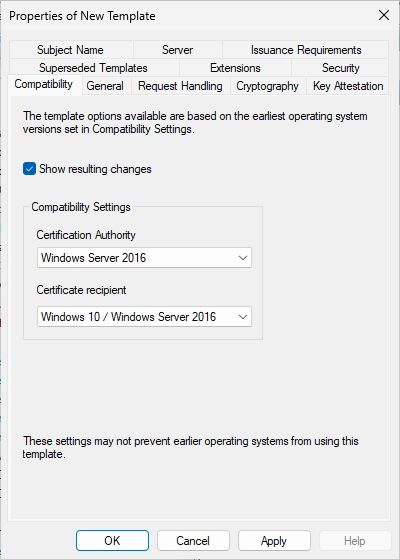
Now, change the compatibility settings from 2003 to 2016 for the Certificate Recipient too and accept the dialog.

It should look like this.

Let’s go over to your DC or Management host and open the Active Directory Users and Computers tool.
Create a group in a location that fits your domain. Do a right-click on the right side in the empty field and select “New” -> “Group”.
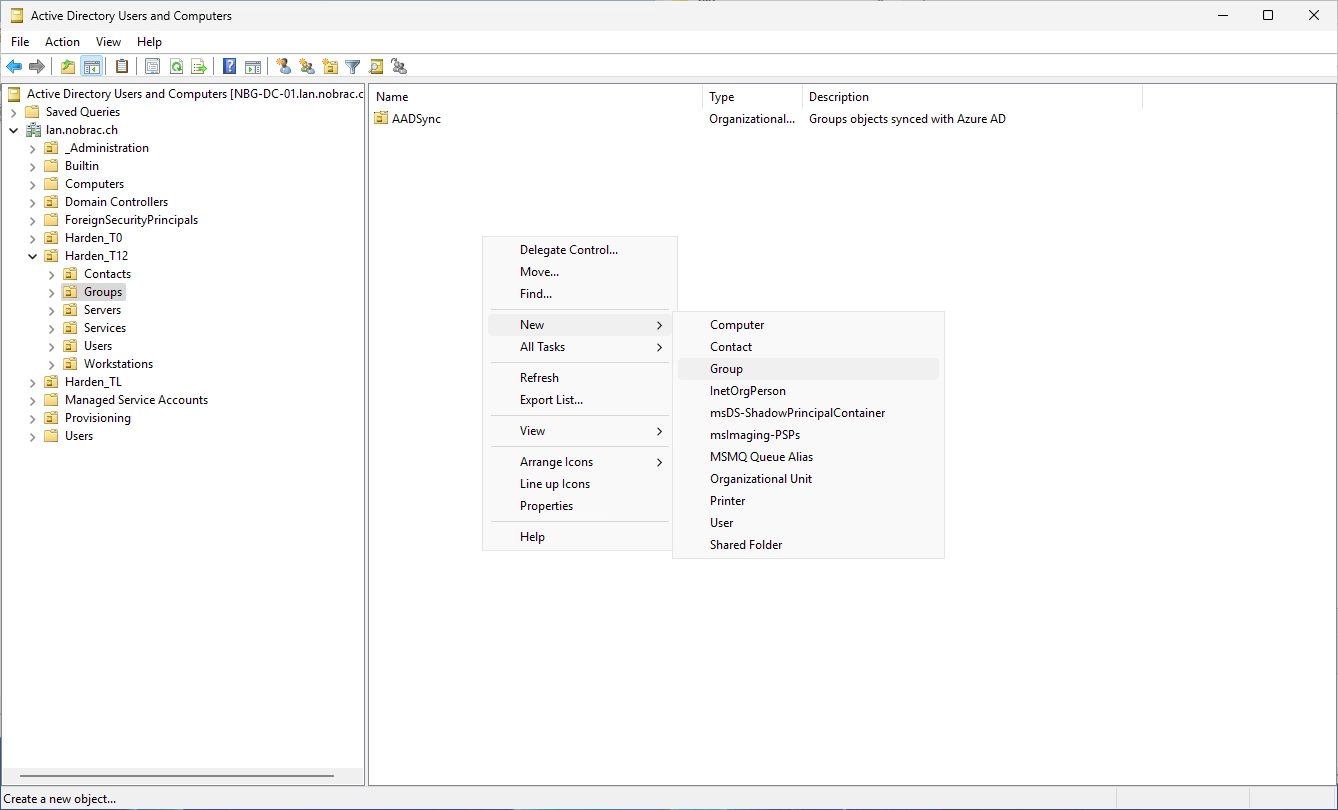
Choose a name that fits the certificate template. I chose “G-S-T1-PKI-CodeSigning” in my homelab.
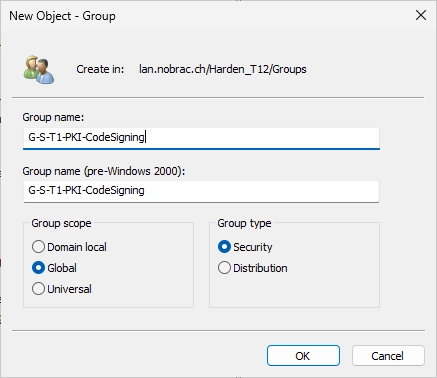
You should now see your new created group.

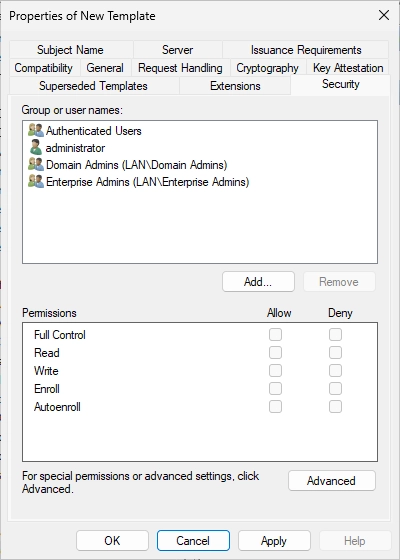
In the open window for the new certificate template, navigate now to the “Security” tab.

Now click on “Add” to add our newly created security group.

It should look like this now.
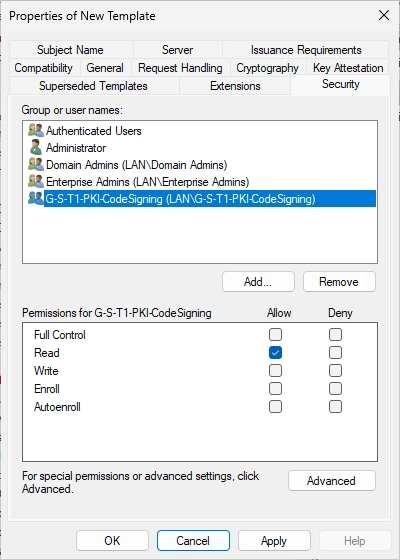
Make sure that the “Enroll” permissions are set for the added security group.

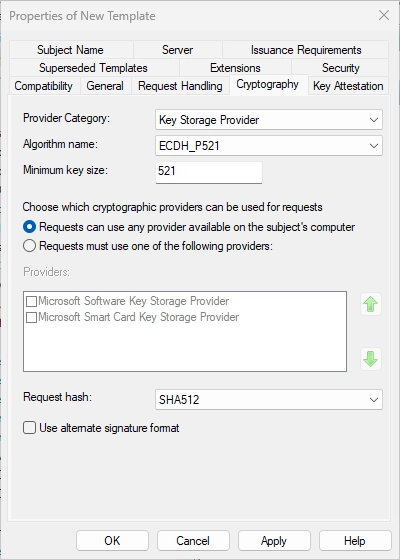
Switch to the “Cryptography” tab. You should see the following window.
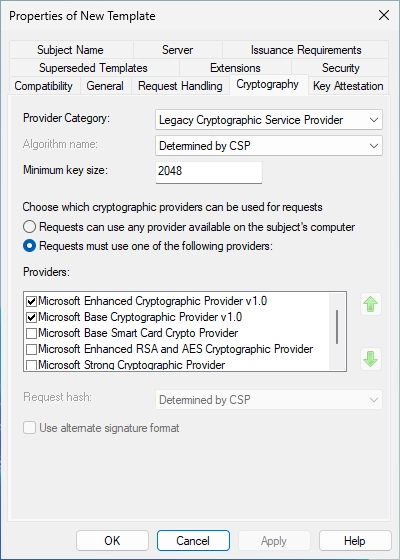
Apply the settings as shown in the screenshot.

Now click on the “General” tab and choose a good name for the template. I always add “Nobrac CH” to the name so it’s easy to filter and so I always know which certs I edited/created.
Click then on “OK”.

We should now see the newly created certificate template in the overview.
You can then close the Certificate Templates Console.

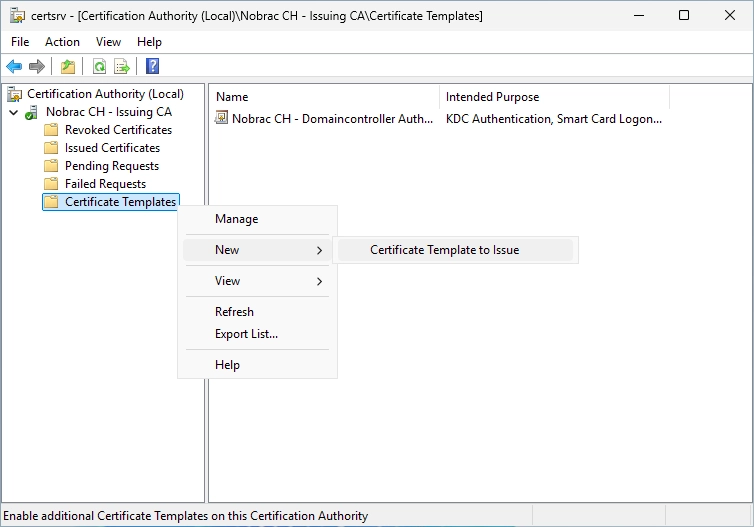
In the Certificate Authority Console, right-click the Certificate Templates folder and select “New” -> “Certificate Template to Issue”.

Select the new certificate template.
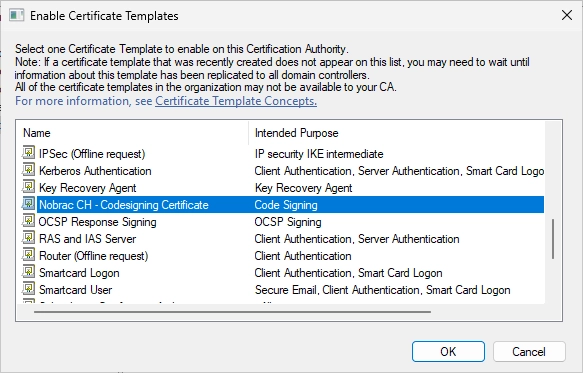
We should now see the new certificate template.

Create new template (Web Server)
We will now configure another template. We will need this for the “CertSrv” web enrollment service. Open the Certificate Authority on the Sub CA and navigate to the Certificate Templates. Do a right-click on the Certificate Templates folder and click on “Manage”.

Search the “Web Server” template.

Right-click it and select “Duplicate Template”.

You should see this window.

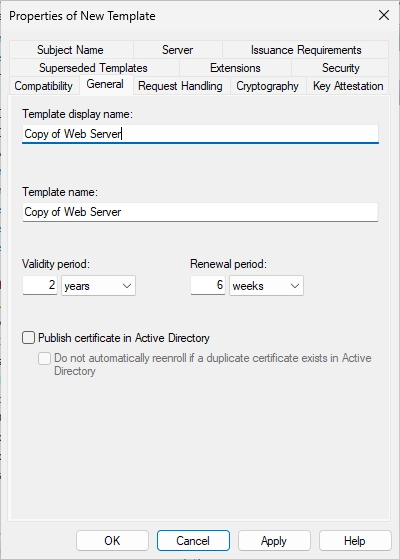
Switch to the “General” to change the name of the template and change the validity period to 1 year and the renewal period to 5 months (you can use something different of course).
Before:
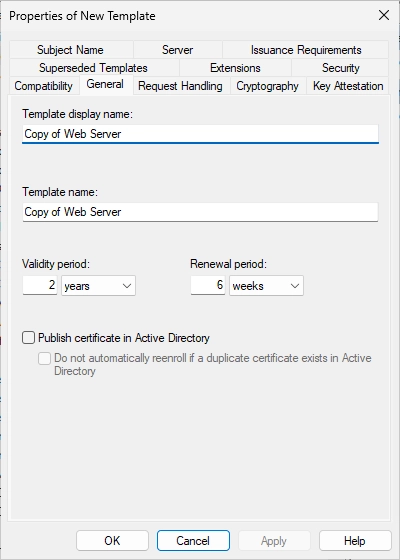
After:

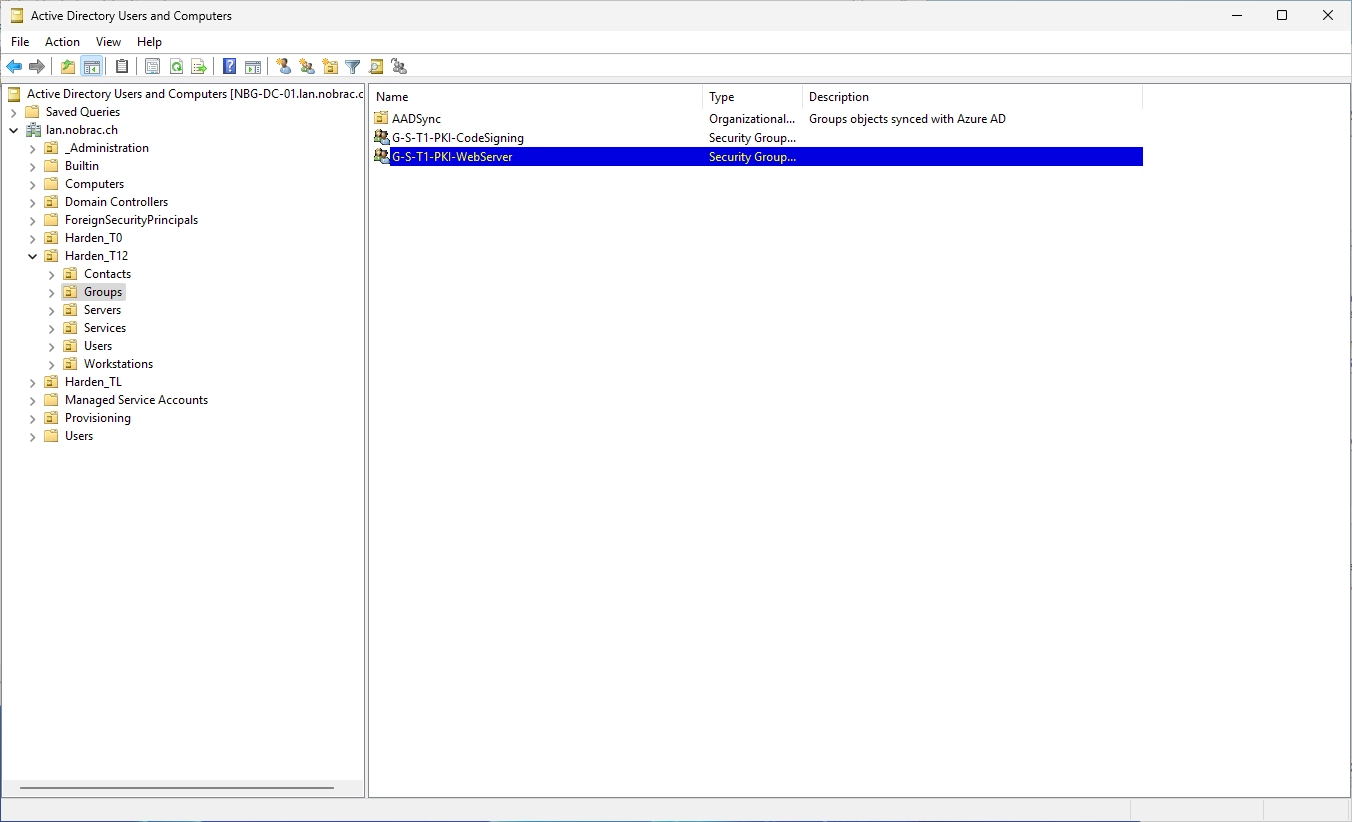
Create a new security group in your Active Directory like before.

I call it “G-S-T1-PKI-WebServer”.
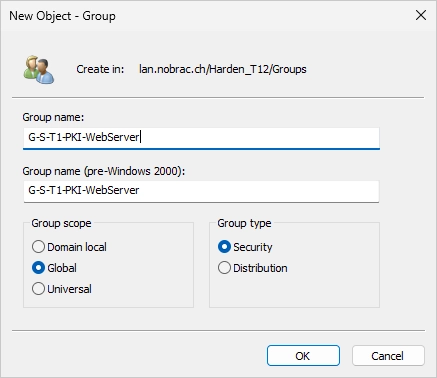
It should look like that.
At the properties of the new certificate template, switch now to the “Security” tab.

Add the newly created group.

Make sure that the permissions “Read”, “Enroll” and “Autoenroll” are selected and click on “OK”.

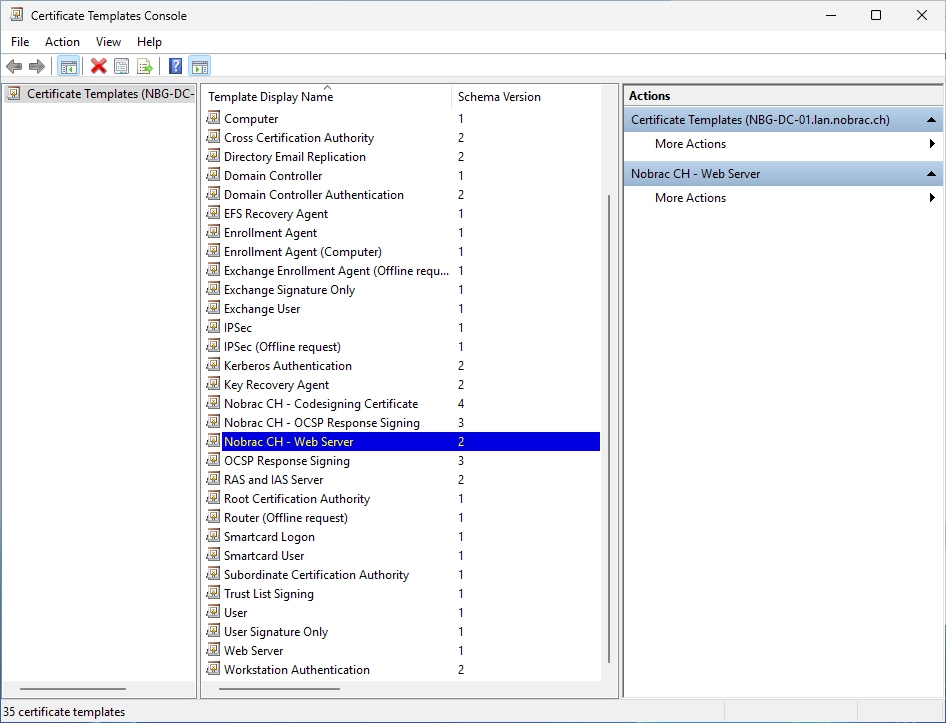
You should see your new template in the overview.
Publish the certificate template (you can do it with the GUI too of course).
You should now see it in the issued templates.

We successfully created our Web Server certificate template.
Create new template (Domaincontroller Authentication - Kerberos)
Open the Certificate Authority on the Sub CA.

Right-click on the Certificate Template folder and click on “Manage”.

Search the “Kerberos Authentication” template.
Do a right-click on the template and select “Duplicate Template”.

On the “Compatibility” tab, change the settings for both options from 2003 to 2016.
Before:

After:

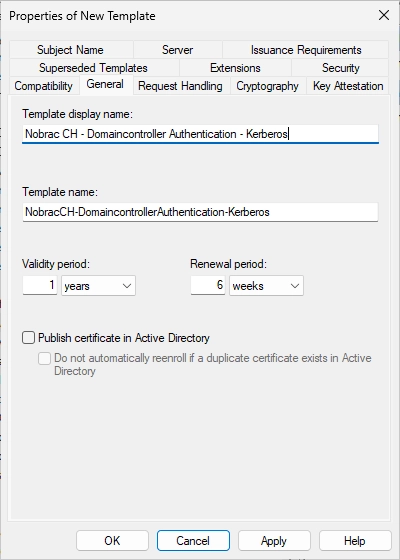
Switch to the “General” tab.
Change the name accordingly. I took “Nobrac CH - Domaincontroller Authentication - Kerberos” as example.
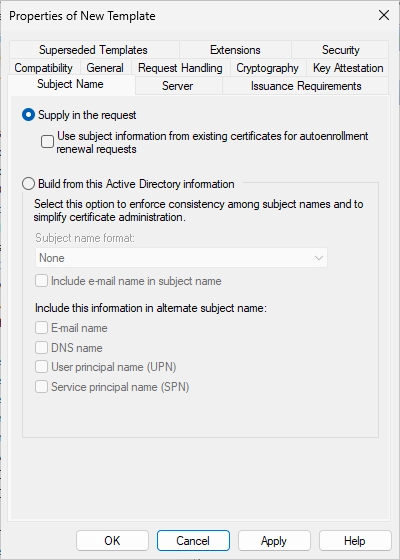
Switch to the “Subject Name” tab and make sure that all settings are like in the screenshot (everything is probably already set correctly).

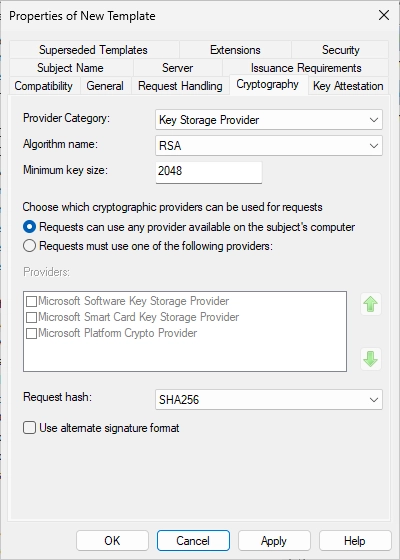
Switch to the “Cryptography” tab.

Change the settings like in the screenshot.
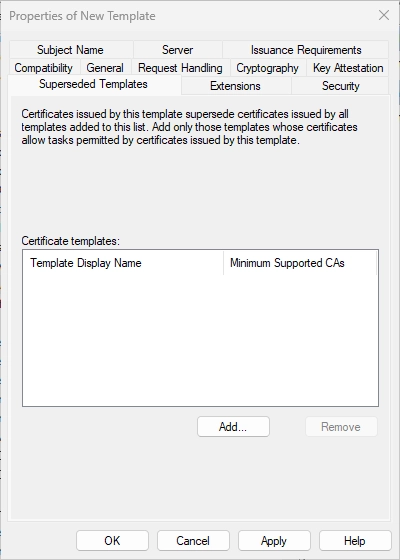
Switch to the tab “Superseded Templates” and click on “Add…”.
Search the “Domain Controller Authentication” template.
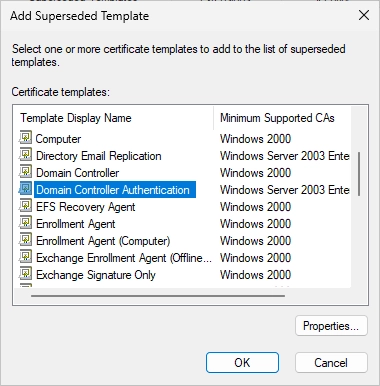
It should look like this.

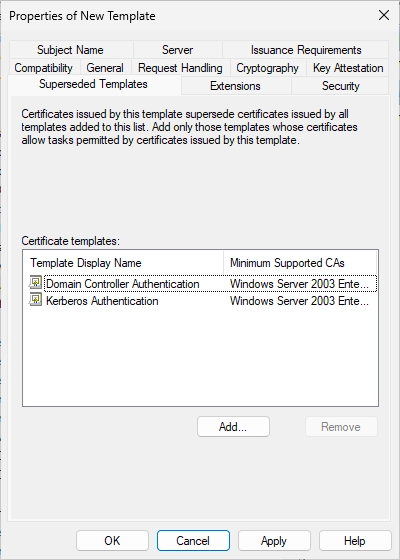
Click on “Add…” again and search the “Kerberos Authentication” template.

It should look like this. You can now click on “OK”.
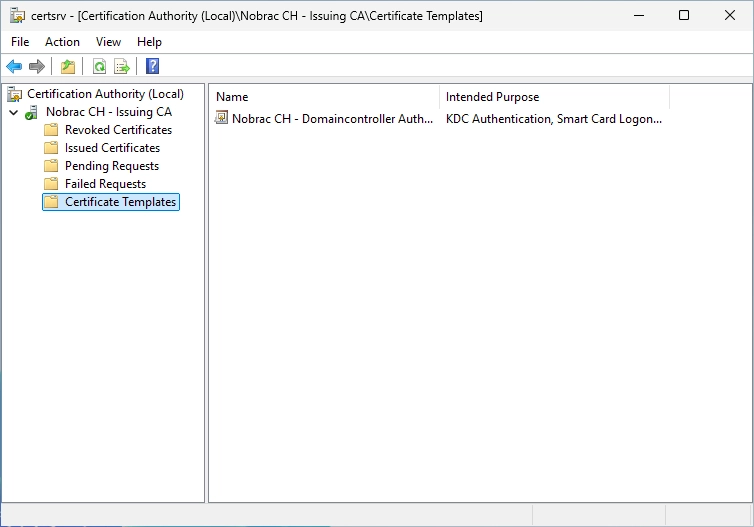
You should now see the newly created template.
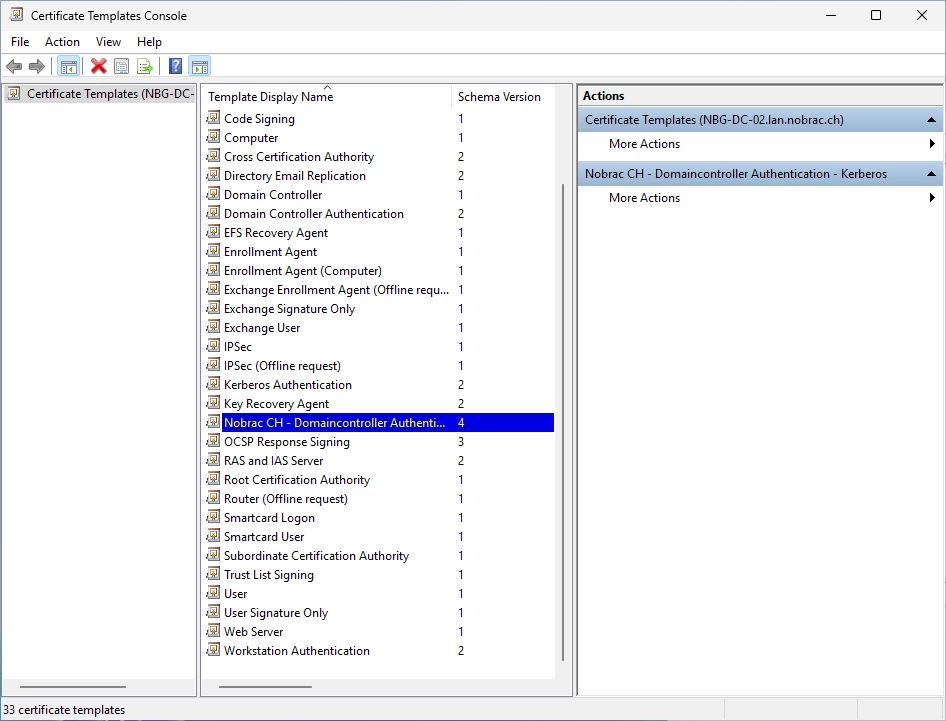
Do a right-click on the Certificate Template folder and select “New” -> “Certificate Template to Issue”.

Select the newly created template.

It should look like this.
Open the Group Policy Management on your Management host or Domaincontroller. Do a right-click on “Group Policy Objects” and select “New”.
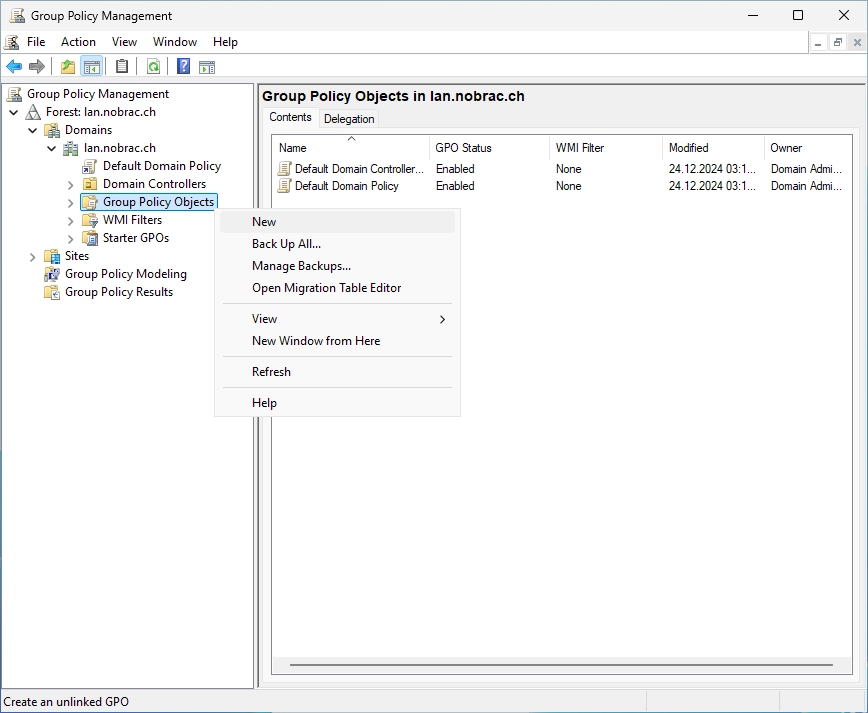
Choose a name for the GPO. I chose “C_Domaincontroller_Auto_Certificate_Enrollment”.

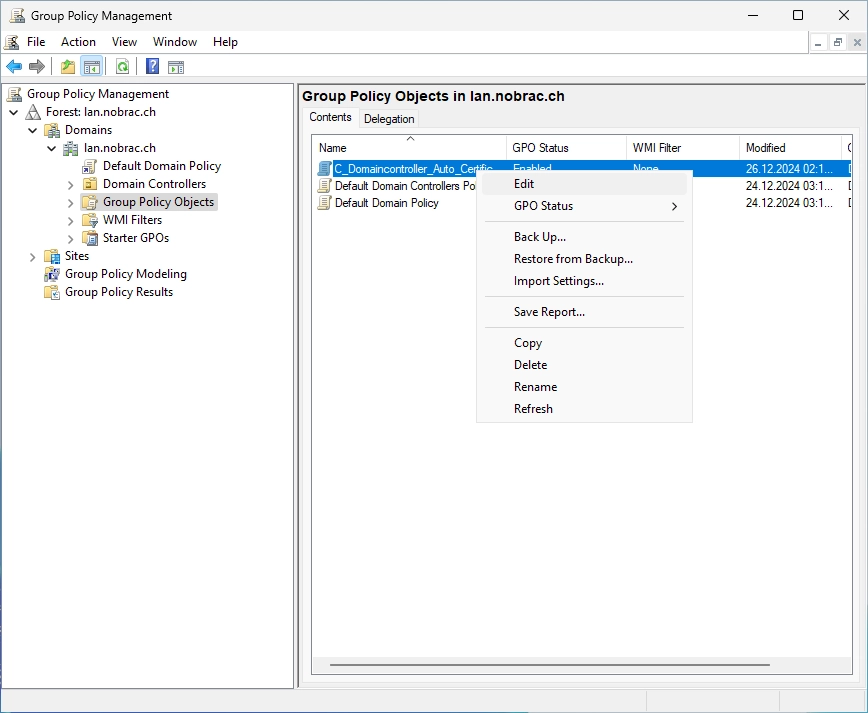
Do a right-click on the newly created GPO and select “Edit”.
Navigate to the following path:
Computer Configuration -> Policies -> Windows Settings -> Security Settings -> Public Key Policies

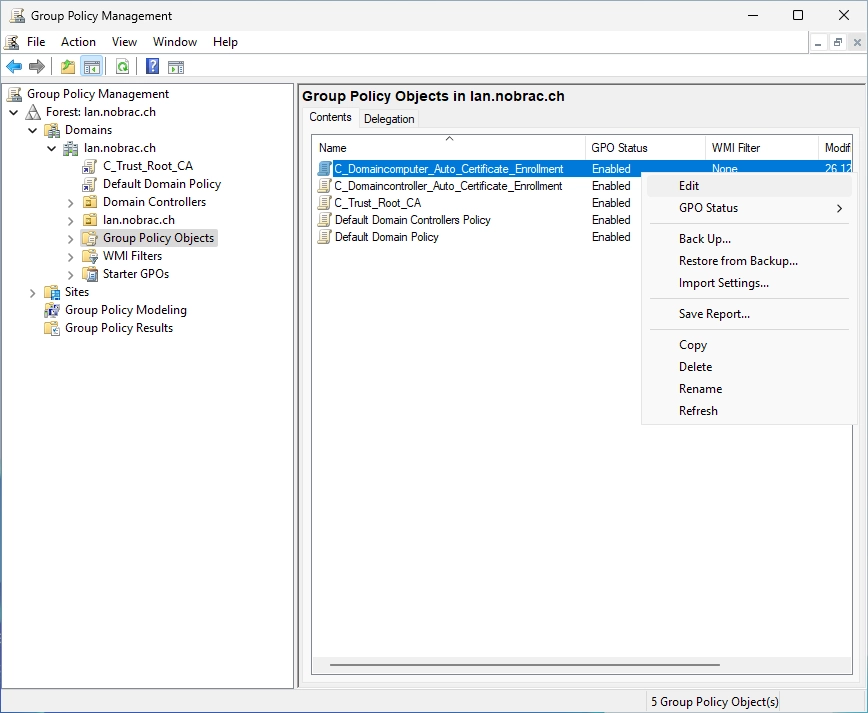
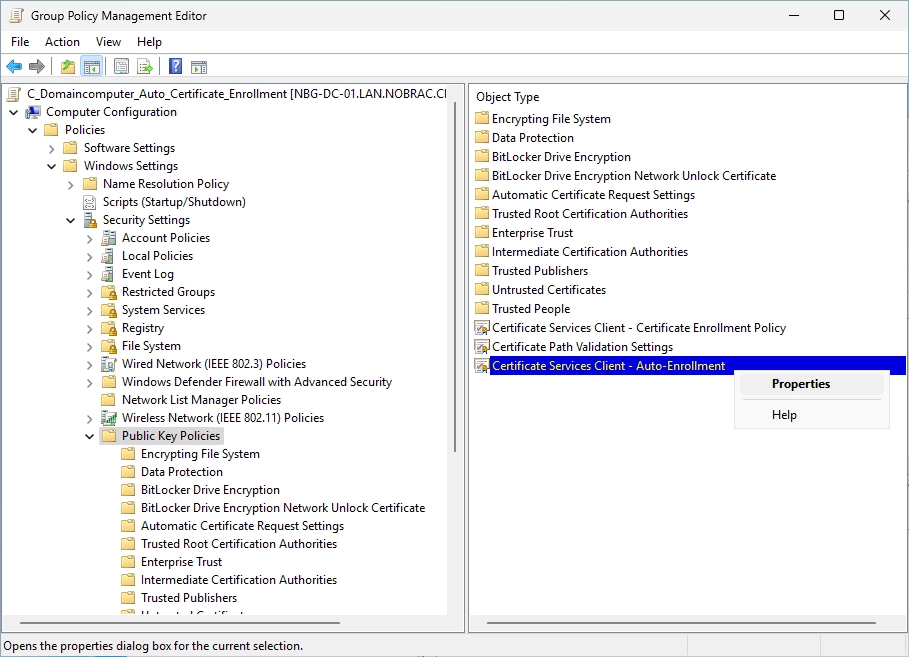
On the right side, do a right-click on the “Certificate Services Client - Auto-Enrollment” object and select “Properties”.

The following window opens.

Enable the policy and configure the options like on the screenshot. The GPO configuration is complete.

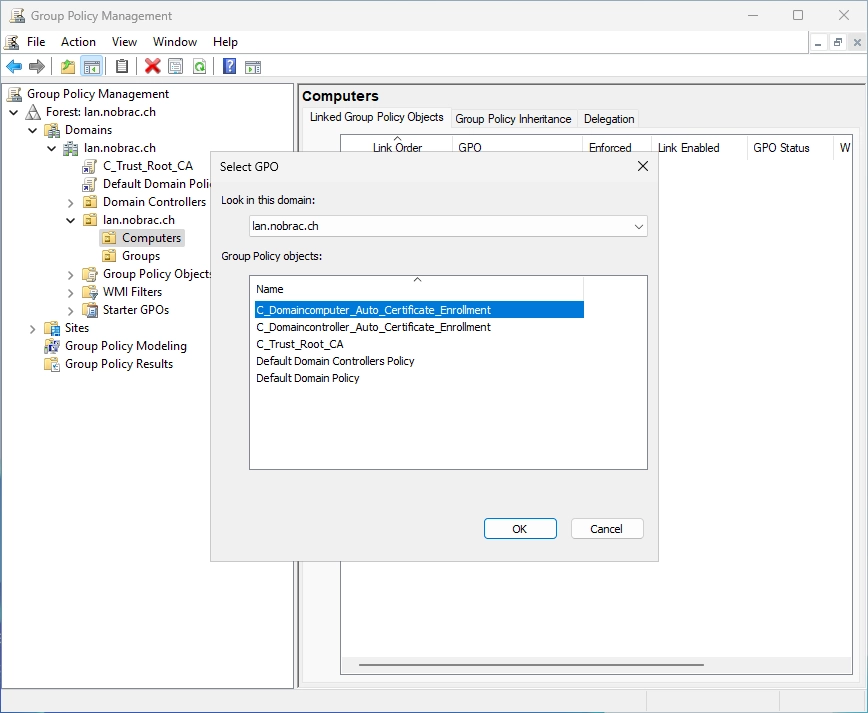
At the Group Policy Management, do a right-click on the “Domain Controllers” OU and select “Link an Existing GPO…”.
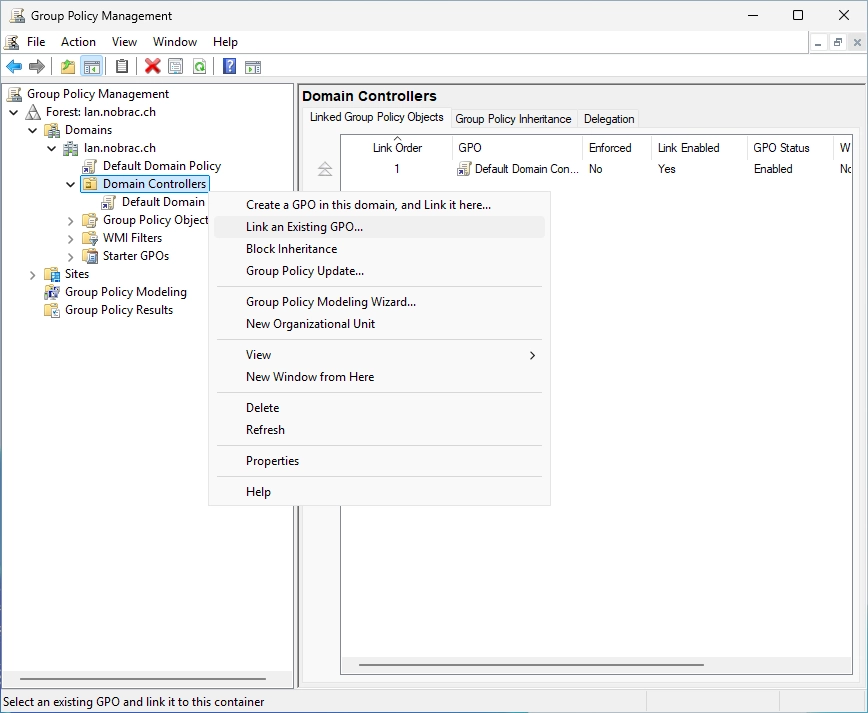
Select the newly created GPO.

It should look like this in the end.

After that, update the GPO with the following command on the Domaincontroller:
|
|

Reboot your Domaincontroller now.
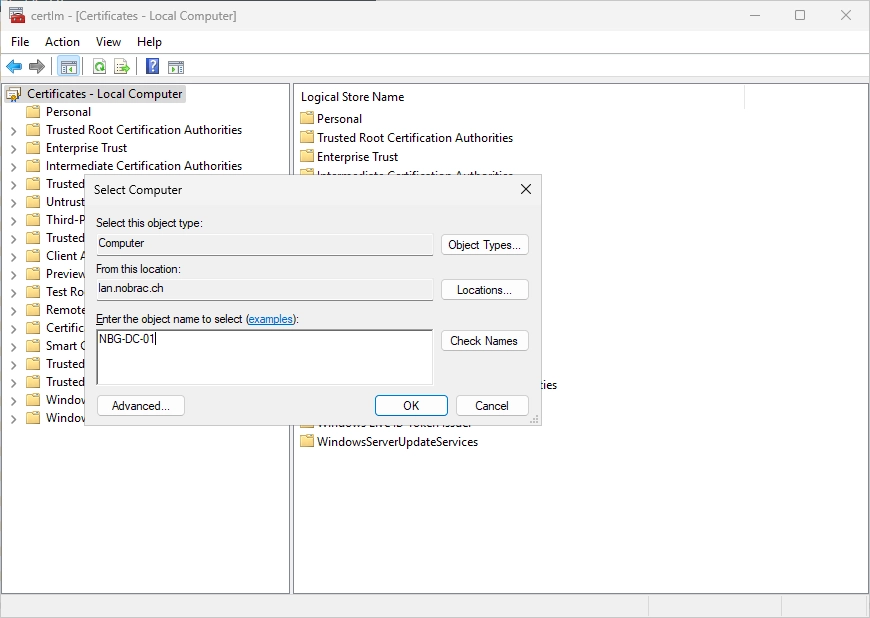
Open “certlm.msc” (Certificates - Local Computer) and right-click on “Certificates - Local Computer” and select “Connect to another computer…”.

Enter the hostname of your Domaincontroller.
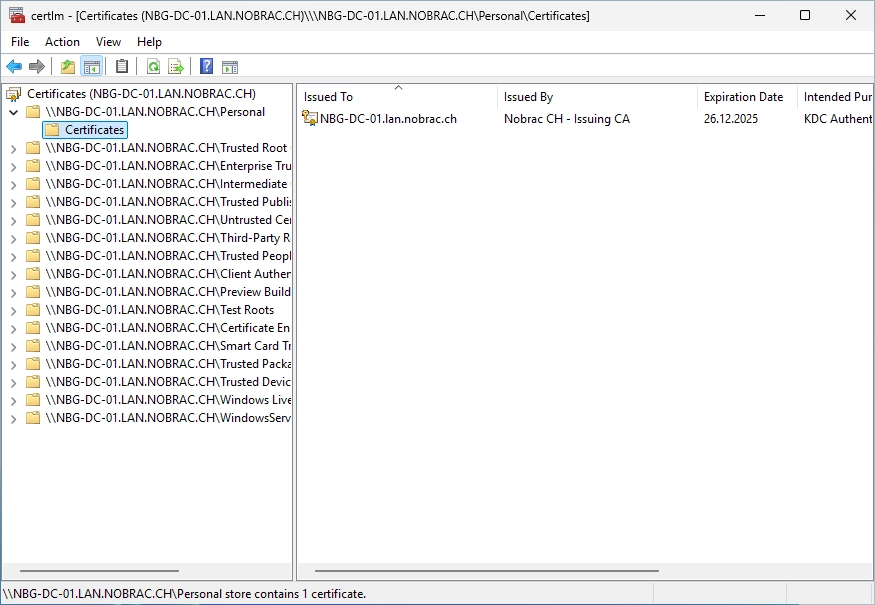
Navigate to the “Personal” -> “Certificates” folder. There should be a new certificate. Everything worked.
Create new template (Remote Desktop Authentication)
Open the Certificate Authority on the Sub CA and do a right-click on the Certificate Templates folder and select “Manage”.
Search the “Web Server” certificate template and do a right-click on it and select “Duplicate Template”.

You should see the following window.
Change the compatibility settings for both options (Certification Authority and Certificate recipient) to Windows Server 2016.
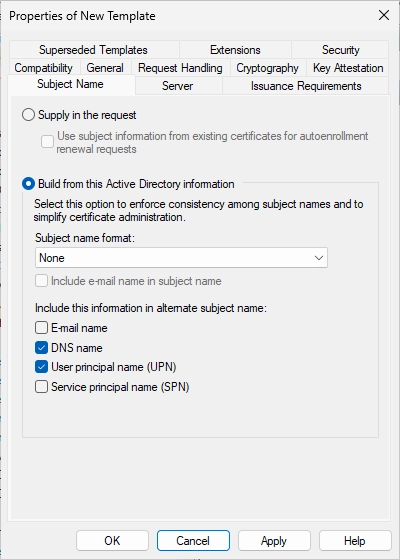
Switch to the “Subject Name” tab.
Change the settings accordingly.
Select “Build from this Active Directory information” and make sure that the boxes “DNS name” and “User principal name (UPN)” are checked.
Switch to the “Extensions” tab. Make sure that “Application Policies” is selected and click on “Edit…”.
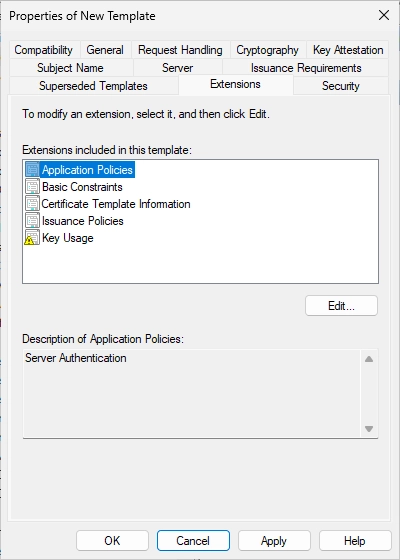
You should see the following window. Click on “Add…”.

You should see the following window. Click on “New…”.

You should see the following window.

For the name, enter “Remote Desktop Authentication” and for the object identifier, enter “1.3.6.1.4.1.311.54.1.2”.

Select the newly created application policy “Remote Desktop Authentication”.

Two application policies should be selected. Click on “OK” on this window.

Switch to the “Cryptography” tab.
Change the settings like on the screenshot.
Switch to the “General” tab. It should look like this.
Change the name accordingly and change the validity period to 1 year.

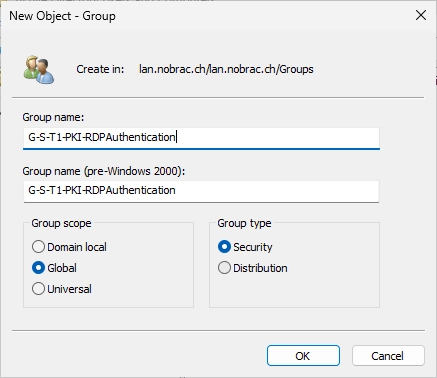
Create a new security group in your Active Directory.
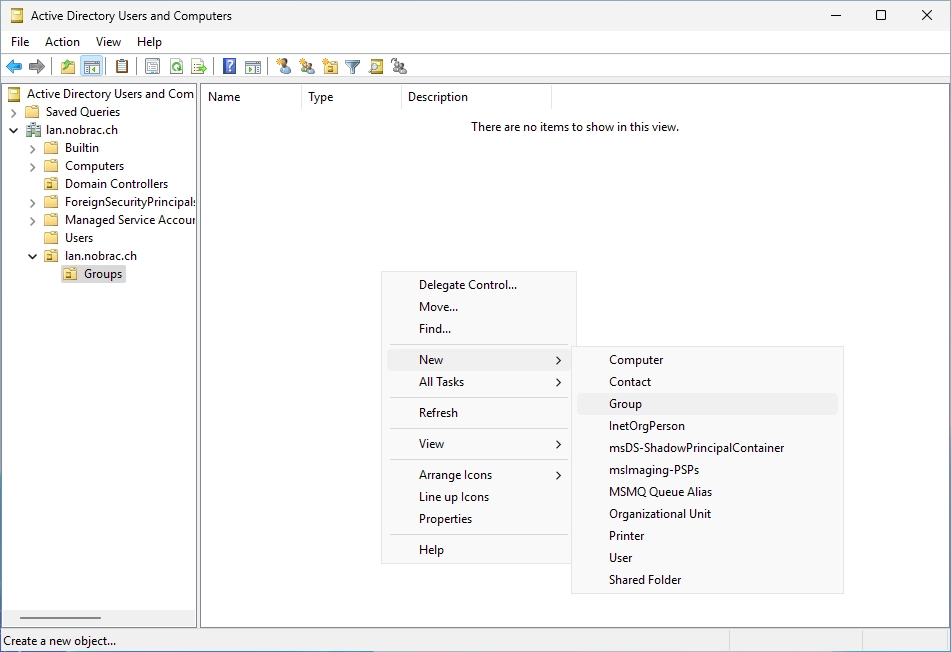
Give the new group a fitting name.
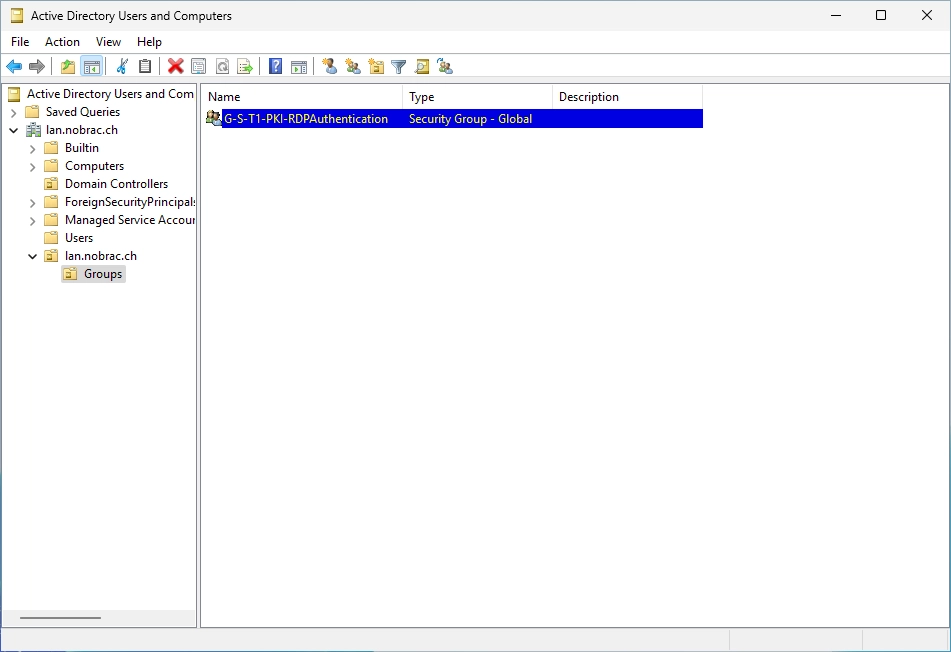
You should see your new group in the Active Directory.
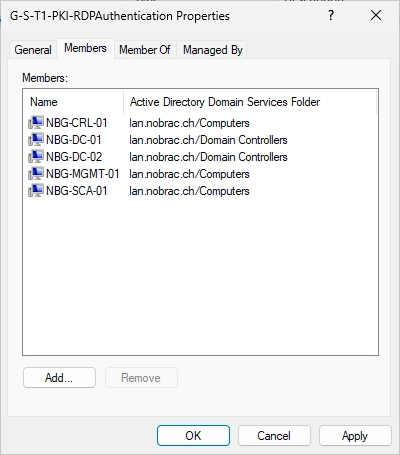
Add all the computers/servers that should get a certificate to the new group.
At the window for the new template, switch to the “Security” tab.
Click on “Add…” and search your group.
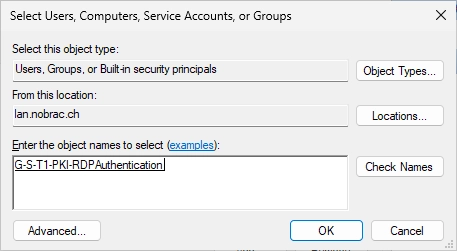
Make sure that the permissions “Enroll” and “Autoenroll” are additionally selected for the group. You can click on “OK” after that.

You should see your newly created template in the overview.
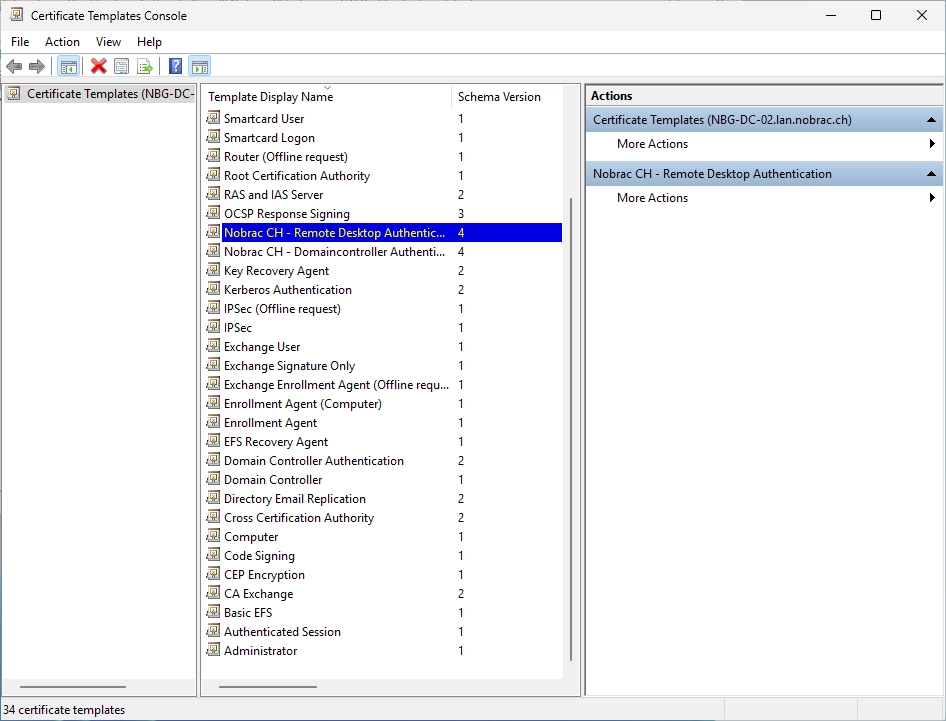
On the Sub CA, do a right-click on the “Certificate Templates” folder and select “New”.
Select the new template.

You should see your new template in the overview.

Open the Group Policy Management on your Management host or Domaincontroller and do a right-click on “Group Policy Objects” and select “New” to create a new GPO.

Choose a good name for it.

After that, do a right-click on the new GPO and select “Edit”.
Navigate to the following path:
Computer Configuration -> Policies -> Windows Settings -> Security Settings -> Public Key Policies

Do a right-click on the “Certificate Services Client - Auto-Enrollment” option and select “Properties”.
You should see the following window.
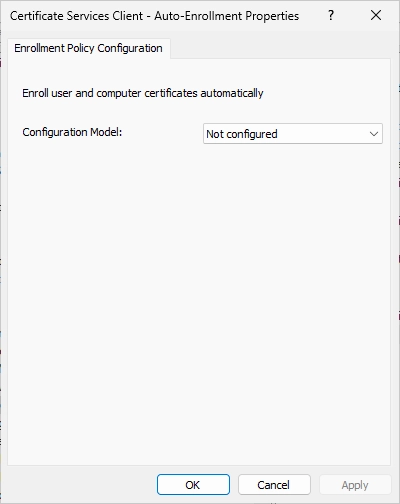
Change the configuration model to enabled and click “OK”.

Now navigate to the following path:
Computer Configuration -> Policies -> Administrative Templates -> Windows Components -> Remote Desktop Services -> Remote Desktop Session Host -> Security

Do a right-click on the “Server authentication certificate template” and select “Edit”.

You should see the following screen.

Enable it and enter the name of the template for the RDP certificates (make sure you use the template name, not the template display name!).

Link the GPO to the OU of your choice. In my example it’s the “Computers” OU. Do a right-click on the OU and select “Link an Existing GPO…”.

Select the GPO.
Do a “gpupdate /force” on a target machine.

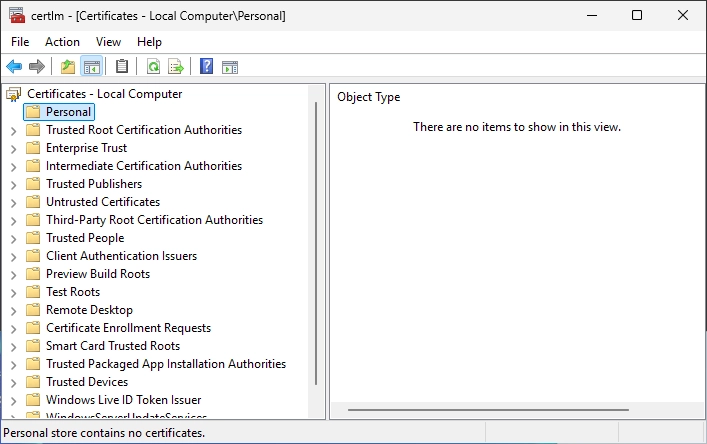
If we check the “Personal” certificates folder on the local machine we can’t find a certificate right now.
Reboot the target server now.
There should be our new RDP certificate in the “Personal” folder after the reboot.

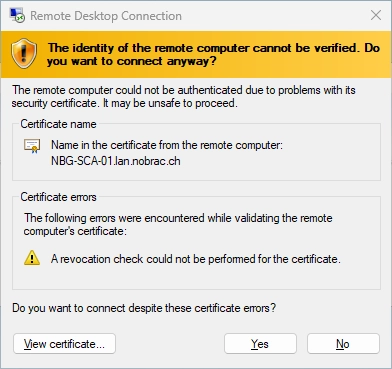
The only warning that may now appear is that no revocation check could be carried out for the certificate. This is because RDP does not support CRL checking. As soon as the OCSP check has been set up, this warning disappears.
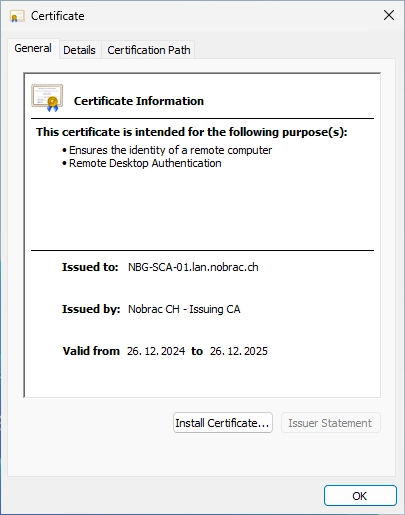
We can also check the issued certificate. Everything looks good.
Configure new template (VCSA / vCenter)
I have written about this topic in a separate blog article. You can find the blog article here: Click Me
Configure Online Certificate Status Protocol (OCSP)
Initial configuration
Go back to your CRL IIS server.
Open the Server Manager and select “Add Roles and Features”.
Just click on next.
Select “Role-based or feature-based installation”.

Make sure that the correct server for the CRL IIS is selected.
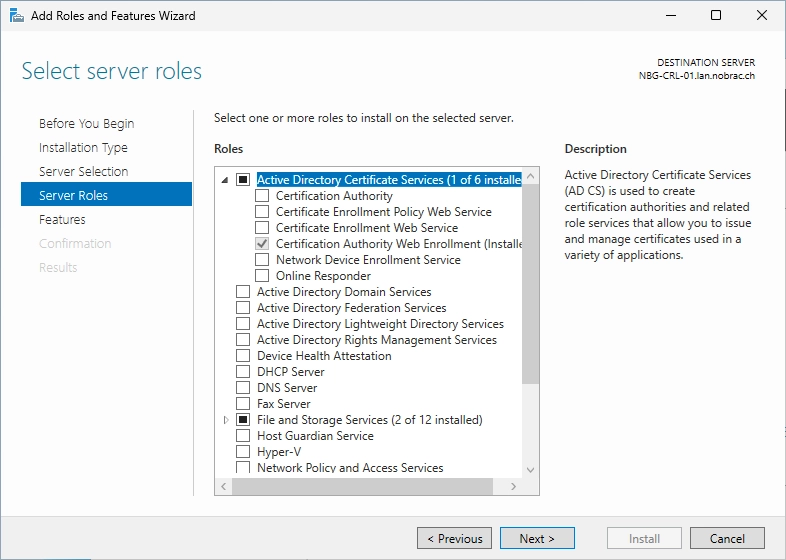
Expand the drop down menu for the “Active Directory Certificate Services” and select the “Online Responder” service.
Confirm the required features.

It should look like this now.

We don’t need additional features so just click next here.

Confirm the information.

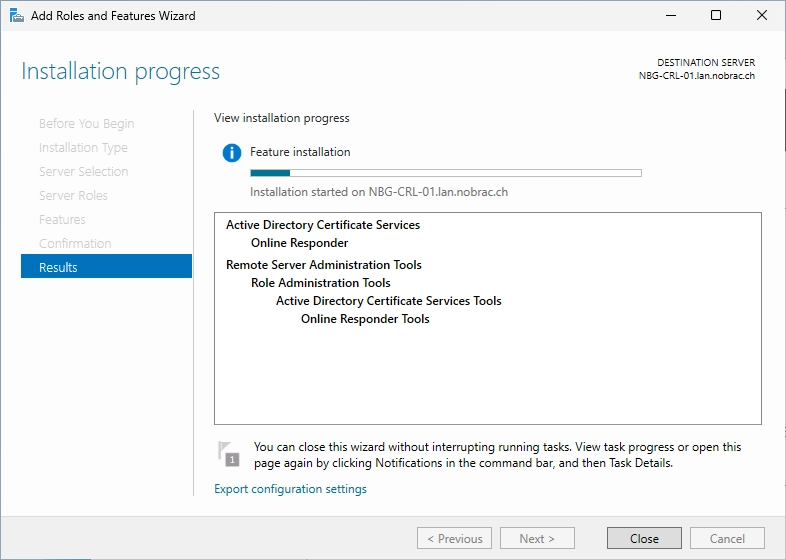
Wait till the installation is finished.
You should now see a yellow flag in the top right of your Server Manager.
Click on the flag and then click on “Configure Active Directory Certificate Services…”.
Use the Domainadministrator account and click on next.

You should see the following window.

Select the “Online Responder” service.

Confirm the information and click on “Configure”.

Wait until the configuration is finished.

Configure OCSP URL on Sub CA
We now configure the OCSP URL on the Sub CA server. Open the Certificate Authority on the Sub CA server.

Right-click on the Issuing CA and select “Properties”.
You should now see the following window.

Navigate to the “Extensions” tab.
Select “Authority Information Access (AIA) in the drop down menu and click on “Add…”.
Enter the same URL that you used for the CRL in the beginning of the guide and just add the “/ocsp” path and click “OK”.
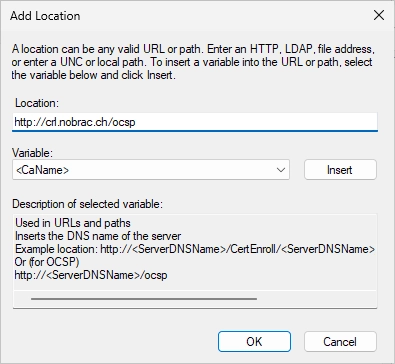
Make sure that the box “Include in the online certificate status protocol (OCSP) extension” is selected. It should look like this now. You can click on “OK”.

Accept the service restart.

On the Sub CA, right-click the Certificate Templates folder and click on “Manage”.
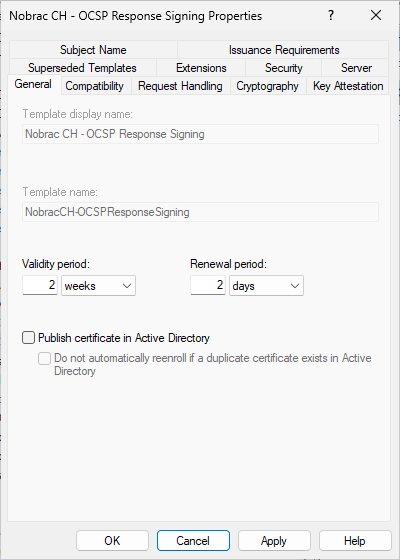
Search the “OCSP Response Signing” certificate template.

Right-click the template and select “Duplicate Template”.

You should now see the following window.

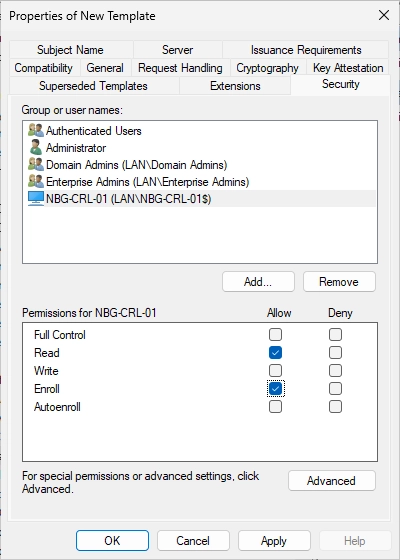
Navigate to the “Security” tab and click on “Add…”.

Click on “Object Types…”.
And add “Computers” to the selection.

Now search/add the CRL IIS server.

Make sure that the “Enroll” permission is selected for the CRL IIS server.
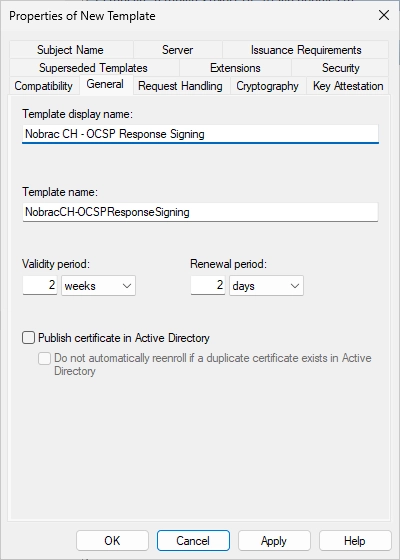
Navigate to the “General” tab.

Change the name. Like before, I add “Nobrac CH” at the beginning of the name for easy filtering.
Click then on “OK”.
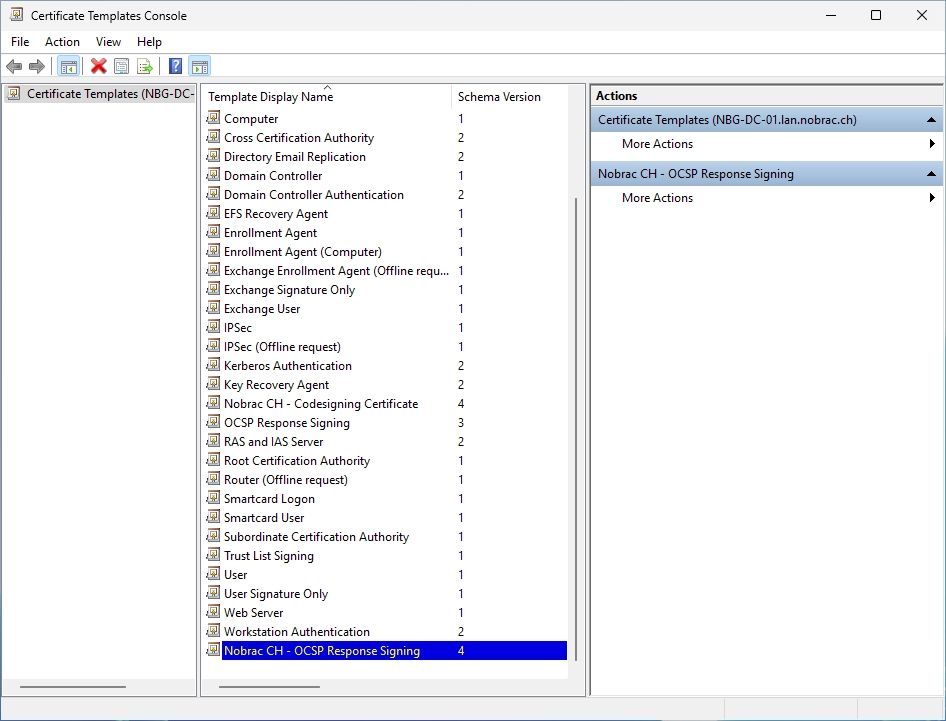
You should now see the new certificate template.
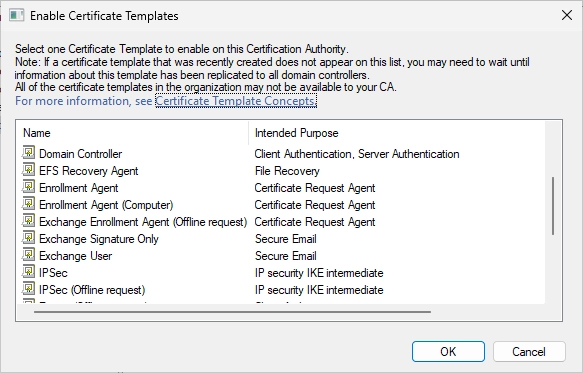
Right-click on the “Certificate Template” folder and select “New” -> “Certificate Template to Issue”.
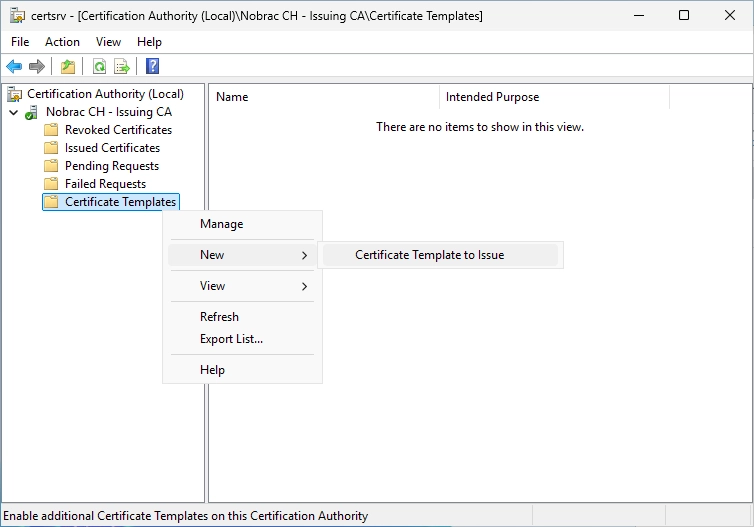
If the new template can be selected here, simply select it and click on “OK”.
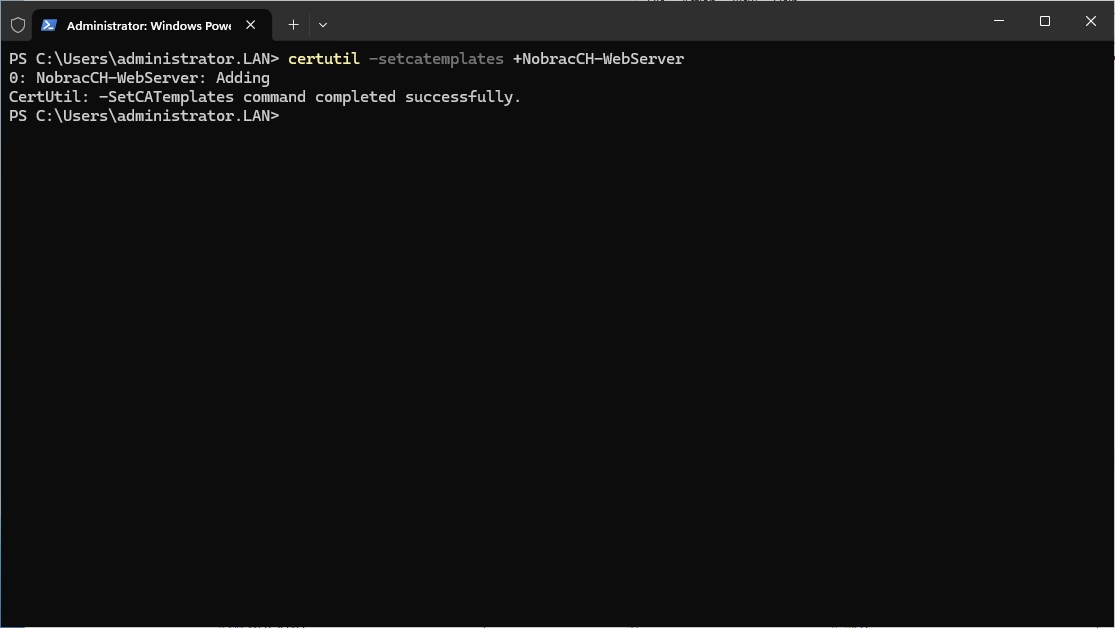
However, it can sometimes happen that the OCSP template cannot be selected here. In this case you have to publish the template via the CLI.
Open an administrative Powershell on the Sub CA.
Enter the following command to publish the new template:
|
|

In the command, the “Template name” must be selected for the certificate template and not the display name.
We should then see the new template.

Configure OCSP service
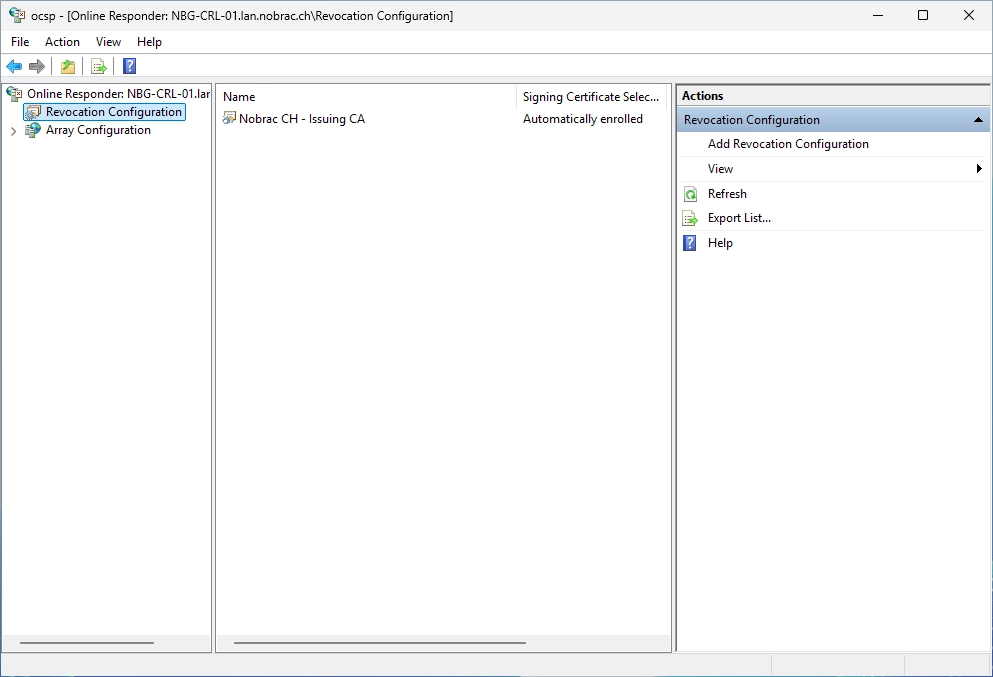
On the CRL IIS server, open the “Online Responder Configuration”.

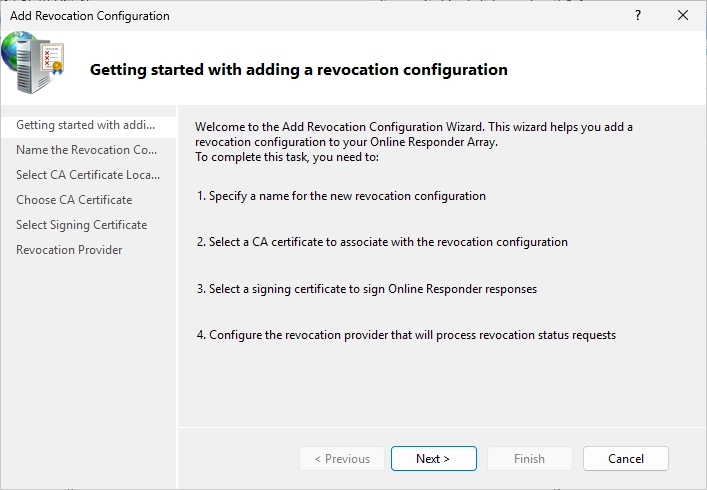
Do a right-click on the “Revocation Configuration” option and select “Add Revocation Configuration”.

Click on next.
Choose a name.

I chose “Nobrac CH - Issuing CA” cause the revocation configuration is for the Issuing CA.

Make sure the option “Select a certificate for an Existing enterprise CA”.

Make sure the option “Browse CA certificates published in Active Directory” and click on “Browse…”.
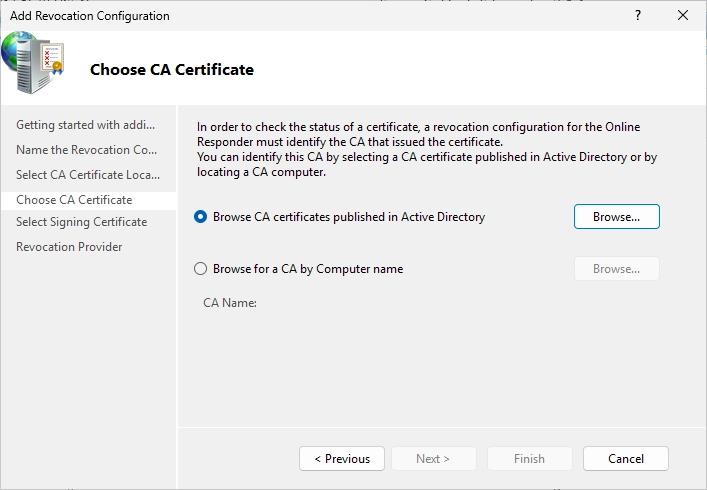
Select the Issuing CA.
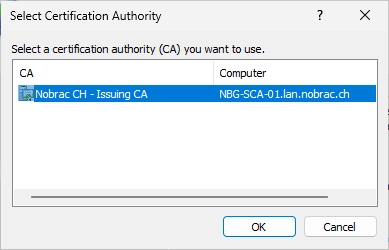
It should look like this.

Check that the settings are as shown in the screenshot.
The new certificate template that we created previously should already be selected automatically as the certificate template.
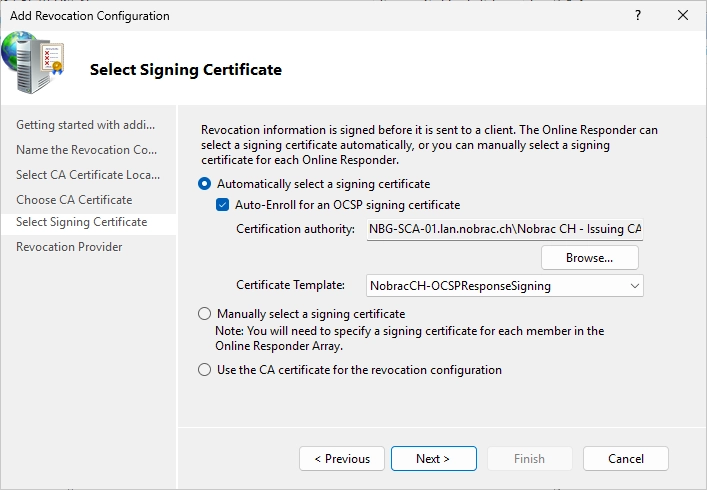
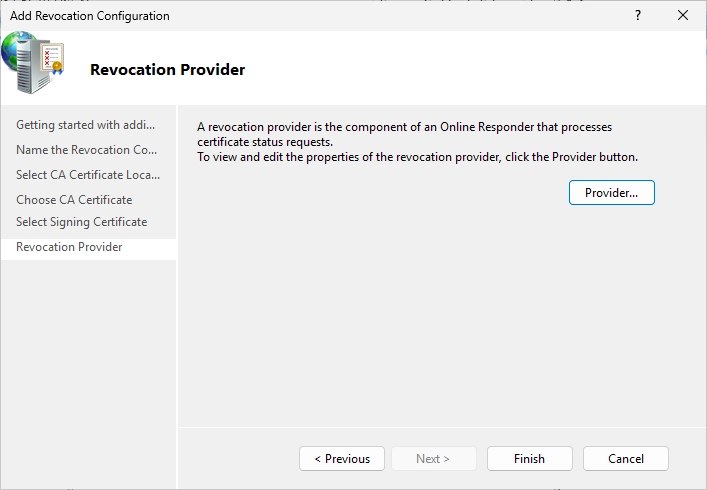
In the next window, click on “Provider…”.
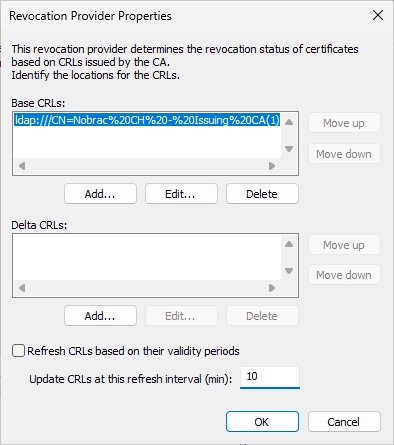
Uncheck “Update CRLs based on their validity periods” and change the update interval to 10 minutes.
Click on “Finish”.

We should now see the new configuration in the overview.
Open the drop down menu at the “Array Configuration” and then select the Issuing CA. The status at the bottom should now say “Signing Certificate: Ok”.
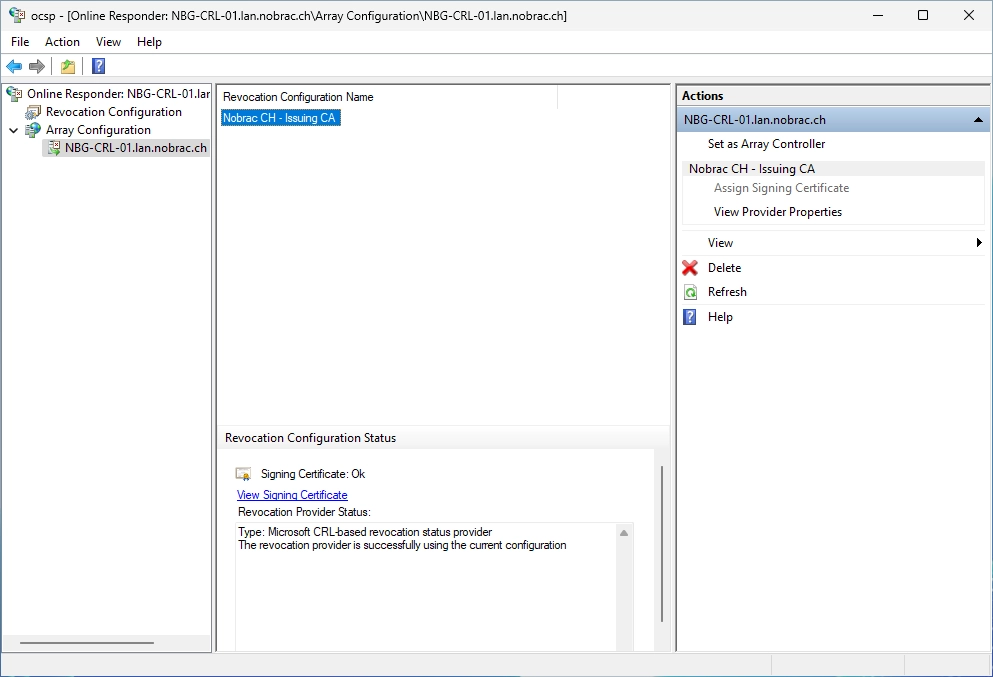
You can also click on “Online Responder” at the top of the navigation bar. The Issuing CA should then also be displayed here with “Working” and a green tick.

Edit GPO
We need to export the Issuing CA certificate.
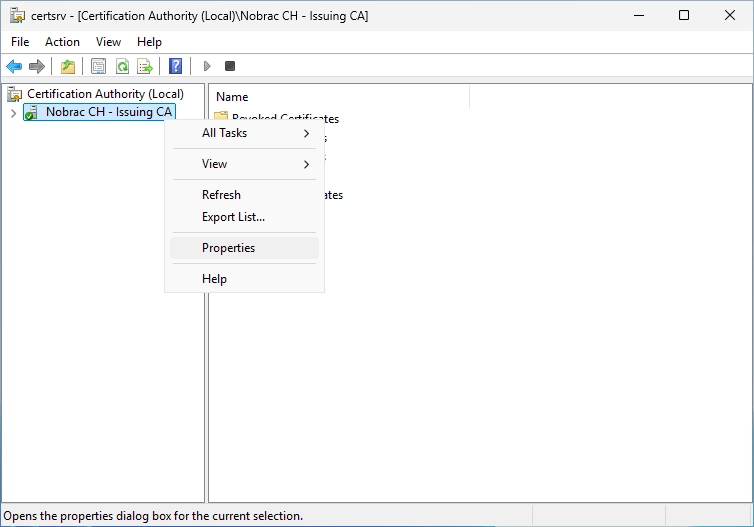
Open the Certificate Authority on the Sub CA server and do a right-click on the Issuing CA and select “Properties…”.
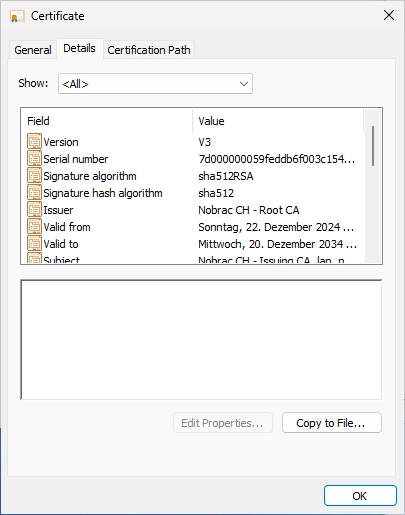
Select the certificate. You probably only have “Certificate #0”.
Click on “View Certificate”.
You should now see this window.

Switch to the “Details” tab and click on “Copy to File…”.
Click on next.

Select the “DER encoded” option.

Click on “Browse…”.

Specify a name. I save the file directly in C:.

Click on next.

Confirm the information and click on “Finish”.

Confirm the export.

Open the Group Policy Management console on your Management host or DC.

Search for the GPO that we created earlier in this guide (C_Trust_Root_CA in my case). Do a right-click on it and select “Edit…”.
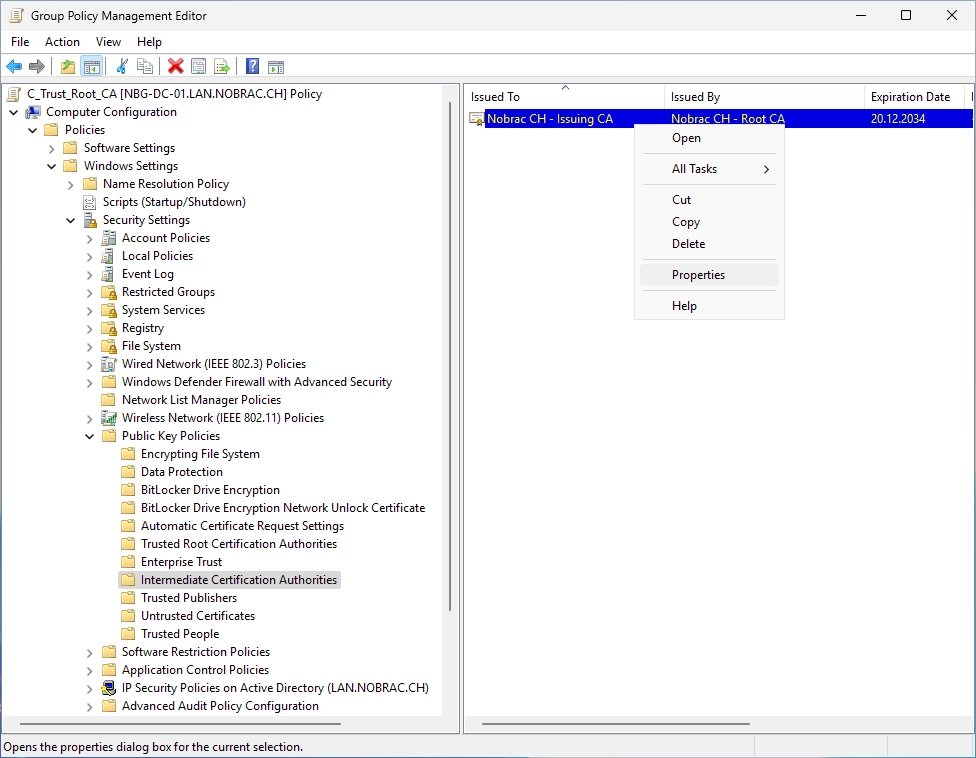
Navigate to the following path: Computer Configuration -> Policies -> Windows Settings -> Security Settings -> Public Key Policies -> Intermediate Certification Authorities

Copy the Issuing CA certificate from the Sub CA to your Management host or DC (I used the c$ share again).
The 10.101.191.10 host is my Management host.

Do a right-click on the empty field on the right side and select “Import…”.
Click on next.
Click on “Browse…”.
Select the Issuing CA certificate.

It should look like this.
Make sure that the certificate store is “Intermediate Certification Authorities”.

Confirm the information and click on “Finish”.

The import was successful.
You should now see the imported Issuing CA on the right side (you probably need to refresh the menu).

Do a right-click on the imported Issuing CA certificate and select “Properties”.
You should now see the following window.

Navigate to the “OCSP” tab.

Enter the OCSP URL and click on “Add URL”.

It should look like this.

Now click on “OK”. The OCSP configuration is complete.
Configure Certificate Web Enrollment
Request certificate
We will now request our first certificate. Do this on your CRL IIS server cause we will need this certificate on this server.
Open the computer certificate management.
You should then see the following window.

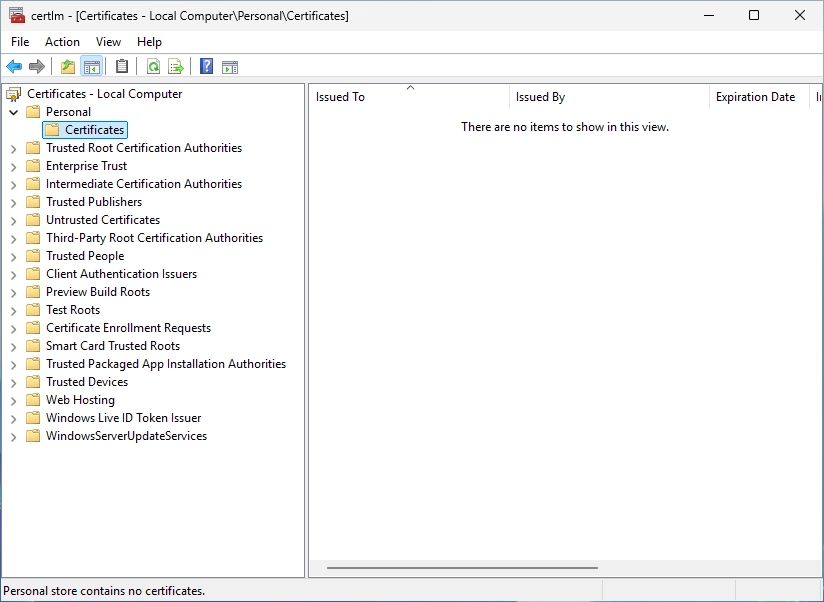
Move to the “Personal” -> “Certificates” folder.
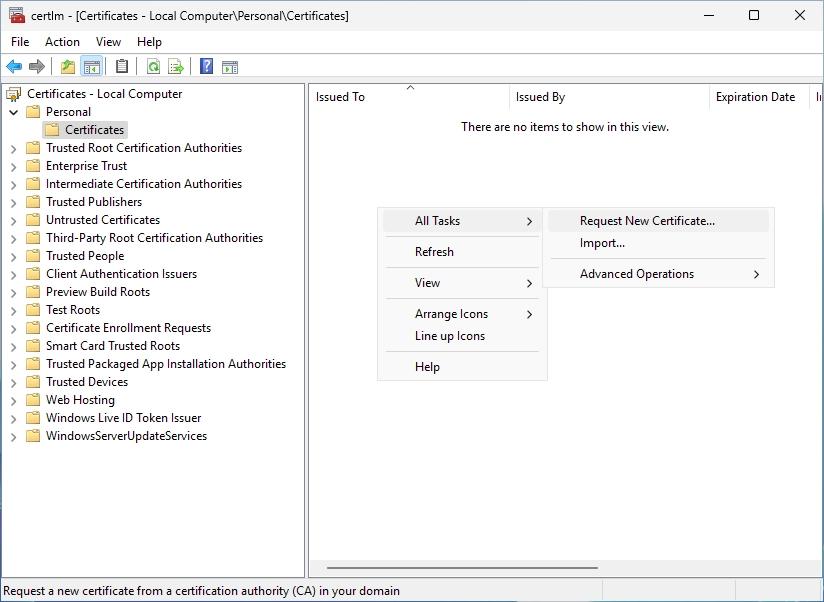
Do a right-click on the right side on the empty field and select “All Tasks” -> “Request New Certificate…”.
Click on next.
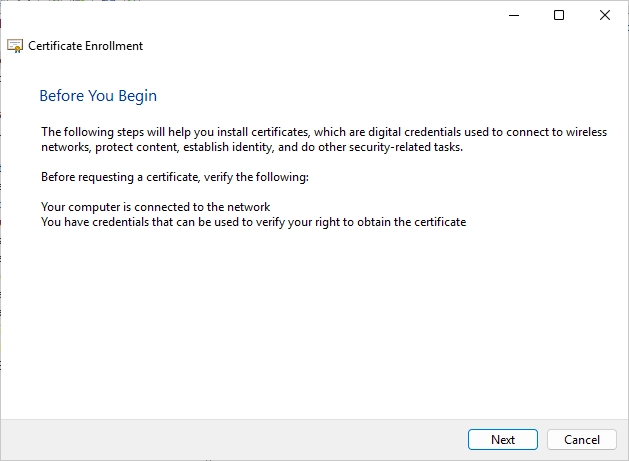
Click on next.
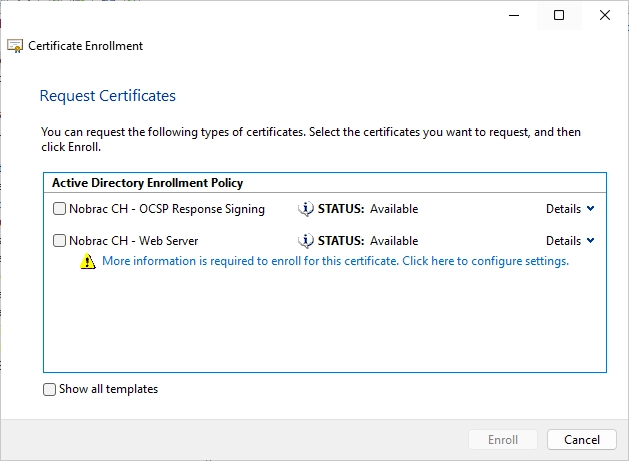
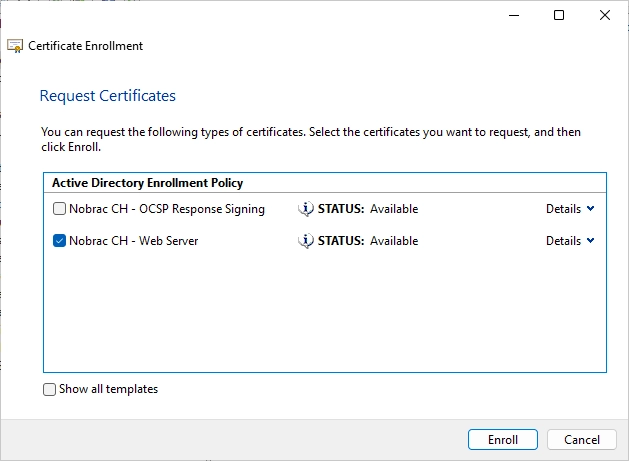
Here you should see your template for the Web Server. Click on the warning that says “More information is required to enroll…”.
Now we can configure the certificate.
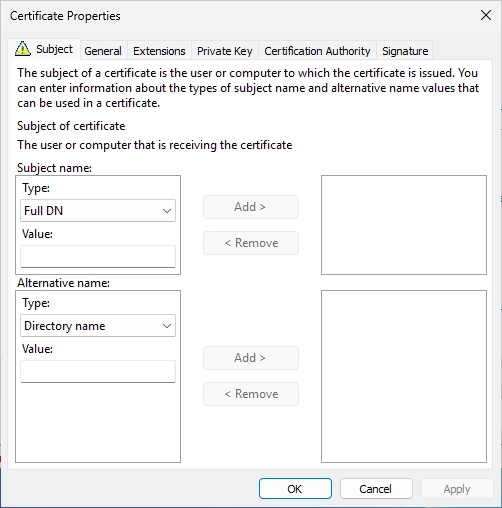
Select “Common name” at the subject name drop down menu and enter your domain that you use as the CRL URL.

Click on “Add >”.

Now do this again for the hostname of the server (nbg-crl-01 in my case) and again with the FQDN of the server (nbg-crl-01.lan.nobrac.ch in my case).
It should look like this.
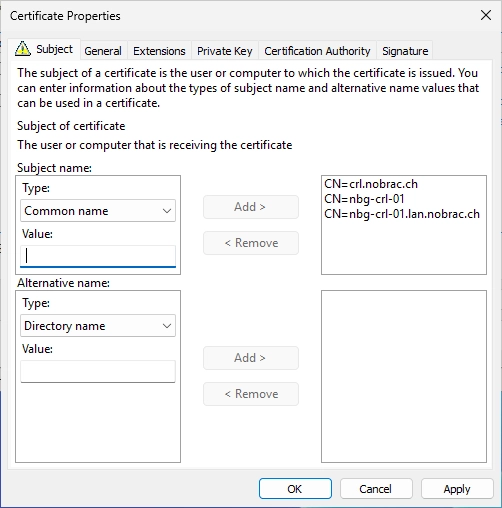
Now we need to do the same thing for the alternative name option cause otherwise our certificates will not be trusted. Select “DNS” as type and repeat it with all addresses.

In the end it should look like this.

The warning should be gone now.

Select the Web Server certificate and click on “Enroll”.
The enrollment was successful.
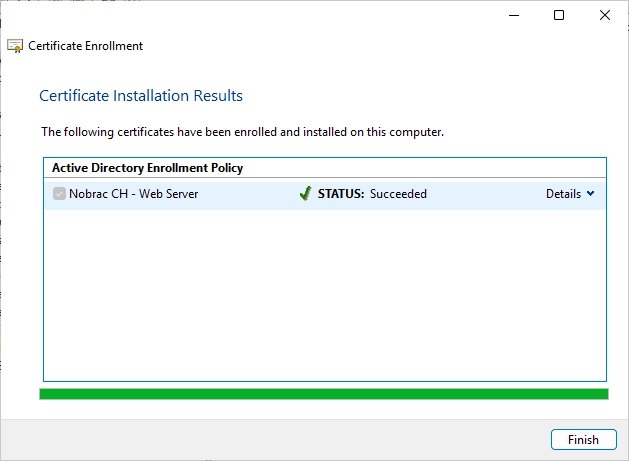
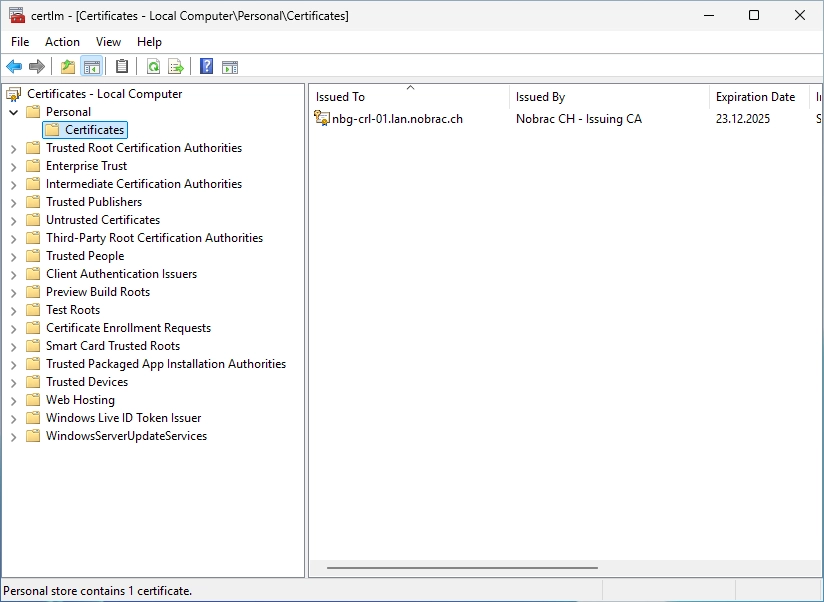
You should now see the requested certificate in the personal certificates folder.
Bind certificate to IIS
Now open the IIS Manager on the CRL IIS server. Then, click on the “Default Web Site” site on the left side. After that, click on “Bindings…” on the right side.

We only have a binding for HTTP at the moment.

Click on “Add…”. Take the same settings like in the screenshot but change the “Host name” field with your CRL URL. You should now be able to select the previously issued certificate from the SSL certificates drop-down menu.
Click on “OK”.
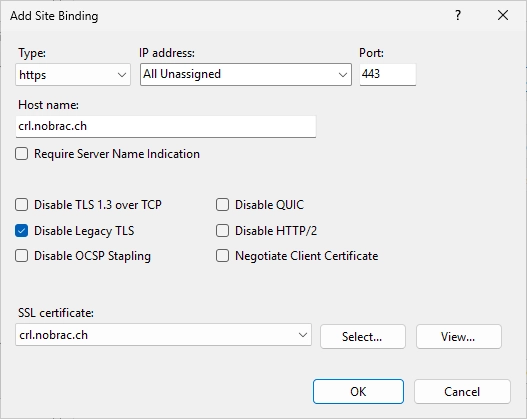
It should look like this.

Click on “Add…” again and do the same for the FQDN of your CRL IIS server and click on “OK”.

It should look like this in the end.

Test the access
Now open your browser and open the following URL:
|
|
My URL for example:
|
|
A login prompt should appear. You can login with your Domainadministrator.
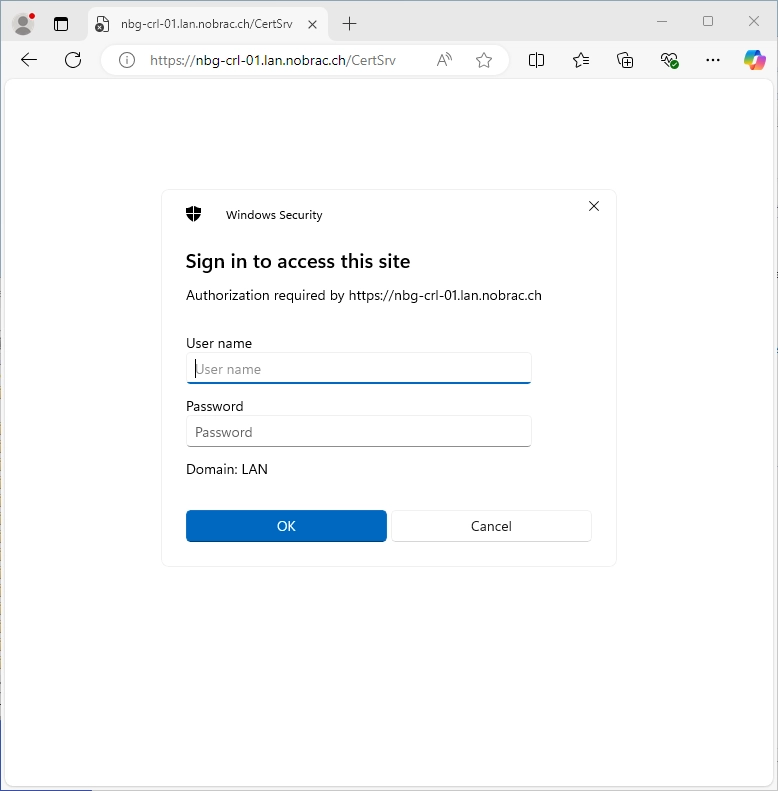
We were able to log in successfully.
Warning: Theoretically, we can now also issue certificates and/or submit CSRs via this website. However, this method is insecure and no longer really supported by Microsoft. However, I still wanted to show it in this guide, as it is still used in many companies.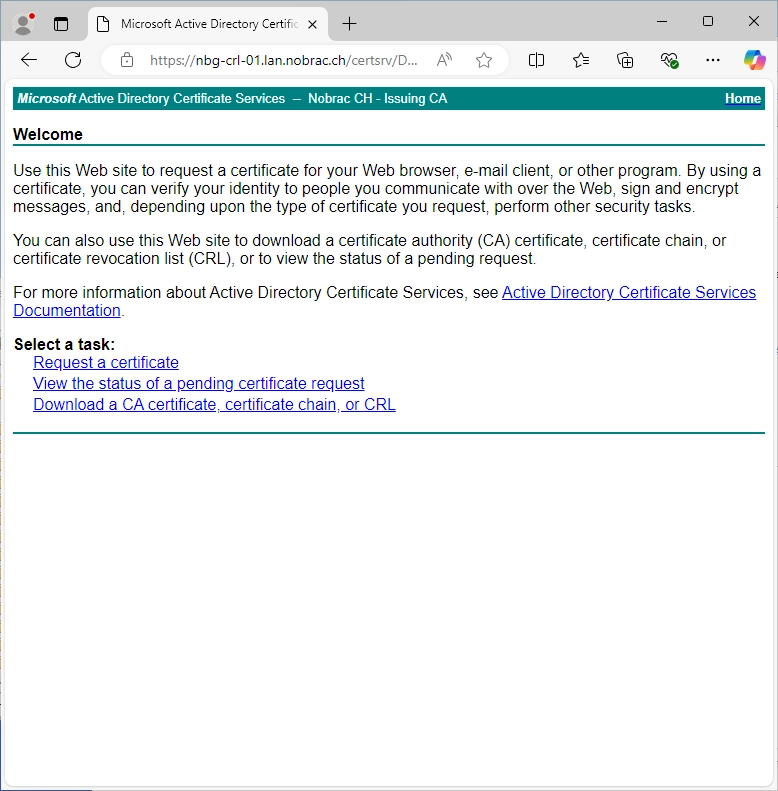
We can also see that our certificate is trusted. We get no warning and we can also check the certificate in the browser.

General certificate information.

We can see the certificate hierarchy too.

That’s it for the “CertSrv” configuration.
Enable Auditing
Configure Local Security Policy
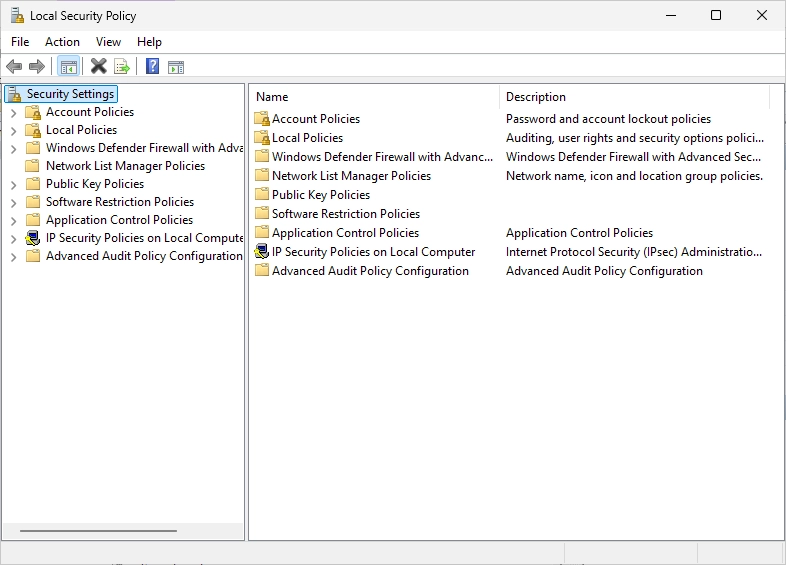
On the Sub CA server, open the “Local Security Policy”.

Navigate to the following path:
Security Settings -> Local Policies -> Audit Policy

Select the “Audit object access” policy on the right side.

You should see the following window.
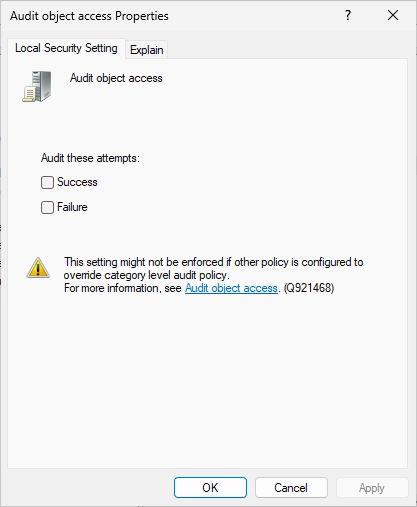
Tick both boxes (Success and Failure).

It should look like this afterwards.

Enable CA Auditing
Open administrative CMD and enter the following command to set a registry entry to enable the CA auditing:
|
|
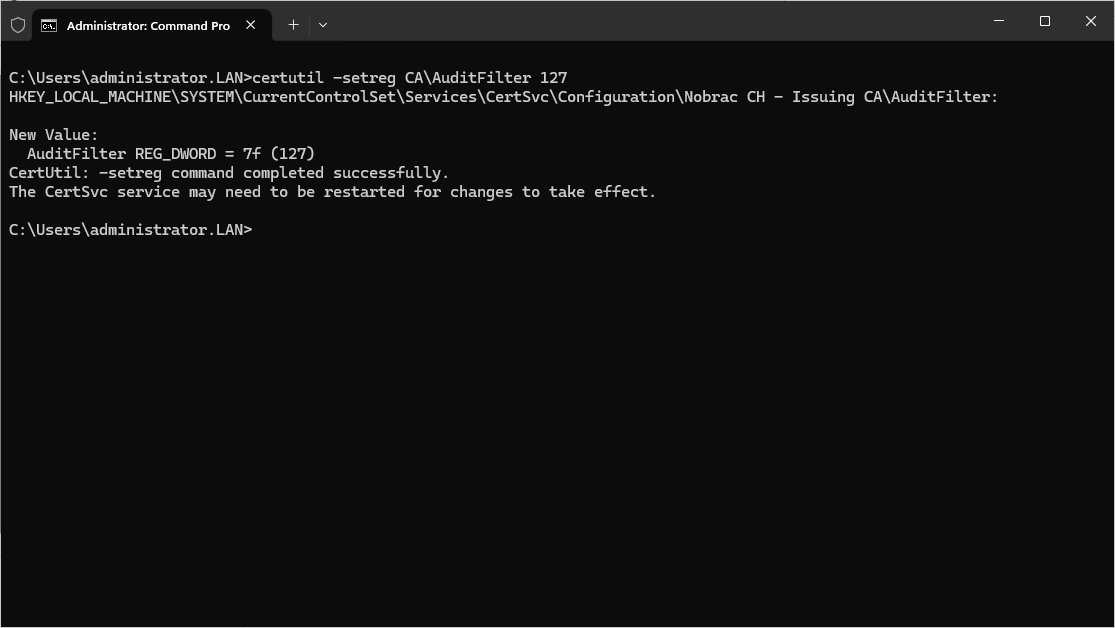
You may be wondering why the number “127” is used. Here is a short explanation:
The CA audit filter is a bitmask value representing the seven different audit categories that can be enabled. If all values are enabled, the audit filter will have a value of 127 (we monitor everything possible).
| Value (Decimal) | Setting |
|---|---|
| 1 | Start and stop Active Directory® Certificate Services |
| 2 | Back up and restore the CA database |
| 4 | Issue and manage certificate requests |
| 8 | Revoke certificates and publish CRLs |
| 16 | Change CA security settings |
| 32 | Store and retrieve archived keys |
| 64 | Change CA configuration |
Restart the CA service afterwards.
Stop it:
|
|
Start it:
|
|
Automate copy CRLs
On the Sub CA, open the Certification Authority and do a right-click on the “Revoked Certificates” and select “Properties…”.

You should see the following window.

Untick the box “Publish Delta CRLs”.

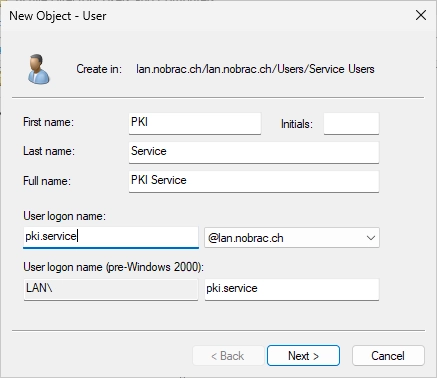
Create a new User in your Active Directory.

Enter name and logon name.
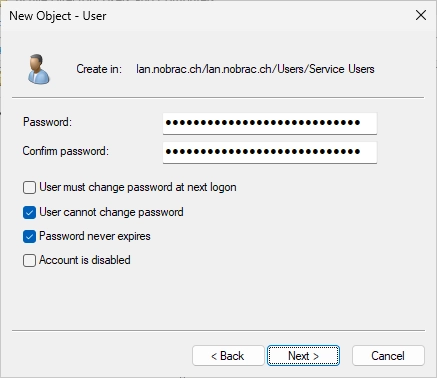
Enter a strong password.
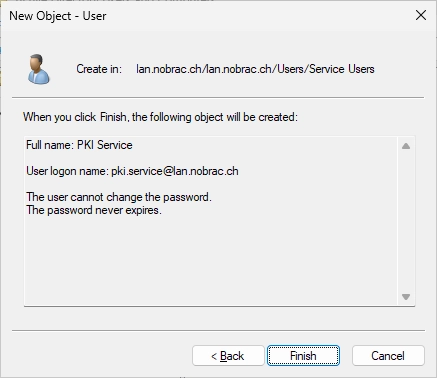
Finish the creation.
You should see your new User in the Active Directory.

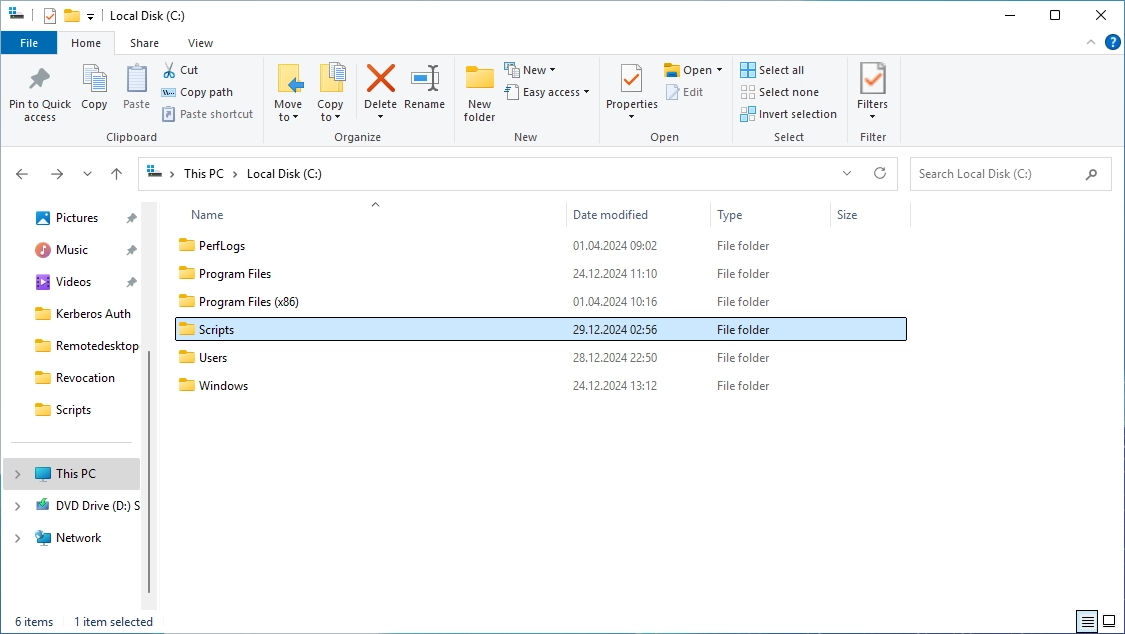
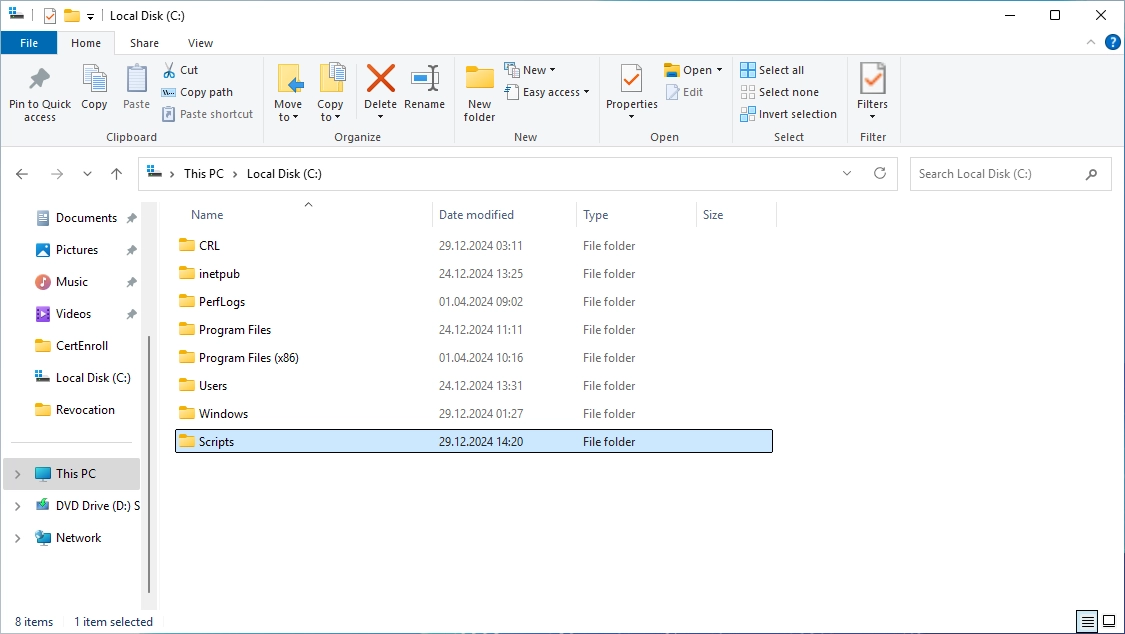
Back on the Sub CA, create a new folder with the name “Scripts” in the C:\ directory.
Create a BAT-File and give it a good name. I chose “copy_crl.bat” in my lab.

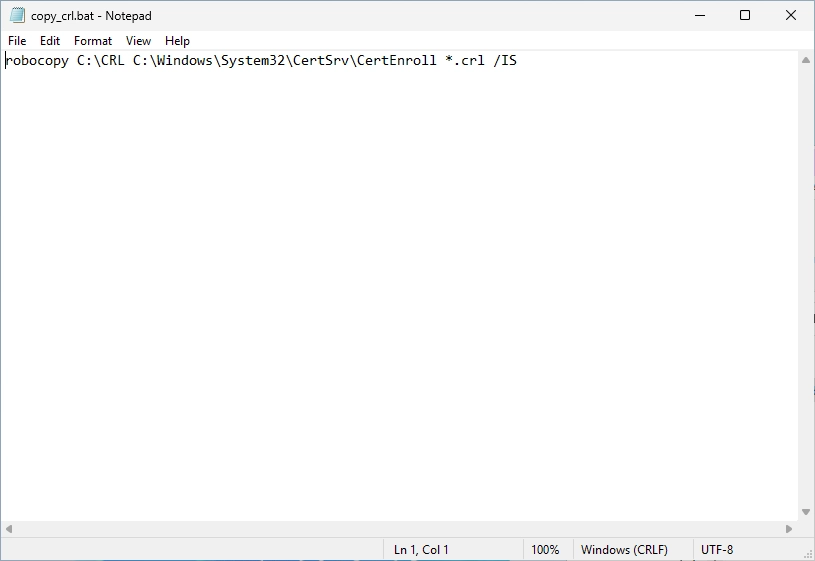
Enter the following Robocopy command:
|
|
For my lab it’s the following command:
|
|
It should look like this:

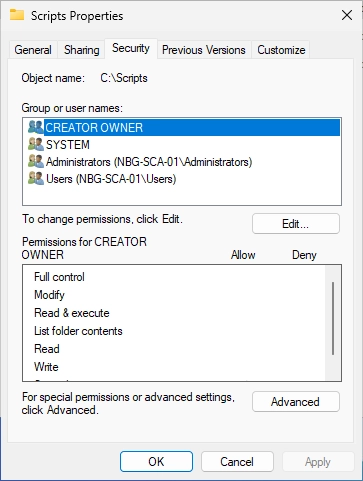
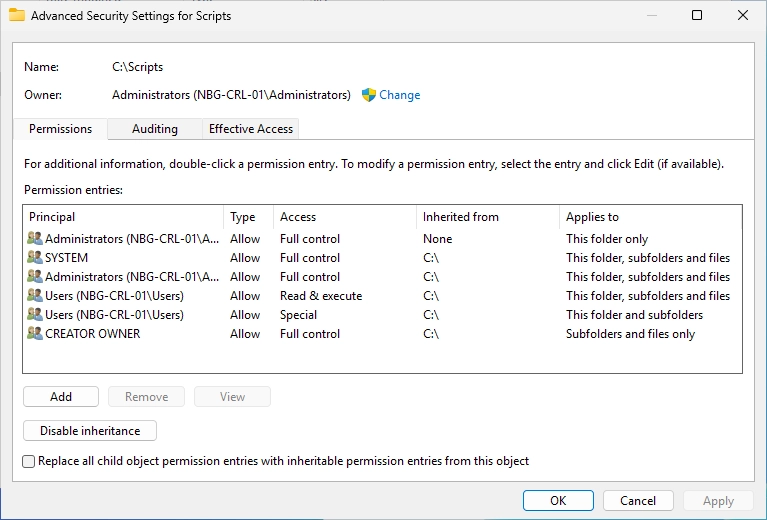
Do a right-click on the “Scripts” folder and select “Properties”.

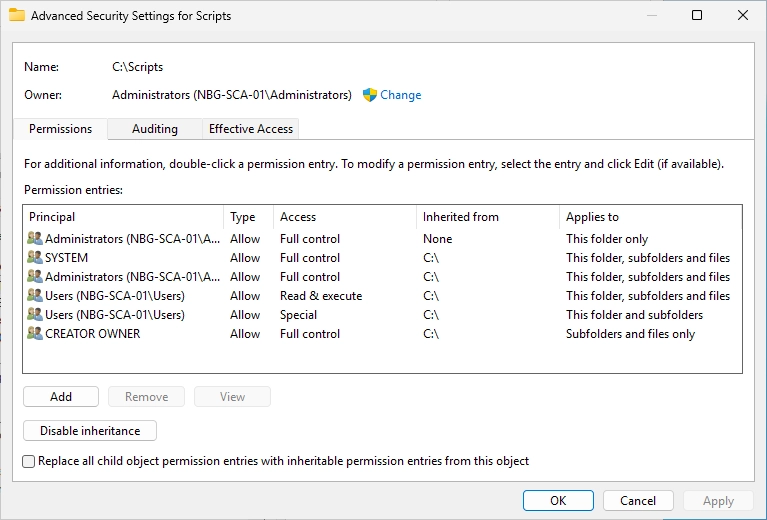
Switch to the “Security” tab and click on “Advanced”.
You should see the following window. Click on “Add”.
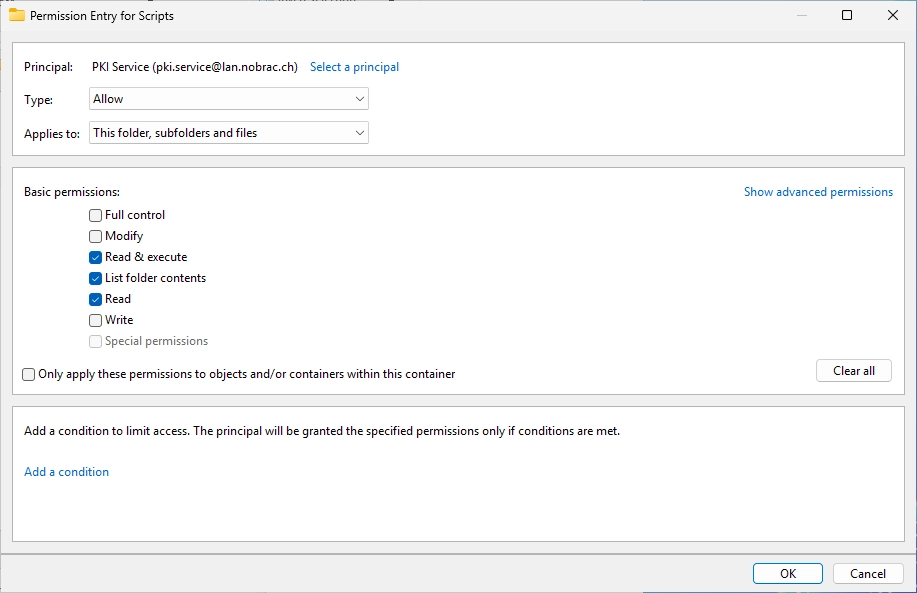
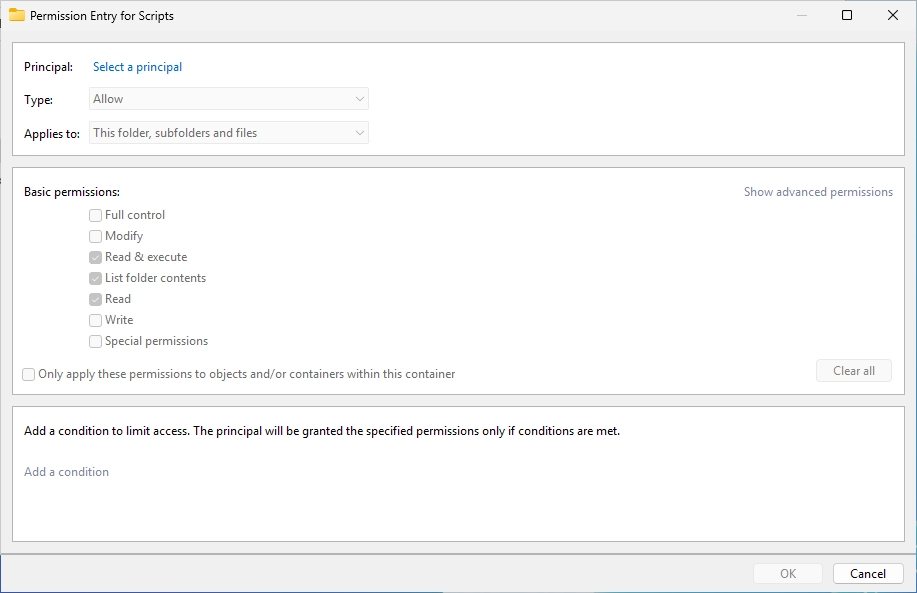
In the following window, click on “Select a principal”.

Search for your newly created User.

Adapt the permissions like on the screenshot below. Click on “OK”.
It should look like this.

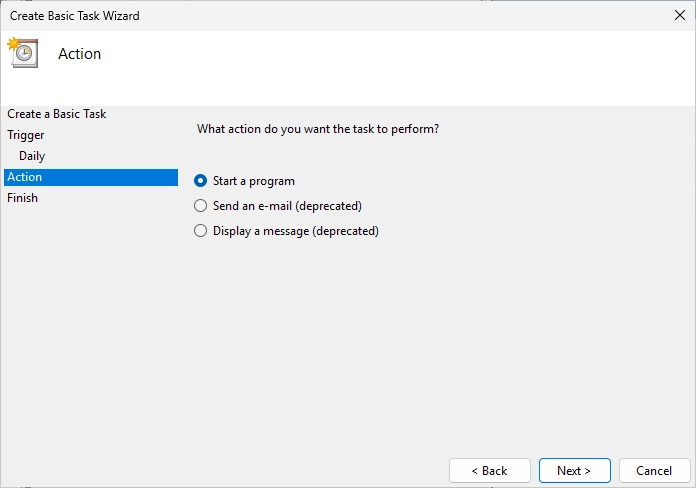
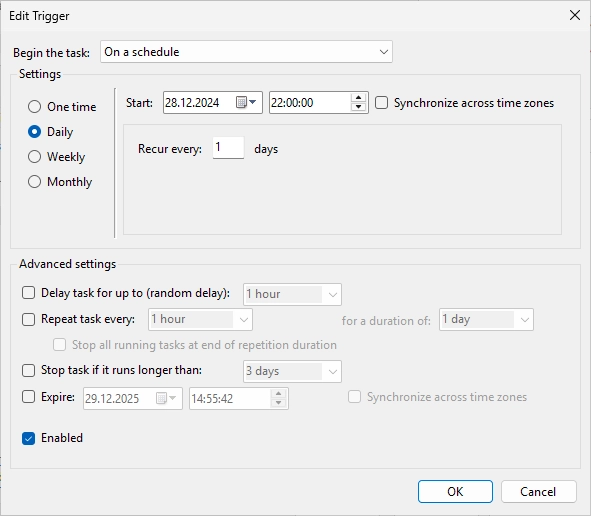
Open the Task Scheduler on the Sub CA server. Do a right-click and select “Create Basic Task…”.
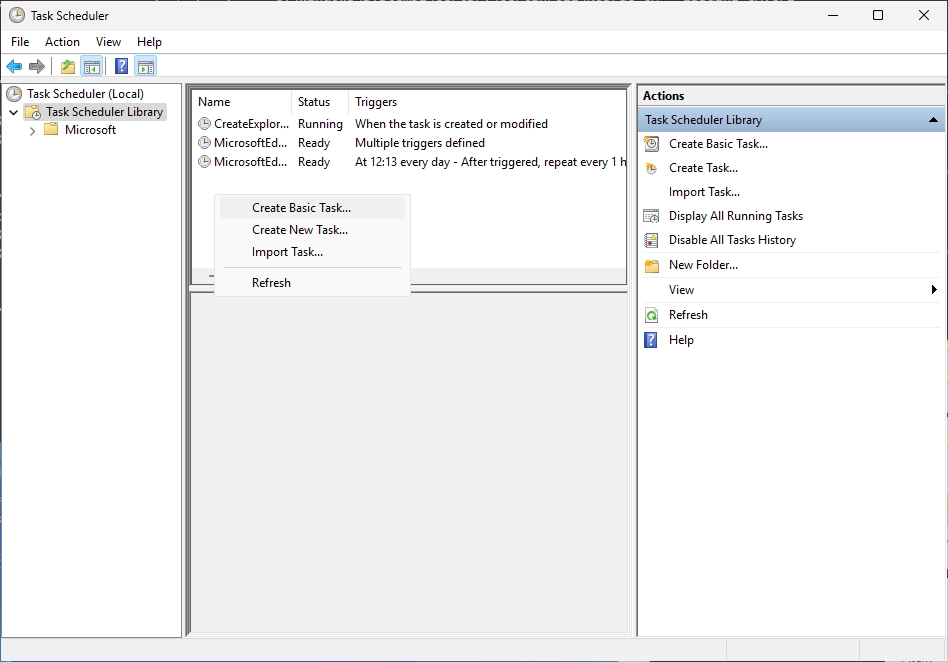
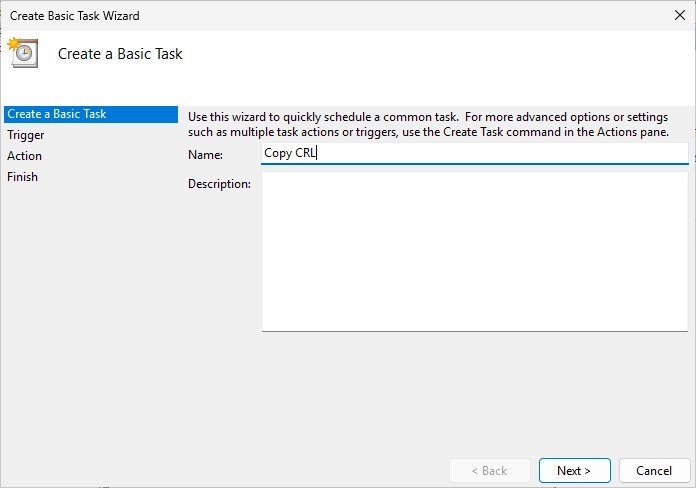
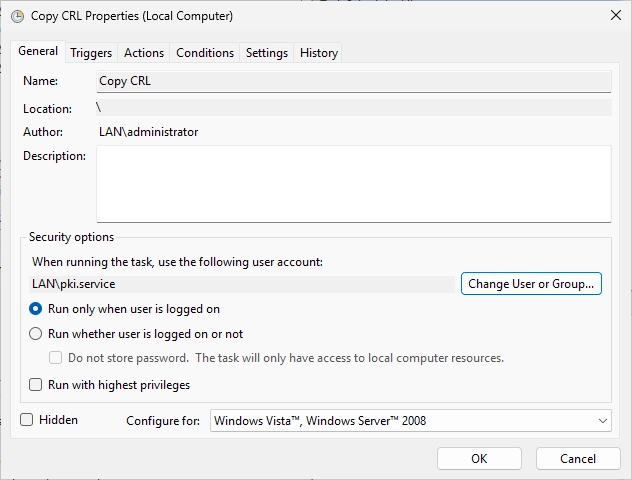
Enter a good name for the task. I chose “Copy CRL”.
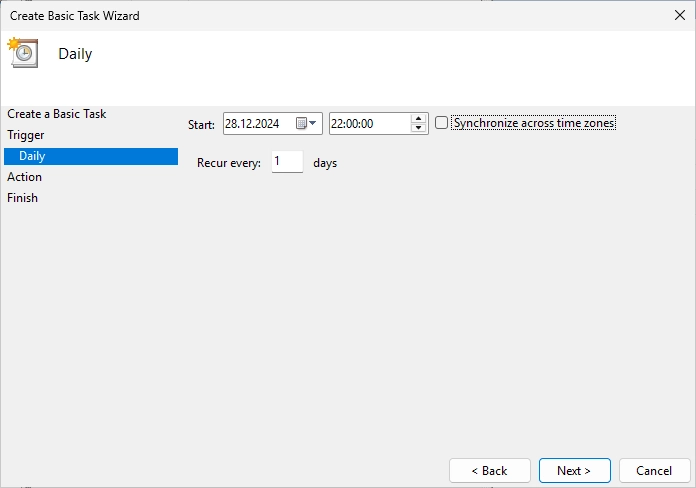
Select “Daily”.

Select date and time (time doesn’t really matter).

Select “Start a program” for the action option.

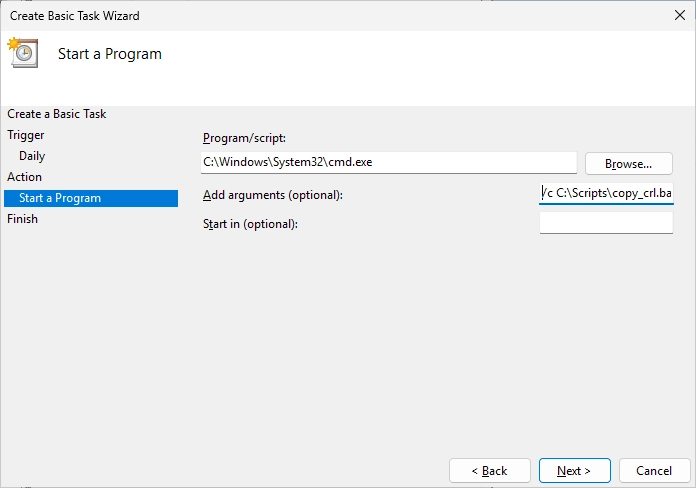
For the “Program/script” field, enter the following:
|
|
For the “Add arguments” field, enter the following:
|
|
It should look like this:

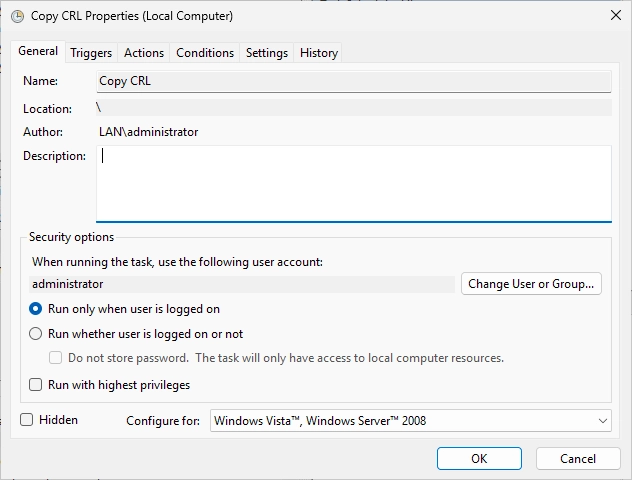
Finish the creation of the task and tick the box “Open the Properties dialog…”.

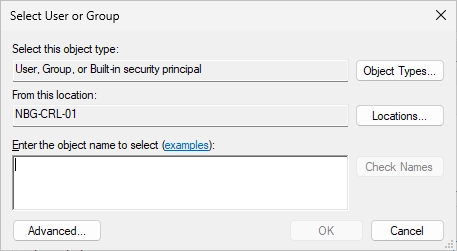
You should see the following window. Click on “Change User or Group…”.
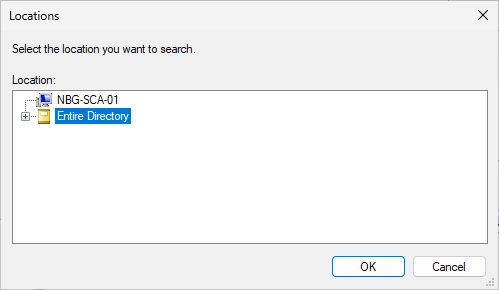
The following window should appear. Click on “Locations…”.

Select “Entire Directory” and click on “OK”.
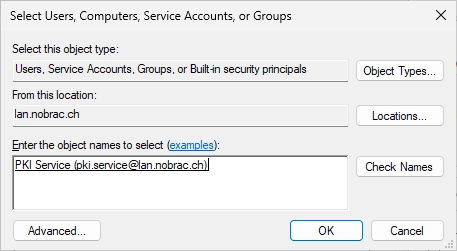
Enter your service account that you created before.

It should look like this.
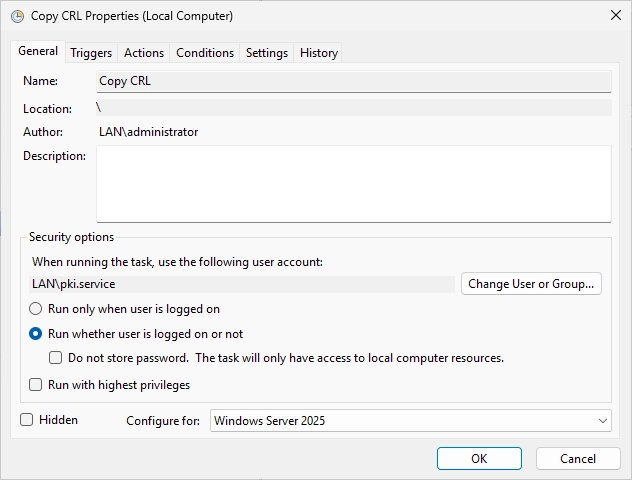
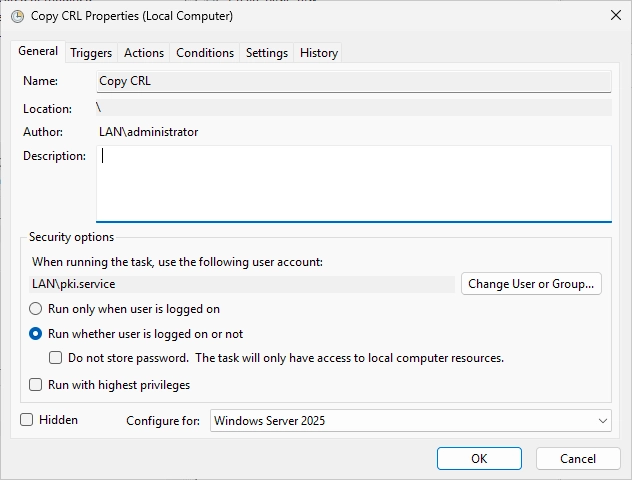
On the “General” tab, select the radio button “Run whether user is logged on or not” and change the “Configure for” option to Windows Server 2025 (or the latest version that you can select). It should look like this in the end.
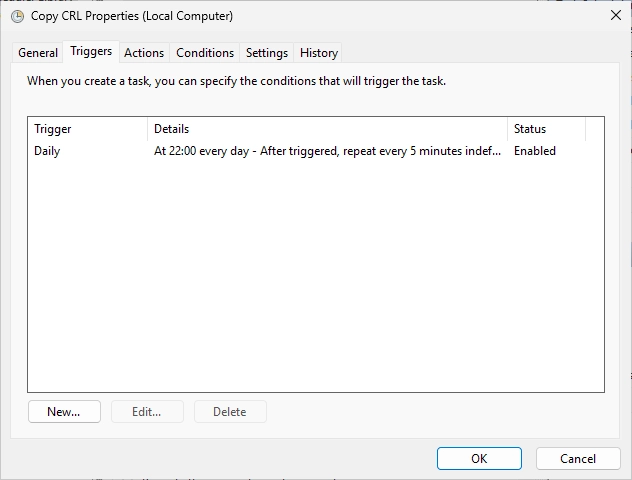
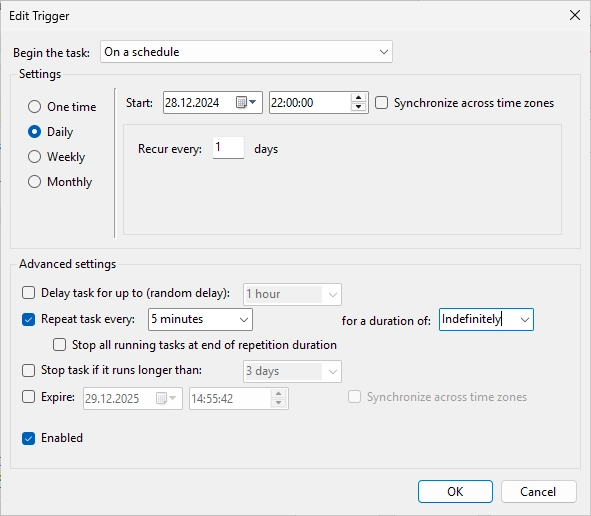
Switch to the “Triggers” tab and click on “Edit…”.

Change the settings like on the screenshot. We will execute the task every 5 minutes. Click “OK” after changing all the settings.

It should look like this. You can click on “OK”.
You will now need to enter the password for the User since we selected the radio button “Run whether user is logged on or not” before.

Confirm the information dialogue.

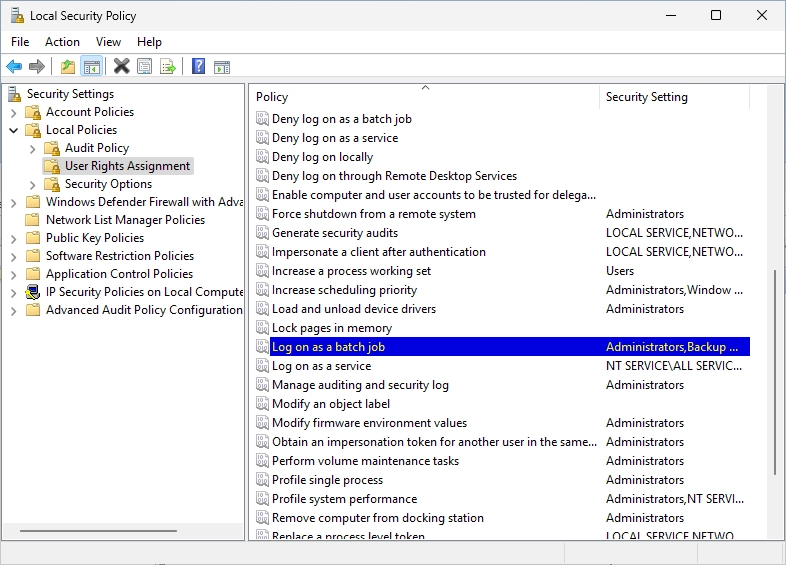
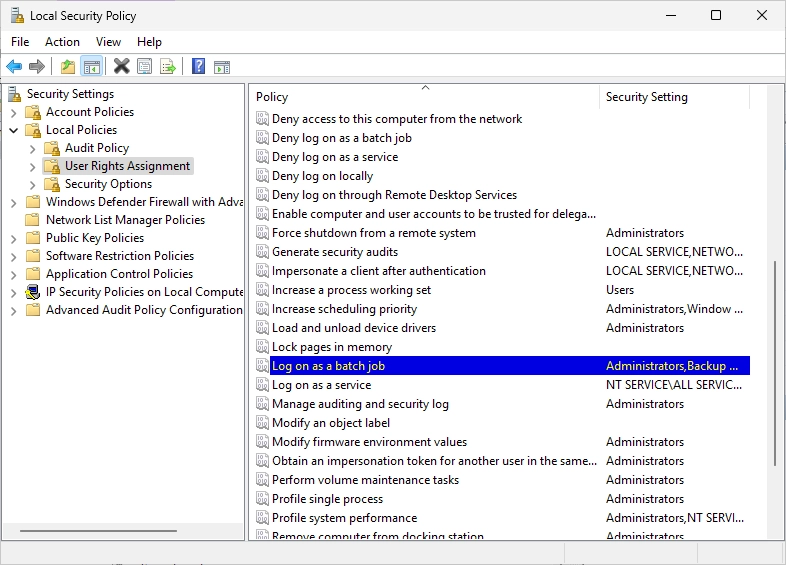
Still on the Sub CA server, open the “Local Security Policy”.

Navigate to the following path:
Local Policies -> User Rights Assignment
Search the “Log on as a batch job” policy and edit it.
You should see the following window. Click on “Add User or Group…”.
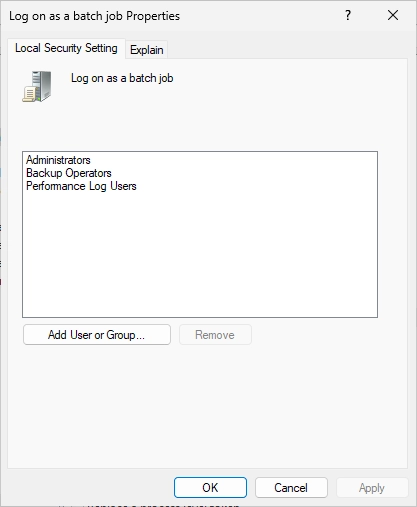
Select the User that you created before.

It should look like this.

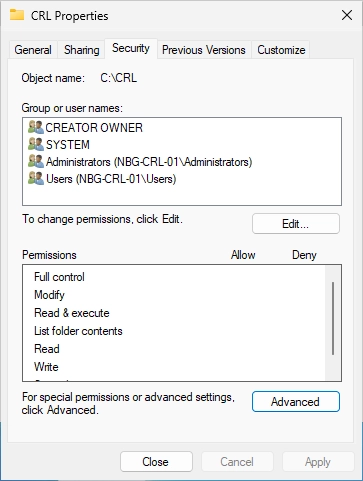
On the CRL IIS server, create a folder with the name “CRL” in the C:\ directory.

Do a right-click on the folder and select “Properties”.

The following window should appear.

Switch to the “Sharing” tab and click on “Advanced Sharing…”.

The following window appears.

Tick the box “Share this folder” and enter “CRL$” as the share name. The $-symbol will hide the folder. Click now on “Permissions”.
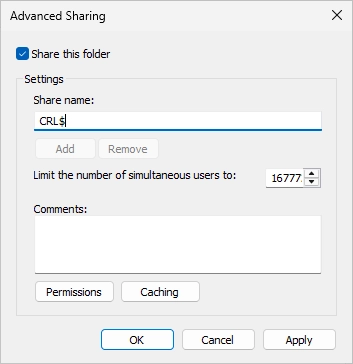
The following window should appear.
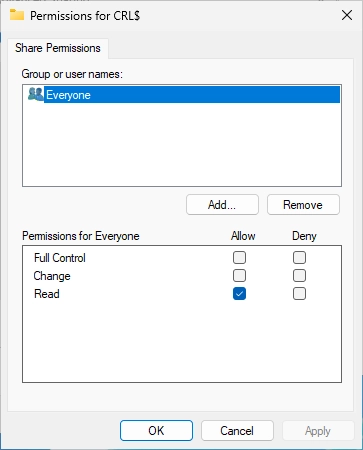
Remove the “Everyone” group. Click on “Add…”.

Select your service User that you created before.
Make sure that the permissions “Change” and “Read” are selected and click on “OK”.
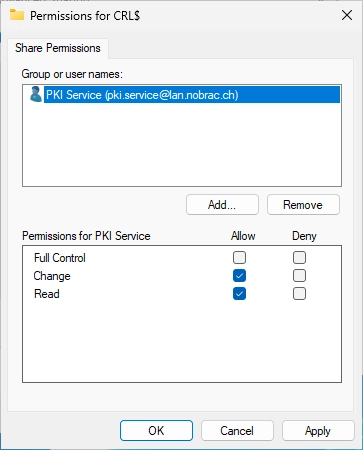
It should look like this.

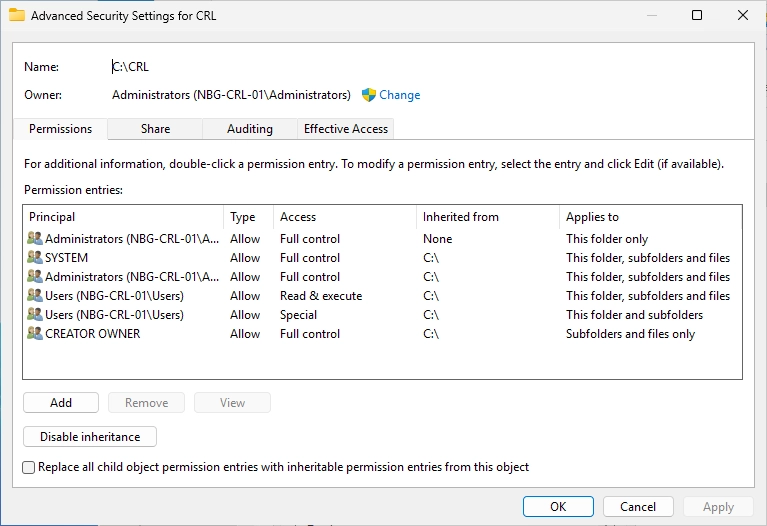
Switch to the “Security” tab. Click on “Advanced”.
You should see the following window. Click on “Add”.
You should see the following window.

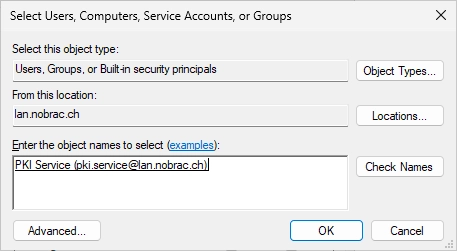
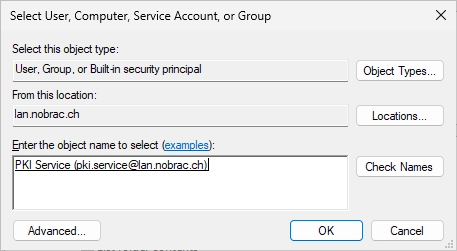
Click on “Select a principal” and select again your service User.
Adjust the permissions like on the screenshot. Click “OK”.

It should look like this.

We can now execute the Task “Copy CRL” to test if the file copy works.

In the CRL folder on the CRL IIS server I can see the two CRL-Files. The file copy works.

On the CRL IIS server create a folder with the name “Scripts” in the C:\ directory.
Do a right-click on the folder and select “Properties”.

You should see the following window.

Switch to the “Security” tab and click on “Advanced”.

The following window should appear. Click on “Add”.
Click on “Select a principal”.
Select your service User that you created before.

Adjust the permissions like on the screenshot.

It should look like this.

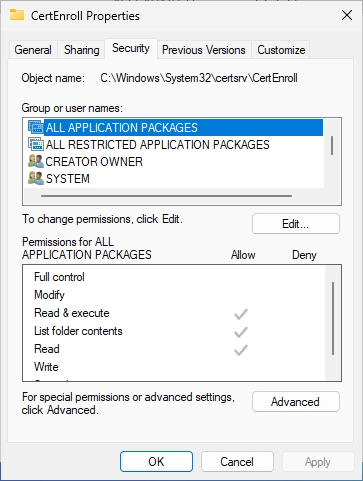
Navigate to the C:\Windows\System32\certsrv directory on the CRL IIS server and do a right-click on the “CertEnroll” folder and select “Properties”.
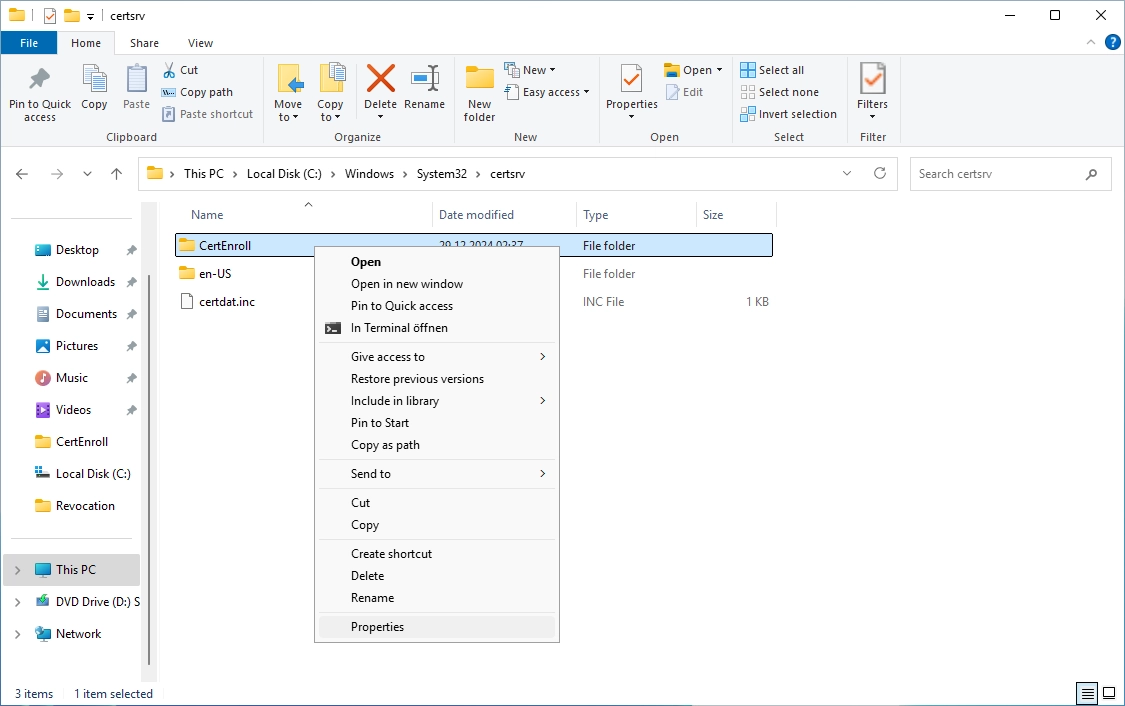
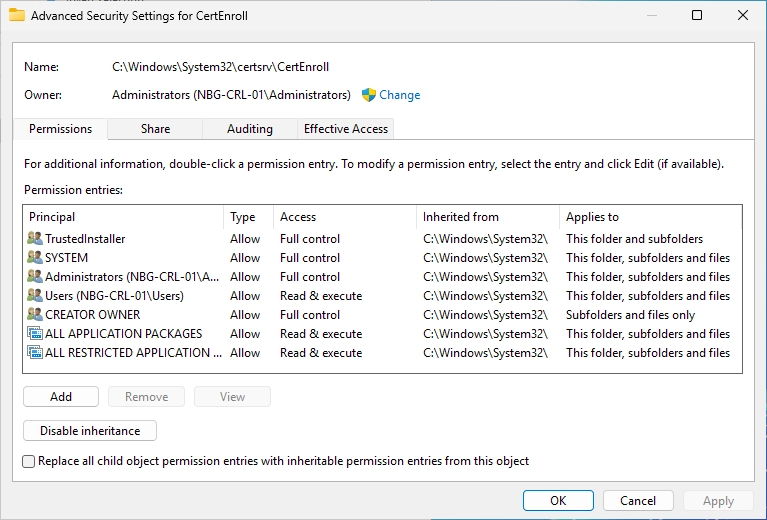
Switch to the “Security” tab and click on “Advanced”.
The following window should appear. Click on “Add”.
You should see the following window. Click on “Select a principal”.
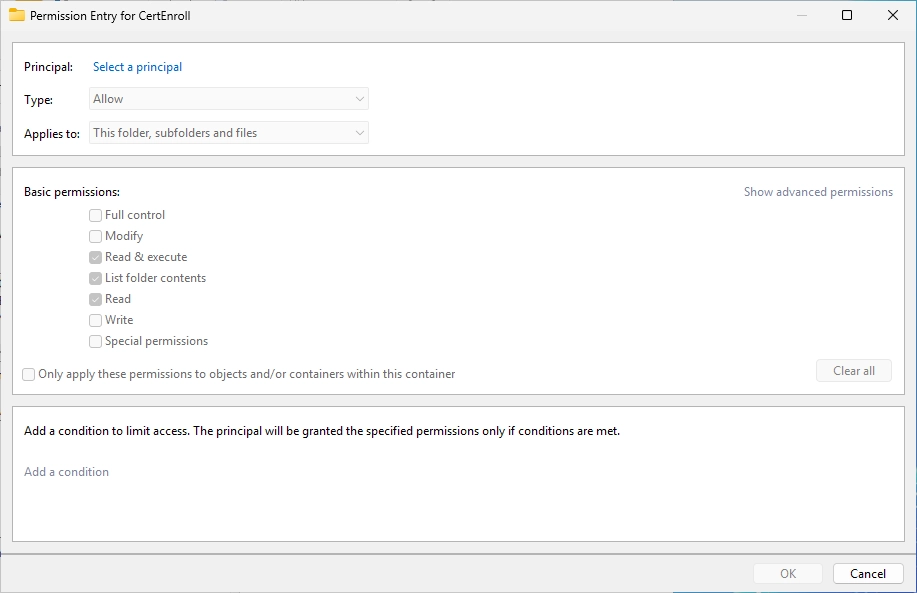
Select your service User.

Adjust the permissions like on the screenshot.

It should look like this.
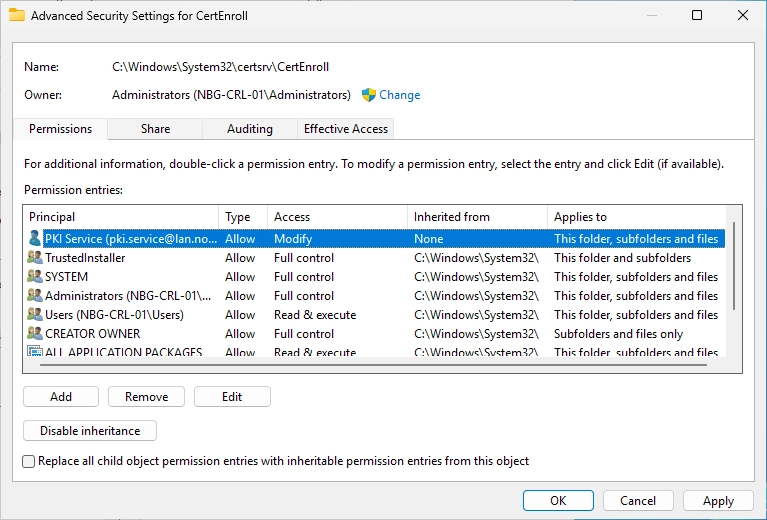
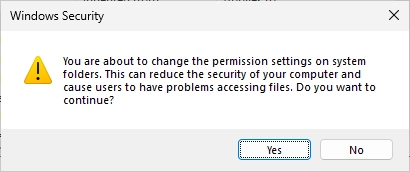
Confirm the warning for adjusting permissions on a system folder.
Create a BAT-File on the C:\Scripts folder on the CRL IIS server. I chose “copy_crl.bat” again as the name.
Enter the following Robocopy command:
|
|
Create a new task on the CRL IIS server.

Enter a name for the task.

Select “Daily”.

Adjust date and time (time doesn’t really matter like before).
Select “Start a program”.
For the “Program/script” field, enter the following:
|
|
For the “Add arguments” field, enter the following:
|
|
It should look like this.
Finish the creation of the task and tick the box “Open the Properties dialog…”.

The following window appears.

Click on “Change User or Group…” and click on “Locations…”.
Select “Entire Directory”.

Select your service User.

Adapt the settings like on the screenshot.
After that, switch to the “Triggers” tab and click on “Edit…”.

The following window appears.
Adapt the settings like on the screenshot.
It should look like this. Click “OK”.

You will need to enter the password for the service User.
Confirm the information dialogue.

Open the “Local Security Policy” on the CRL IIS server.
Navigate to the following path:
Local Policies -> User Rights Assignment
Search the “Log on as a batch job” policy and edit it.
You should see the following window. Click on “Add User or Group…”.

Select your service User.
It should look like this.

After that, reboot your CRL IIS server so that all the changes to the permissions apply. The configuration for the automatic copy of the CRL files is now complete. Now you will never need to worry about that.
Firewall
Sub CA server to Domaincontroller
| Network Protocol | Destination Port | Protocol |
|---|---|---|
| TCP and UDP | 53 | DNS |
| TCP | 88 | Kerberos |
| UDP | 123 | NTP |
| TCP | 135 | RPC Endpoint Mapper |
| TCP and UDP | 389 | LDAP |
| TCP | 445 | SMB |
| TCP | 636 | LDAPS |
| TCP | 3268 | LDAP GC |
| TCP | 3269 | LDAPS GC |
| TCP | 49152-65535 | RPC Dynamic Ports |
Sub CA server to CRL IIS server
| Network Protocol | Destination Port | Protocol |
|---|---|---|
| TCP | 80 | HTTP |
CRL IIS server to Domaincontroller
| Network Protocol | Destination Port | Protocol |
|---|---|---|
| TCP and UDP | 53 | DNS |
| TCP | 88 | Kerberos |
| UDP | 123 | NTP |
| TCP | 135 | RPC Endpoint Mapper |
| TCP and UDP | 389 | LDAP |
| TCP | 445 | SMB |
| TCP | 636 | LDAPS |
| TCP | 3268 | LDAP GC |
| TCP | 3269 | LDAPS GC |
| TCP | 49152-65535 | RPC Dynamic Ports |
CRL IIS server to Sub CA
| Network Protocol | Destination Port | Protocol |
|---|---|---|
| TCP | 135 | RPC Endpoint Mapper |
| TCP | 49152-65535 | RPC Dynamic Ports |
Server to Sub CA
| Network Protocol | Destination Port | Protocol |
|---|---|---|
| TCP | 135 | RPC Endpoint Mapper |
| TCP | 49152-65535 | RPC Dynamic Ports |
Clients to Sub CA
| Network Protocol | Destination Port | Protocol |
|---|---|---|
| TCP | 135 | RPC Endpoint Mapper |
| TCP | 49152-65535 | RPC Dynamic Ports |
Server to CRL IIS server
| Network Protocol | Destination Port | Protocol |
|---|---|---|
| TCP | 80 | HTTP |
Clients to CRL IIS server
| Network Protocol | Destination Port | Protocol |
|---|---|---|
| TCP | 80 | HTTP |
Clients to CRL IIS server for Certificate Webrequest
| Network Protocol | Destination Port | Protocol |
|---|---|---|
| TCP | 80 | HTTP |
| TCP | 443 | HTTPS |
Security Audit
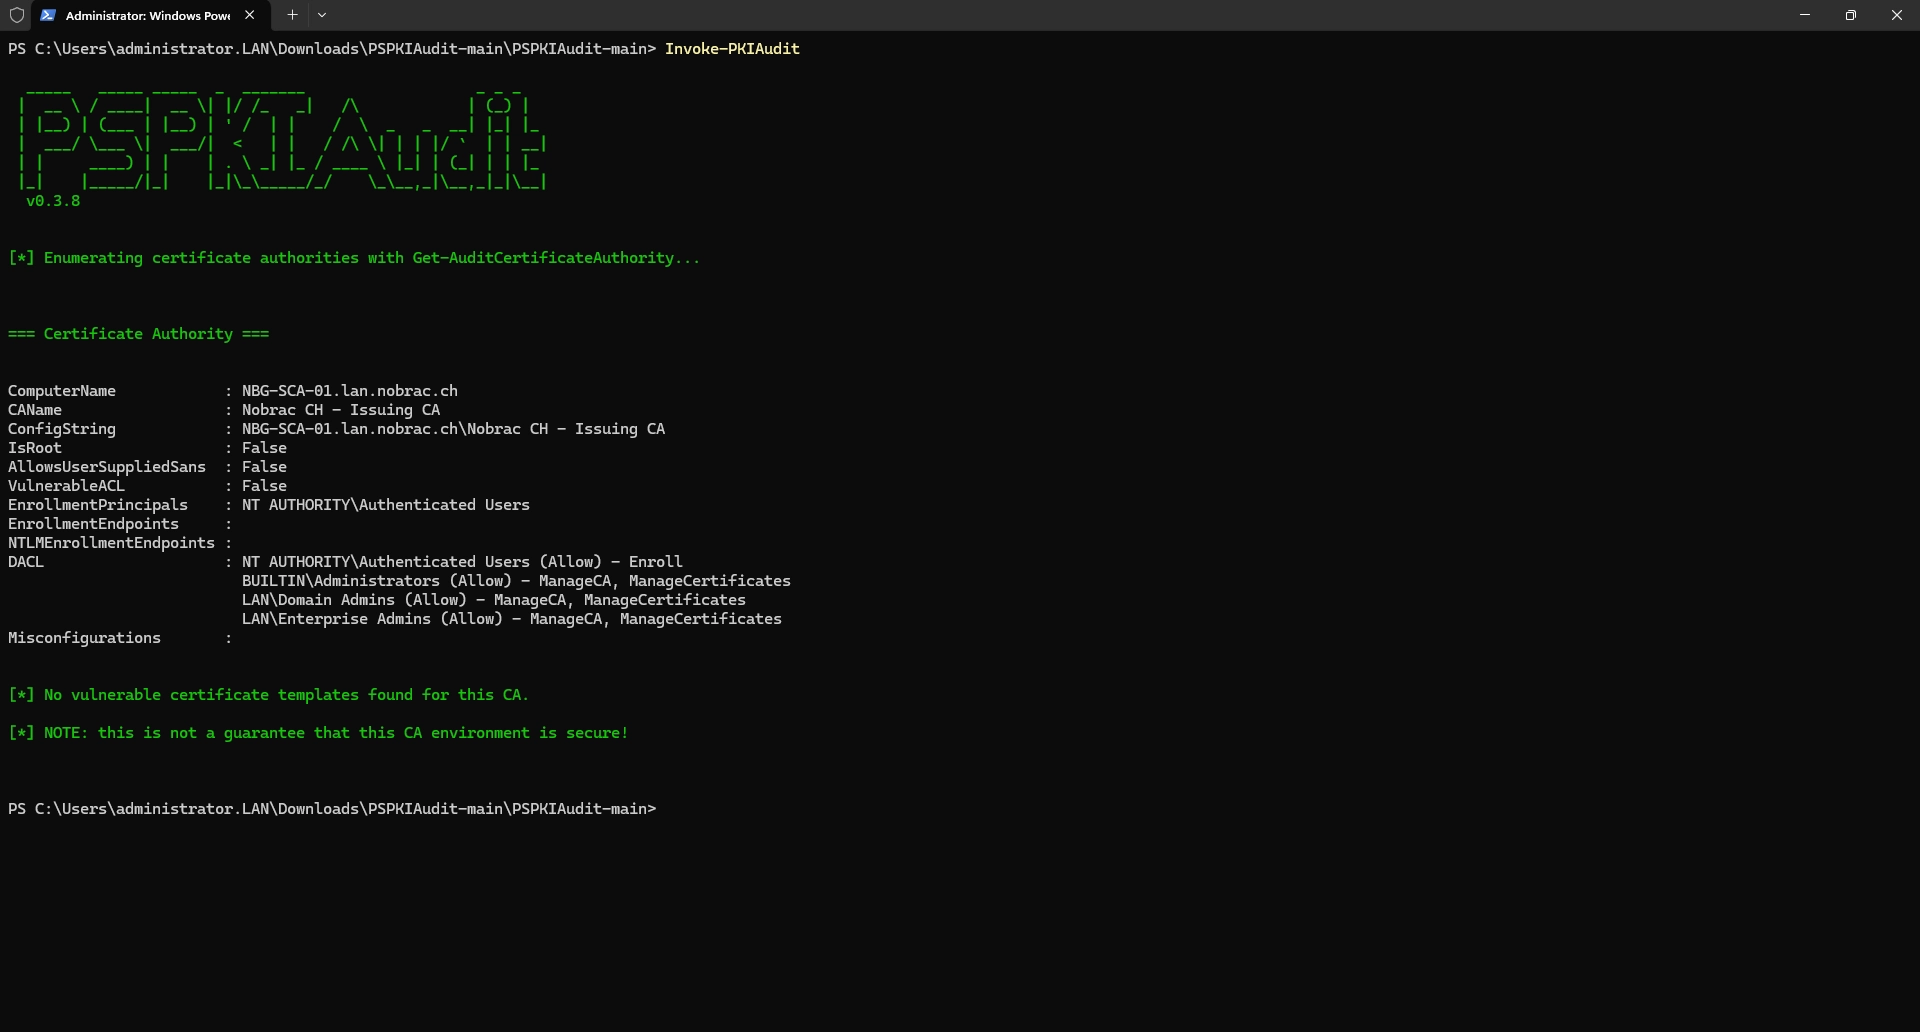
The Active Directory certificate services are a popular target for hackers. For this reason, there are also many tools and scripts to check the most common misconfigurations. I have checked the configuration with the help of three tools and everything looks good.
You can find out how to use the tools in your environment directly on Github. I will not go into this in detail in this guide.
Certify
The link to the tool: https://github.com/GhostPack/Certify

PSPKIAudit
The link to the tool: https://github.com/GhostPack/PSPKIAudit
Locksmith
The link to the tool: https://github.com/TrimarcJake/Locksmith
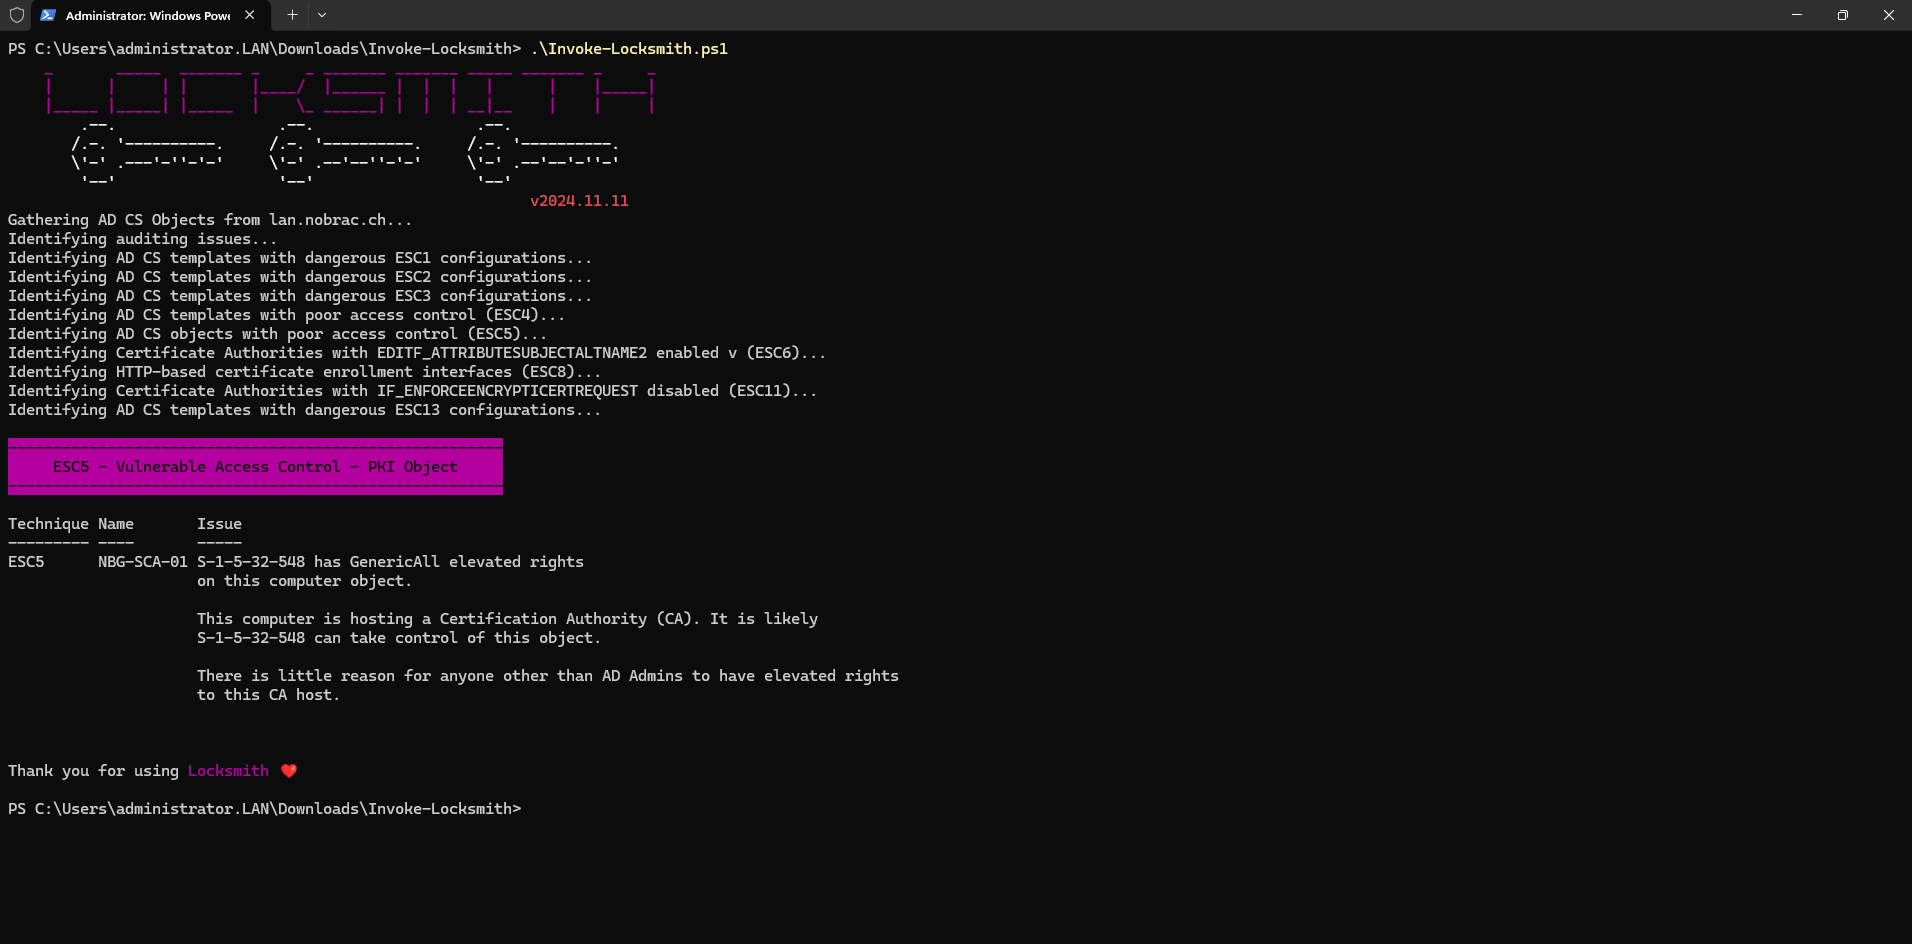
The tool says that the group with the SID “S-1-5-32-548” has GenericAll elevated rights for the computer object. So let’s find out which group this is.

It is the built in “Account Operators” group. This group is included in the Active Directory by default and has no members in the standard configuration. In my opinion, we can therefore ignore the warning.